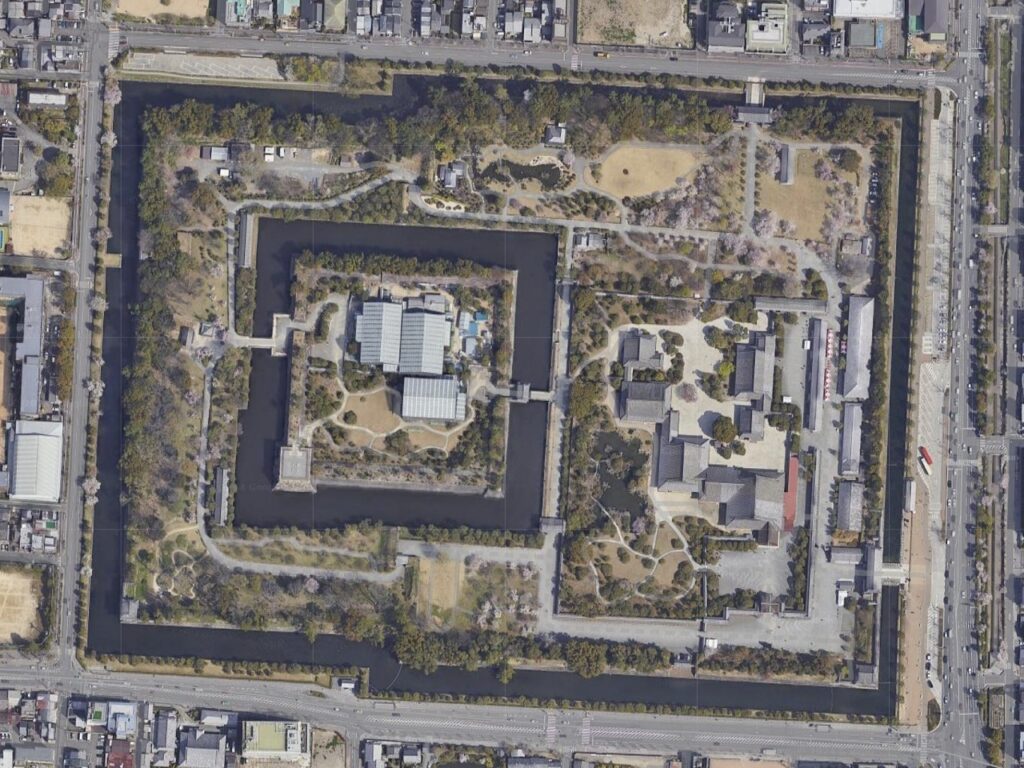
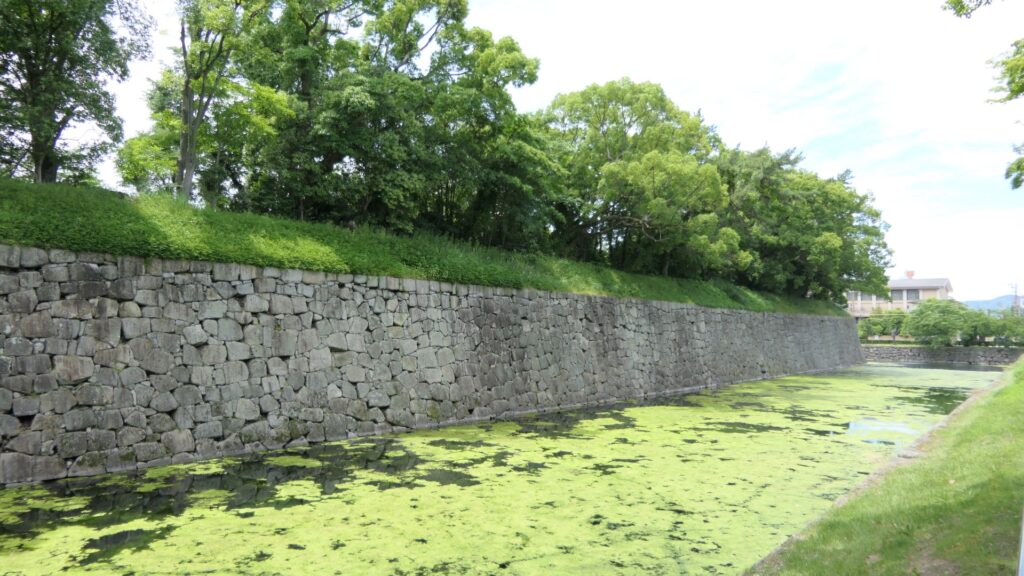
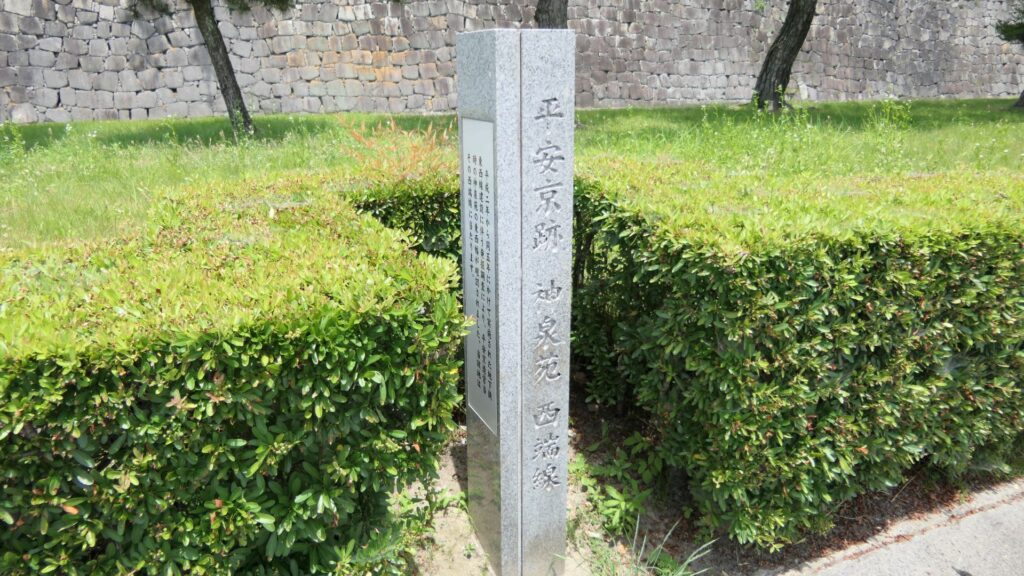
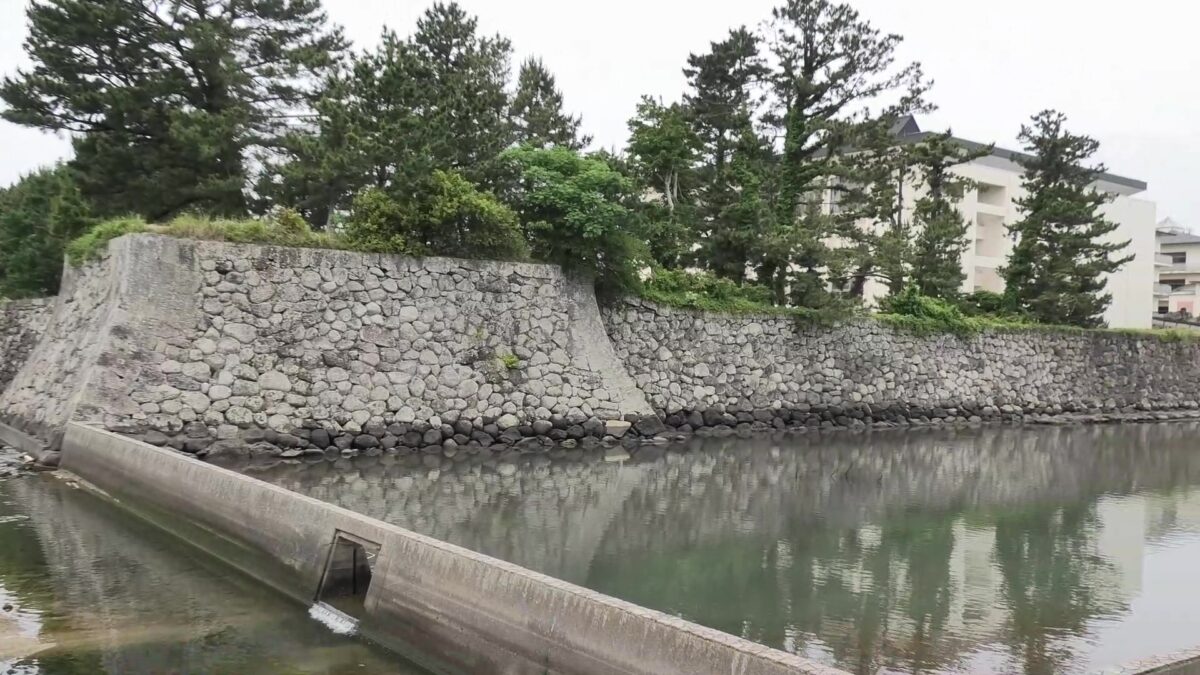
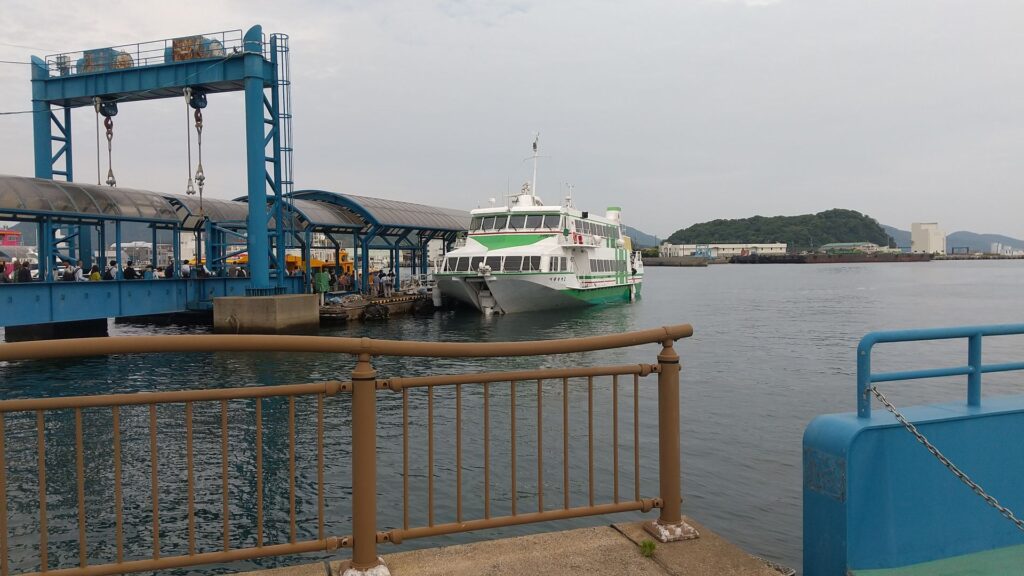
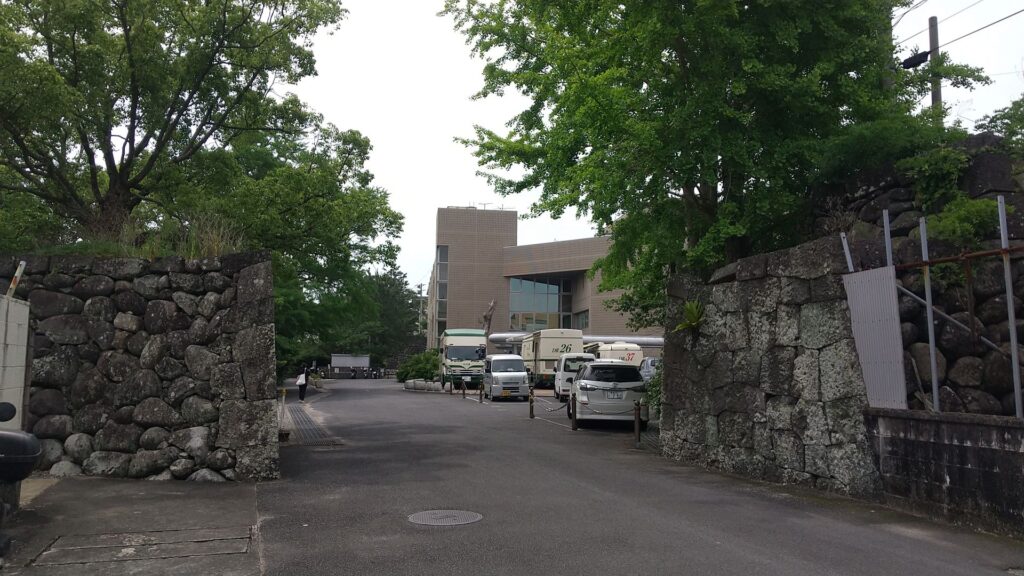
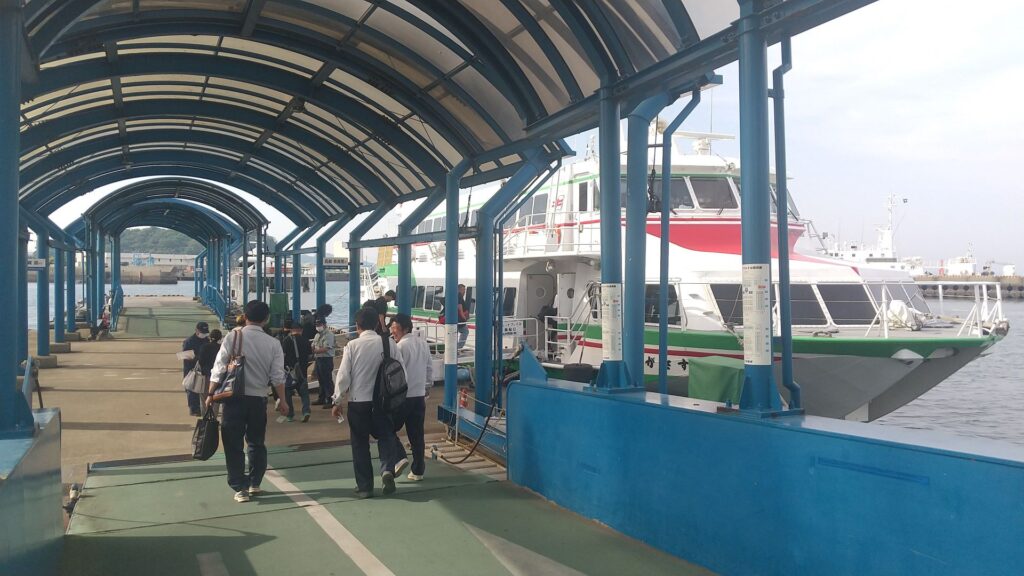
If you want to visit Fukue Island where Fukue Castle Ruins are located, you need to take a ship or a plane. The ruins are closer to Fukue Port than Fukue Airport, which only about 300m away from the port. If you walk from the port to the ruins in the west, you will see the eastern stone walls and the moats in the front. However, the moats had originally been a seashore, and were reclaimed around. That’s why the moats are still filled with the sea water which is controlled by the tide
Features
Walking around Front of Castle
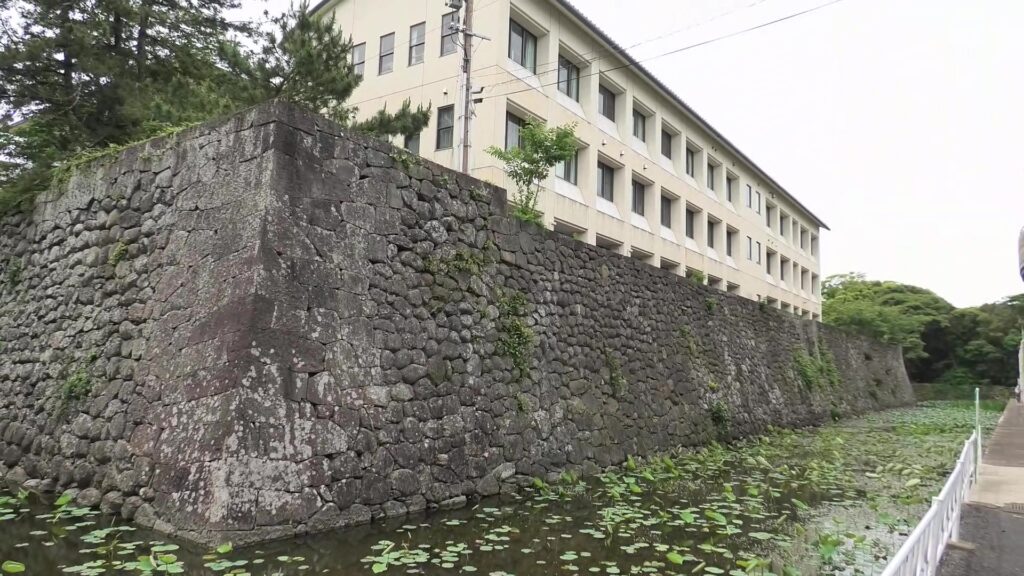
If you want to visit Fukue Island where Fukue Castle Ruins are located, you wil need to take a ship or a plane. The ruins are closer to Fukue Port than Fukue Airport, which is only about 300m away from the port. If you walk from the port to the ruins in the west, you will see the eastern stone walls and the moats in the front. However, the moats had originally been the frontline of the seashore, and where the new artificial land is currently located. That’s why the moats are still filled with the sea water which is controlled by the tide.
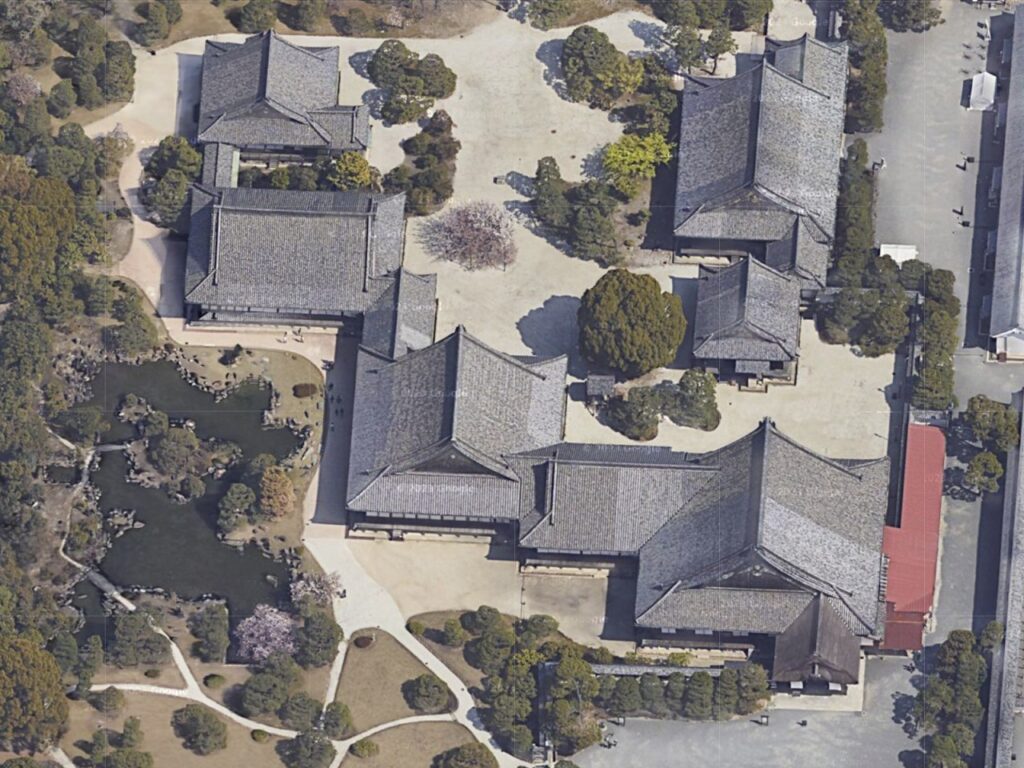
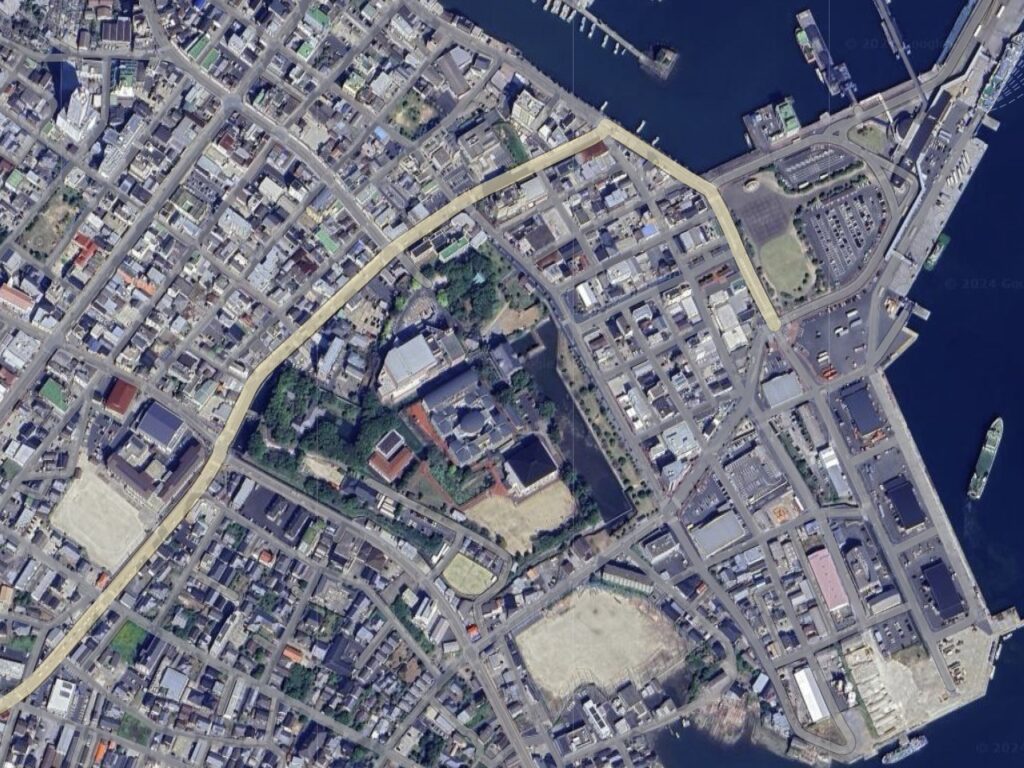
Fukue PortThe aerial photo around the castle (Google Map)The stone walls at the eastern side of the castle
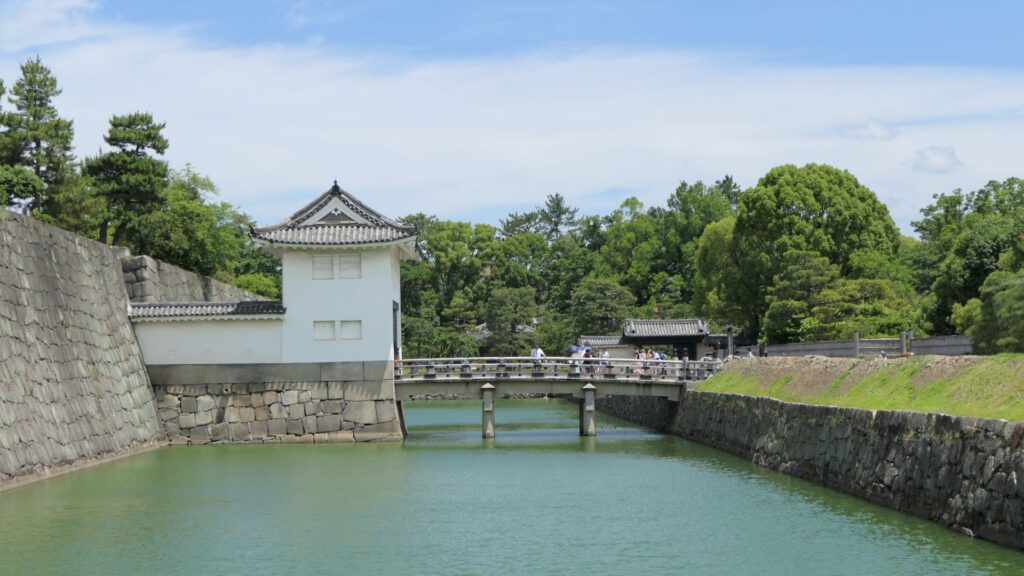
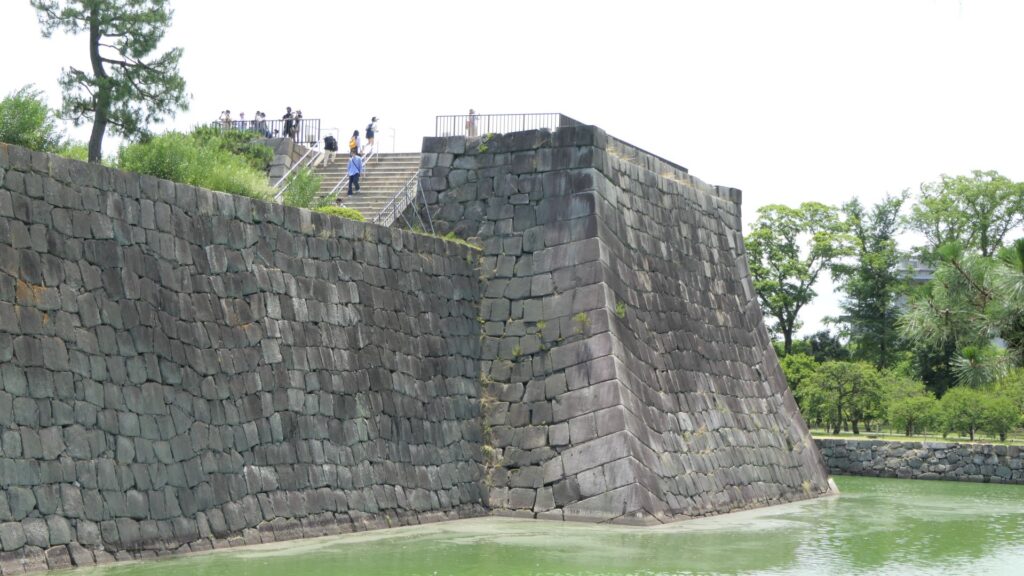
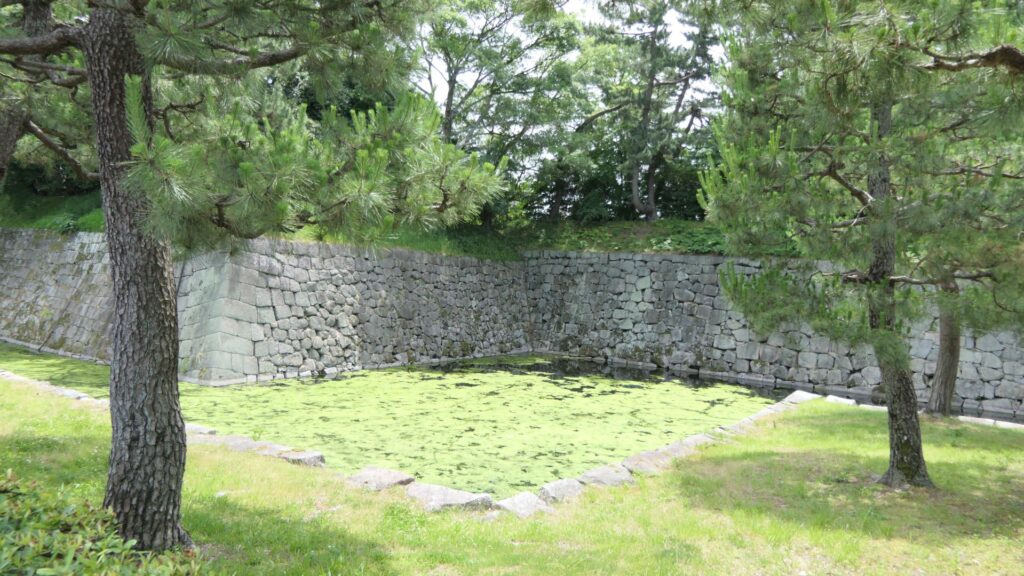
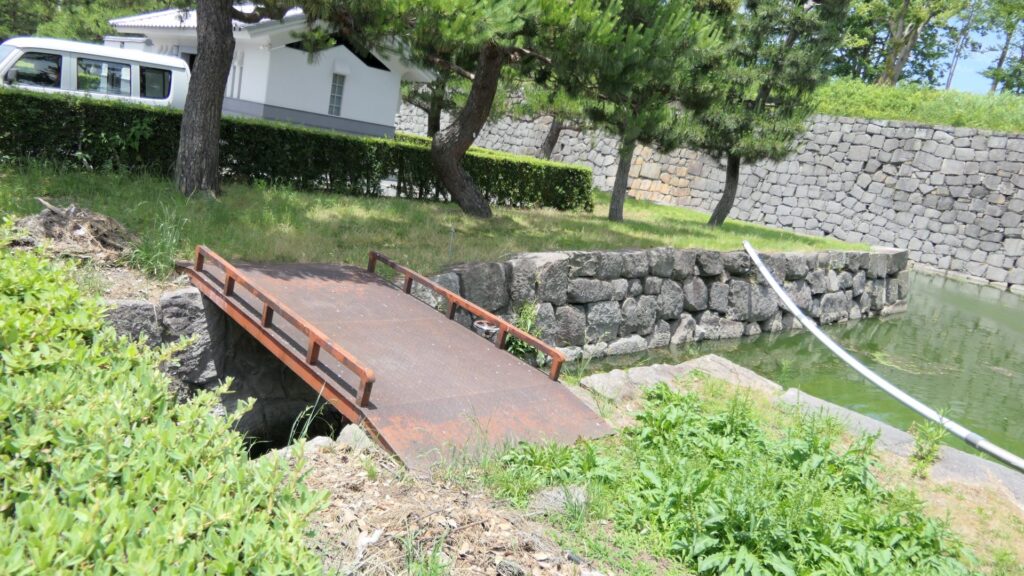
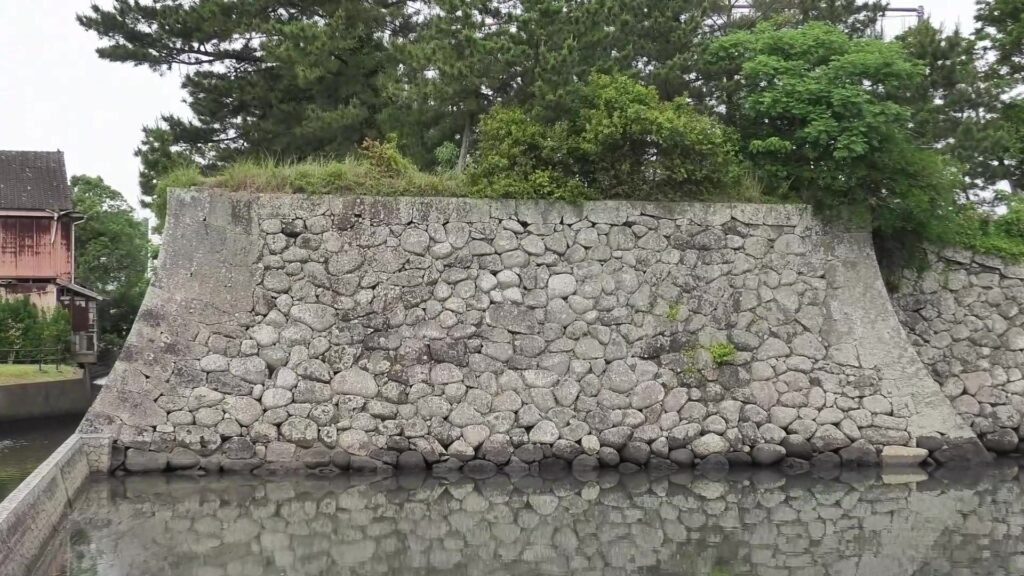
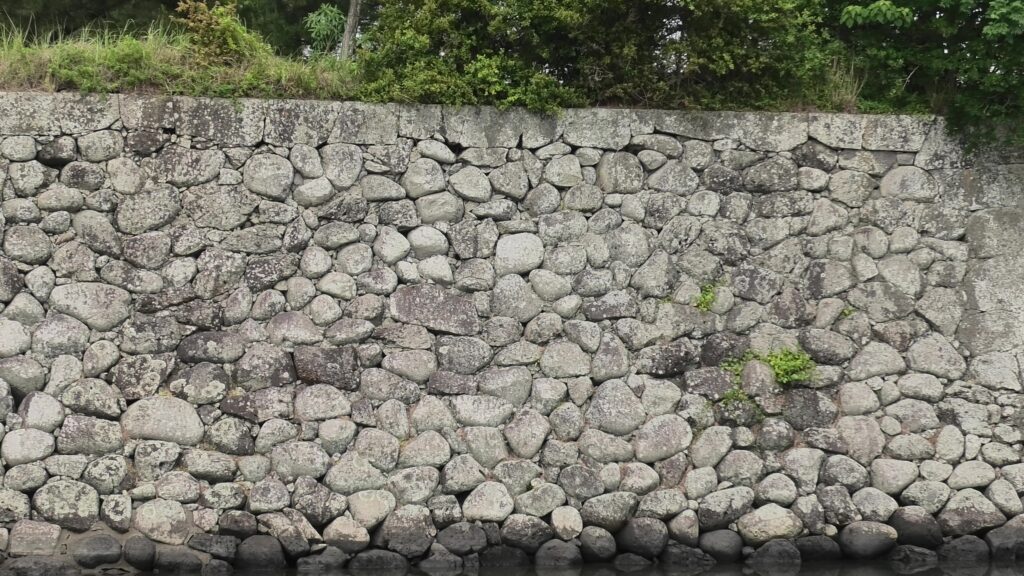
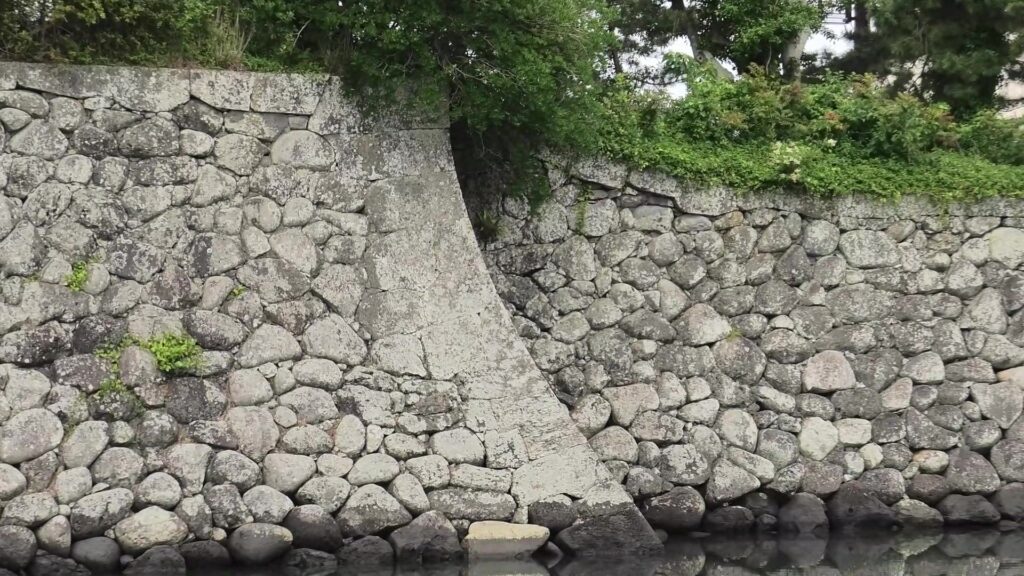
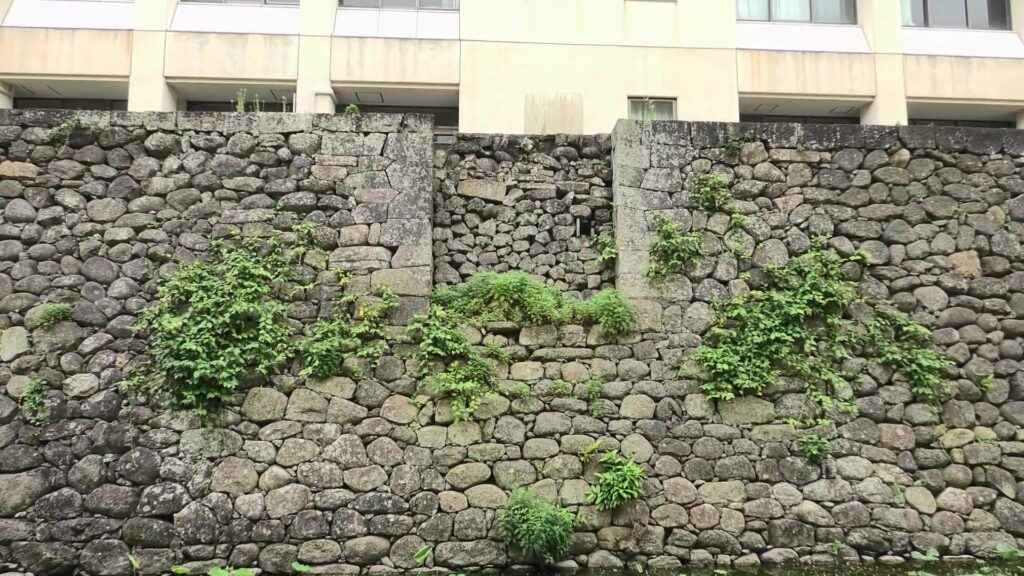
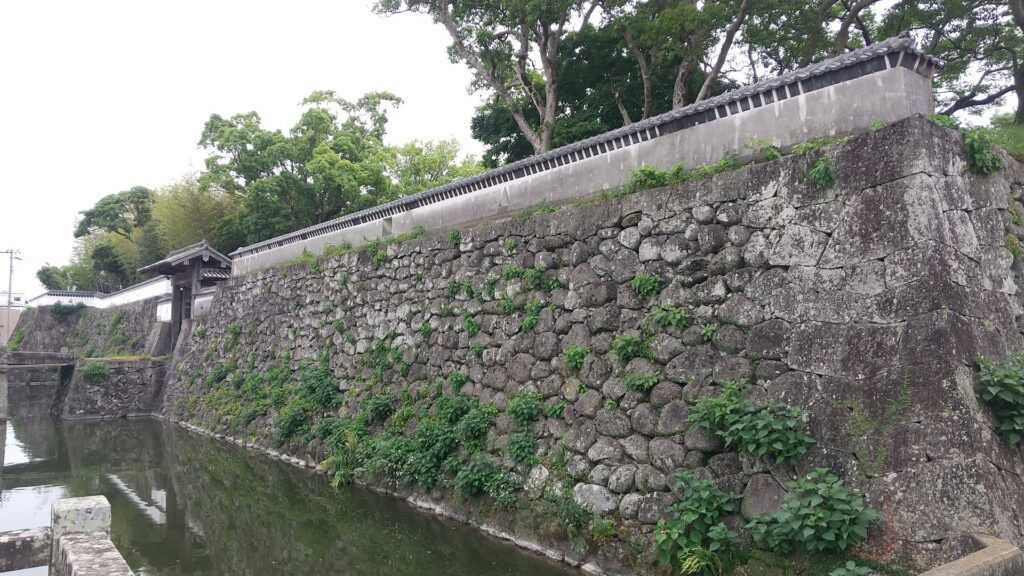
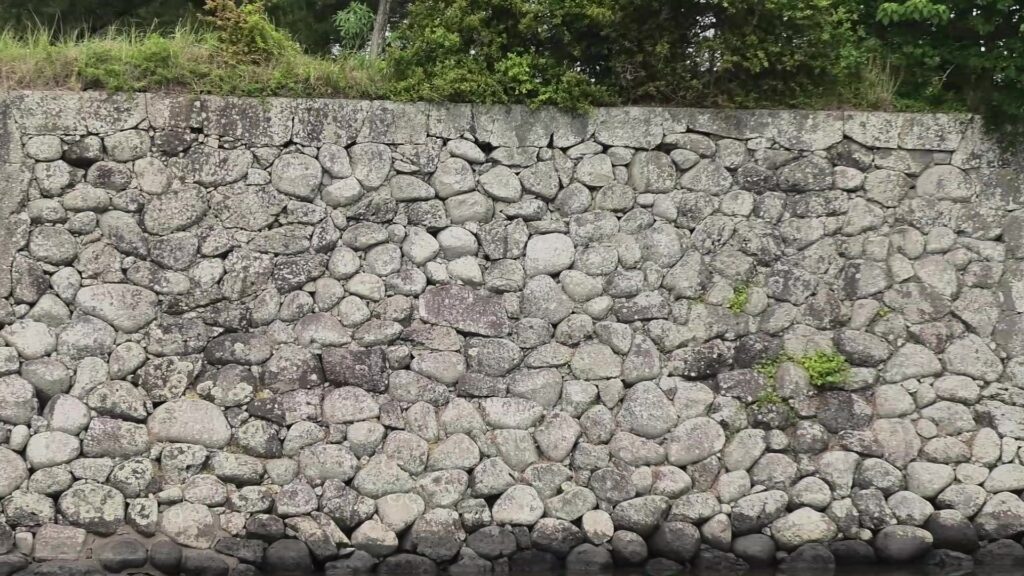
The stone walls are part of the second enclosure, which faced the sea as the front line of the castle. Its corner on the left is one of the canon ruins. The stone walls were basically piled using basalt natural stones which had been produced by Onidake Mountain of the island. Meanwhile, the corners of the stone walls were piled using precisely processed stones. This was because the corners mainly had to support the weight of the walls. If you walk to the north along the moats, you will also see the water gate which was used for ships.
The stone walls of the battery ruinsA part being piled using basalt natural stonesA corner being piled using precisely processed stonesThe water gate
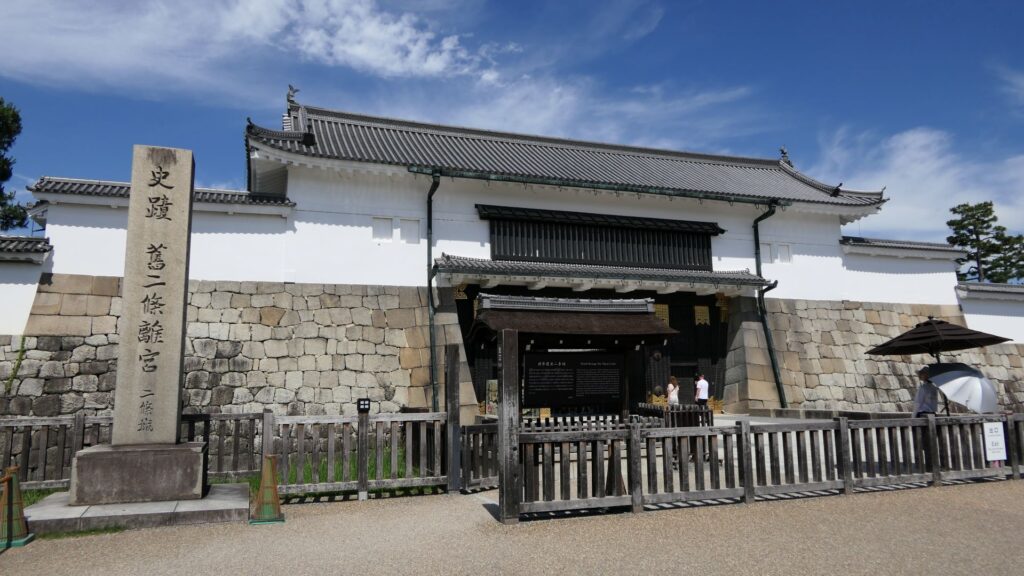
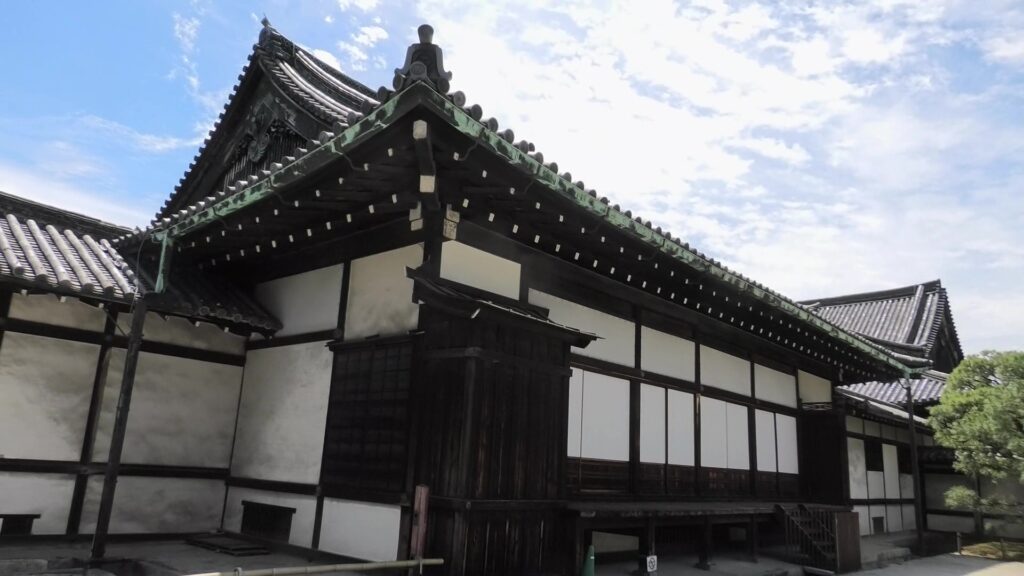
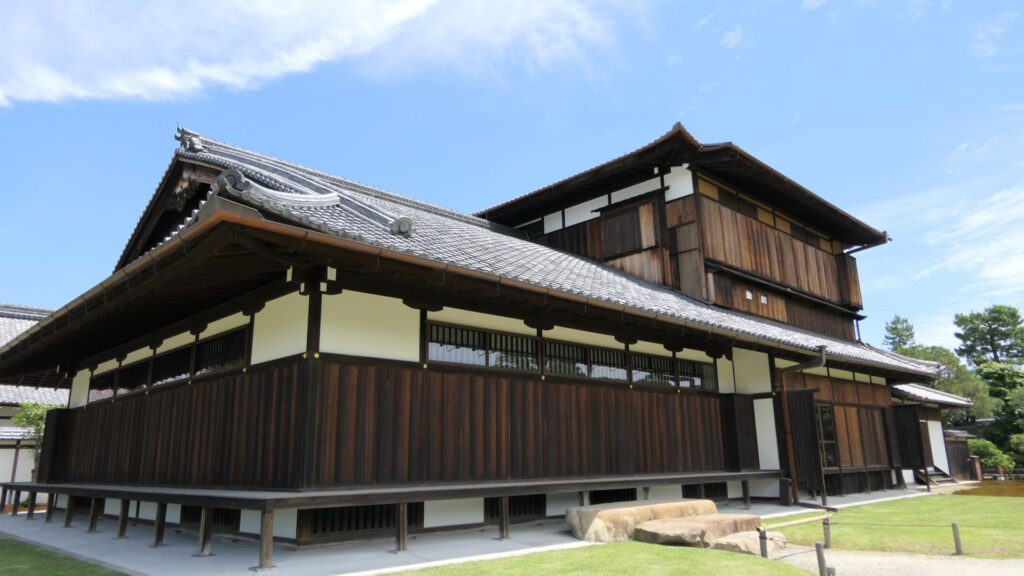
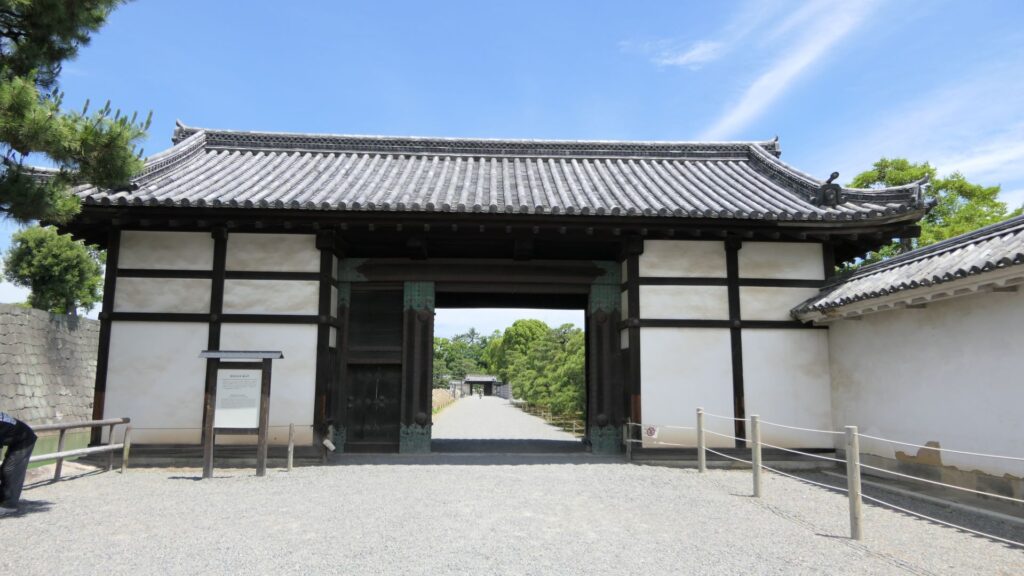
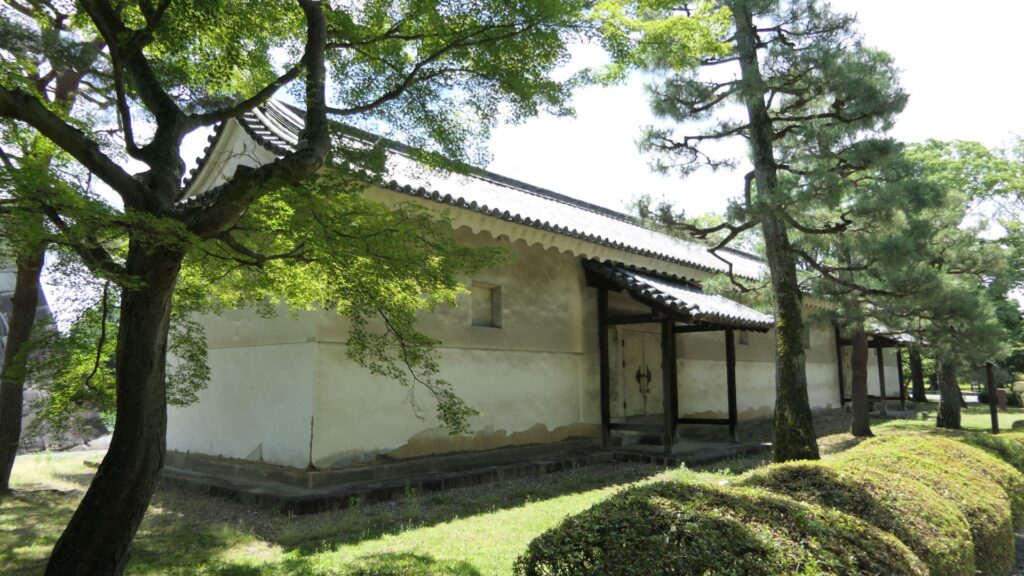
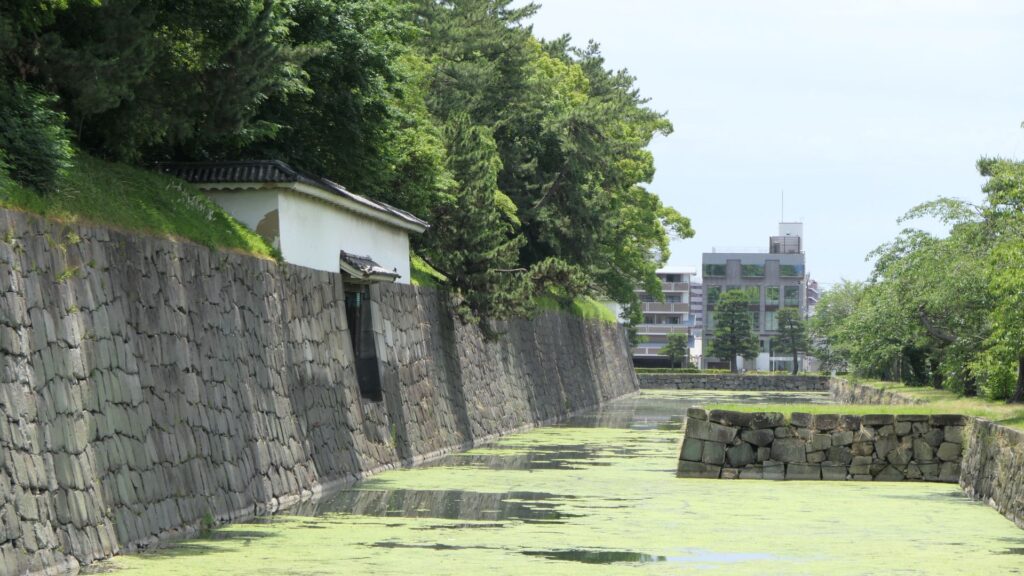
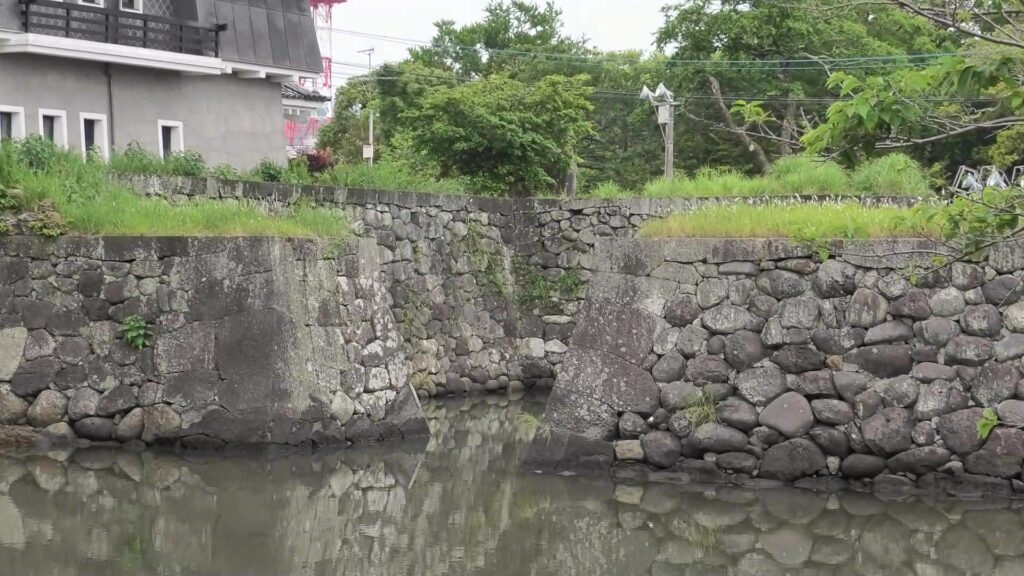
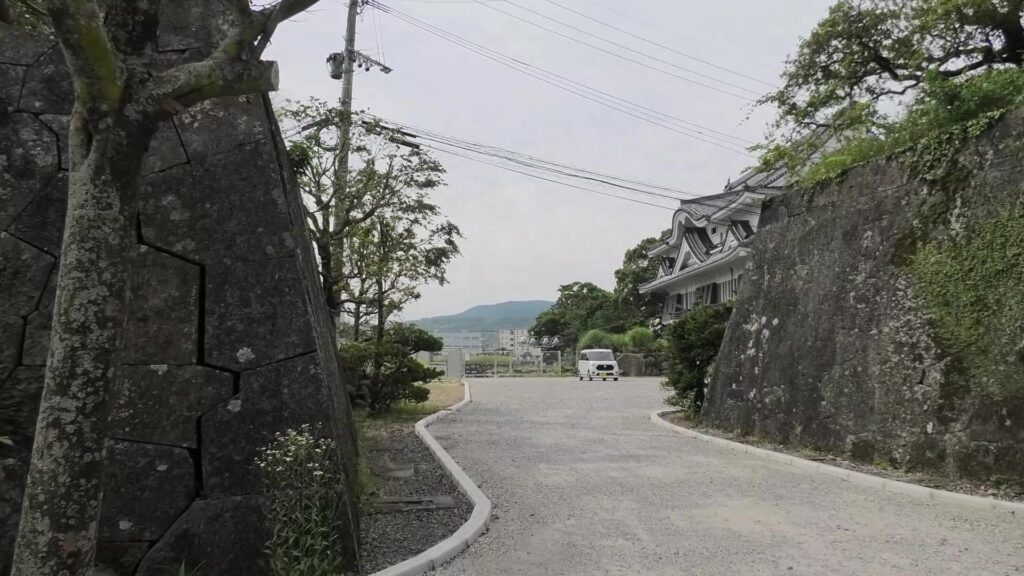
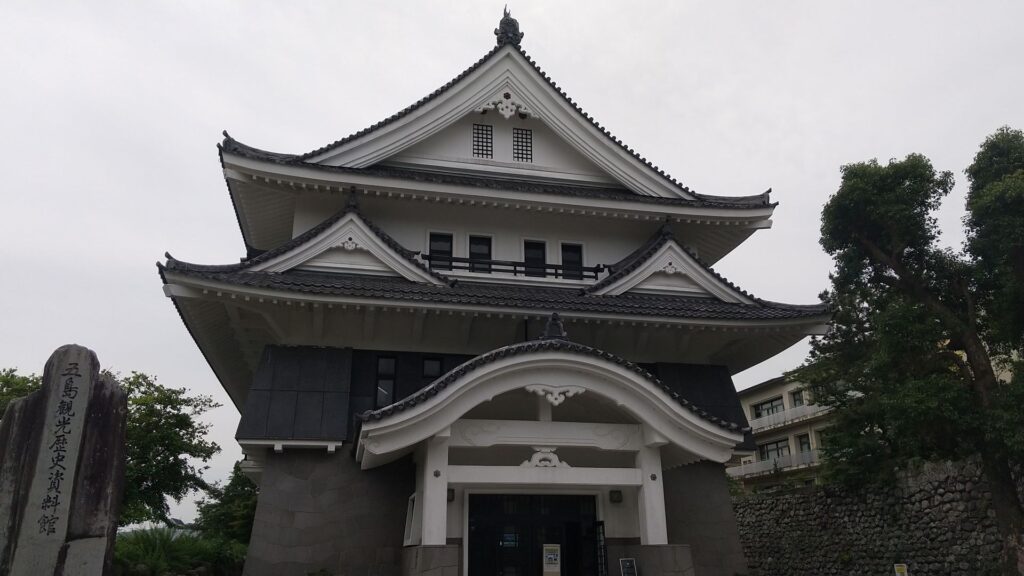
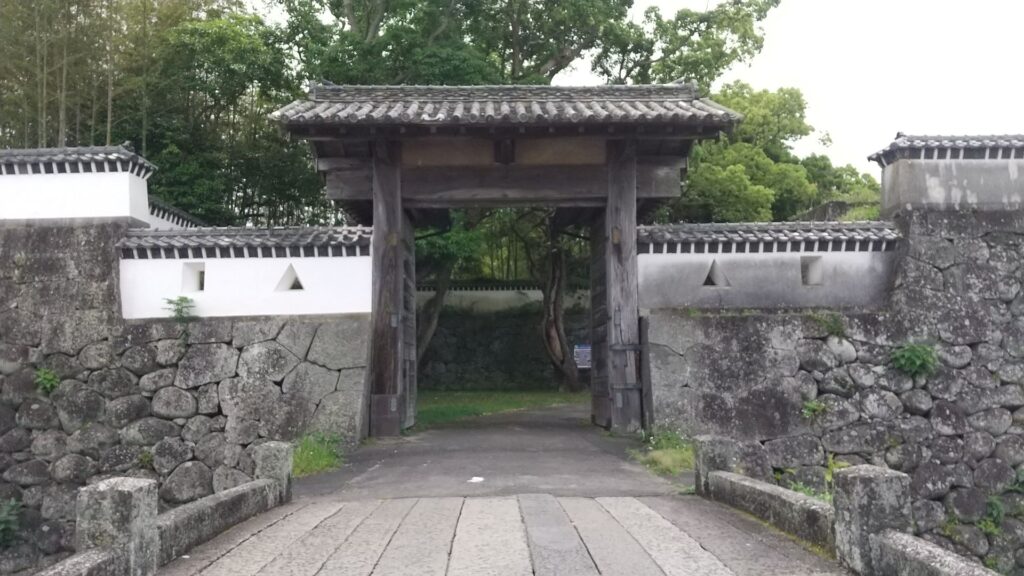
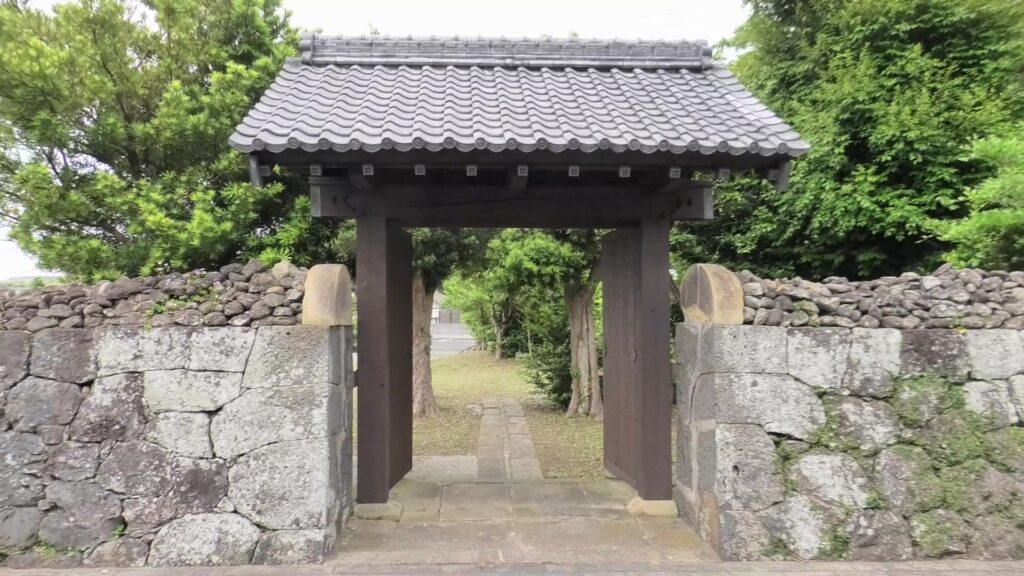
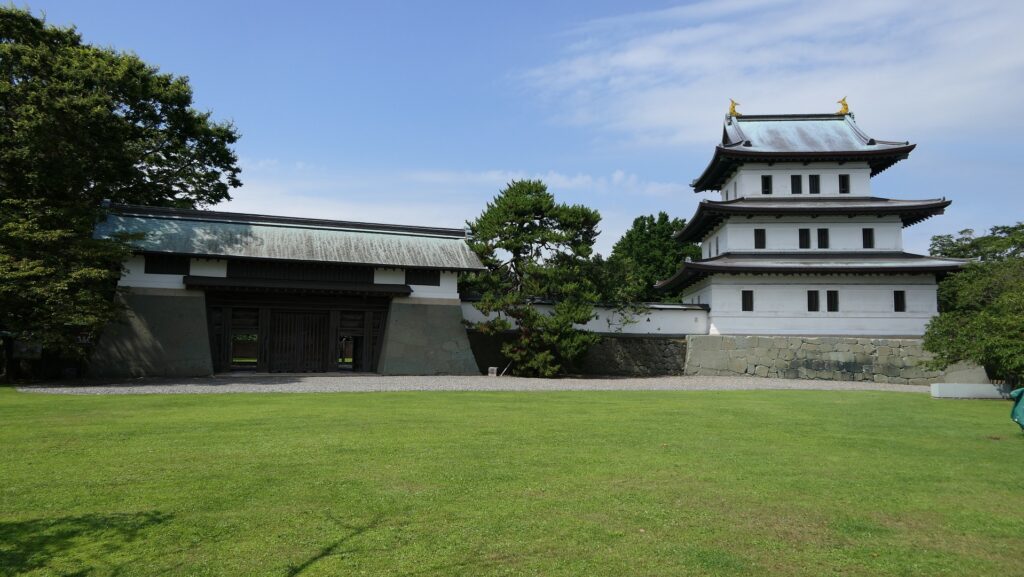
Over the moats, you will eventually arrive at the ruins of the main gate which is the entrance of the northern enclosure. The gate also faced the sea in the front. The stone walls of the gate were piled up using precisely processed stones, as it was also the front gate. It had a turret building on it as well. The enclosure now has the Goto Kanko Historical Museum which looks like a Main Tower, where you can learn the history and culture of Goto Islands.
The ruins of the main gateThe Goto Kanko History Museum
Going to the Back of Castle
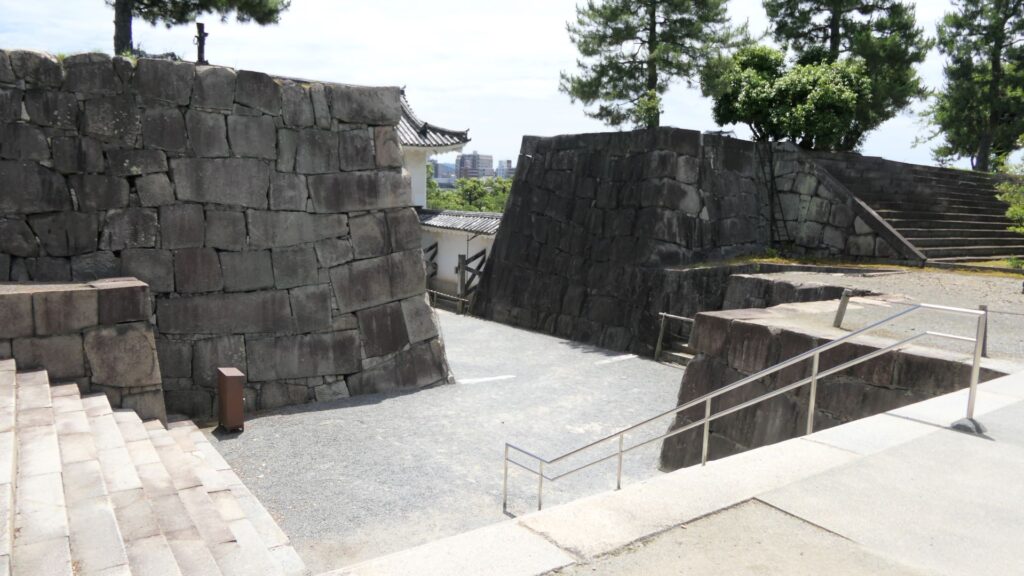
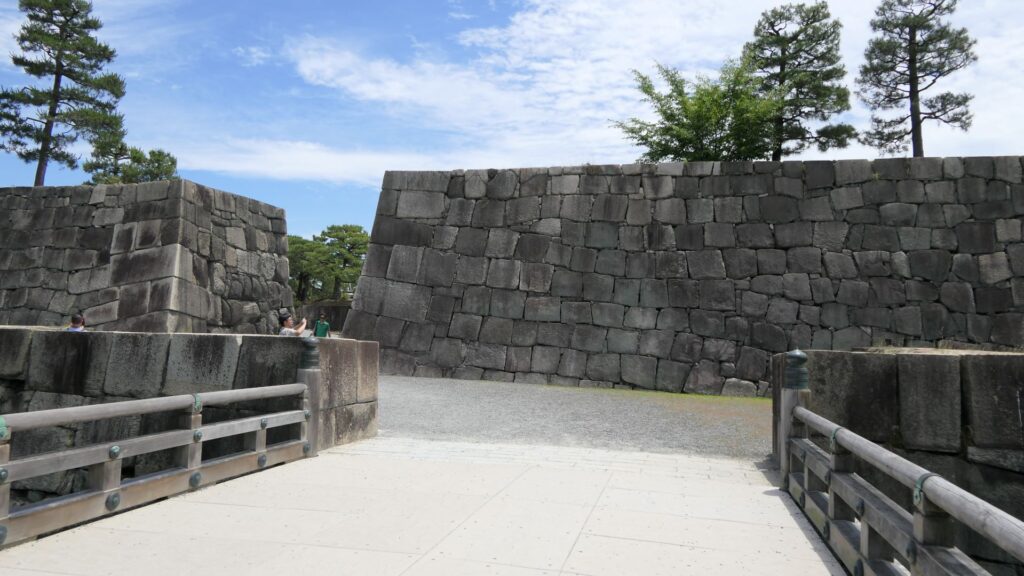
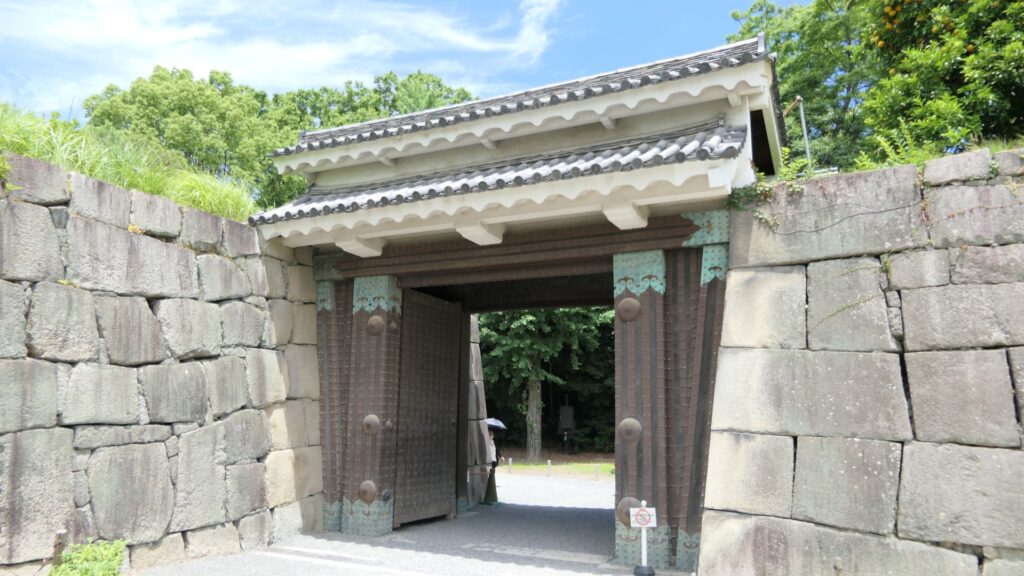
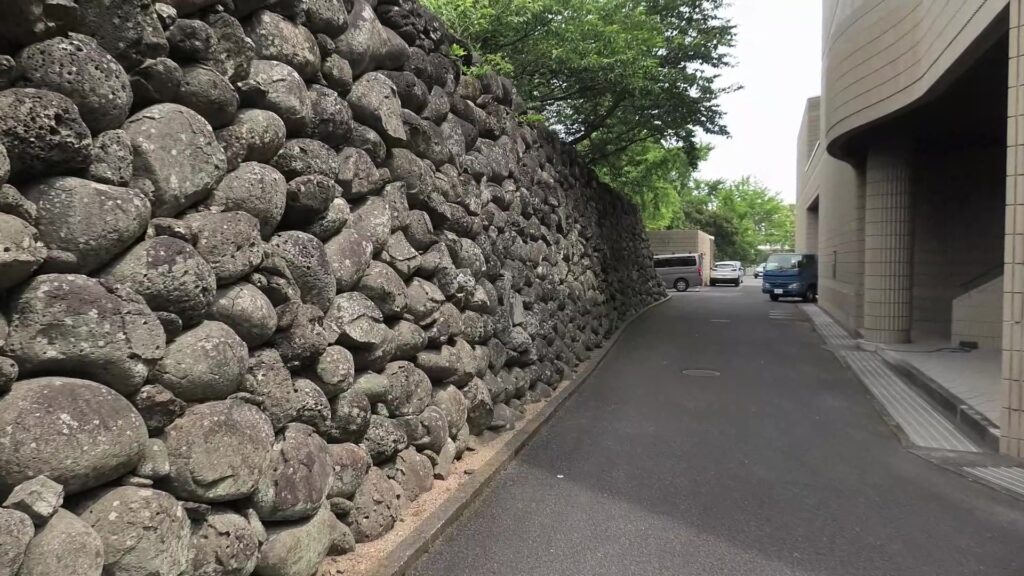
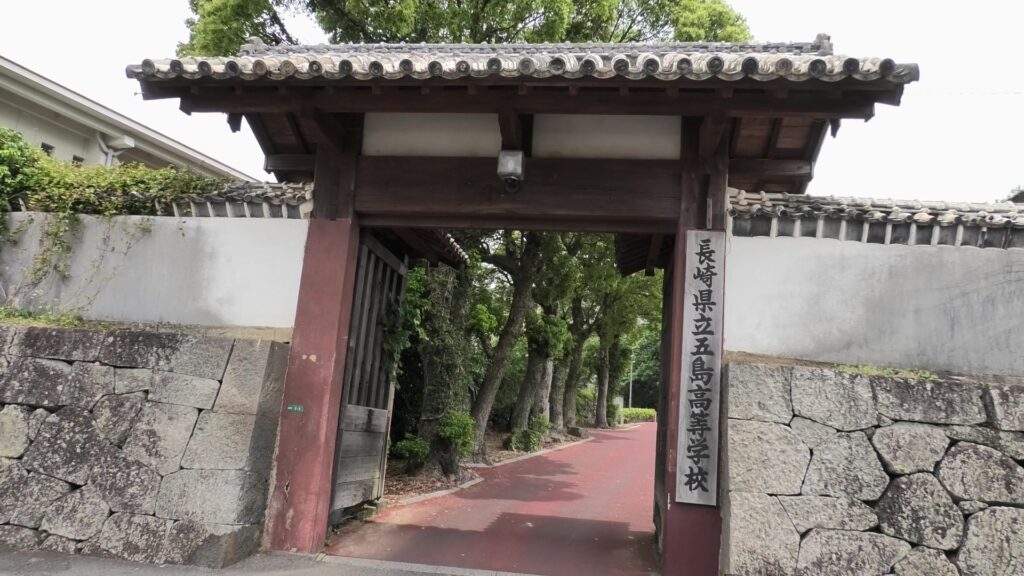
If you go to the back of the castle in the west, from the northern enclosure, you will see the main enclosure and the inner moat. The main enclosure is now used as a high school. That’s why visitors can only look around it. The stone walls of the enclosure have something like a gap, which was actually one of the entrances where the bridge over the moat used to be. If you go further, you need to turn to the right rear and will walk along the long stone walls of the northern enclosure. There is also one of the canon base ruins nearby.
The stone walls of the main enclosure and the inner moatThe trace of the entranceThe stone walls of the northern enclosureThe cannon base ruins seen from the city area
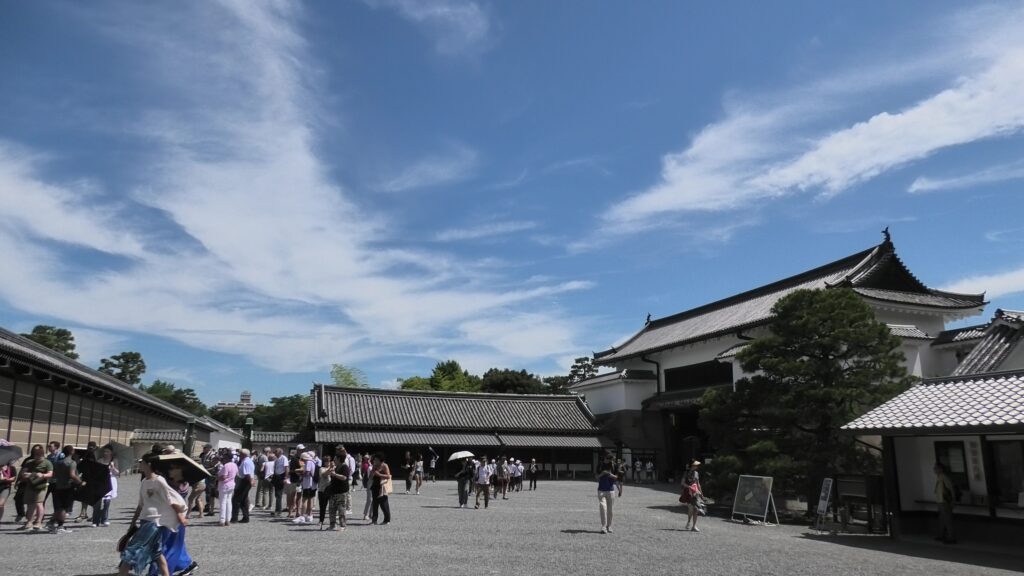
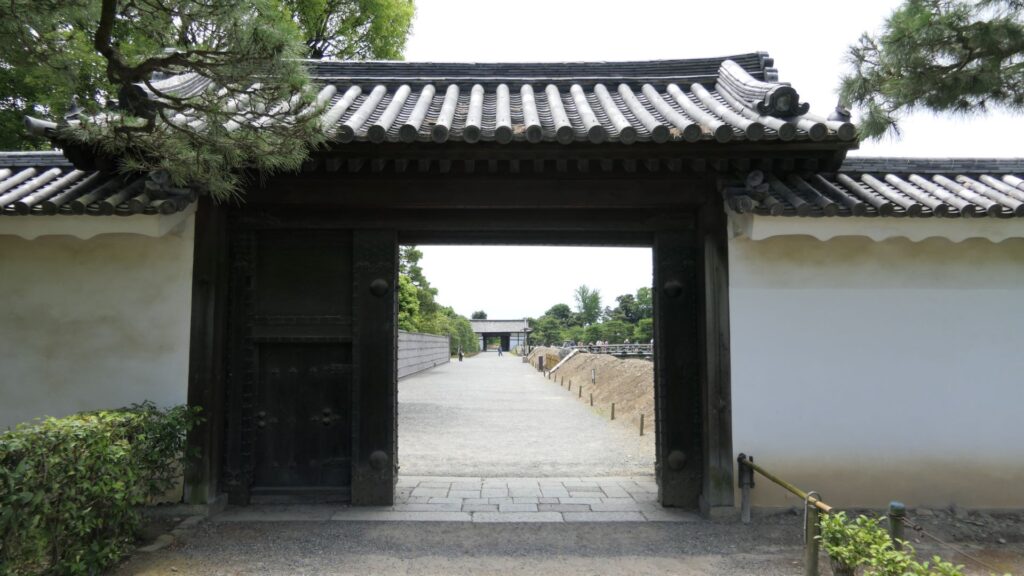
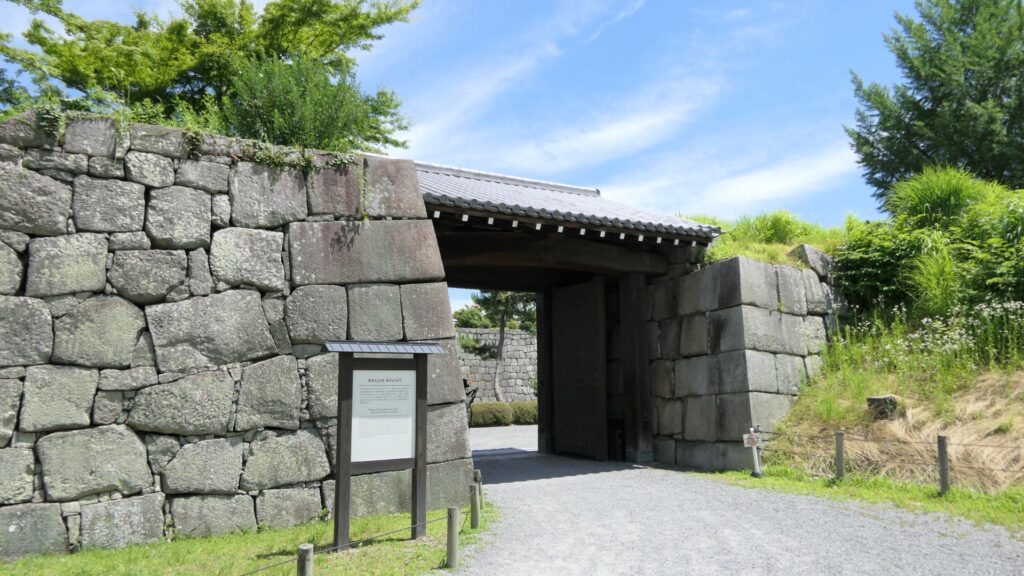
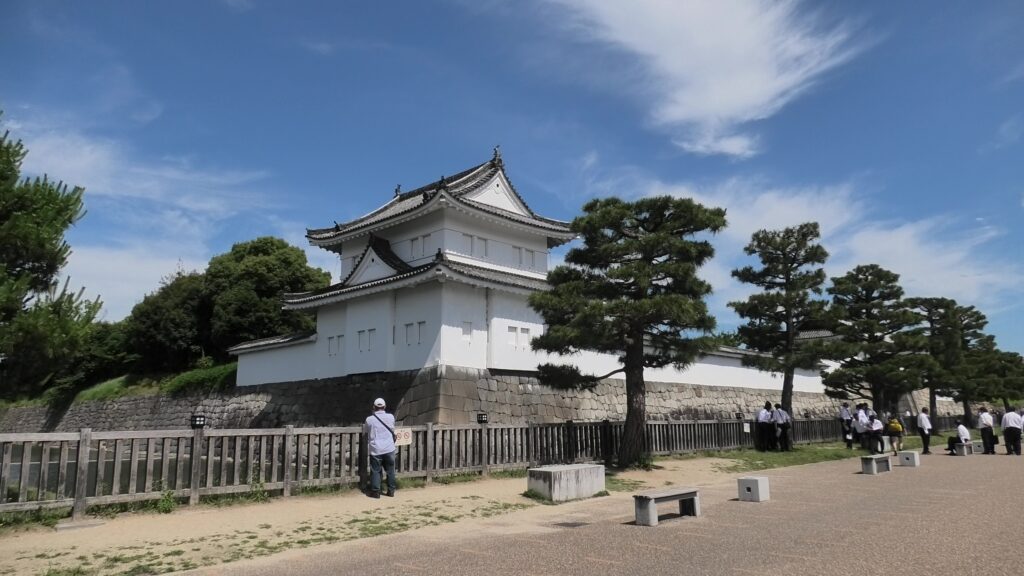
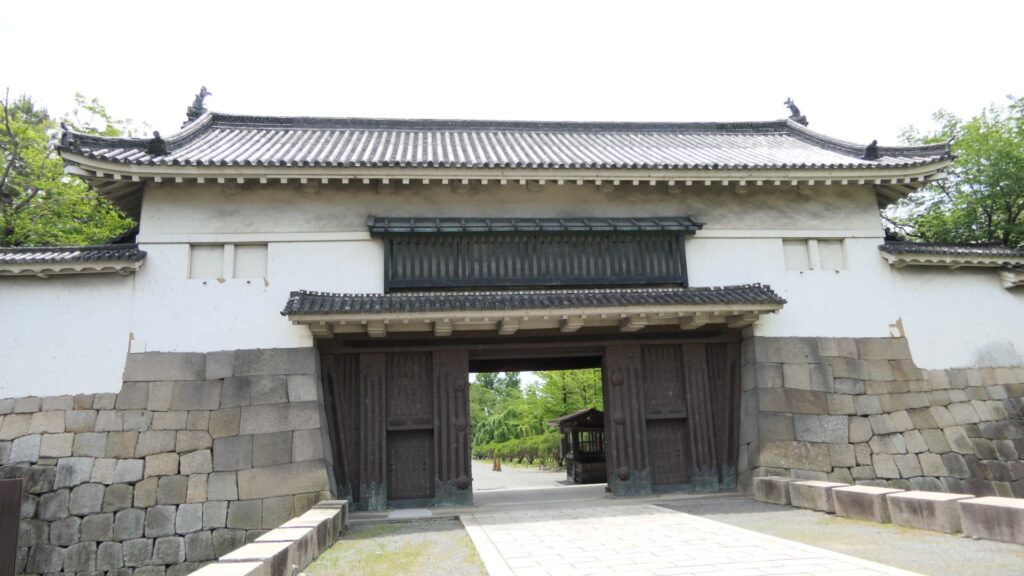
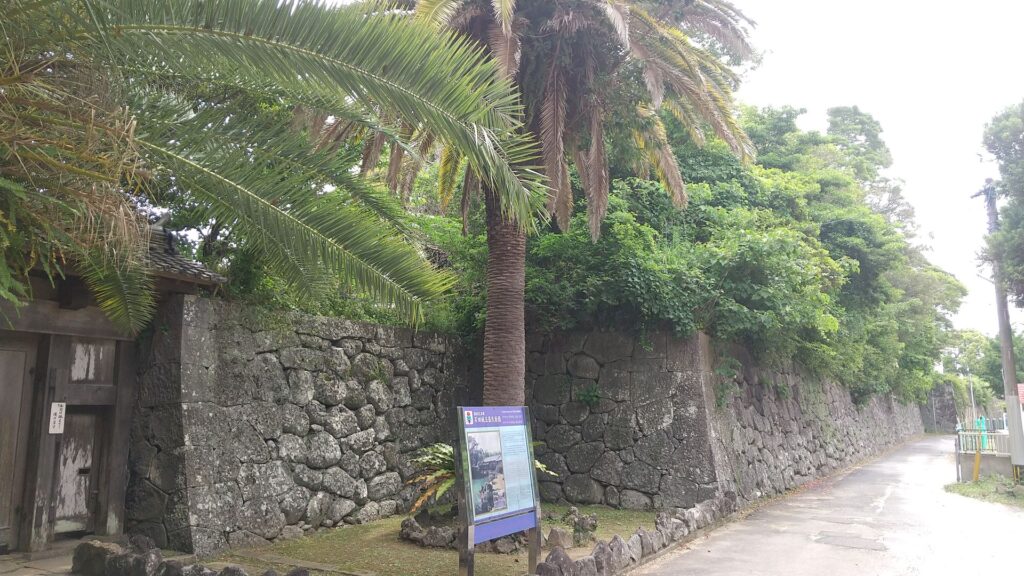
It would be better to exit Fukue Culture Hall, which uses the former castle’s land, in order to see the castle site more. If you go on the city area to the west, you will see the castle’s stone walls and the moat in front of them again. In fact, the moat is original, and does not originate from the sea, and is in the westernmost part of the castle. The stone bridge over the moat, and gate behind are original as well, which have been maintained for a long time. The gate was used as the back gate of the castle. The inside is the remaining retreat of the founder of the castle, Moriakira Goto. This site is open to the public, called “Goto Garden”. However, it sometimes has irregular holidays which may confuse visitors. Therefore, I recommend calling the management office in advance to confirm its business days, if you really want to see it.
The entrance of the Fukue Culture HallThe western side of the castle still has its original moat, bridge and gateThe back gate of the castleThe entrance of Goto Garden, it was closed when I visited
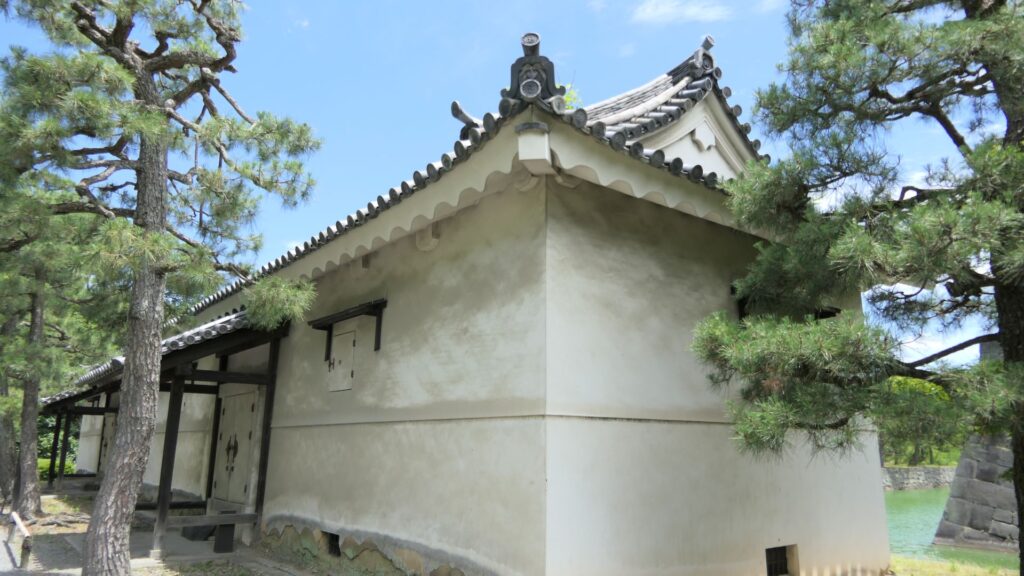
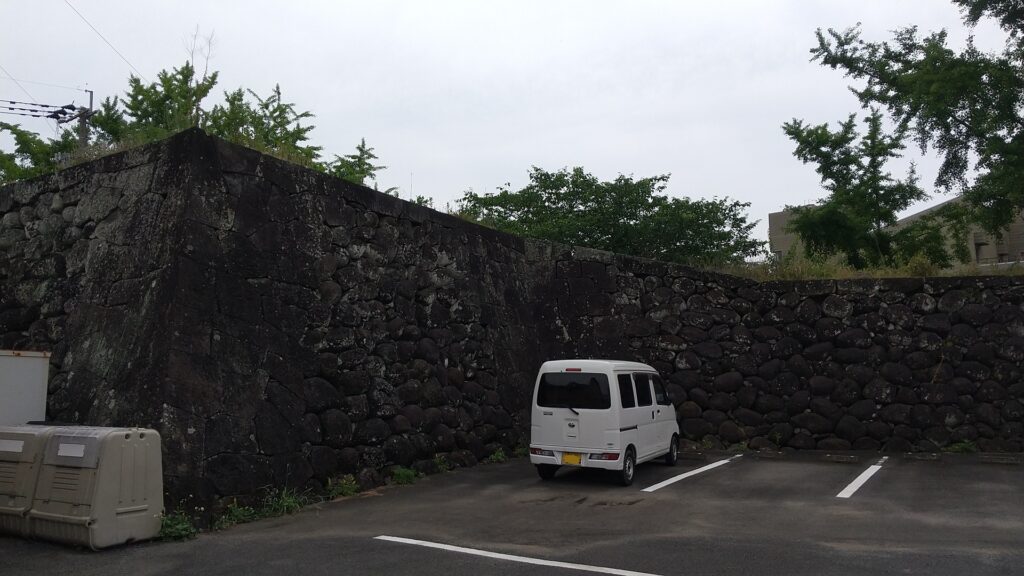
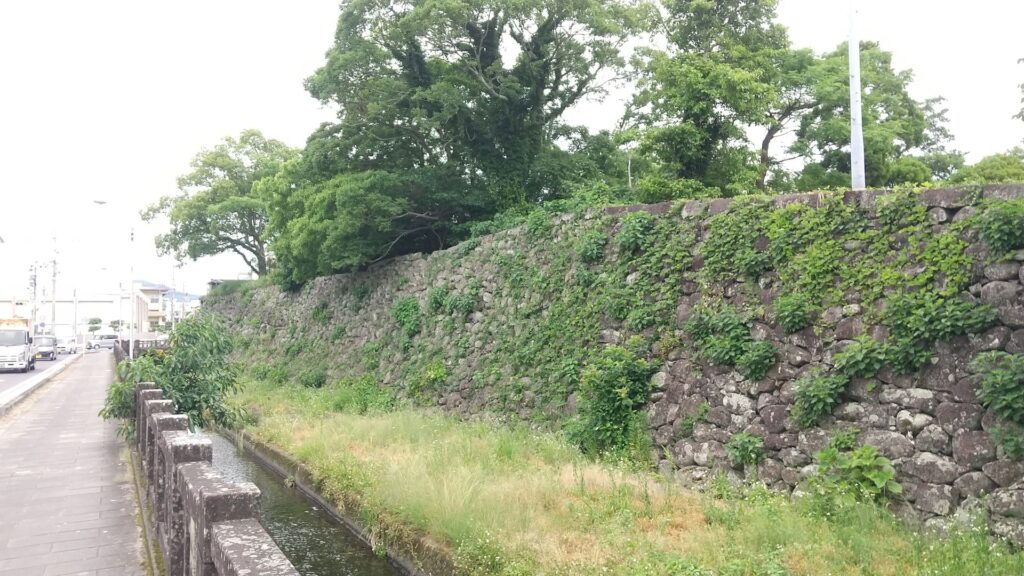
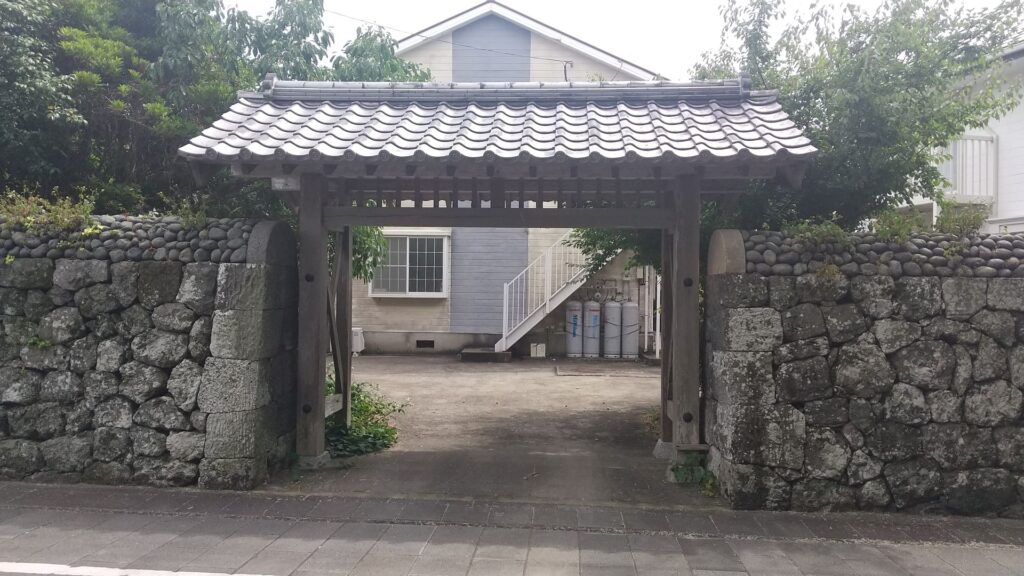
Overall, the stone walls remain well even though most of the sea area around the castle has been reclaimed. The other remaining castle’s gate is used as the entrance of the high school.
The stone walls of the southern side of the castle, the road on the left was the sea in the pastThe other remaining gate where high school students pass every weekday
Related Historical Sites
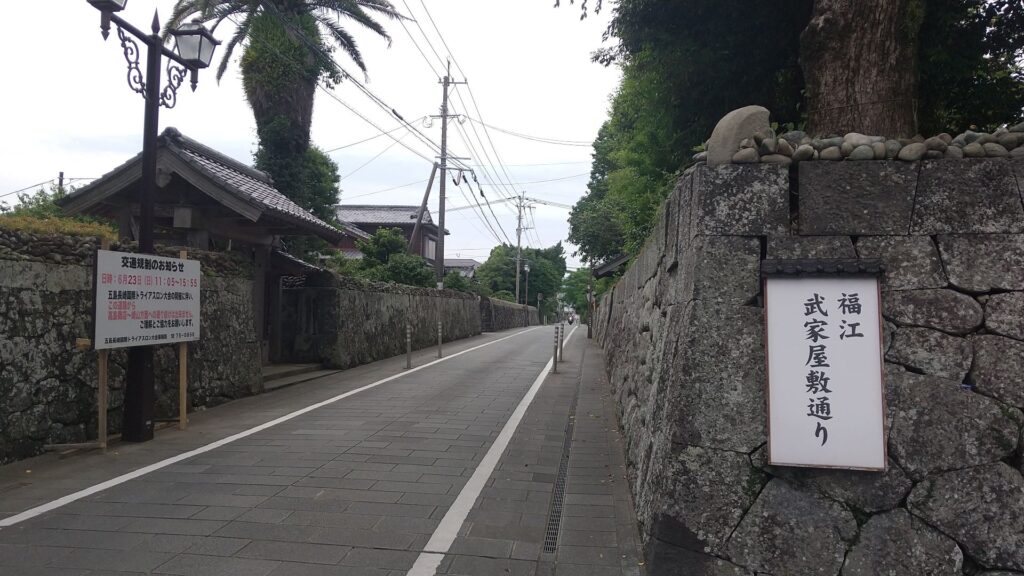
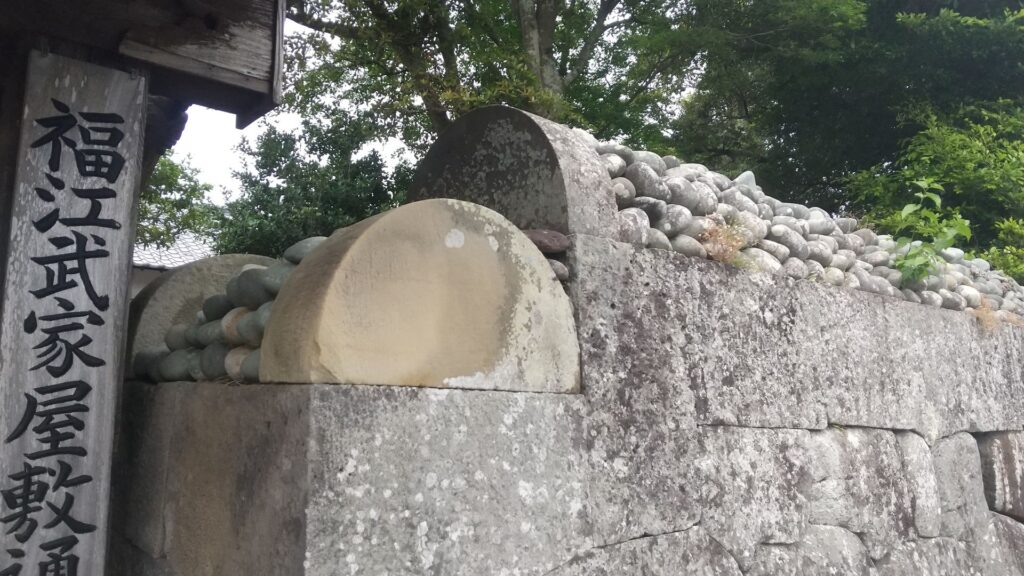
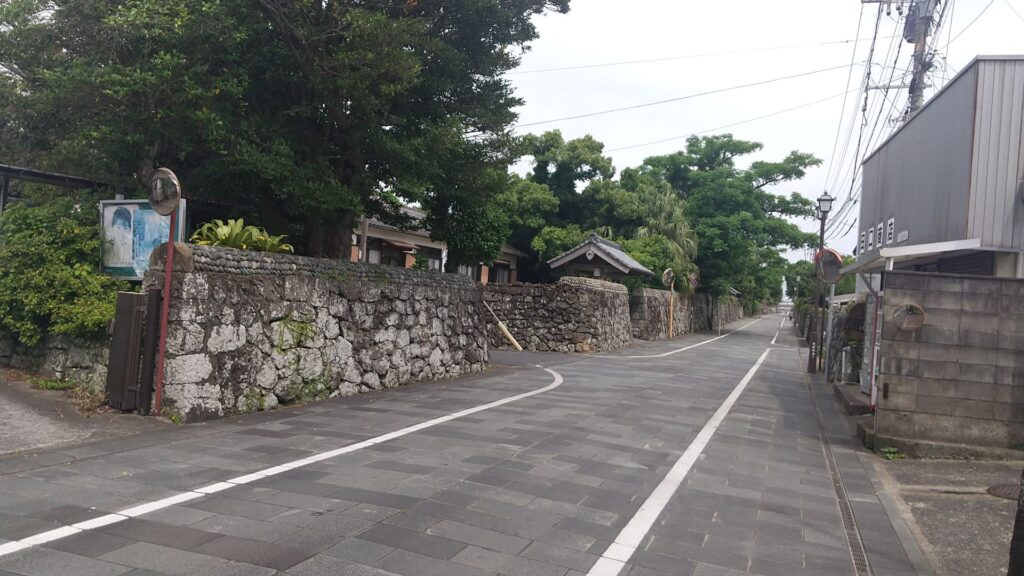
One of the related sites to Fukue Castle is Fukue Samurai Residence Street, which was the residential area of middle-class warriors of the Fukue Domain. It consists of the remaining gates and walls for the residences, which are about 400m long. The walls resemble those of Fukue Castle, but some points are different. There are rough stones lazily piled up, called “kobore-ishi” (meaning “spilling stones”), on the walls. There are also semi-circular stones, called “waki-ishi” (meaning “side stones”), at the edges of the walls. The latter stones keep the former stones on the walls. This is a unique system for the whole country. One theory suggests that invaders over the walls would inform the host by spilling the stones. The other theory says that the host would counterattack the invaders by throwing the stones.
Fukue Samurai Residence StreetThe side stones and the spilling stones
Most of the area behind the gates and walls has become modern residences. However, the street still looks like what it was, with the stone pavements.
There seems to be a park behind the gateThere seems to be an apartment house behind the gateThis street has stone pavement which makes it old-fashioned
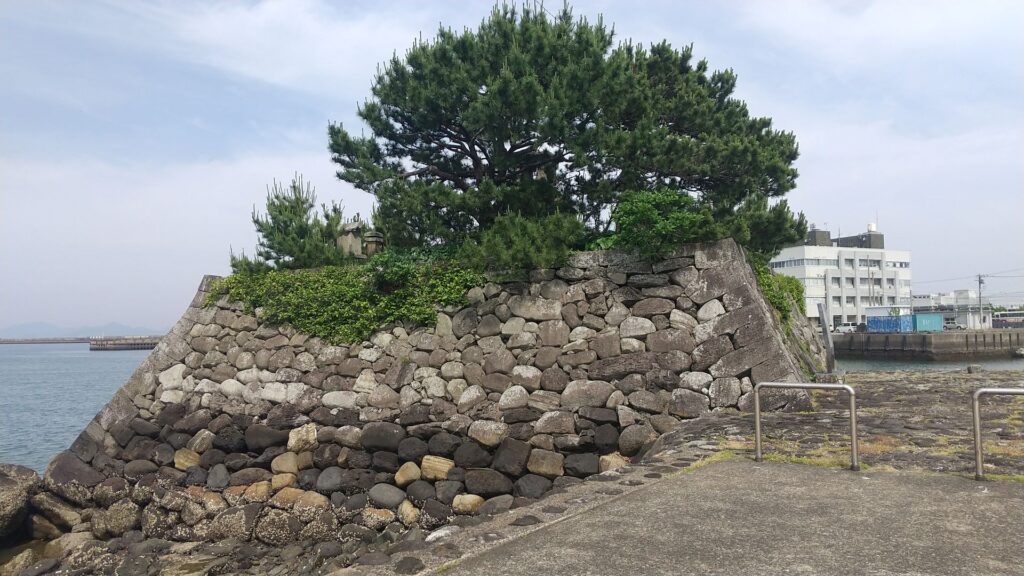
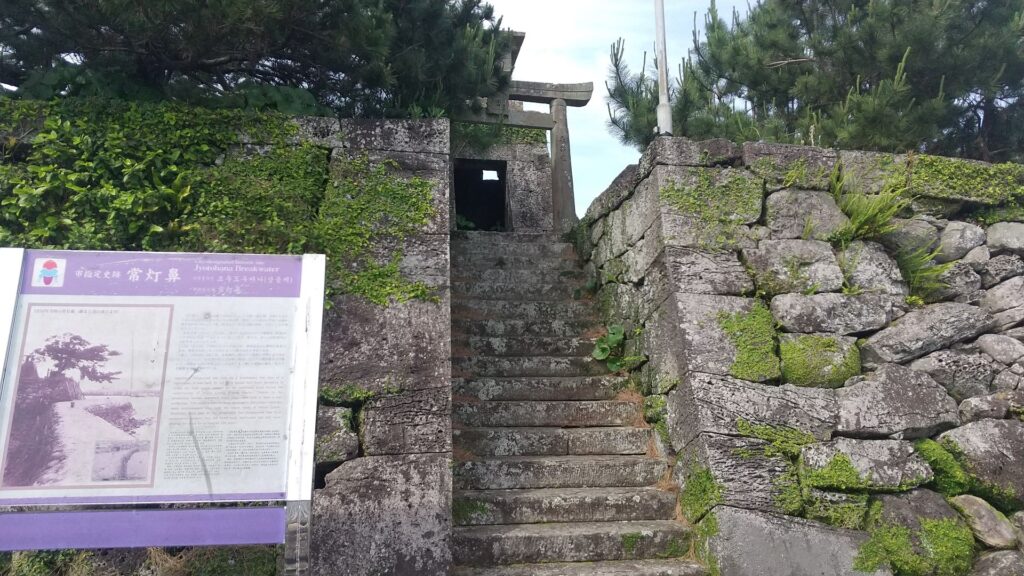
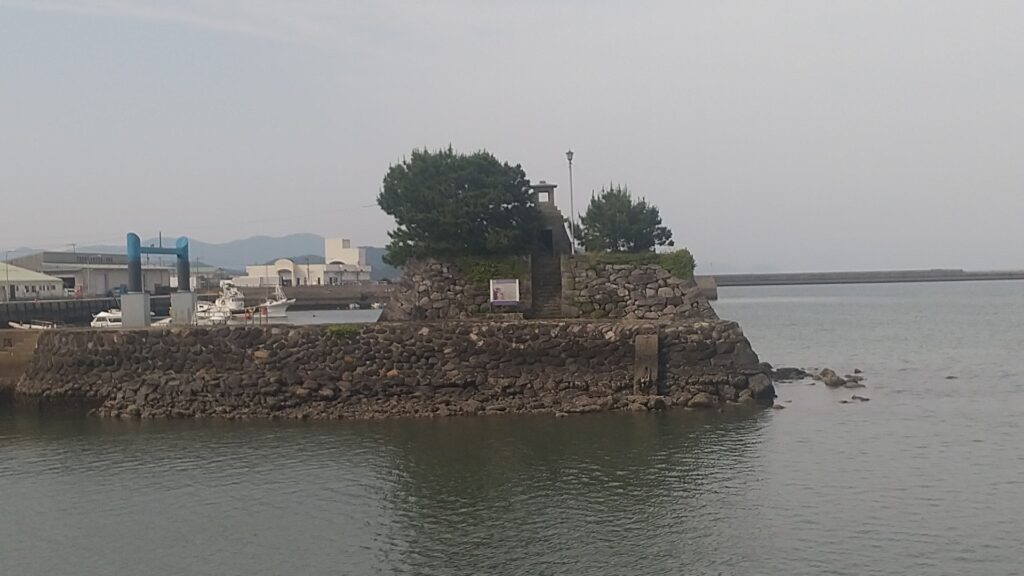
Another related site is Jotobana Ruins near Fukue Port. It was originally built as a lighthouse and the banks to protect the castle construction site from the big waves. Its only remaining item is the lighthouse, so you need to access it by crossing the modern pier. It was said that the site was built by the same craftsman group as those for the stone walls of the castle. In addition, originally, this structure was built alongside the castle, but in fact it was built even before the start of the castle construction. That meant the shogunate might have given an unofficial permission to the castle’s lord back then.
The Jotobana RuinsYou can access the ruins through the pier
If you get close to the stone walls of the lighthouse ruins, you will see they look just like those of the castle. Such a historical site would make us interested in the history of the castle more and more.
The steps to the lighthouse ruins
Is this Extra Edition?
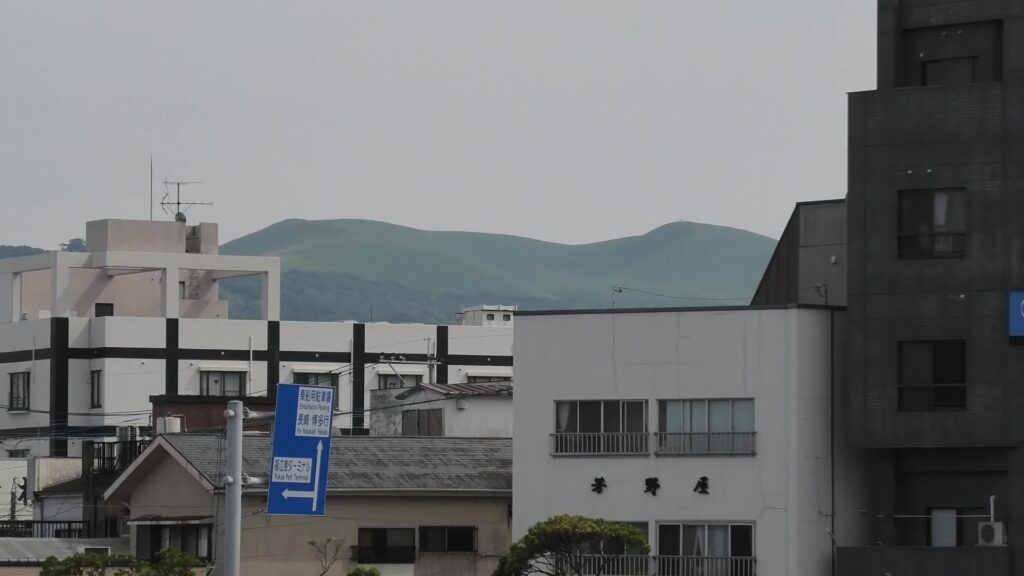
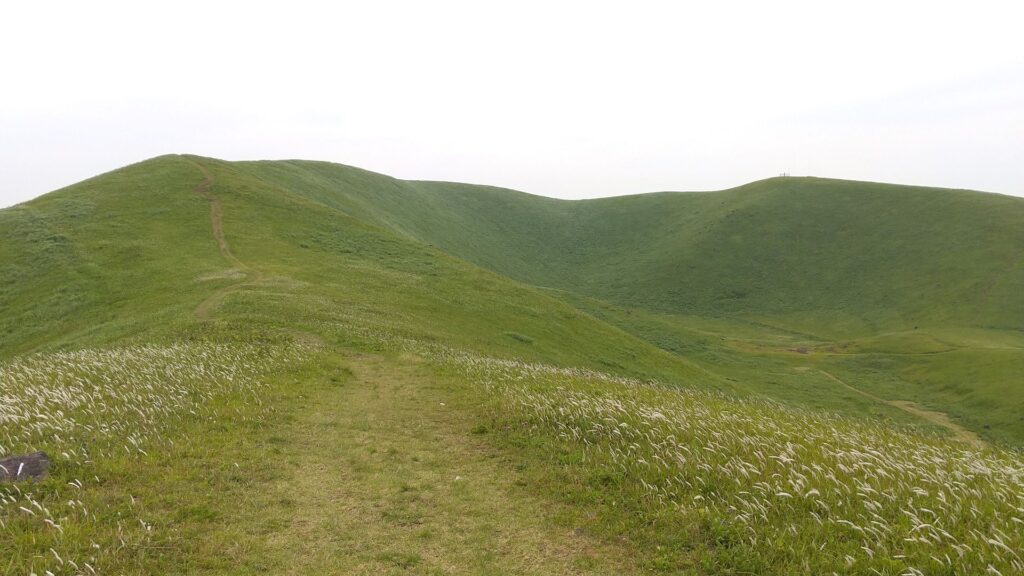
If you walk around the Fukue area, you will often see Onidake Mountain, a symbolic mountain of Fukue Island.
Onidake Mountain, seen from the Jotobana Ruins
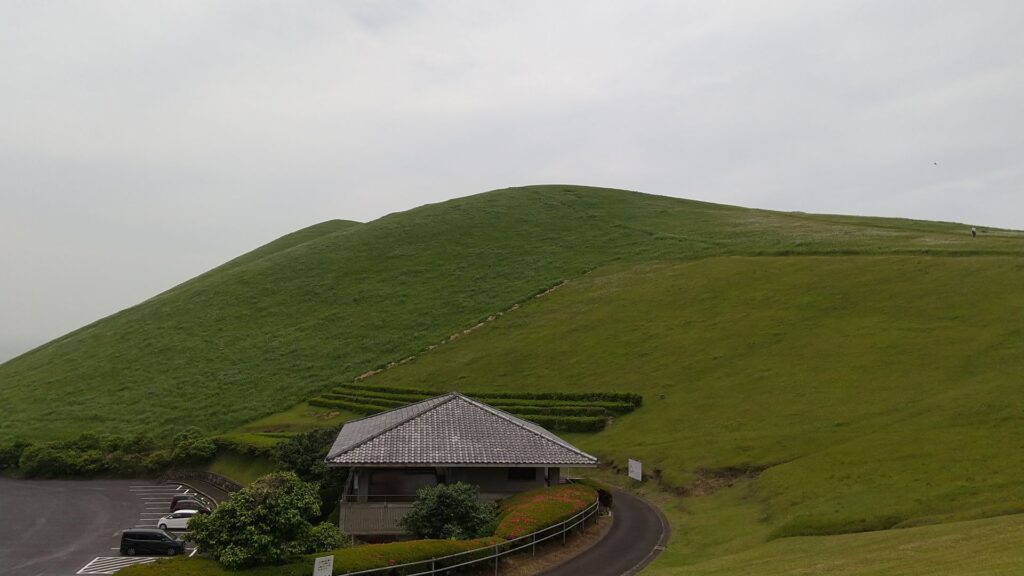
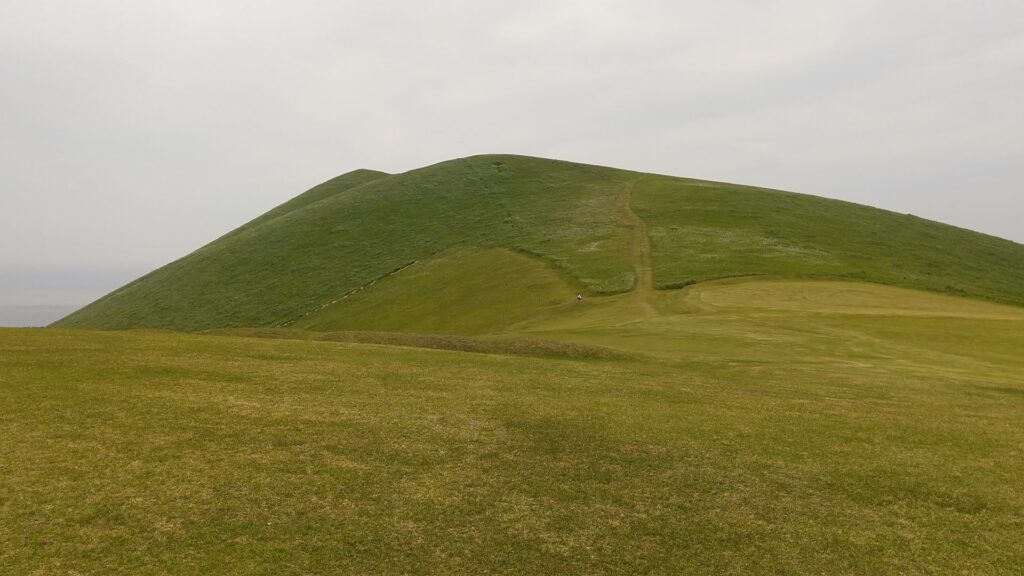
The mountain is 315m above sea level. It is classified as a volcano mountain but there have been no records of its eruptions in human history. Before that, it erupted and eventually made lava coast in the southeastern part of the island. The eruption made the top of the mountain look like a mortar, academically called a scoria hill. People burn off a field of the mountain every several years; the mountain is covered with green grass.
Top of the mountain, seen from the mid slopeThe shape of the mountain with green grass is beautifulAround the top of the mountain
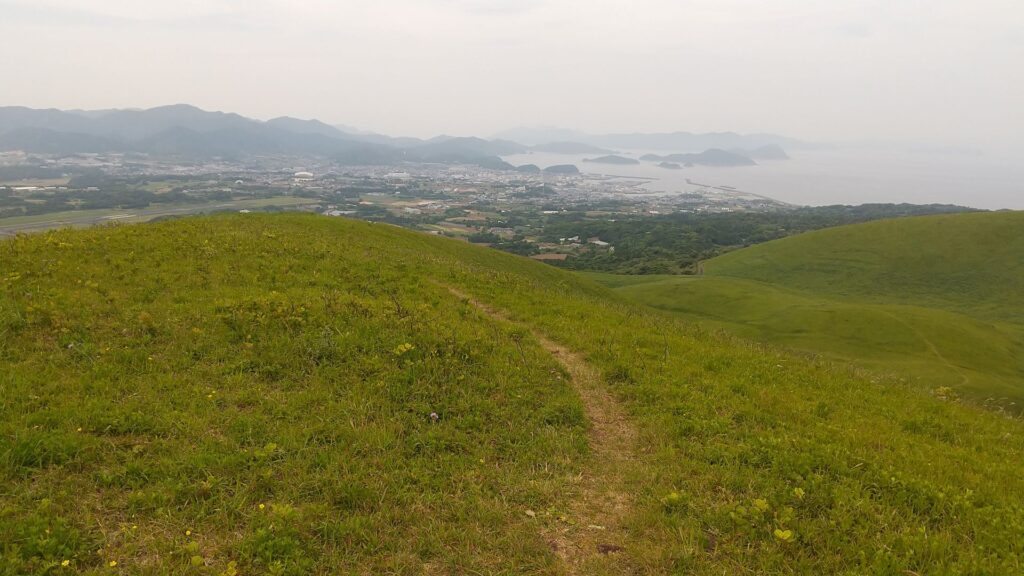
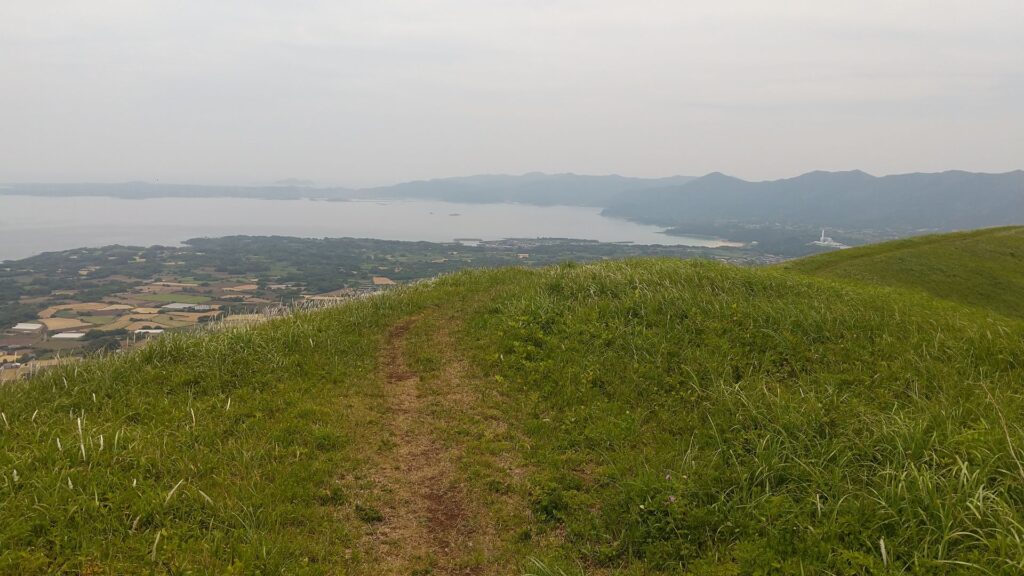
In fact, the mountain is related to the Fukue Domain and Fukue Castle. It was one of the 11 lookout posts the domain built on the islands, in order to monitor foreign ships. You will realize it is a good place for the lookout where you can look over the sea and the castle site.
A view of the Fukue city area including Fukue Castle from the topA view of the opposite side of the castle from the top
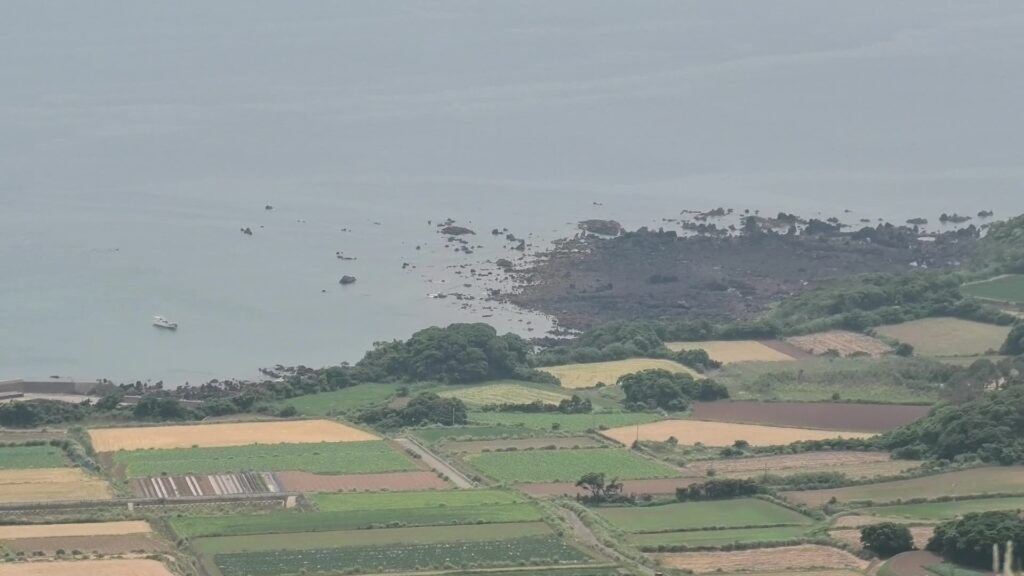
There is also the lava coast the mountain created at the opposite side. The coast provided the natural stones to the castle to build its stone walls. The castle’s history comes with the natural environment of the island.
The lava coast seen from the top
My Impression
I honestly say that I thought it would be enough to have a day trip just to visit Fukue Castle Ruins. That’s why I originally bought a return ticket using ships to and from Nagasaki Port in one day. However, when I got there, I got interested in many other things. As a result, I unfortunately didn’t have enough time to see everything including the lava coast and a church. Therefore, I recommend staying overnight if you visit Fukue Island.
Fukue Castle was located in Fukue Island, which is the largest one of Goto Islands. It was built by the Goto Clan, the lord family of the Fukue Domain during the Edo Period. Goto Islands are at the westmost part of the Kushu Region. That’s why they have a long history including close relationships with foreign countries through sea transportation. However, the castle is one of the latest castles in Japan because of the special conditions and matters of the islands.
Location and History
Fukue Castle was located in Fukue Island, which is the largest one of Goto Islands. It was built by the Goto Clan, the lord family of the Fukue Domain during the Edo Period. Goto Islands are at the westernmost part of the Kushu Region. That’s why they have a long history including close relationships with foreign countries through sea transportation. However, the castle is one of the youngest castles in Japan because of the special conditions and matters of the islands.
The location of the castle
Goto Islands with Matsura Party, Kaizoku warriors, and Wako pirates
In the ancient times, Goto Islands were on the southern route for Japanese missions to the Tang dynasty of China. For example, a famous priest, Kukai, left the islands to the dynasty by ship. In the Middle Ages, warriors, called Matsura Party, invaded the islands in order to govern it. Though their leader, the Matsura Clan stayed in Hirado of the main Kyushu Island, other members like the Uku and Aokata Clans moved to Goto Islands. Apart from the jobs for ruling their lands, they usually acted as sea guards and navies. They also pirated cargos from the ships which meant they didn’t have to pay to enter certain areas or were wrecked. So, they were sometimes called Kaizoku, which directly means ‘pirates’.
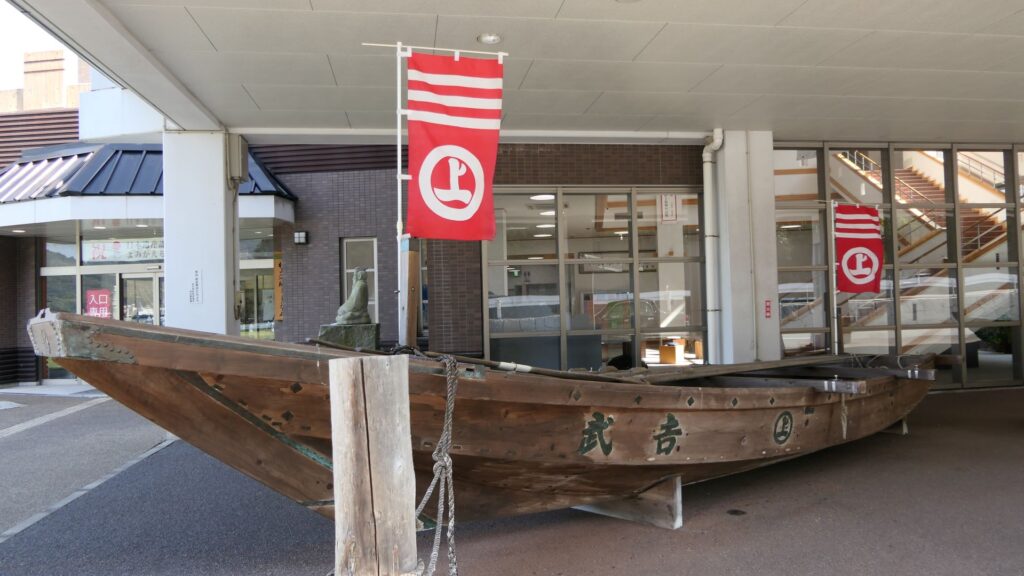
The restored Kobayabune boat, which is an example of navies’ or Kaizoku’s boats, exhibited by Murakami KAIZOKU Museum
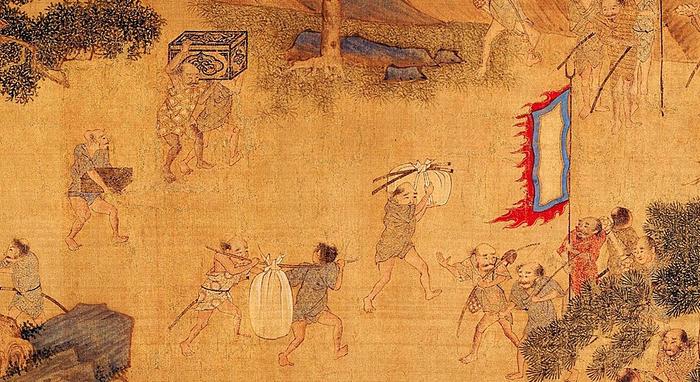
Another leading group at that time were Wako pirates, which used Goto Islands as a base. They were classified in the former Wako during the Muromachi Period and the later one during the Sengoku Period. The latter was, in fact, ruled by Chinese people, who were like armed merchants. It was said that some Japanese people from the Matsura Party might have joined the Wako pirates. The lords of the party tried to build a strong connection with those of the pirates to improve their power.
A picture of the Wako attack (licensed under Public Domain via Wikimedia Commons)
Rule of Goto Clan as Fukue Domain
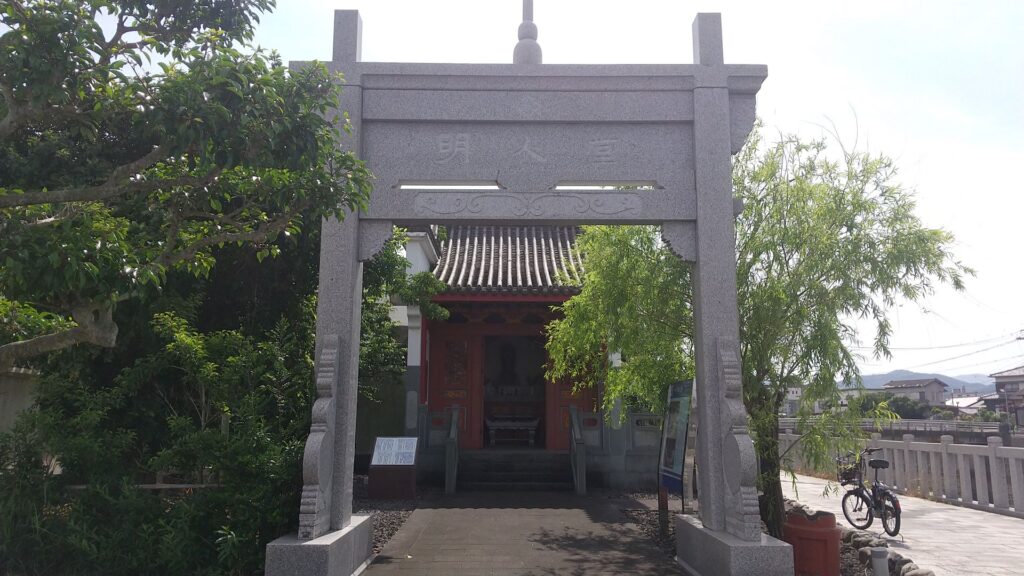
In the 14th Century during the Muromachi Period, one of the Matsura Party, the Uku Clan managed to unify Goto Islands. As a result, the clan moved its home from Uku Island to Fukue Island, the largest one in the islands. Morisada Uku, who was the lord of the clan in the middle of the 16th Century tried to increase trading by building Egawa Castle near the estuary of Fukue River. He met a Chinese big shot from the Wako Pirates, called Wang Zhi, in the process. Morisada allowed Wang Zhi to live and trade in Fukue, by building a Chinatown near the castle. Some historical items, such as Minjin-do (a mausoleum) and Rokkaku Well, can be seen in the town ruins. Goto Islands became a trading center following Hirado.
The portrait of Wang Zhi, exhibited by Minjin-do MausoleumThe imaginary image of the Chinatown, exhibited by Minjin-do MausoleumThe Minjin-do MausoleumThe Rokkaku Well
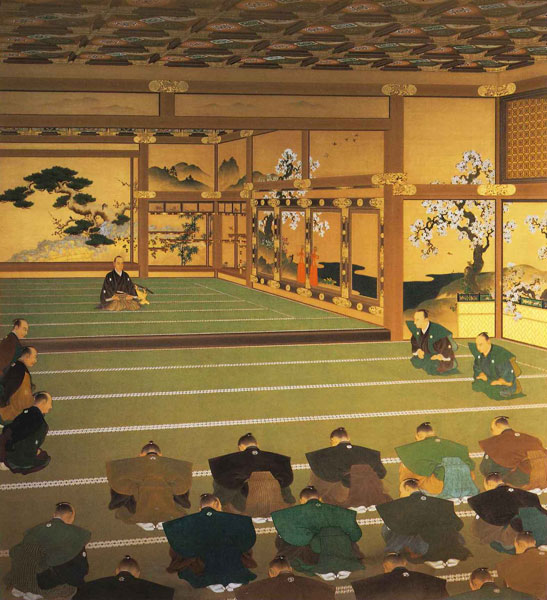
The Uku Clan also adapted to its new environment. When Christianity came to Goto Islands, Morisada’s son, Sumisada became a Christian. Sumisada’s grandson, Sumiharu changed his family name from Uku to Goto, as the representative of the islands, during the unification of Japan by Hideyoshi Toyotomi. Sumiharu’s successor, Harumasa Goto survived even when Ieyasu Tokugawa became the last ruler. Harumasa was the first lord of the Fukue Domain which governed the area all through the Edo Period. The second lord, Moritoshi Goto forced all the warriors of the domain to live in Fukue town to rule over them completely. Fukue Samurai Residence Street is the ruins for the middle-class warriors’ residential area.
Fukue Samurai Residence Street
However, the situation of the domain was not stable. Even though the income of the domain had been good because of the prosperous fishing industry, both of them declined rapidly. Therefore, the domain needed to make counterplans. Their first plan was to tax each person in the domain, It seemed unusual but the second counterplan was more unorthodox. Their second plan was to force some girls to serve high-class warriors like slaves for three years! This was obviously a tribble law even during the Edo Period, which lasted until the end of the period. On the other hand, another plan might have unknowingly brought a good thing to Goto Islands. Fukue Domain asked Omura Domain in the main island of Kyushu to move farmers to Goto Islands. They agreed with each other, and then, thousands of farmers went to the islands. In fact, many of the farmers were underground-Christians. Being Christian was prohibited at that time, but Fukue Domain accepted them carelessly without checking their background because they wanted to increase their income. As a result, Christianity was secretly worshiped by the farmers, which would lead to some Hidden Christian Sites in the Nagasaki Region (as a World Heritage) in Goto Islands.
Kashiragashima Church in Kashiragashima Island of Goto Islands (licensed by Indiana jo via Wikimedia Commons)
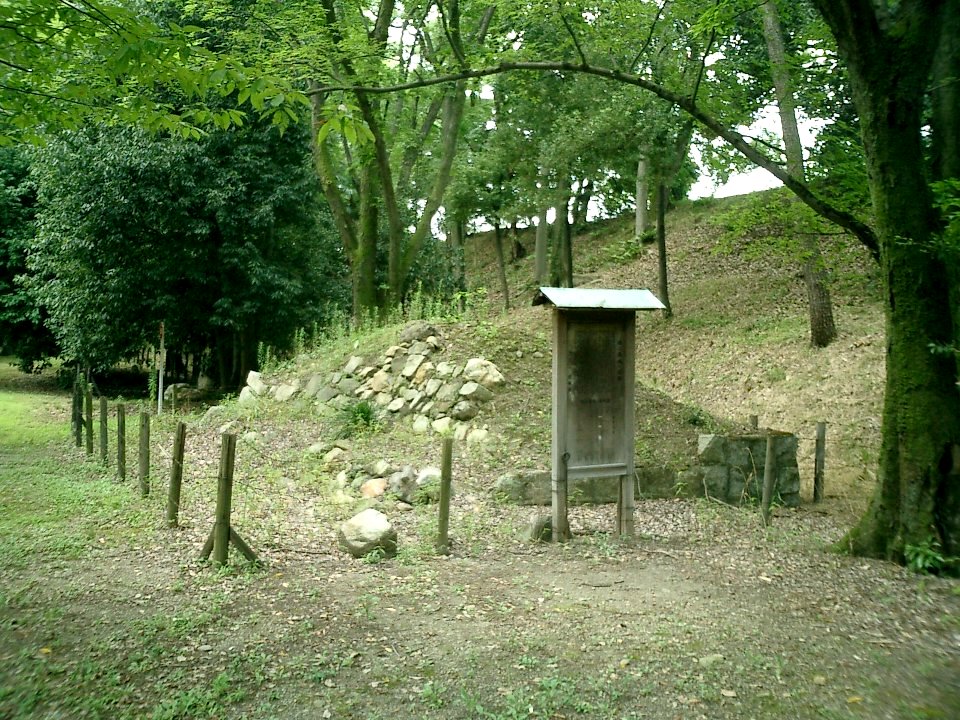
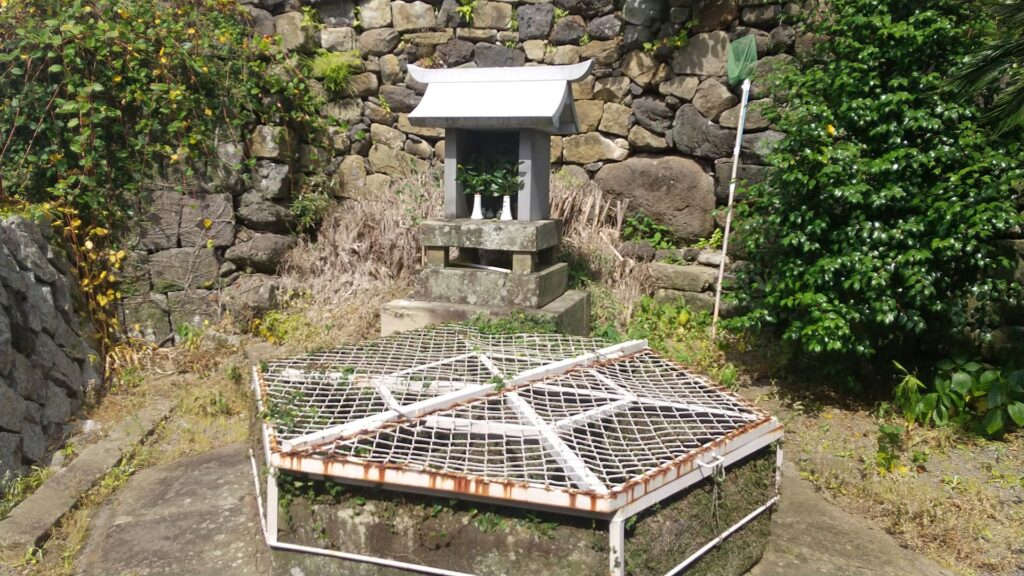
As for the castle’s matter, Egawa Castle was eventually burned down by accident in 1614. Fukue Domain tried to build another one, however, it was not allowed by the shogunate. This was because the domain was too small for having a castle. The shogunate controlled all the domains by classifying them and permitting what they could do. Instead, Fukue Domain built Ishida Encampment at a seashore where Fukue Castle would later be built.
The ruins of Egawa Castle, where only a monument stands beside the hotel
Road to Fukue Castle
Fukue Domain was also not allowed to trade with foreign countries because it was allowed to do so with Netherlands and China. The only trading that was allowed was in Nagasaki Port. Furthermore, the domain was ordered by the shogunate to monitor the foreign trading ships on route to Nagasaki near Goto Islands. The domain built 11 lookout posts on the islands in order to monitor foreign ships. That made the domain become more careful of foreign affairs. The domain sent some officers to Nagasaki to collect foreign information. As time passed, unidentified Western ships often appeared in the sea around Japan. The domain felt a sense of crisis and applied the first permission to build a castle in 1806 but was rejected in the end.
Dejima Island in Nagasaki Port, which was used for the trading with the foreign countries (licensed under Public Domain via Wikimedia Commons)
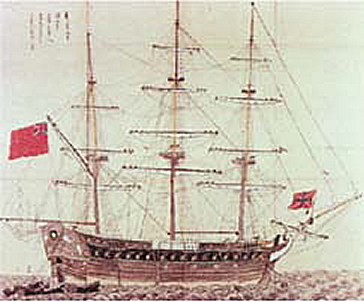
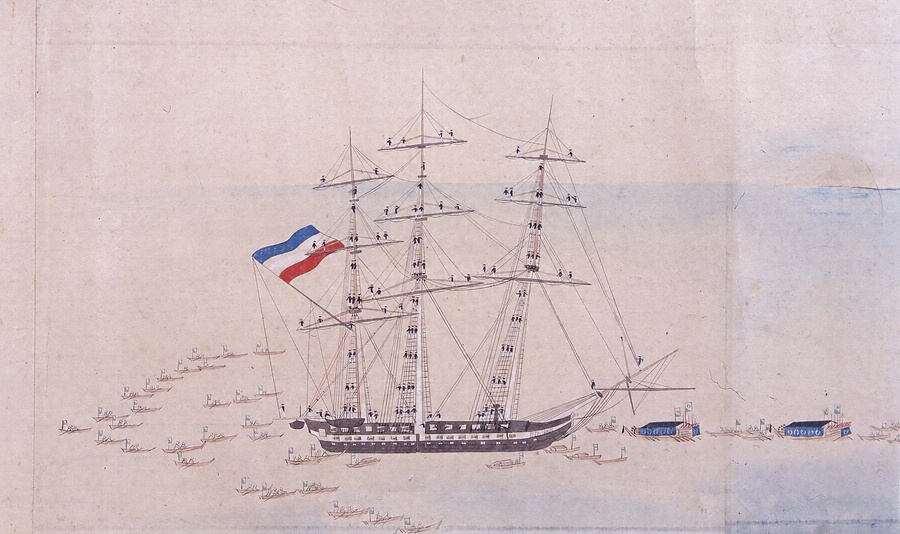
Meanwhile, there were big incidents at Nagasaki. In 1808, a British warship, called Phaeton, rushed towards Nagasaki, to catch some ships of Netherlands under a state of war between the countries. Then, in 1844, a Dutch warship, called Palembang, visited Nagasaki with a diplomatic massage by the Dutch king, which encourage Japan to open the country. This information was basically confidential, but Fukue Domain got it through the officers at Nagasaki.
The British warship, Phaeton (licensed under Public Domain via Wikimedia Commons)The Dutch warship, Palembang (licensed under Public Domain via Wikimedia Commons)
Therefore, it asked the shogunate to allow them to build the castle again and again. Eventually, they were allowed to do it in 1849, which was the same year as that of Matsumae Castle in Hokkaido was built.
Matsumae Castle
Construction of Castle
Fukue Domain lauched the construction of Fukue Castle at the same site as its encampment right away. However, it took a very long time as long as 15 years. This was because of the lack of the budget and its location near the estuary. There is the ruins of a lighthouse called Jotobana near Fukue Port. it was originally built as banks to protect the construction site from the big waves. The castle was eventually completed in 1863. It was one of the youngest castles in Japan and unique one devoted to guarding the sea.
The Jotobana Ruins
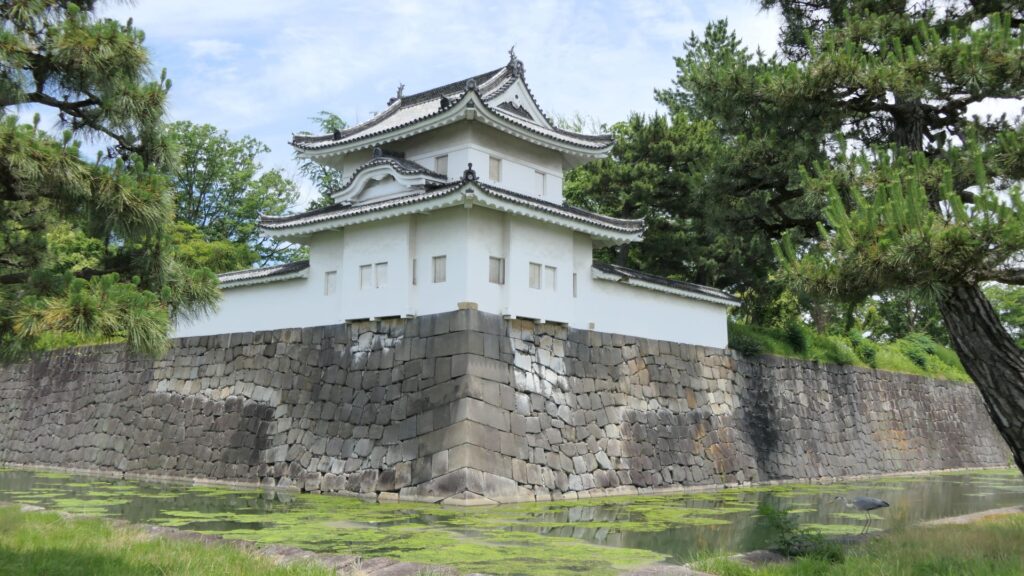
For these reasons, it had several distinct features. First, the castle faced Eastern China Sea in the east and surrounded by it in the east, north, and south directions. The sea could be a natural moat for the castle too, but it made enemy ships attack that area more easily. Therefore, the stone walls at the eastern side were very thick. A water gate was also built to sail the castle’s ships. Secondly, the castle had several enclosures such as the Main, Second and Northern Enclosures like other castles. However, the corners had cannon bases, not turrets which Japanese castles used to have. The residence and garden for the lord were built in the western part of the castle, which was the farthest from the sea, which was also the safest area of the castle. Finally, the stone walls of the castle used many natural stones which the island produced. The stones were piled in a method called Nozura-zumi by a special stone craftsman group called Ano-shu.
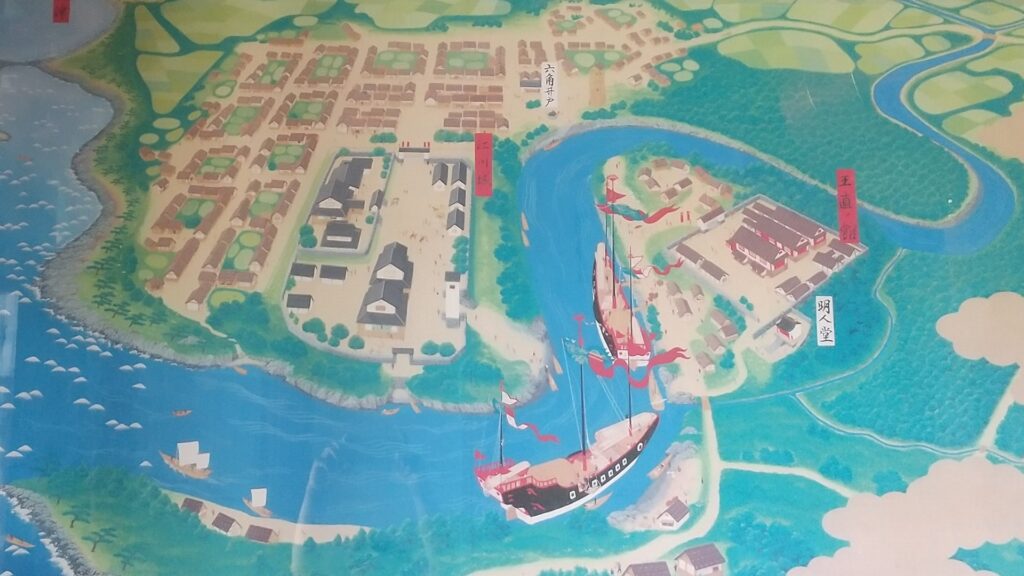
The illustration of Fukue Castle, quoted from the board of education of Nagasaki PrefectureThe stone walls at the eastern side of the castleThe stone walls which were piled in the Nozura-zumi method
Though the castle was built after the great efforts after a long time, it was abandoned in 1872 after the Meiji Restoration when it was only 9 years old.