81.Matsuyama Castle Part2

The long way to the Main Tower

Later History

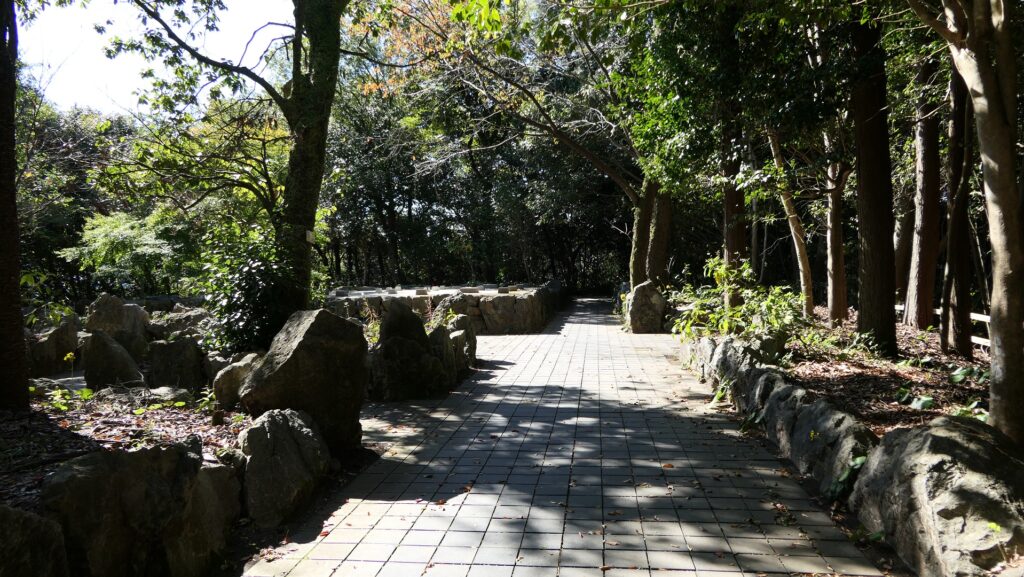
After the Meiji Restoration, The buildings at the foot of the mountain were demolished or burned by accidental fires. The Japanese Army used the area including the Second and Third Enclosures at the foot. After the World War II, the area was used as public facilities such as the civic hall, an NHK broadband station, a museum, a library, a hospital, a school, and playgrounds. The Second Enclosure was finally developed as Ninomaru Historical Garden in 1992 after the hospital and school moving to others. It looks like the original Main Hall with repaired stone walls and restored walls when you look it from the outside. The Third Enclosure has been developing as a public park with a large square which can be used for events. Excavation has also been done to find out the castle’s history after the playgrounds had been moved.

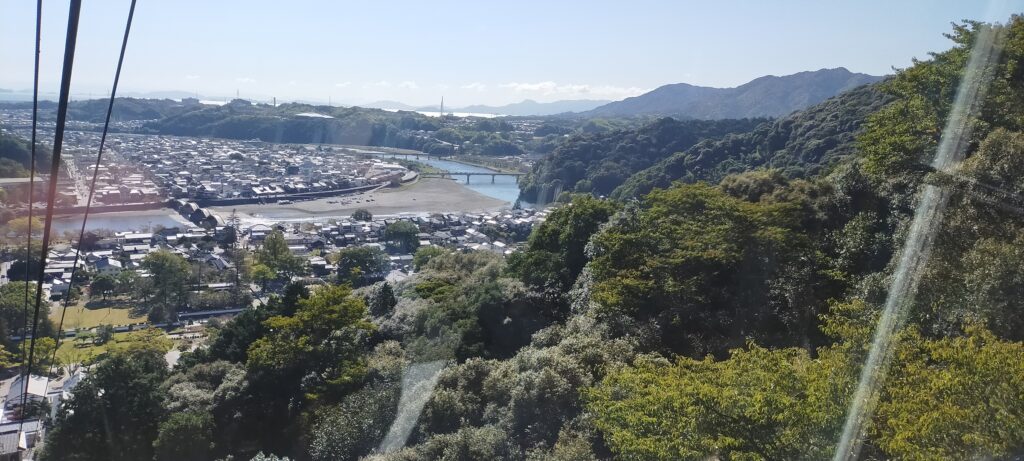
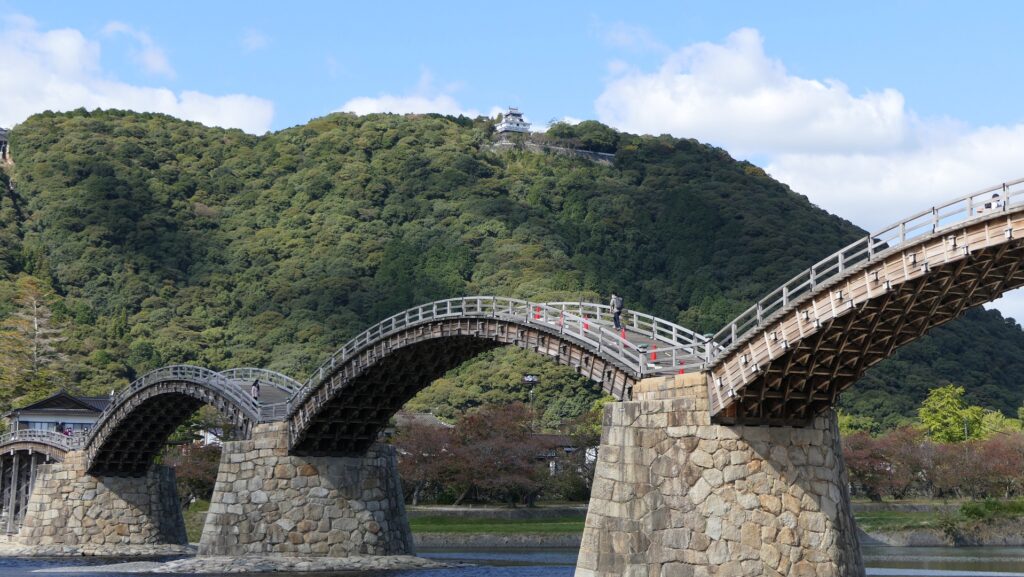
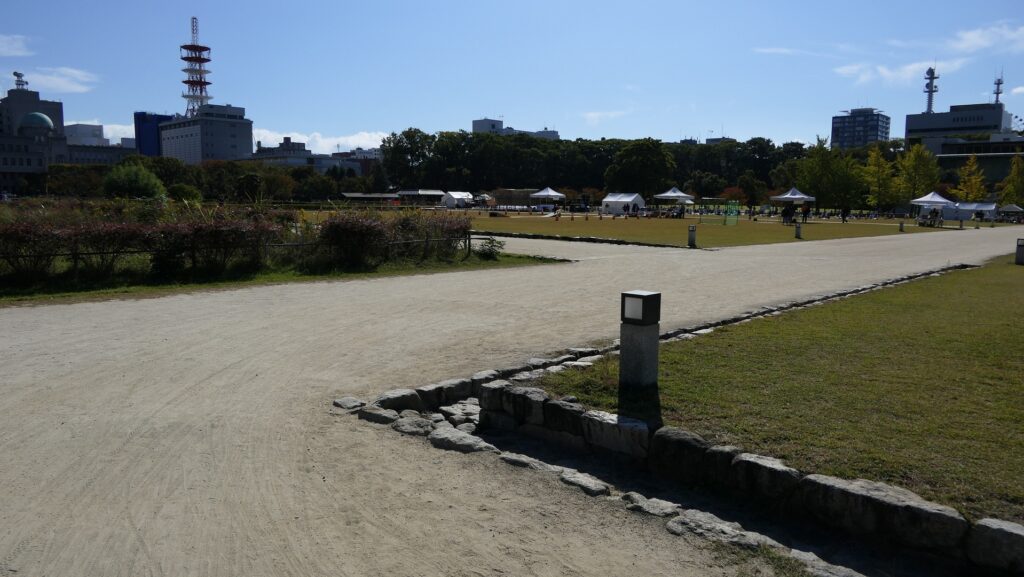
The aerial photo around the castle in the 1970’s

The perimeter of the restored Second Enclosure
The inside of the Second Enclosure has become a garden
The former site of a playground at the Third Enclosure
The Third Enclosure has become a square

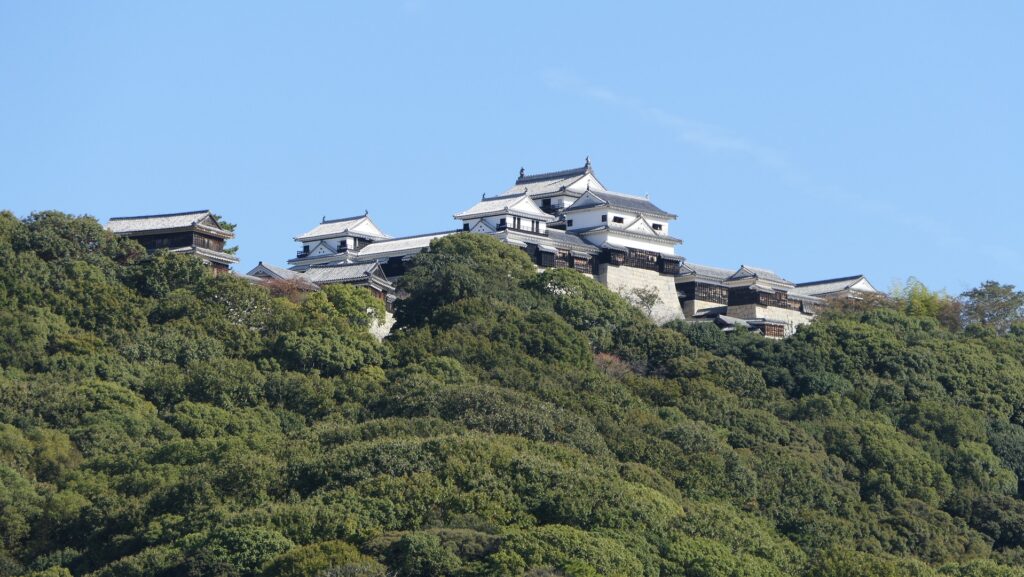
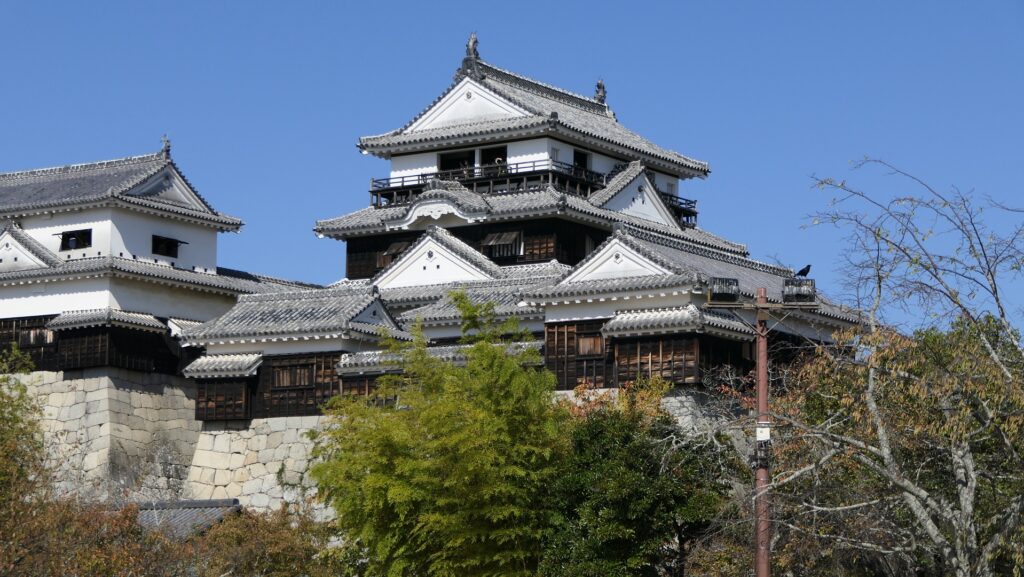
On the other hand, many buildings on the mountain including the Main Tower remained. There were 44 buildings in the beginning of 1933. However, they were reduced by an arson in the same year to 35, by an air raid in 1945 to 24, and finally by another arson in 1949 to 21. Matsuyama City designated the 21 buildings as Important Cultural Properties in 1950 and started to restore other buildings in 1958. So far, 31 buildings were restored by 1992 in the original method, mostly using wooden materials. That means the number of the buildings became larger than 1933. In addition, the whole range of the castle, called the Shiroyama Park, has been designated as a National Historic Site since 1952.

The remaining or restored buildings of Matsuyama Castle on the mountain

Features

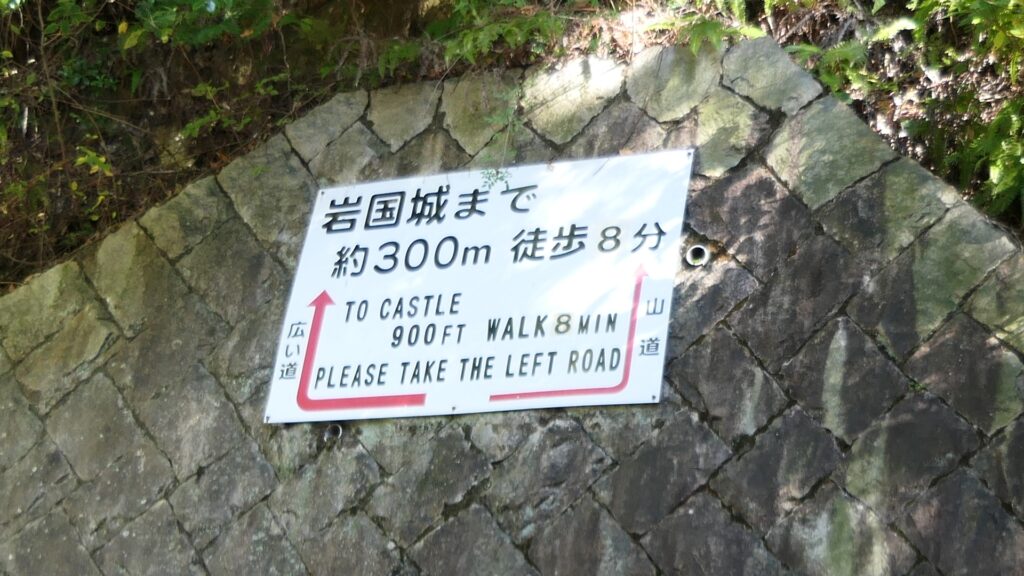
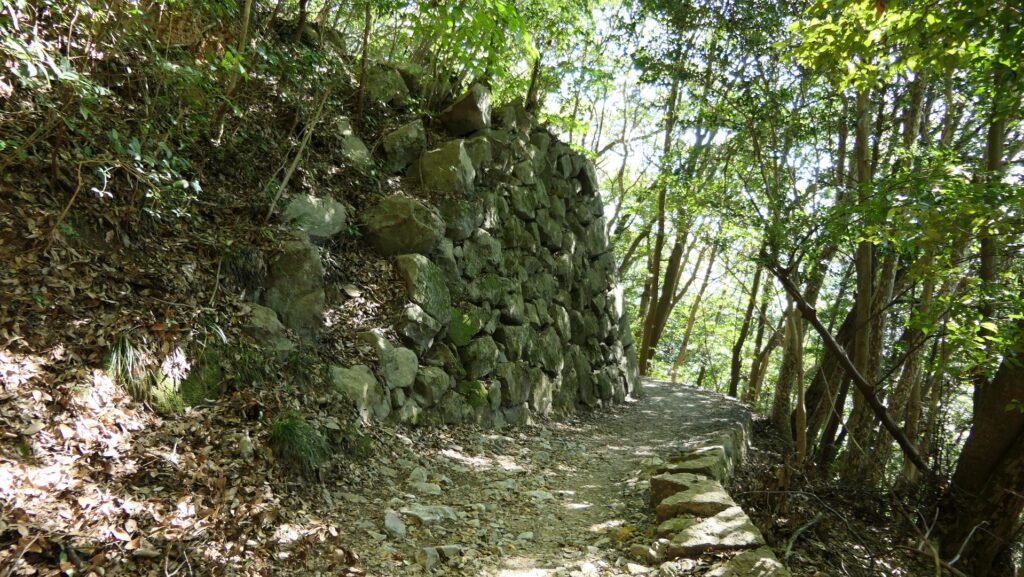
Going on Kuromon Route to Top

Today, visitors can choose four routes to visit Matsuyama Castle on the mountain. The most popular one is the Shinonome Route where visitors can use a cable car or lift and get around the top easily. However, if you are a history fan, I recommend visiting it by walking on the Kuromon Route which was the Main Route to the castle.

The location map of the mountain, from the signboard at the site, adding the red English letters

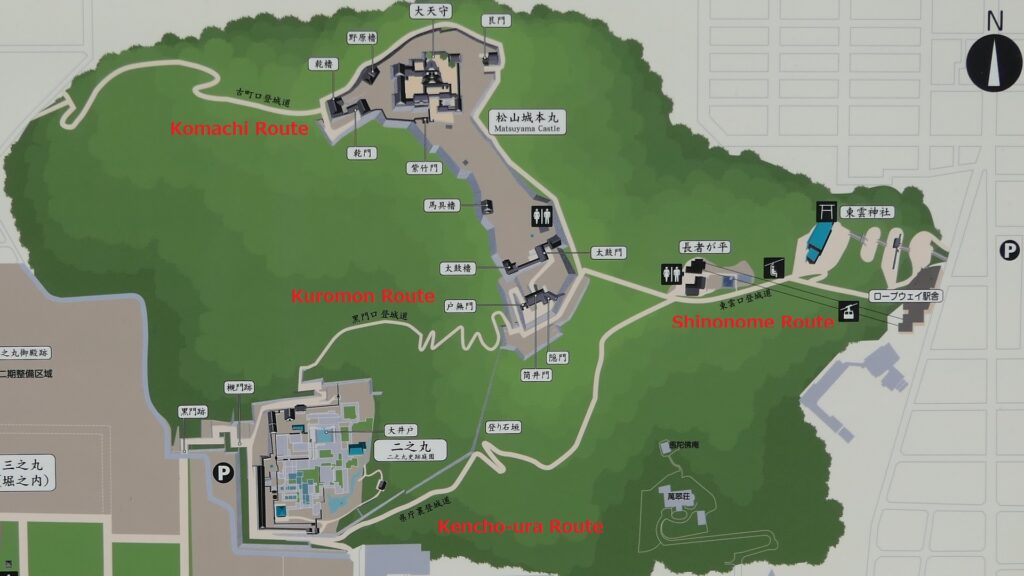
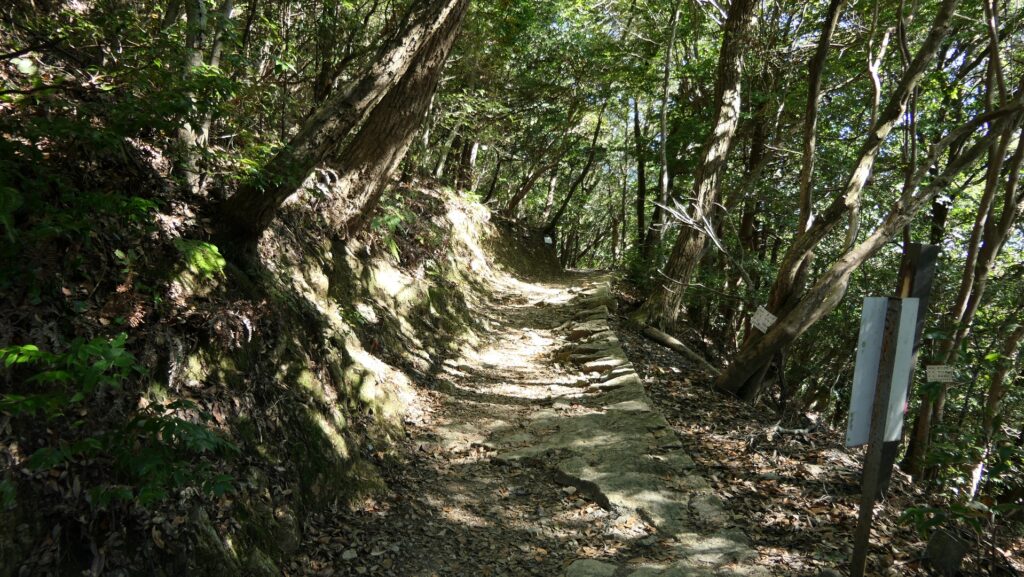
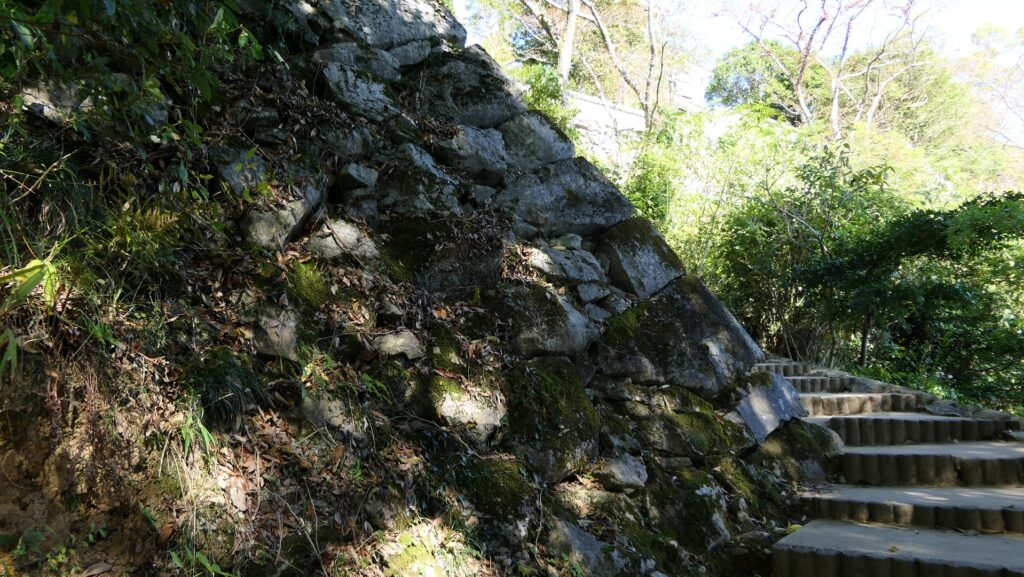
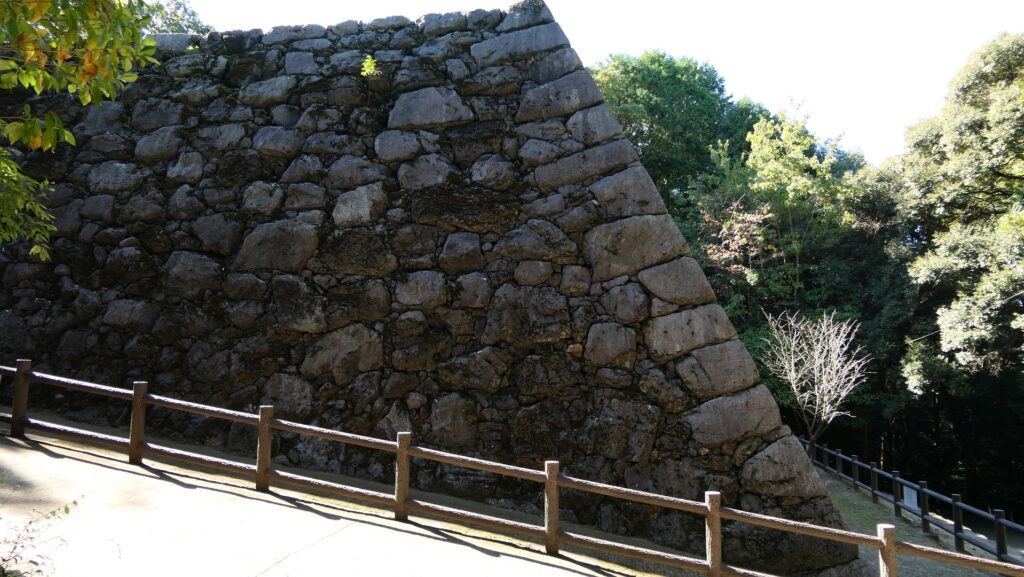
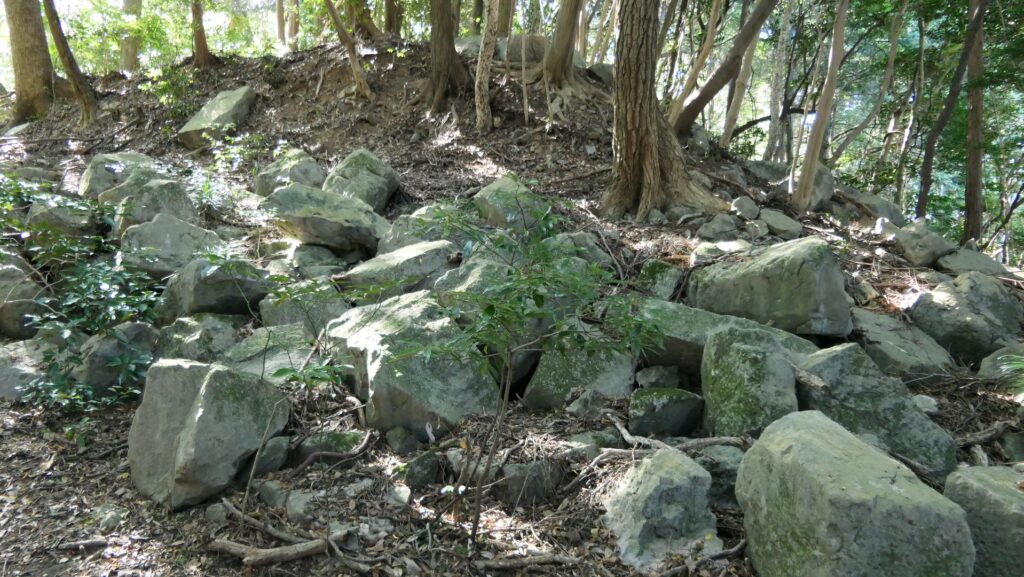
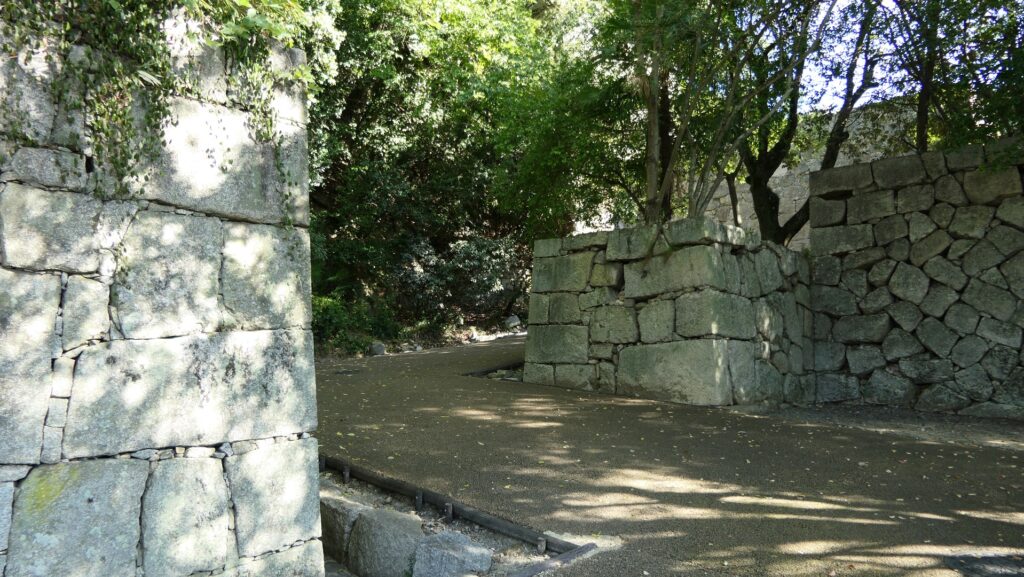
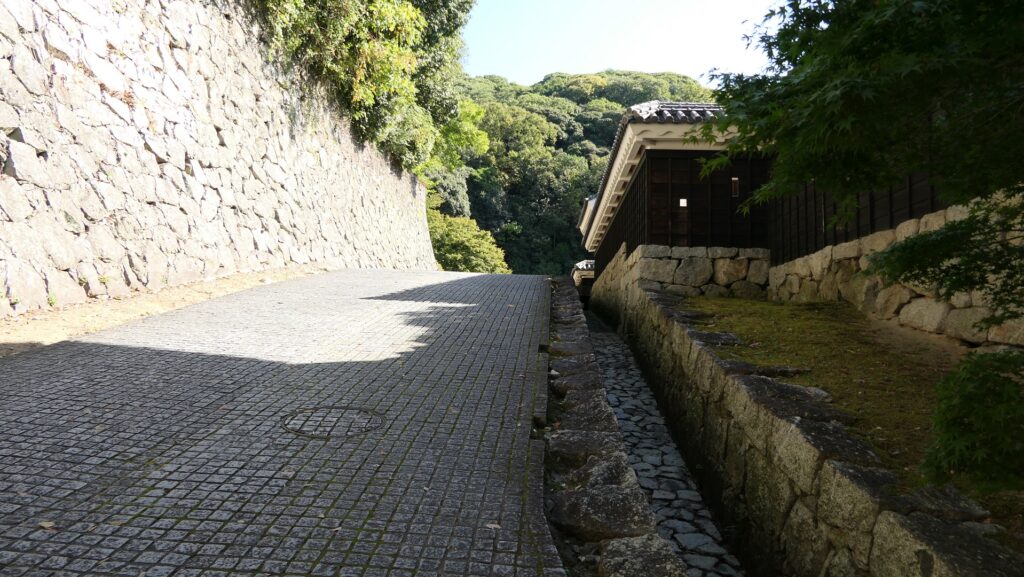
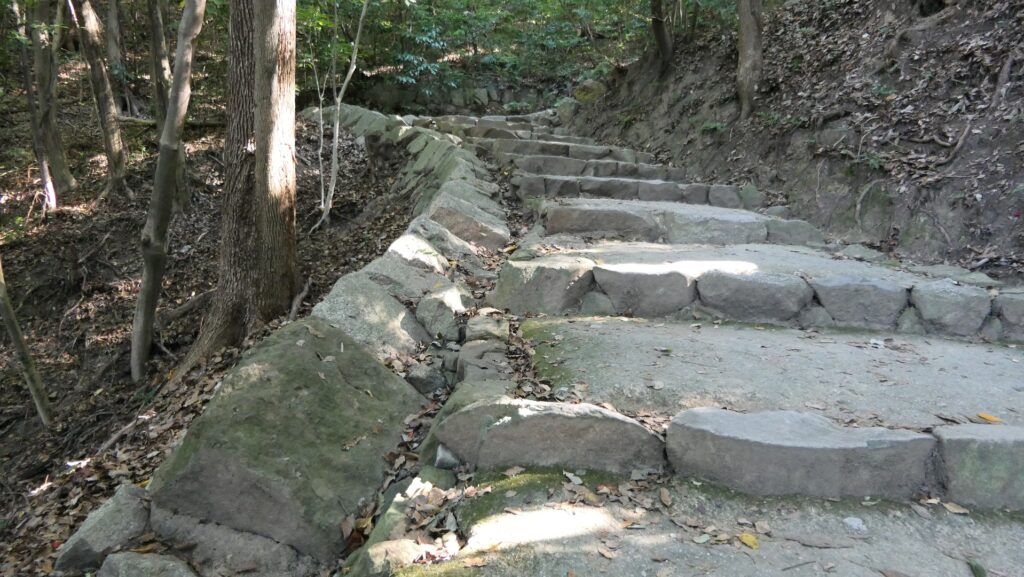
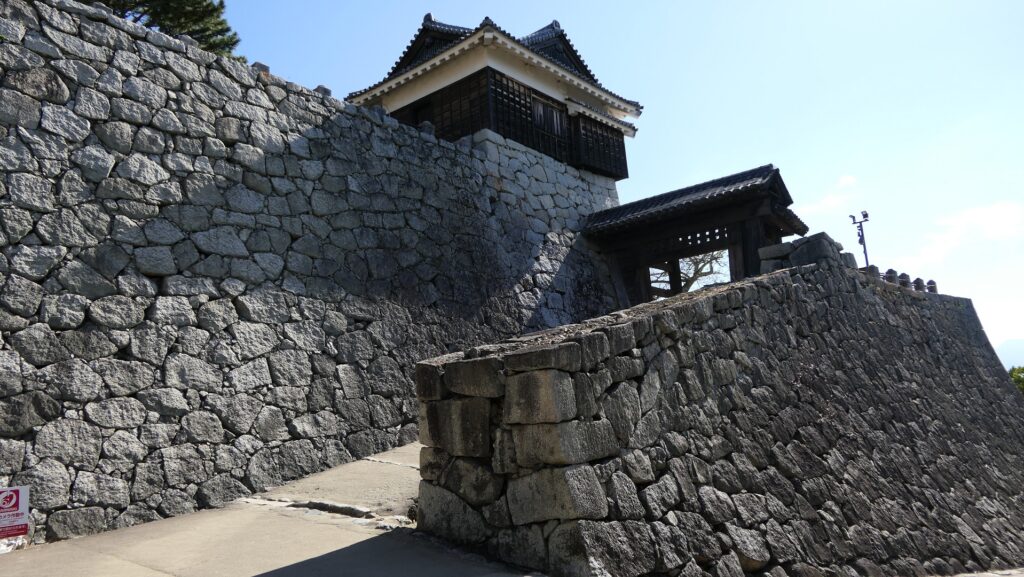
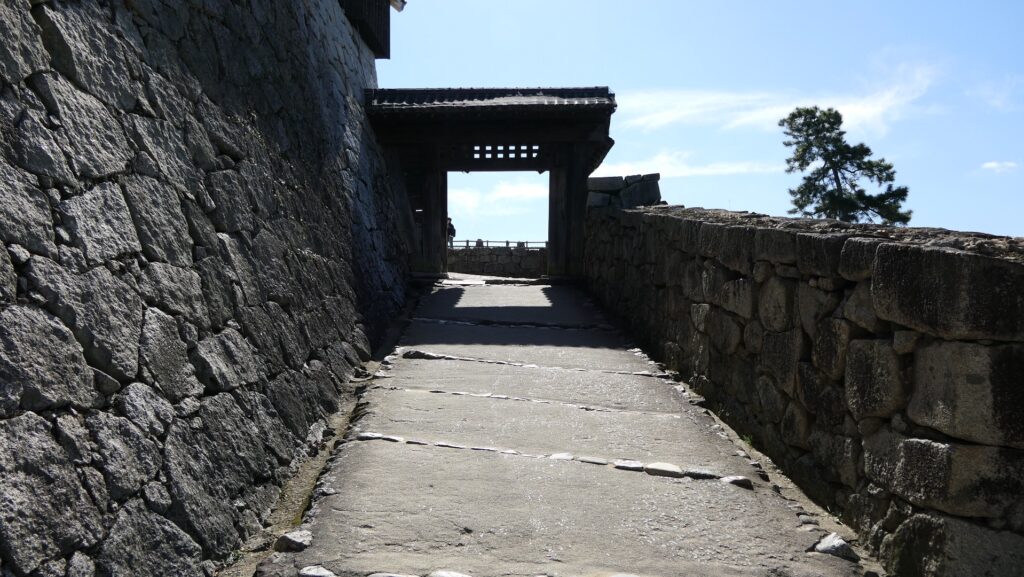
The route starts from the back of the Third Enclosure and passes by the Second Enclosure where the Main Hall was. There are no buildings remaining on the route, but it is still surrounded by great stone walls. First of all, you need to turn five times to go through the three gate ruins of Kuromon or The Black Gate, Tsuga-mon or the Hemlock Gate, and Keyaki-mon or the Zelkova Gate. Then you will enter the zigzagging trail partly with original stone steps to the top.

The map around the Kuromon RouteBlack Gate

The ruins of the Black Gate, the starting point of the route
The ruins of the Hemlock Gate
The route goes by the Second Enclosure on the right
The ruins of the Zelkova Gate
The trail to the top

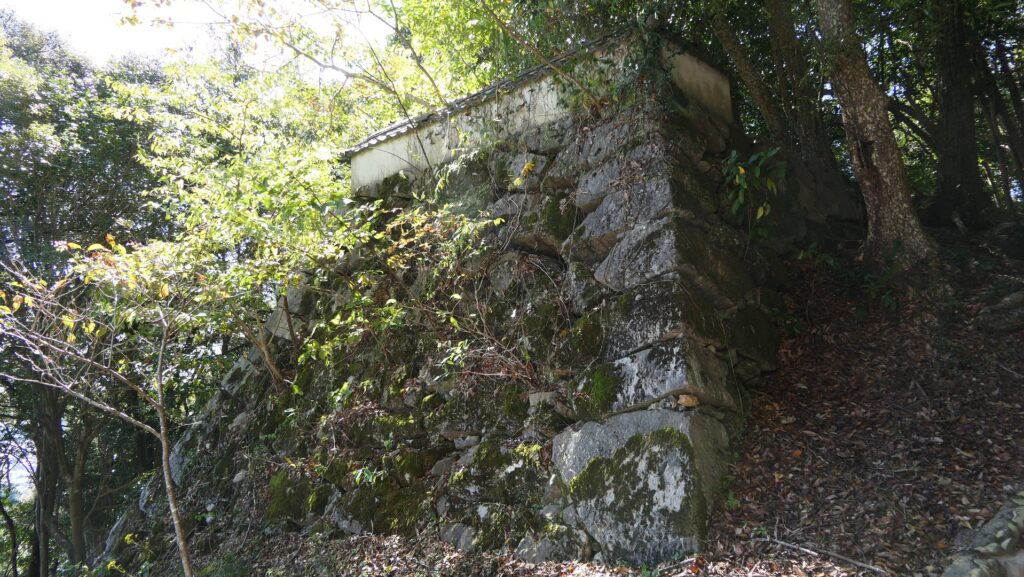
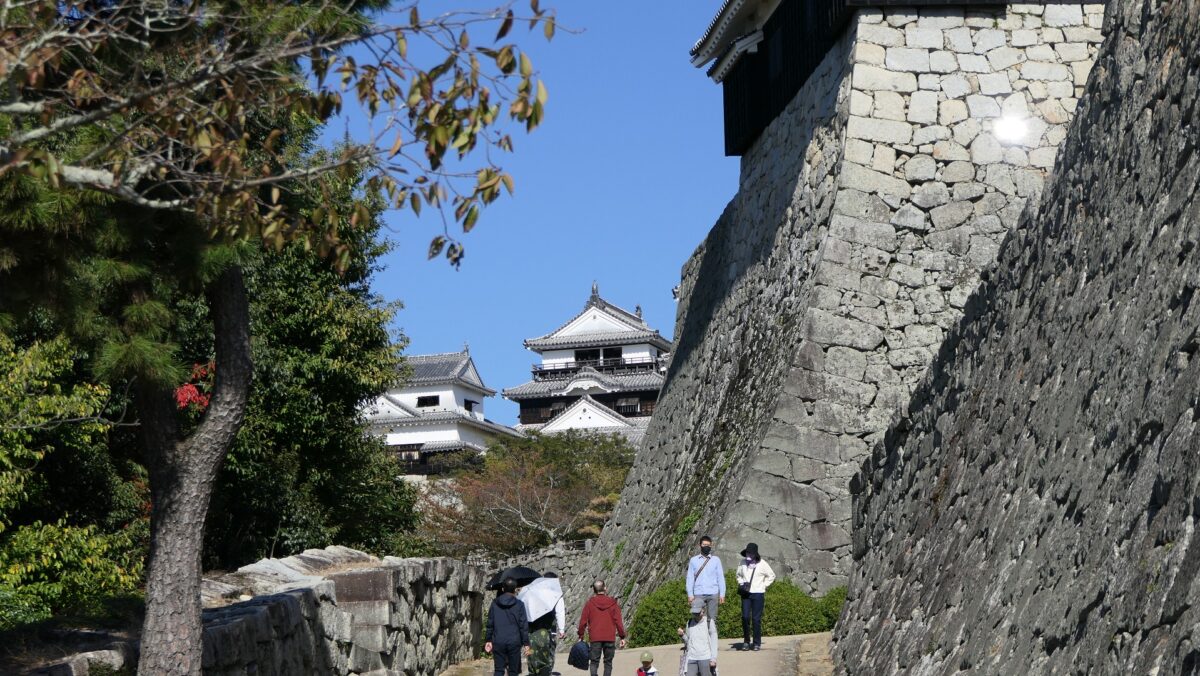
Strong Defense system around Main Gate

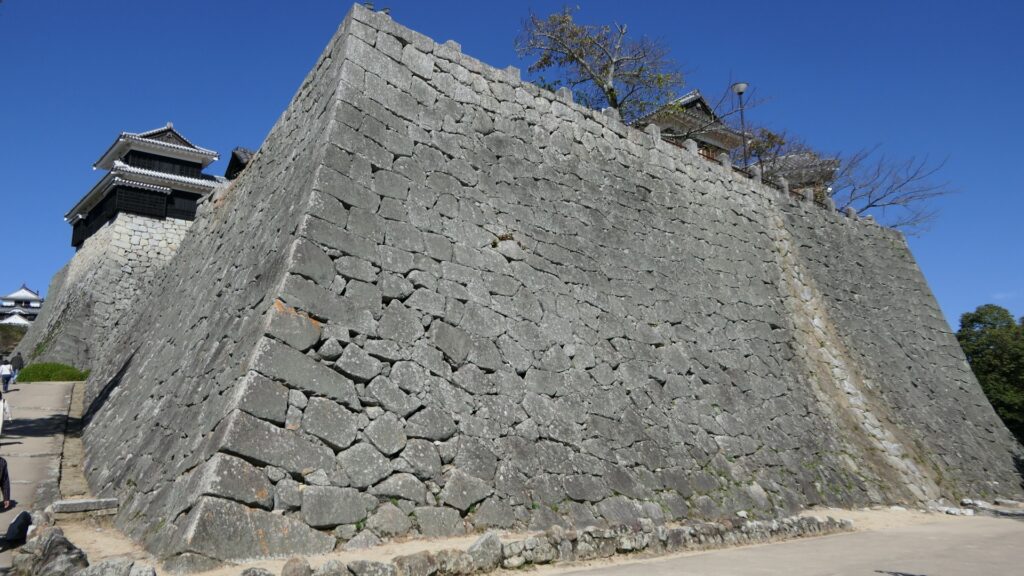
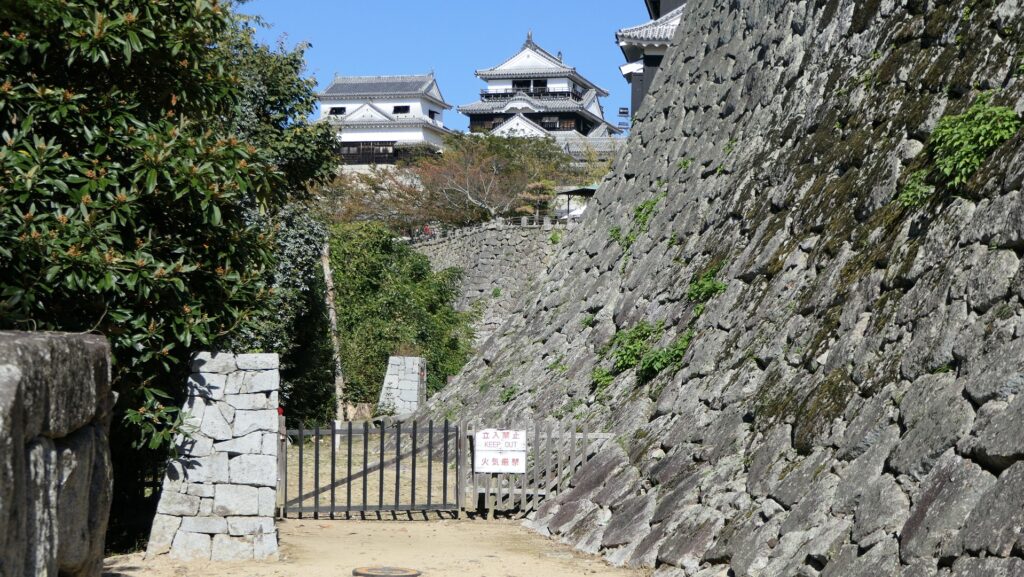
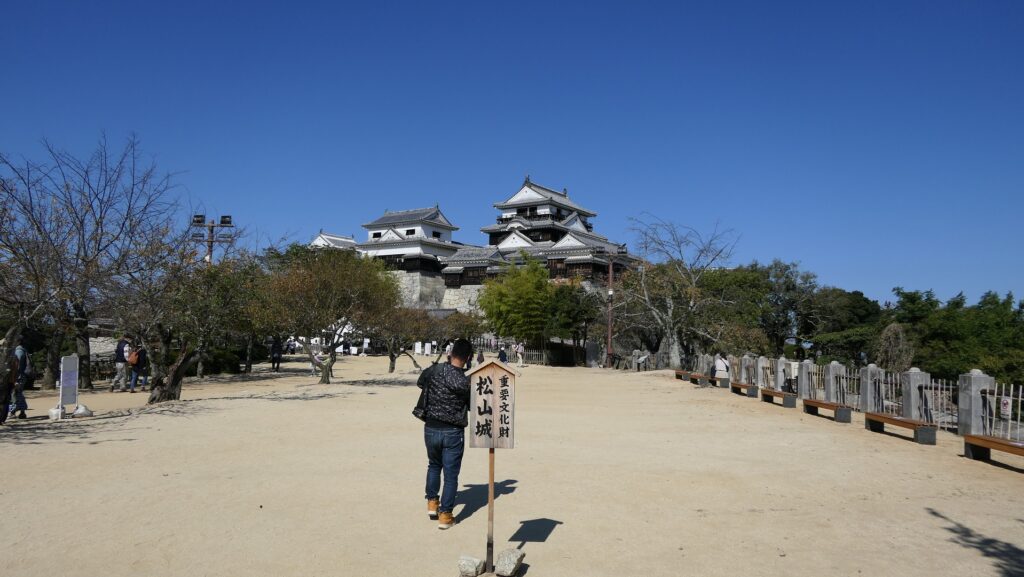
You will eventually reach the Main Gate Ruins near the top. You will also see the great high stone walls surrounding the Main Enclosure and many other visitors who used a cable car or lift. This is the meeting point with the Shinonome Route.

The map around the Main Enclosure

Arriving at the ruins of the Main Gate
The high stone walls of the Main Enclosure

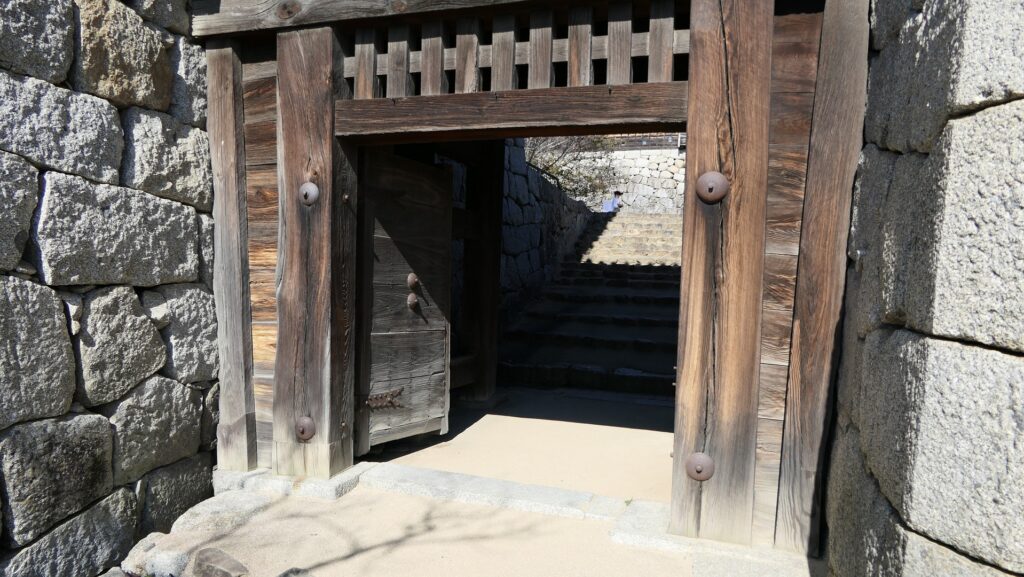
Next, you will go on the path towards the direction where you can see the Main Tower, but it is a dead end and a trap for enemies, you have to turn at 180 degrees to enter the Main Enclosure (the dead end is not allowed to enter). Next comes the remaining Tonashi-mon or the Doorless Gate, which was probably built to lure enemies. Enemies would be confused around there.

You can see the Main Tower ahead
The path towards the tower is a dead end
You have to turn at 180 degrees to the next
The Doorless Gate

Then, you will see the restored Tsutui-mon Gate which looks like a single gate. In fact, there is also the remaining Kakure-mon or the Hidden Gate next to it, so the defenders would counterattack the enemies from the gate.

Tsutui-mon Gate
The Hidden Gate
The back side of Tsutui-mon Gate (on the right) and the Hidden Gate (on the left)

Great views from Main Enclosure

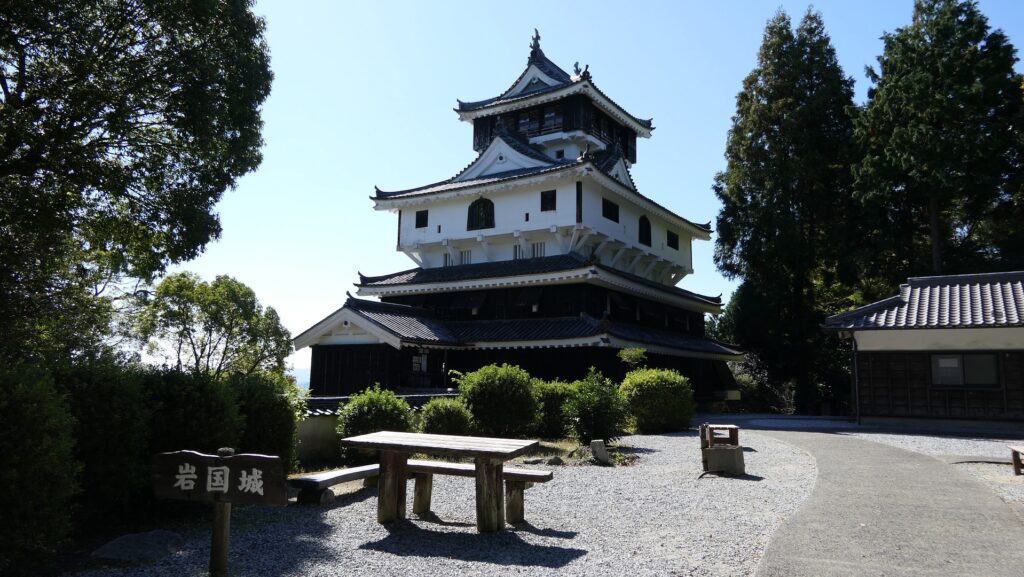
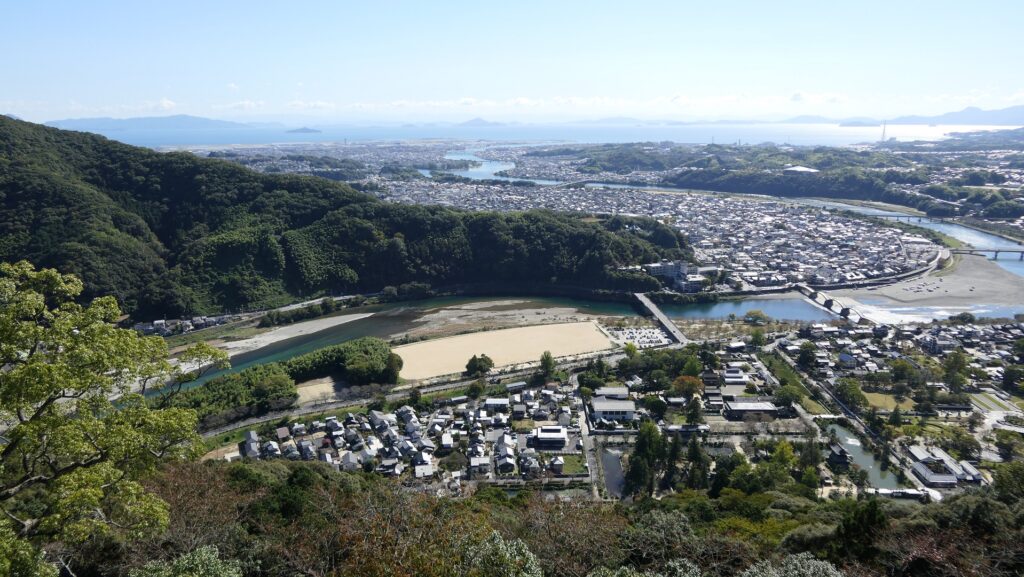
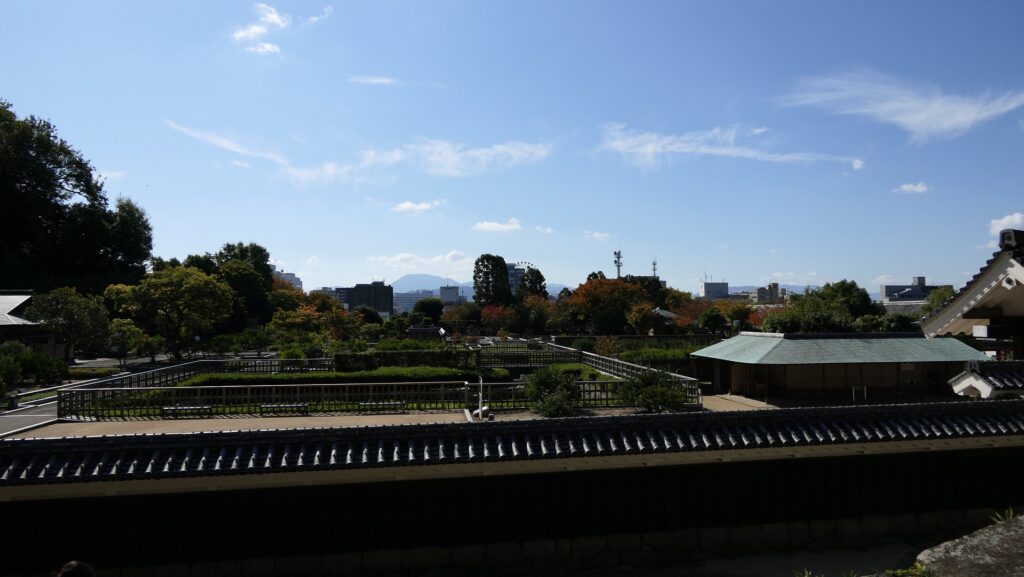
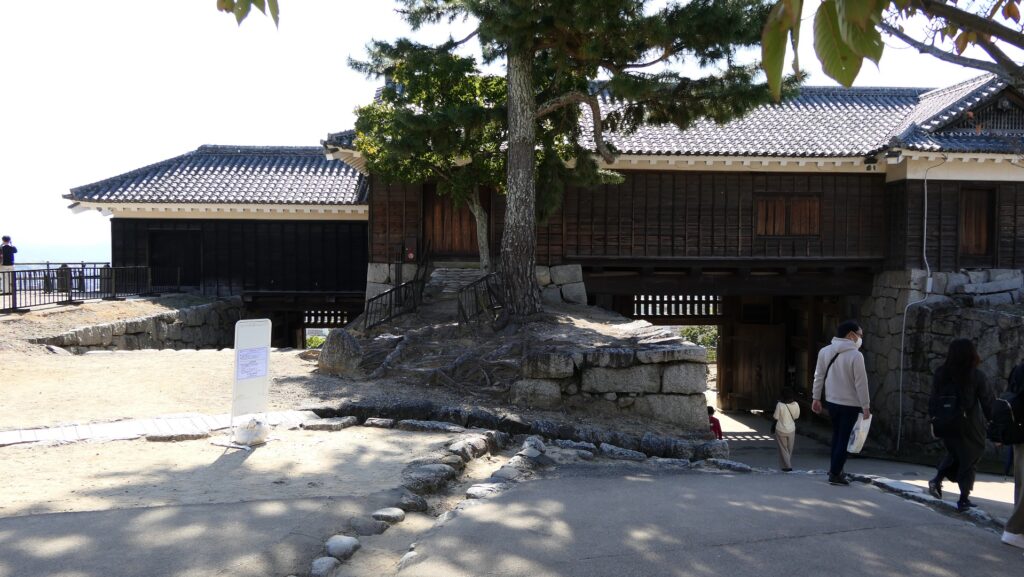
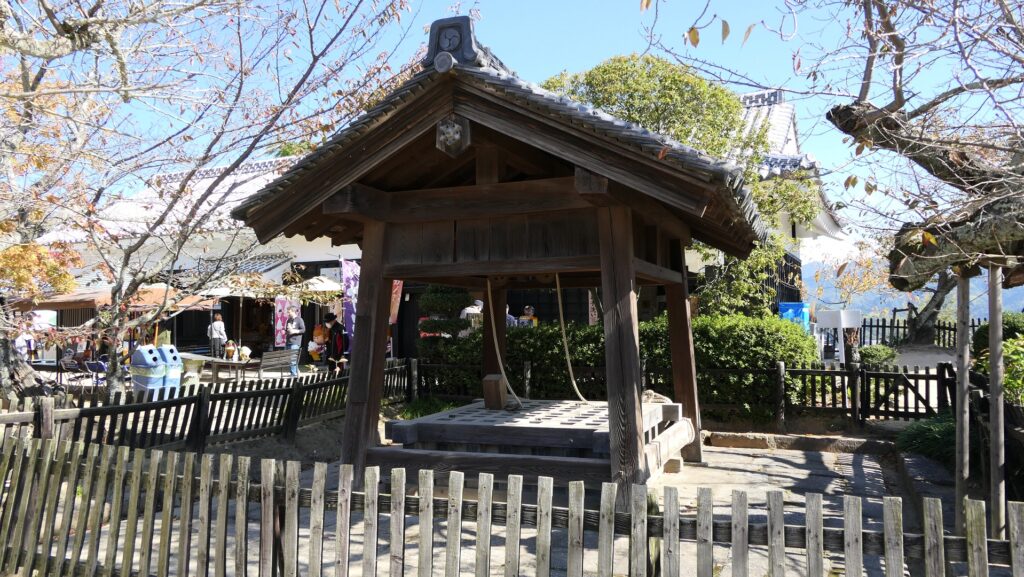
After that, you will finally arrive at the Main Enclosure going through the restored Taiko-mon or the Drum Gate. The center of the enclosure looks a square, and there are the restored well, Tatsumi-Yagura or the Southeast Turret and Bagu-Yagura or the Harness Turret around. This is definitely a good view spot for the Main Tower and the area around including Matsuyama City and Seto Inland Sea.

The Drum Gate
The well
The inside of the Main Enclosure
A view of the Main Tower
A view of Matsuyama city area from the Main Enclosure

To be continued in “Matsuyama Castle Part3”
Back to “Matsuyama Castle Part1”

74.Iwakuni Castle Part2

Let us try to look into more of the castle.

Later History

After the Meiji Restoration, the residence at the foot of the mountain was turned into the Kikko Park in 1885. Kintaikyo Bridge survived for 277 years, however it was flown out because of the flood caused by Kezia Typhoon in 1950. People in Iwakuni City restored the bridge in the original method in 1953. It was rebuilt again in 2004 due to deterioration. That’s why it still looks new. It has been designated as a National Scenic Spot since 1922.

The present Kintaikyo bridge

As for Iwakuni Castle, the Main Tower on the mountain was rebuilt in 1963, but its position was moved by about 50m from the original in ordered to be more well seen from the foot with the bridge. The cable car between the foot and the top also opened in 1964 which has been boosting tourism.

The present Main Tower of Iwakuni Castle which can be seen from the foot

Features

From Kintaikyo Bridge to Rebuilt Main Tower

For visitors who visit the area around Iwakuni Castle site today, the castle itself might not be popular for them. They probably want to see and walk across Kintaikyo Bridge first. They can also ride a cable car to the top of the mountain to enjoy the great view of the area including the bridge. Visiting the rebuilt Main Tower may be their third option because they can get a better view of the bridge from the foot. However, if you try to look into more of the castle, you can find new perspectives of it.

Walking across Kintaikyo bridge
A view from the cable car window
A view of Kintaikyo bridge from the top of the mountain

After arriving at the platform of the cable car, you will find the guide plate of the two routes to the castle. The guide plate recommends taking the left road, but I suggest taking the right road. This is because the path on the right leads you the front side of the castle. You will see the edge of the remaining stone walls with triangular stones on the right side of the trail. You can also see the great stone walls of the Second Enclosure on the left. As you go further, the Barbican Enclosure overhangs in front of you. It has a defensive square space called Masugata inside which was the Main Gate of the castle. The inside of the Gate Ruins is the Second Enclosure which is used as a modern rock garden, modified in the present time.

The map around the castle

The guide plate recommends the left wide road
Choosing the right trail this time
The stone walls below the Second Enclosure
The stone walls of the Barbican Enclosure overhangs
Looking up the stone walls
The ruins of the Main Gate
The inside of the Second Enclosure

Rebuilt Main Tower and Original Main Tower Base

The Main Enclosure is next to the Second Enclosure in the north. The restored Main Tower stands out in front of you. The tower probably has a similar appearance to the original one because its designer used the cross section drawing which was said to come from the original. It has four levels with the third one of which hanging out. This type of Main Towers was rare, called Nanban-zukuri or the Western Style. The tower is actually a modern building which is used as a historical museum and an observation platform. The original stone wall base for the Main Tower was also restored in the original position according to the excavation.

The Main Enclosure including the rebuilt Main Tower seen from the Second Enclosure
A rare Western Style Main Tower
The explanation about the cross section drawing of the Main Tower, exhibited by Iwakuni Castle
A view from the observation platform
The restored original Main Tower base

To be continued in “Iwakuni Castle Part3”
Back to “Iwakuni Castle Part1”

74.Iwakuni Castle Part1

The castle is reflected by Hiroie Kikkawa’s life.

Location and History

Hiroie saves Mori Clan

Iwakuni is known for its beautiful scenery from Kintaikyo bridge which has five magnificent wooden arches. The bridge over Nishikigawa River also has a good background of a mountain with the Main Tower of Iwakuni Castle. Visitors may think they all remain as they were, however, the castle has many episodes, in fact, and had a tough life.

Kintaikyo bridge with the background of Iwakuni Castle on the mountain

Hiroie Kikkawa was the founder of the castle, who also was a senior vassal and relative of the Mori Clan. The clan governed most of the Chugoku Region with an earning of 1.2 million koku of rice at the end of the 16th Century. However, after the ruler of Japan, Hideyoshi Toyotomi died in 1598, the situation became unstable. Many lords tried to rely on Ieyasu Tokugawa, the largest one in eastern Japan with 2.5 million koku as the next ruler, while others including Mitsunari Ishida still supported the Toyotomi Clan. Mitsunari tried to make the lord of the Mori Clan, Terumoto Mori as their leader because the clan was the largest lord in western Japan. The opinions inside the clan were divided. One is to support Mitsunari and become the next ruler instead of Ieyasu, mainly insisted by Ekei Ankokuji, the other is to support Ieyasu to maintain their territory, objected by Hiroie.

The portrait of Hiroie Kikkawa, owned by Historiographical Institute the University of Tokyo (licensed under Public Domain via Wikimedia Commons)
The portrait of Terumoto Mori, owned by the Mori Museum (licensed under Public Domain via Wikimedia Commons)

When the Battle of Sekigahara happened in 1600, Terumoto became the head of the West Quad which was actually led by Mitsunari, because being a ruler was attractive to him. Hiroie was a cool-headed commander who knew his master couldn’t take over the East Quad led by Ieyasu. Therefore, he contacted Ieyasu secretly and promised that his troops would not do anything in the battle in exchange for maintaining the Mori’s territory. As a result, Ieyasu defeated Mitsunari. However, after the battle, Ieyasu found out the evidence that Terumoto had wanted to be a ruler. Ieyasu decided to take all the Mori’s territory away from Terumoto and give two provinces (Nagato and Suo) of it to Hiroie. Hiroie urged Ieyasu to give the provinces to Terumoto instead of him. In the end, Mori’s territory was formally reduced from a worth of 1.2 million koku to only 370 thousand koku of the two provinces, known as the Choshu Domain.

The Portrait of Ieyasu Tokugawa, attributed to Tanyu Kano, owned by Osaka Castle Museum (licensed under Public Domain via Wikimedia Commons)
The portrait of Mitsunari Ishida, owned by Hajime Sugiyama (licensed under Public Domain via Wikimedia Commons)

Iwakuni Castle is built in Hiroie’s new territory

Hiroie had to stand in a difficult position. He was actually the hero of the Mori Clan, but many members of it thought he was a destroyer. He was finally given by the clan a small territory with 30 thousand koku, which was the eastern edge of the Choshu Domain. Hiroie started to build a new castle as his home base in 1601, which would be called Iwakuni Castle. He first built his residence called Odoi beside Nishikigawa River which could be the natural Outer Moat. The residence was also surrounded by the artificial Inner Moat. After that he developed the mountain part of the castle mainly by building the Northern, Main and Second Enclosures on the ridge from the north to the south. They were all surrounded by stone walls and the Main Enclosure had the four-level Main Tower. The castle was completed in 1608.

The range or the Choshu Domain and the location of the castle

The relief map around the castle

Hiroie’s hard decision to destroy Mountain part

However, another difficulty was coming to Hiroie after the Tokugawa Shogunate defeated the Toyotomi Clan in 1615. The Tokugawa Shogunate ordered all the lords in Japan to destroy all the castles except for one castle where the lord lived by issuing the Law of One Castle per Province in the same year. The shogunate tried to prevent any other lords from rebelling based on many strong castles. According to this law, Iwakuni Castle could survive because the castle could be the only one castle in Suo Province and the shogunate still considered Hiroie’s Kikkawa Clan as an independent lord. However, the Mori Clan didn’t allow it as they thought that the Kikkawa Clan was just a retainer of them, not an independent lord. The controversial relation between Hiroie and the Mori Clan since the Sekigahara Battle remained. Hiroie had to choose to destroy the castle considering the future relationship with the Mori Clan.

Intentionally broken stone walls on the mountain

The mountain part was actually destroyed but the residence beside the river survived for living. It was formally called Iwakuni Encampment, not Castle until the end of the Edo Period. Kintaikyo Bridge was first built in 1673 by the third lord of the clan, Hiroyoshi Kikkawa to connect his residence with the castle town which had been built at the opposite side of the river. This bridge could be seen as a symbol of the peace at that time.

The ruins of the Odoi residence at the foot
”Kintaikyo bridge in Suo Province” from the series “Unusual Views of Celebrated Bridges in the Provinces” attributed to Hokusai Katsushika in the Edo Period (licensed under Public Domain via Wikimedia Commons)

To be continued in “Iwakuni Castle Part2”