119.Sugiyama Castle Part2

Let us simulate attacking the castle.

Features

Simulation of Attack from Main Entrance to Main Enclosure

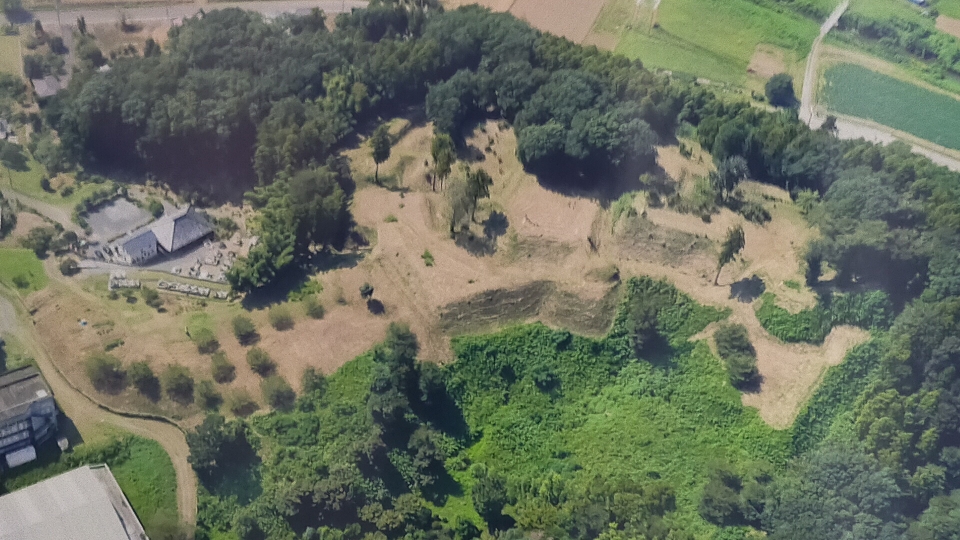
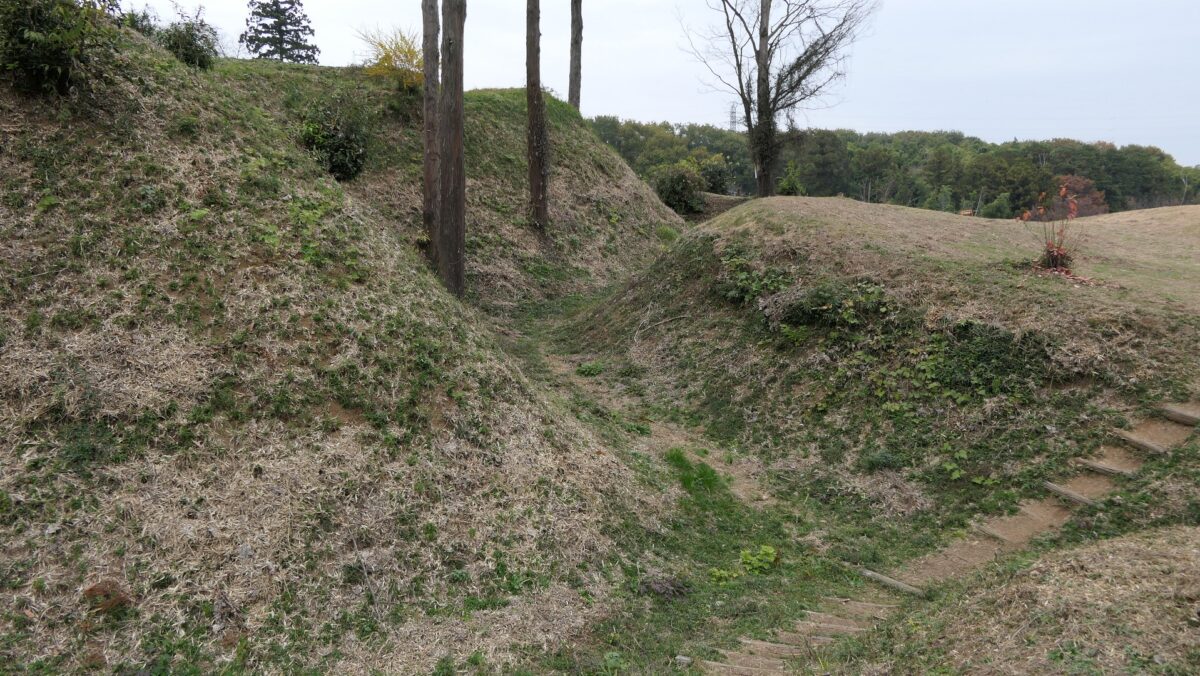
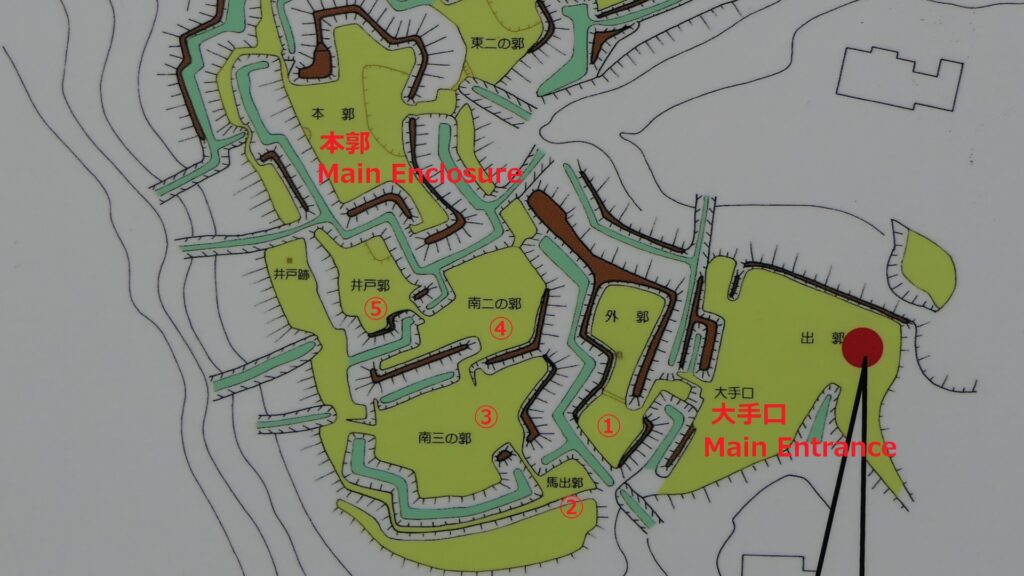
Today, the ruins of Sugiyama Castle are well-developed and maintained for visitors as a historic site. The ruins were once covered with a lot of trees and bushes, but most of them were removed. That means you can see the soil-made layout of the castle clearly. Let us simulate attacking the castle as an enemy.

The entrance of the castle ruins
The location map at the site

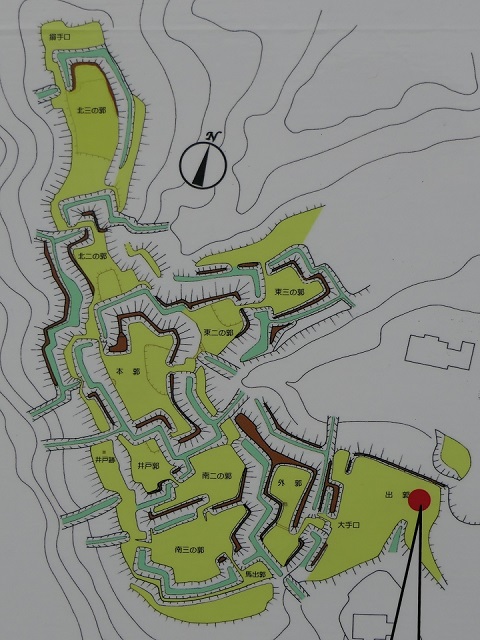
For example, if you approach the castle ruins from the south, you will first stand at the Main Entrance or Oteguchi as the starting point. In fact, you will need to pass through five enclosures to reach the Main Enclosure.

The Main Entrance
The enclosures between the Main Entrance and the Main Enclosure with numbering, from the location map adding the red colored letters

From Outer Entrance to Umadashi and Southern Third Enclosures

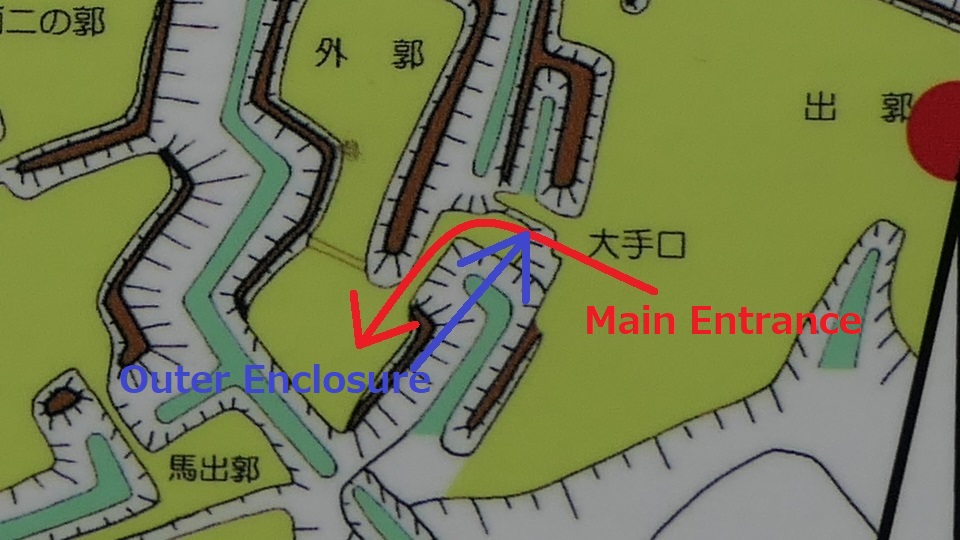
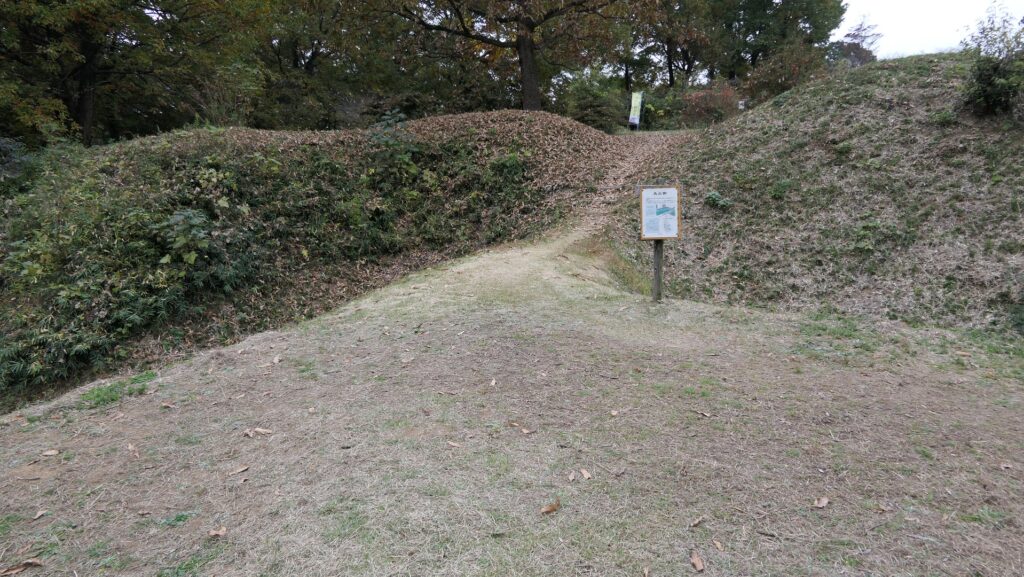
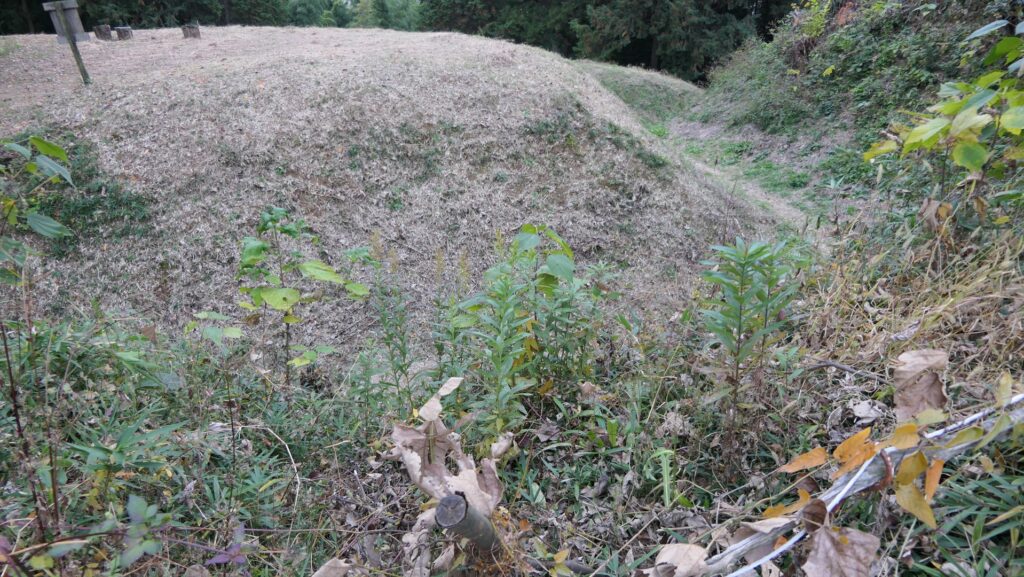
To enter the first enclosure called the Outer Enclosure, you will have to turn left in front of its entrance. Defenders could make a flanking attack on your left side before you turn.

Turn left to enter the Outer Enclosure
The route to entrance seen from the Outer Enclosure
The route to the Outer Enclosure (the red arrow) and the counterattack from the enclosure (the blue arrow)

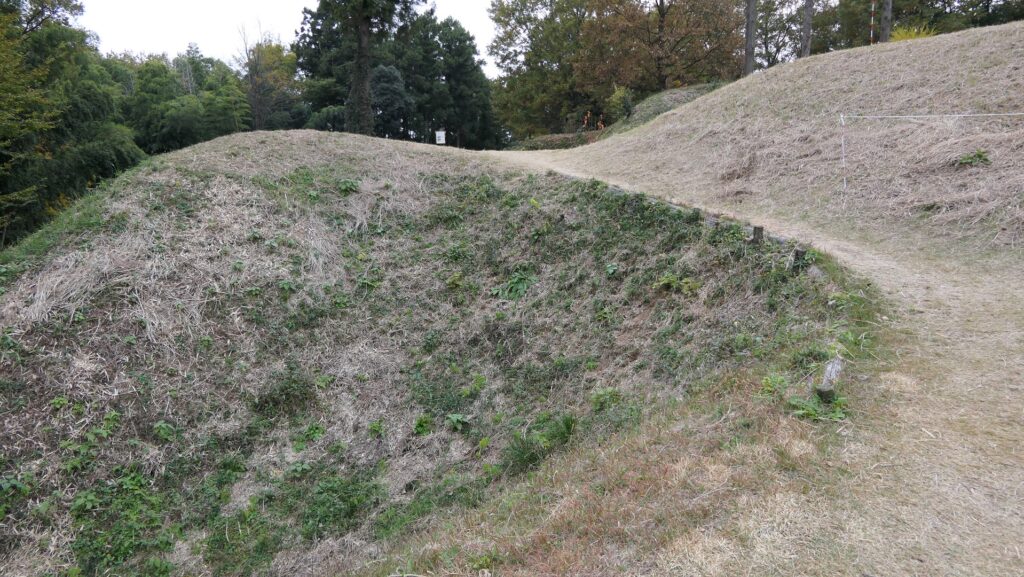
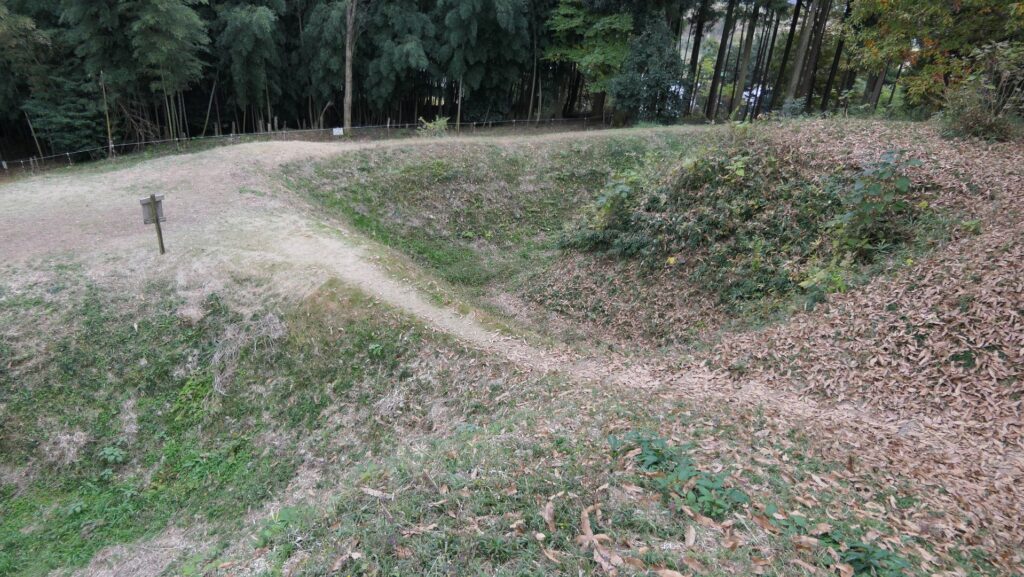
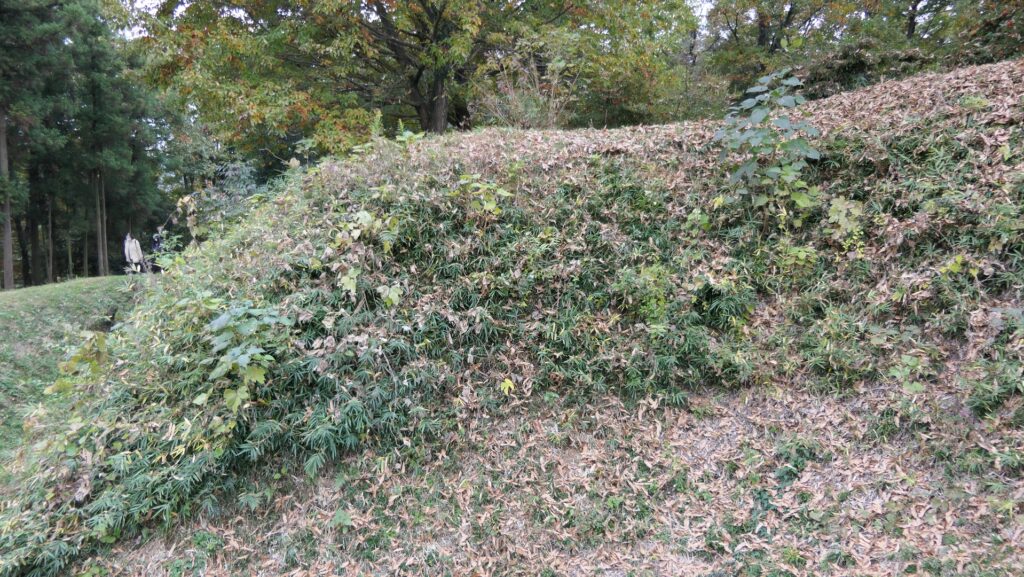
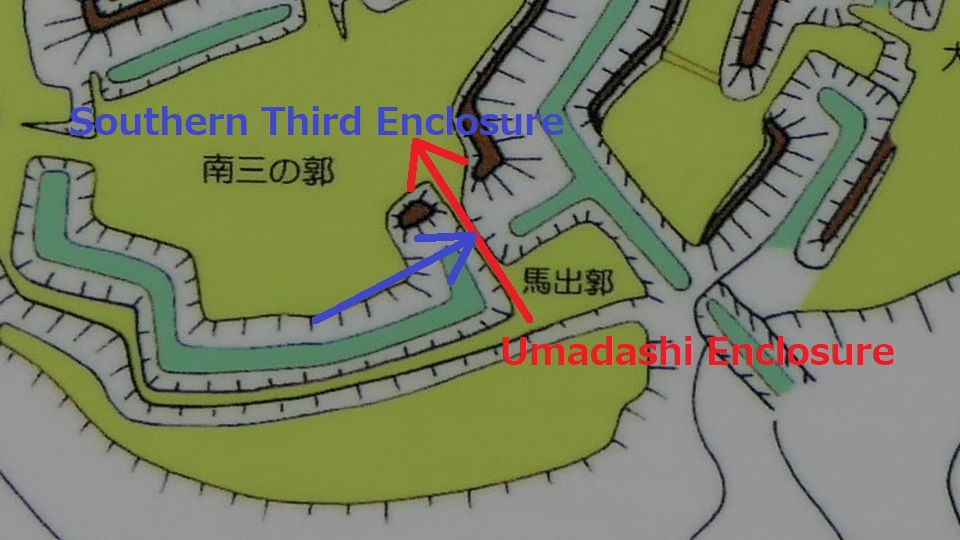
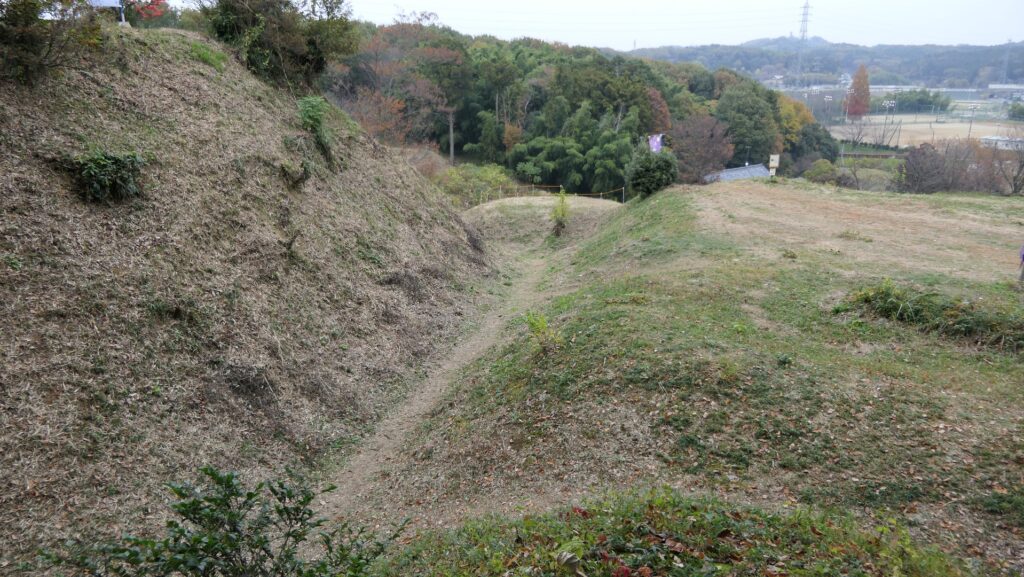
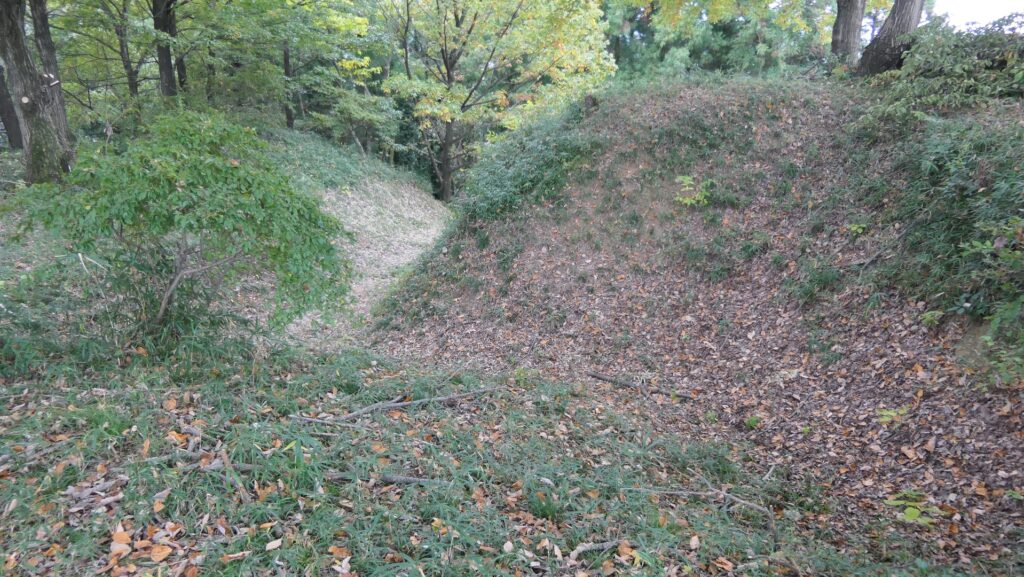
After entering the Outer Enclosure, the second one is the Umadashi Enclosure. You will need to go over the dry moat to get to the Umadashi Enclosure. A wooden bridge might have been built on it, but it would have been fallen if a battle occurred. When you cross the dry moat, you would be attacked on your right side from the L-shaped earthen walls of the Southern Third Enclosure.

The dry moat in front of the Umadashi Enclosure
The L-shaped earthen walls of the Southern Third Enclosure
The Southern Third Enclosure seen from the dry moat
The dry moat seen from the Southern Third Enclosure
The route to the Umadashi Enclosure (the red arrow) and the counterattack from the Southern Third Enclosure (the blue arrow)

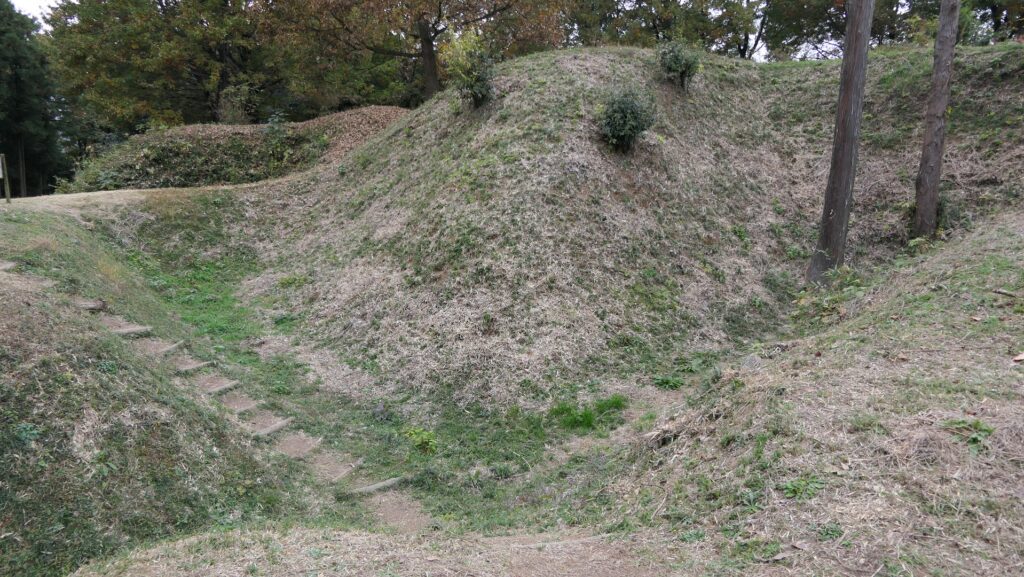
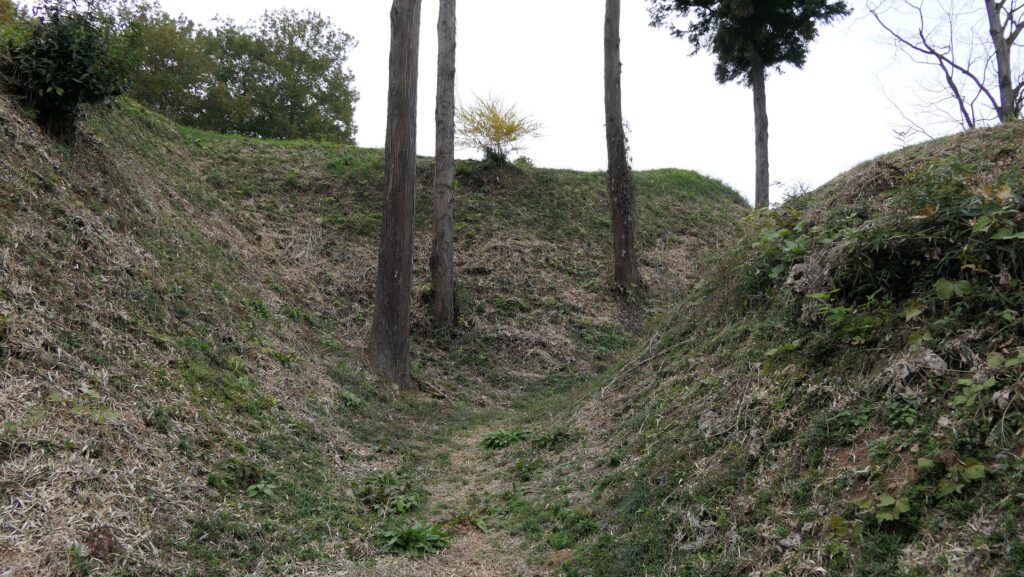
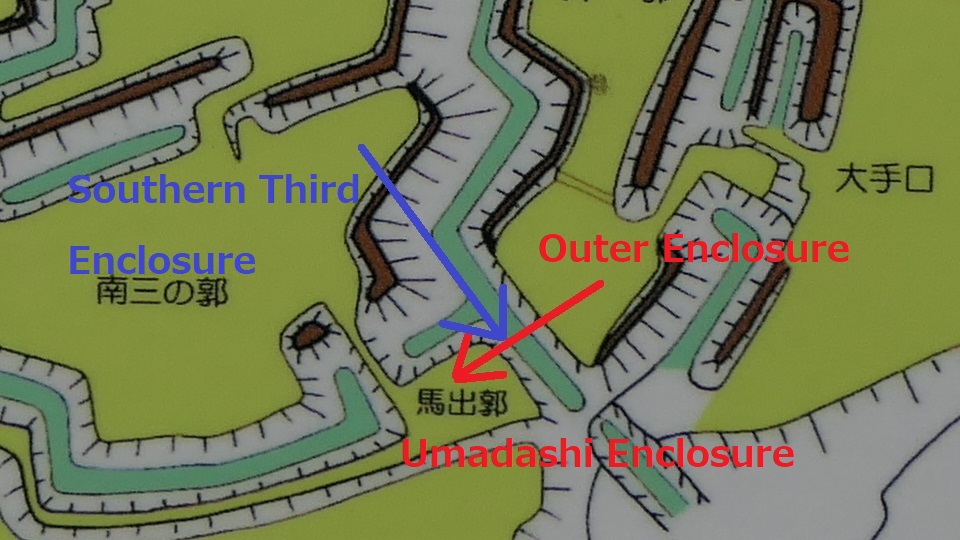
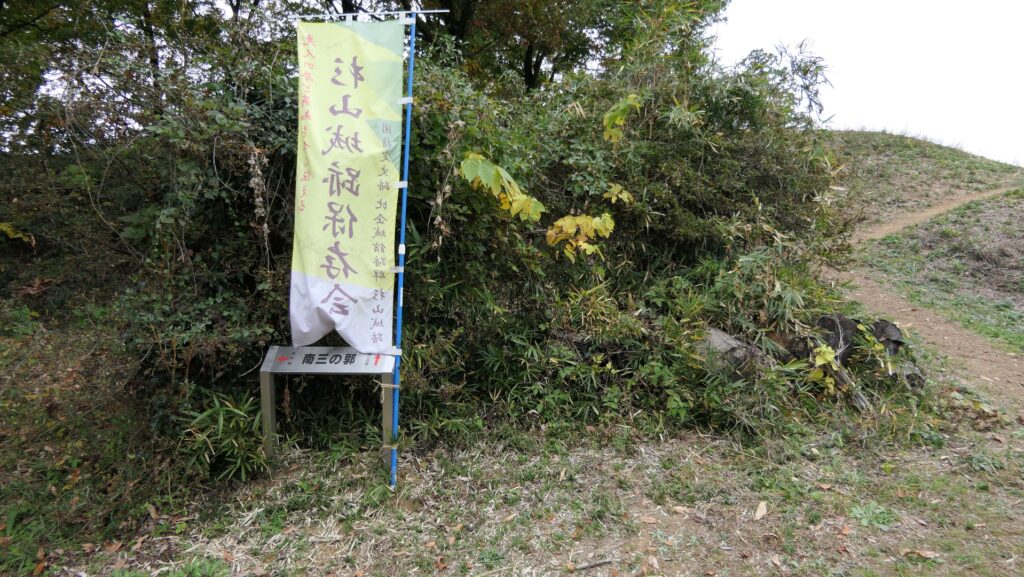
The Umadashi Enclosure is a small sticking out space from the entrance of the Southern Third Enclosure. The other L-shaped earthen walls of the Southern Third Enclosure also make it possible to defeat the enemy in this area of the castle.

The Umadashi Enclosure
The Umadashi Enclosure and the L-shaped earthen walls seen from the Southern Third Enclosure
The L-shaped earthen walls are nearby on the left if you stand at the entrance of the Southern Third Enclosure
The route to the Southern Third Enclosure (the red arrow) and the counterattack from the Enclosure (the blue arrow)

Strong Defense of Main Enclosure

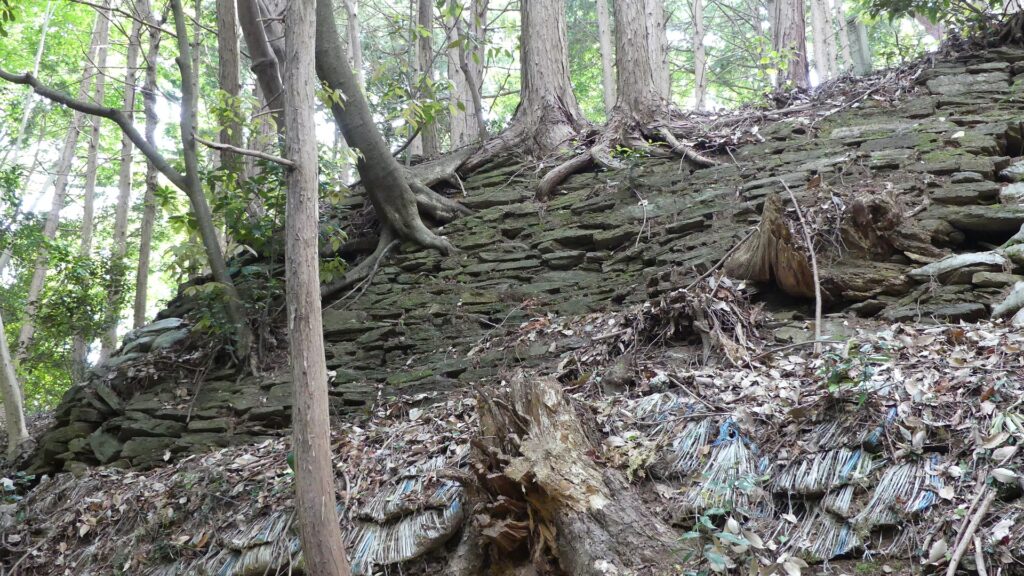
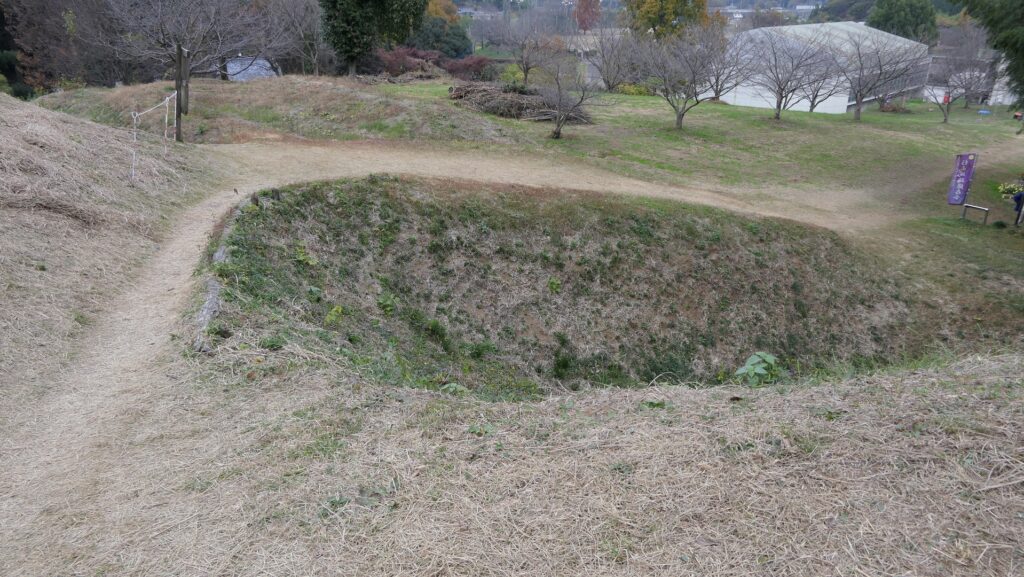
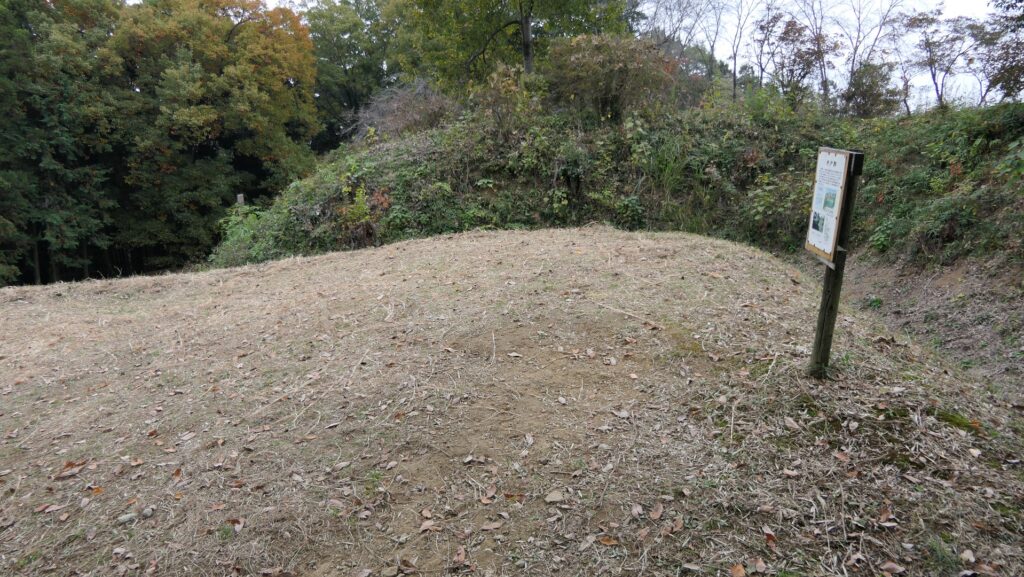
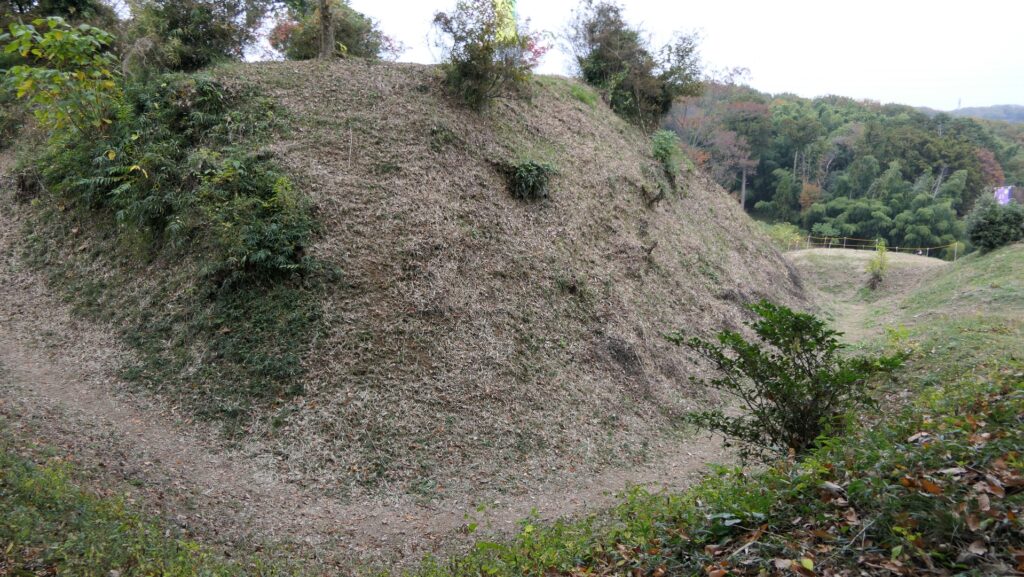
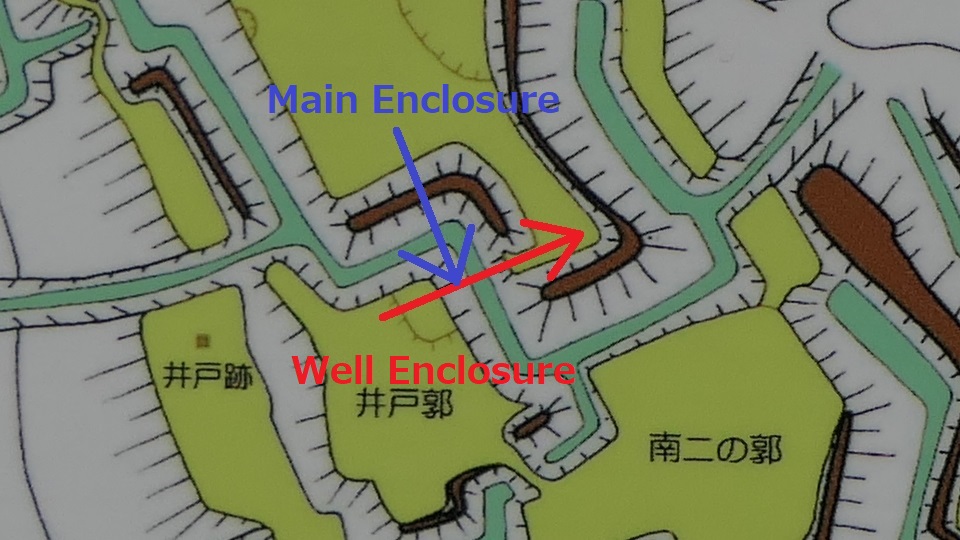
After that, if you somehow reach the Southern Second Enclosure after the Southern Third Enclosure, you will see the high earthen walls of the Main Enclosure. However, there is no direct route to the Main Enclosure, so you will have to move to the Well Enclosure on the left. (Its enclosure is guarded in a similar way to other enclosures.)

The Southern Third Enclosure
The high earthen walls of the Mani Enclosure seen from the Southern Second Enclosure
The dry moat between the Main Enclosure and the Southern Second Enclosure seen from the Well Enclosure
The Well Enclosure
The routes to the Southern Second and Well Enclosures (the red arrow) and the counterattack from the Enclosures (the blue arrow)

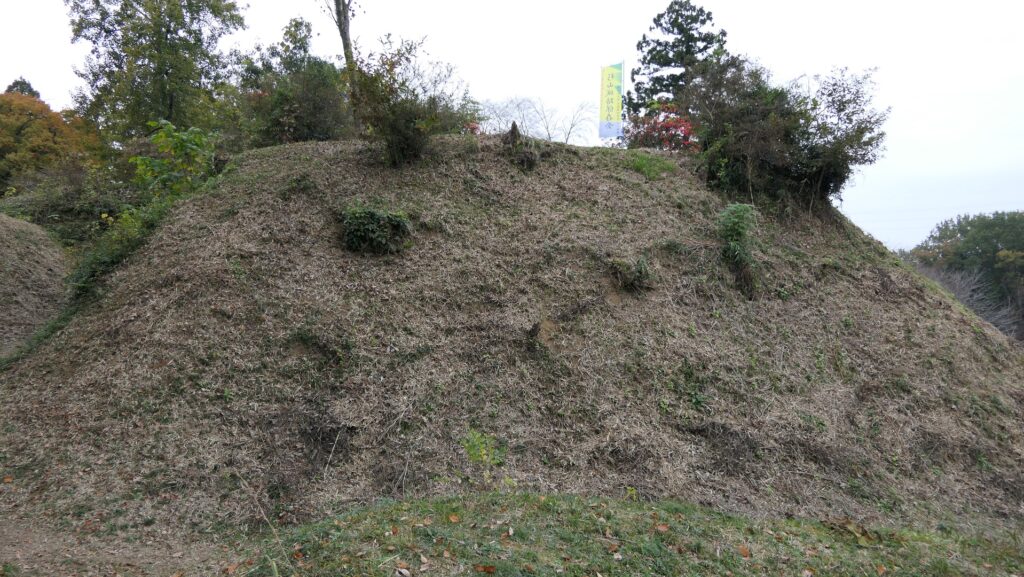
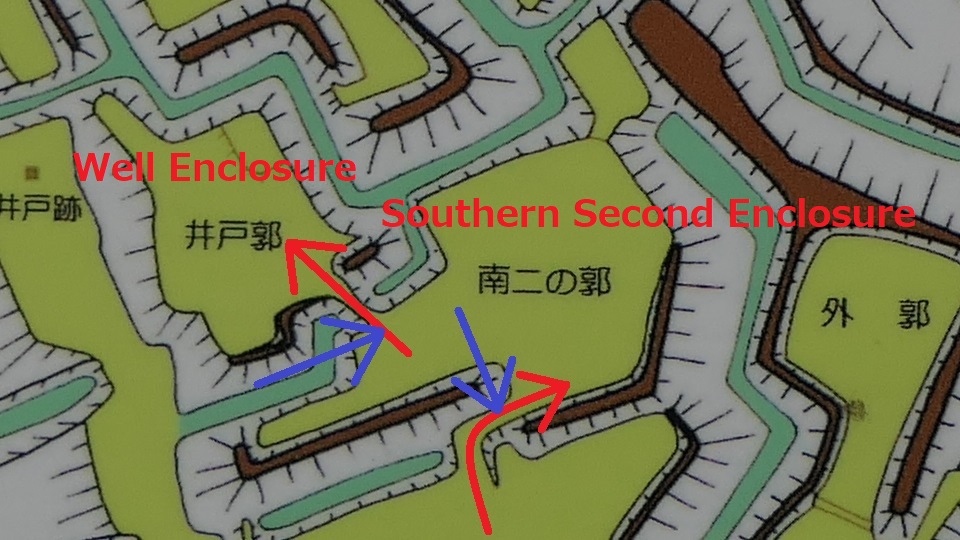
The Well Enclosure leads to the Main Enclosure, which was connected by the wooden bridge over the dry moat. However, you could be counterattacked from the front and from your left side from the Main Enclosure above. The earthen walls of the Main Enclosure are shaped to surround the attacker. Overall, you could suffer damages from the frank attacks as many as the number of the enclosures.

The wooden bridge was built over the dry moat
he L-shaped earthen walls of the Main Enclosure to make a flanking attack enemies in the Well Enclosure
The Well Enclosure seen from the Main Enclosure
The route to the Main Enclosure (the red arrow) and the counterattack from the Enclosure (the blue arrow)

To be continued in “Sugiyama Castle Part3”
Back to “Sugiyama Castle Part1”

119.Sugiyama Castle Part1

A castle which has both an advanced defense system and a mysterious history

Location and History

Simple but Popular Castle

Sugiyama Castle was located in Hiki District, what is now in the western part of Saitama Prefecture. The ruins of the castle recently became popular among history fans in Japan. The ruins are not so large and have no buildings and no stone walls. The ruins are all made of soil. In addition, it is also uncertain when and who built and used the castle. There are no clear records about the castle at all. So, what did the castle become famous for? The answer is that the castle had a surprisingly artful defense system for such a small local castle.

The location of the castle

“Sugiyama Castle Problem”

Historians have tried for a long time to find out when and who built Sugiyama Castle. However, their conclusions became more complicated. When the excavation team researched the castle ruins, they thought the castle was built and used around early 16th Century based on the unearthed relics. The Uesugi Clan, which governed the Kanto Region, had internal conflicts in the area around the castle at that time. The team speculates the clan built the castle. On the other hand, the researchers who study the layout of castles argue that the complex defense systems like Sugiyama Castle should have appeared later, such as in the late 16th Century. They think the Hojo Clan, which governed the Kanto Region after the Uesugi Clan, must have built such an advanced defense system. People call this discussion “Sugiyama Castle Problem”. The problem might even make the castle more popular.

The family crest of the Uesugi Clan called the Uesugi Bamboo Grass (licensed by Mukai via Wikimedia Commons)
The portrait of Ujityasu Hojo, the lord of the clan in the 16th Century, owned by Odawara Castle (licensed under Public Domain via Wikimedia Commons)

“Textbook for Building Castles”

Sugiyama Castle was built on a hill. The hill measured 42m high from the base. The castle had 10 enclosures, including one in the center of the castle. The enclosures spread into three directions in the south, north and east. These enclosures were built to protect the center of the castle called the Main Enclosure. The west of the castle was a steep cliff with a river flowing below, which was a natural hazard. All the enclosures were surrounded by earthen walls and dry moats and connected by earthen or wooden bridges. The most important feature of its defense system was that all the entrances of the enclosures were protected by the frank attacks or Yokoya. Protection was provided by the clever layout of the L-shaped earthen walls and the route to the enclosures. The design of the castle was highly sophisticated, so it is now often called “a textbook for building castles”.

The miniature model of the castle ruins, exhibited in the Ranzan Town Office

Castle may be Temporary

The excavation found that Sugiyama Castle didn’t have permanent buildings such as halls, turrets, and gates. It probably only had temporary buildings like huts and fences. It was also found that the castle was used for a short time because it was not modified before it was destroyed by fire. This means that the castle could have been built for a single purpose or battle. There were many other castles around Sugiyama Castle, which were also built probably for a single purpose. Many of these castles, such as Ogura Castle, had distinct features. Many battles happened around this area in the 16th Century during the Sengoku Period. It is thought that the warlords in this area built residential castles as well as single-use castles to survive. Even though Sugiyama Castle may have been one of the latter, it had a surprisingly technical defense system.

The whole view of Sugiyama Castle Ruins, from the signboard at the Ranzan Town Office
The ruins of Ogura Castle, this castle has stone walls which were rare in the Kanto Region when it was built

To be continued in “Sugiyama Castle Part2”

84.Kochi Castle Part3

Why would Kochi Castle maintain so many original buildings?

Features

Interior of Main Tower

The first floor of the tower has some equipment for defense, such as machicolations and loopholes for guns. In addition, there are also iron spikes outside the floor to prevent enemies from climbing the tower, which is the only remaining example in Japan.

From the Main Hall to the Main Tower
The first floor of the Main Tower
One of the machicolations
One of the loopholes for guns
The iron spikes outside the first floor

On the second floor, you can see lot of exhibitions about the castle like a miniature model.

The second floor of the Main Tower

The third floor is basically the attic of the hip-and-gable roof, but it has windows and space inside the roof for defenders who could counter attackers.

The third floor of the Main Tower

On the fourth floor, you can see one of the bronze grampuses on the roof close by through the window.

The forth floor of the Main Tower
The bronze grampuses seen through the window

The fifth floor is a very dark attic, by contrast, the top floor is open and bright where you can enjoy a great view of the castle and city to all directions. You can also walk around the veranda (another steel handrail was added for safety and preservation) like the lord of the castle used to do.

The fifth floor of the Main Tower
The top floor of the Main Tower
The veranda of the top floor
A view from the top floor

Later History

After the Meiji Restoration, Kochi Castle was turned into Kochi Park. All the buildings in the Second and Third Enclosures were demolished while the buildings in the Main Enclosure and a few others remain. All the 15 remaining castle buildings have been designated as Important Cultural Properties since 1950. The castle also became a National Historic Site in 1959.

The Main Tower of Kochi Castle

My Impression

When I visited Kochi Castle for the first time many years ago, I misunderstood the reason for the small Main Hall in the Main Enclosure. I thought it was because Japanese people in the past were shorter and smaller than now. In my recent second visit, I understood its real reason. I guess if the hall was very large, it might have been demolished like the hall in the Second Enclosure when the castle once became the park. If it is true, fortune is unpredictable and changeable.

The interior of the Main Hall of the Main Enclsosure

How to get There

If you want to visit there by car:
It is about 15 minutes away from Kochi IC on Kochi Expressway.
There are several parking lots around the castle such as the Kochi Park Parking Lot.
By public transportation, take the Tosaden Bus from JR Kochi Station and get off at the Kochijo-mae bus stop.
If you go there from Tokyo or Osaka, I recommend traveling by plane or using an express bus.

Links and References

Kochi Castle Pamphlets

That’s all. Thank you.
Back to “Kochi Castle Part1”
Back to “Kochi Castle Part2”

error: Content is protected !!