181.Kokura Castle Part1

The top floor of the Main Tower hanged out, which was called Western Style. This was because its balcony and handrails were covered by black outer walls to prevent damage from bad weather and strong wind.

Location and History

Castle is built as Bridgehead in Kyushu

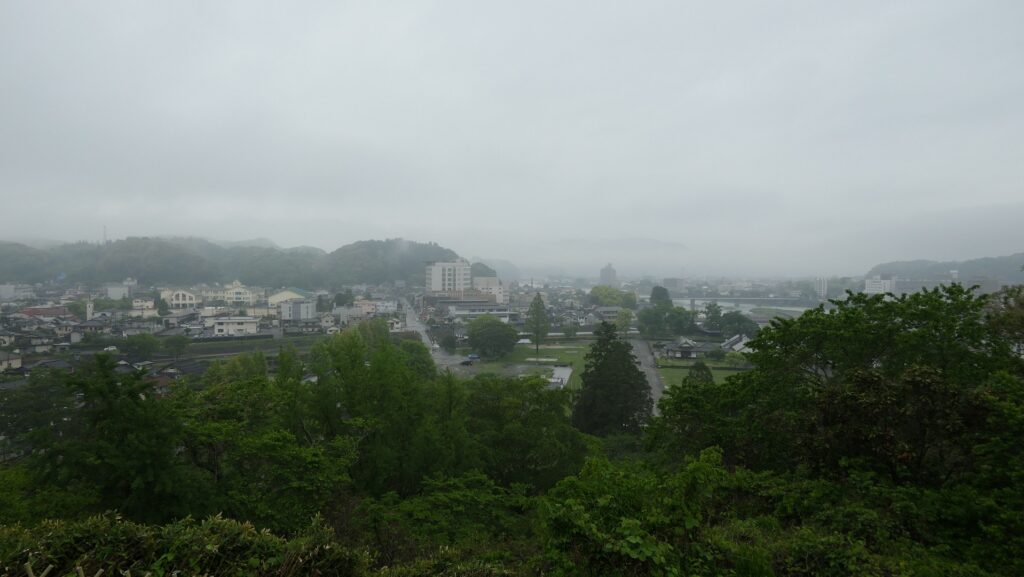
Kokura Castle is located in the Kokura area of Kitakyushu City at the northern edge of the Kyushu Region. For example, if you visit the region using a Shinkansen super express, the first station will be Kokura Station near the castle. The area was more well known as the entrance of the region, which had Kokura Port facing the Kanmon Strait, sandwiched by Kyushu Island and the main island of Japan. That’s why warlords, who wanted to invade the region from the mainland, tried to build a bridgehead in this area. Certain records say that Motonari Mori, who was a great warlord of the Chugoku Region, built it in 1569, which would be the former Kokura Castle. After the ruler, Hideyoshi Toyotomi invaded the region in 1587, he gave the castle to his trusted vassal, Katsunobu Mori. However, Katsunobui was eventually fired because he was against Ieyasu Tokugawa, who would become the next ruler, in the decisive battle in 1600.

The range of Buzen Province and the location of the castle

Tadaoki Hosokawa renovates Castle

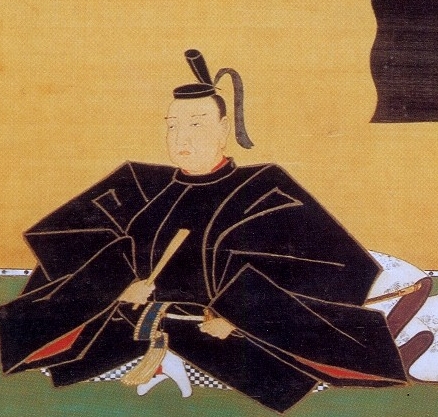
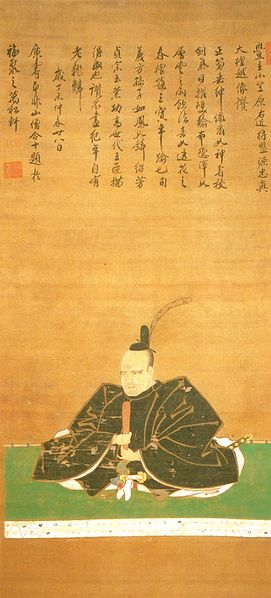
Instead, Tadaoki Hosokawa (also known as Sansai after his retirement), who had greatly supported Ieyasu in the battle, was assigned as the lord of Buzen Provence including the Kokura area and would be the founder of the Kokura Domain. He first lived in Nakatsu Castle, which the former lord of the castle, the Kuroda Clan had built, but soon started to renovate the castle in Kokura in 1602 as his new home, which would be what we call Kokura Castle.

The portrait of Tadaoki Hosokawa, owned by Eisei Bunko Museum (licensed under Public Domain via Wikimedia Commons)
The current Nakatsu Castle Ruins

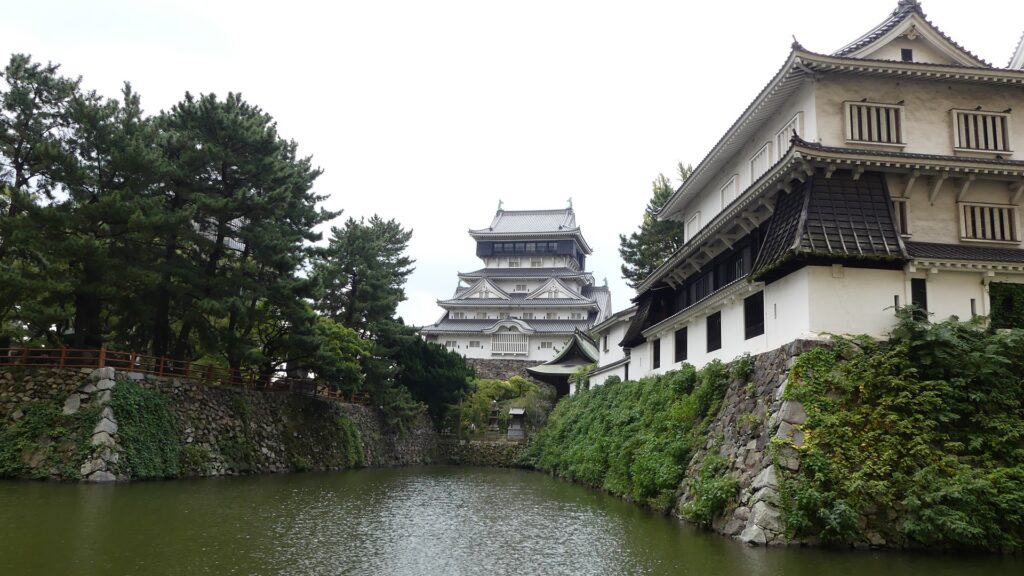
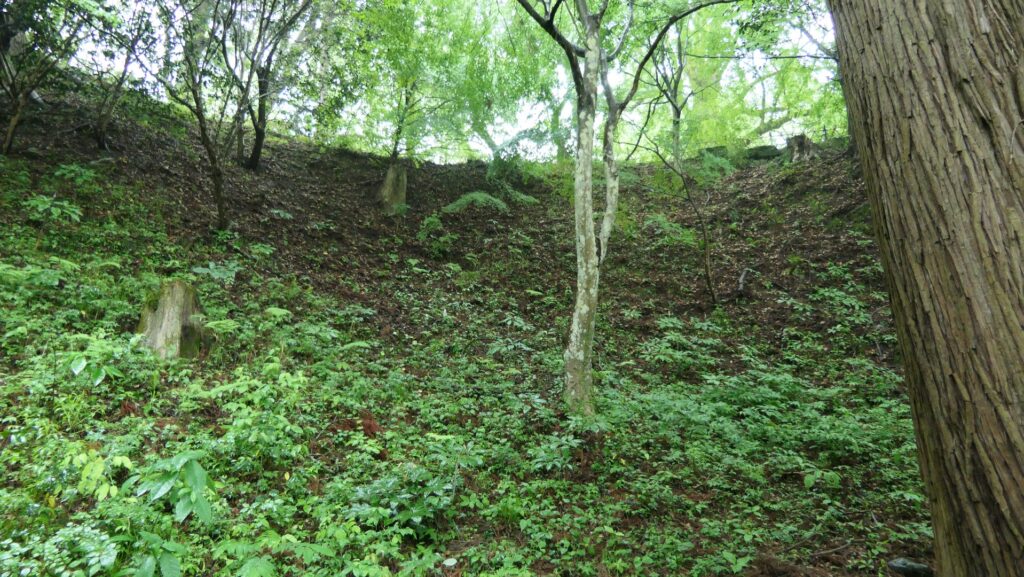
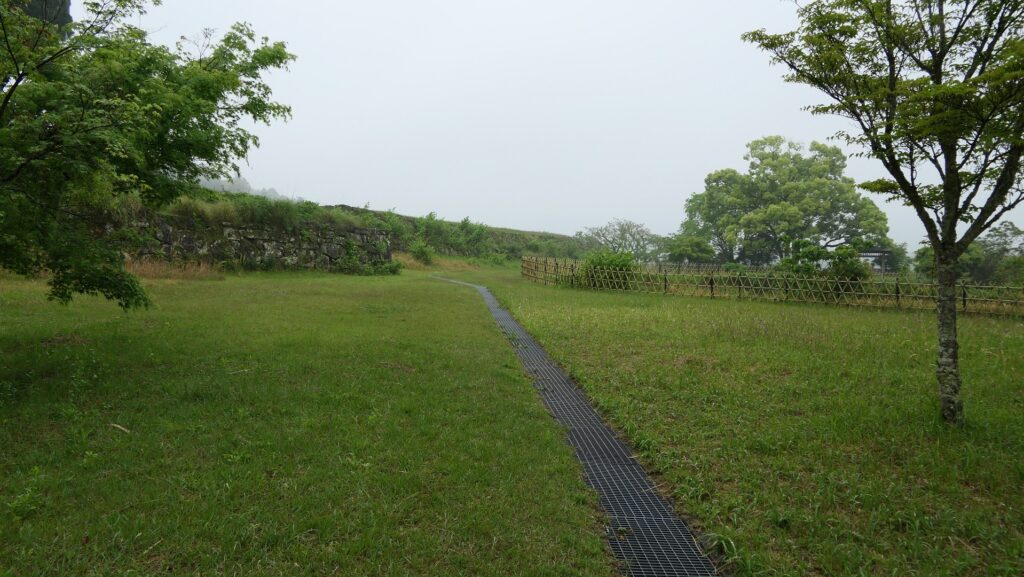
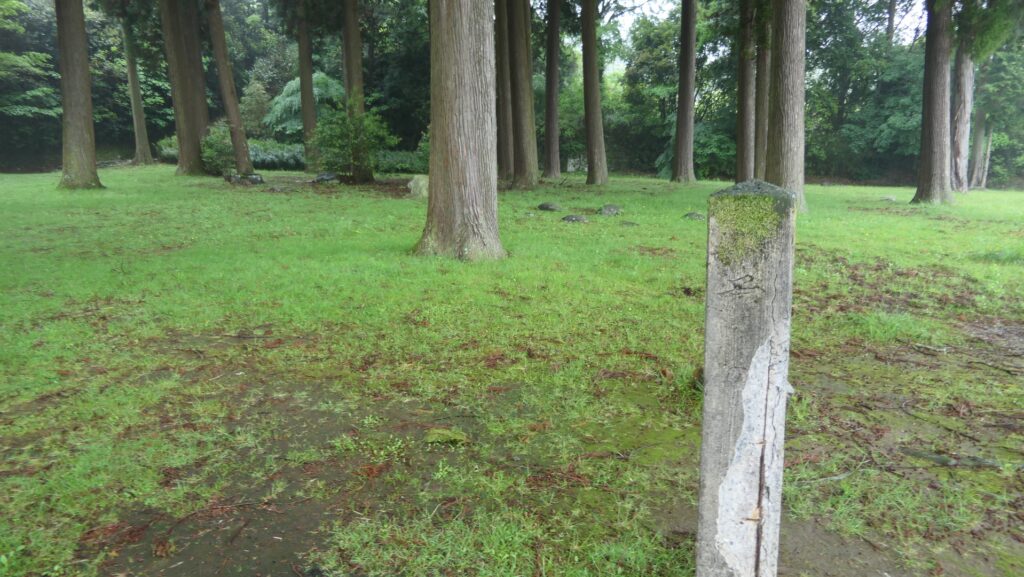
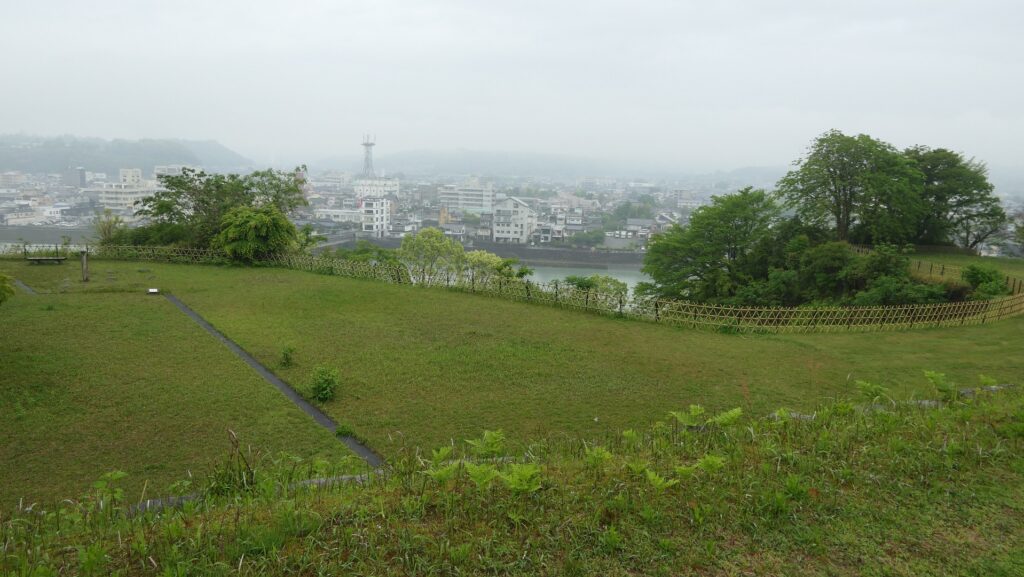
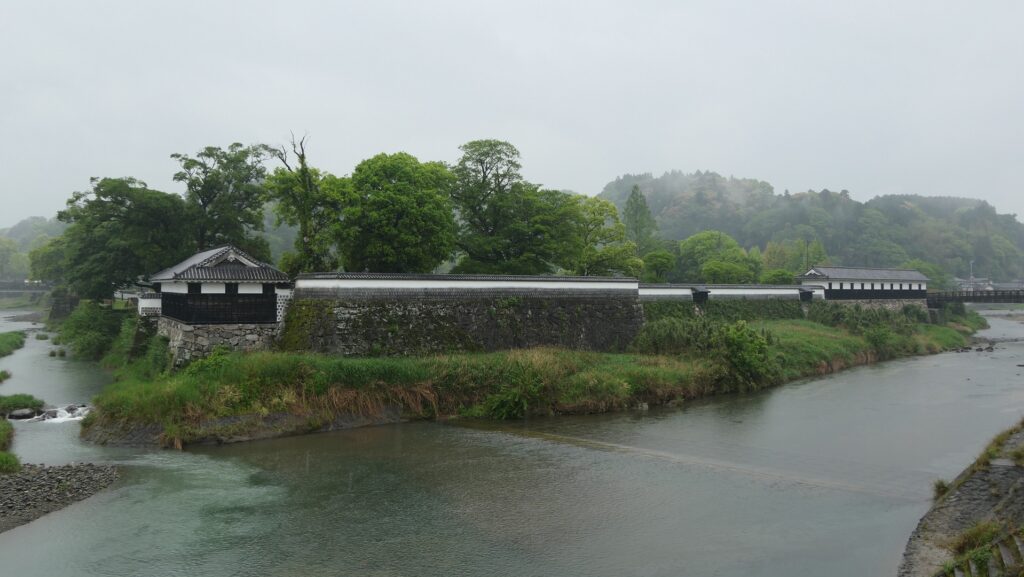
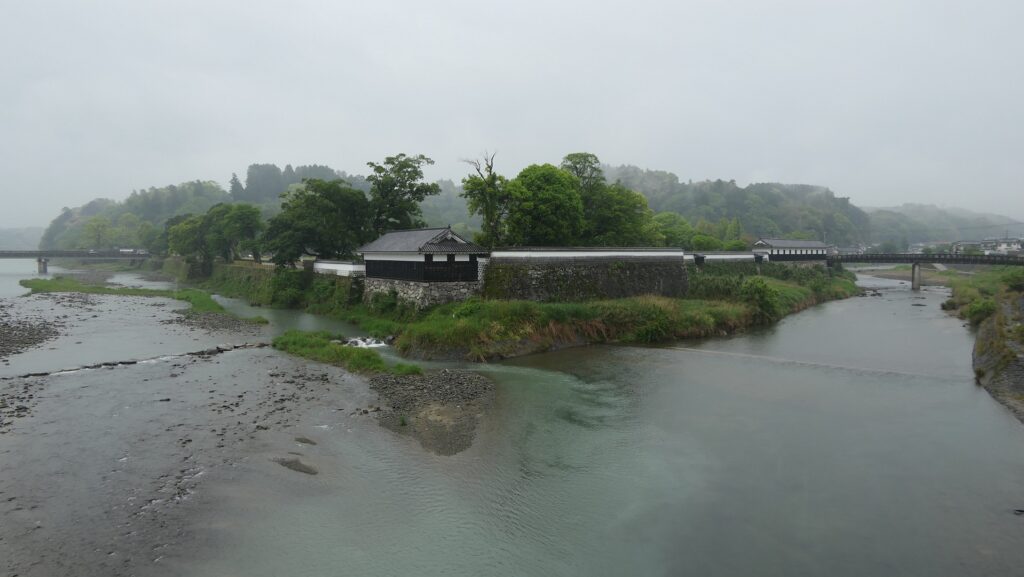
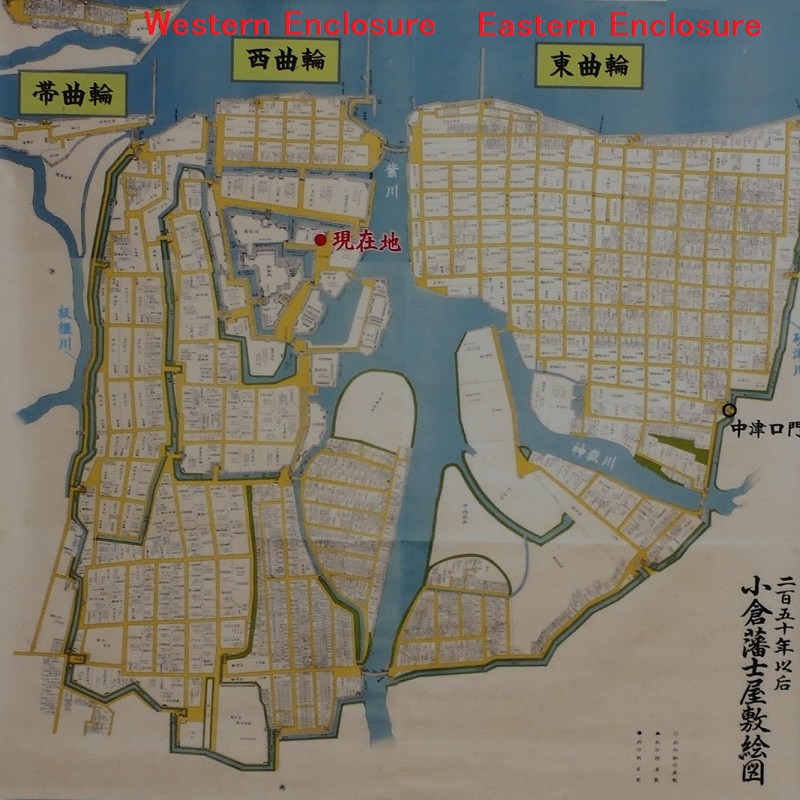
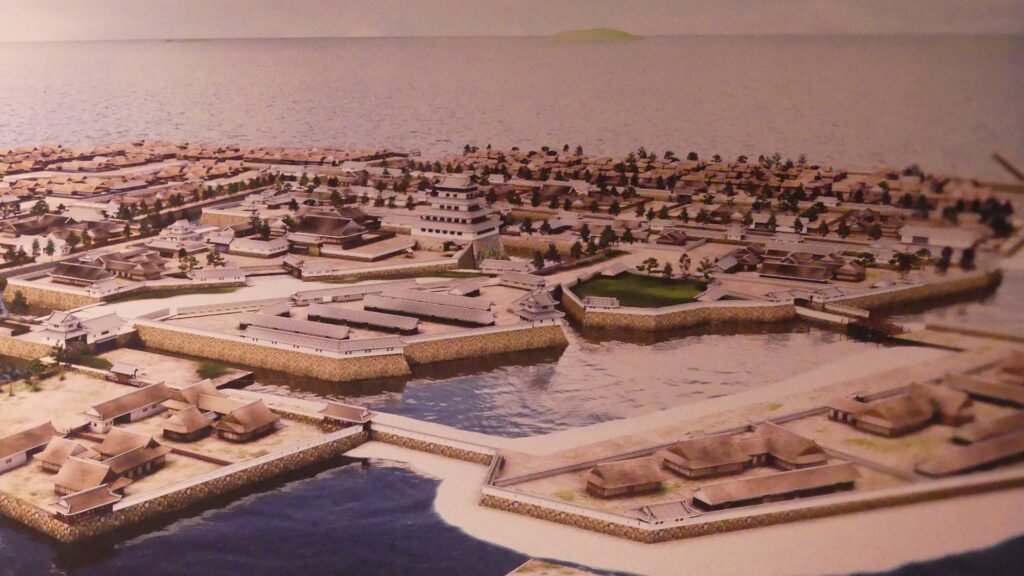
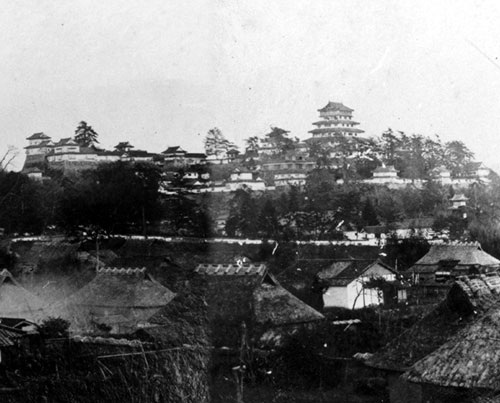
The former castle and the port was along the large estuary of Murasaki River, like a bay, when Tadaoki greatly developed the area. The area was broadly separated into the Western and Eastern Enclosures, binding the river. The Western Enclosure was also divided by water moats into smaller sub enclosures, such as the Main Enclosure, for the lord and warriors. The Eastern Enclosure became the castle town for people like merchants, craftsmen and monks. Furthermore, the whole area was surrounded by other natural or artificial rivers as the outermost moat whose perimeter was about 8km. Tadaoki thought if a large enemy force attacked the castle, he would flood the enemy by breaking the banks of the rivers.

the whole Kokura Castle drawn in “the illustration of Kokura Samurai residences”, from the signboard at the site, adding the English comments
Sunatsu River, the western part of the outermost moat

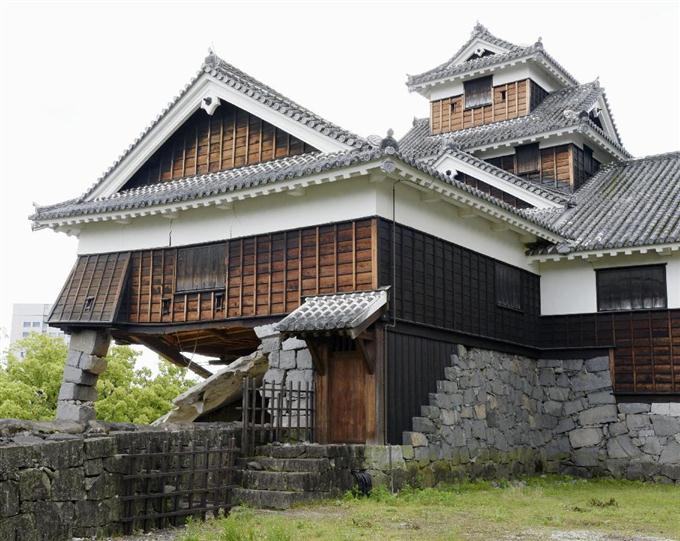
Characteristic Main Tower

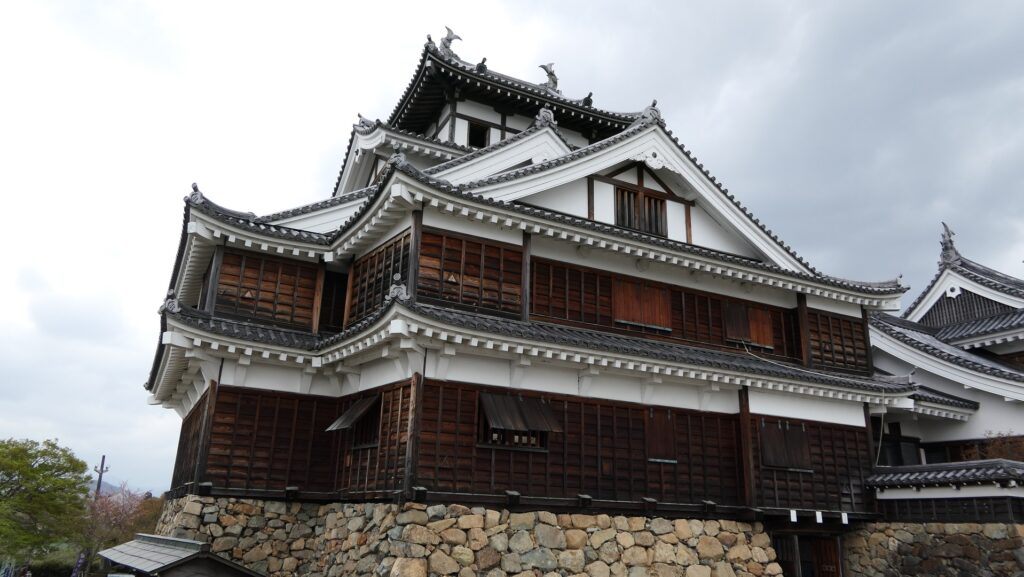
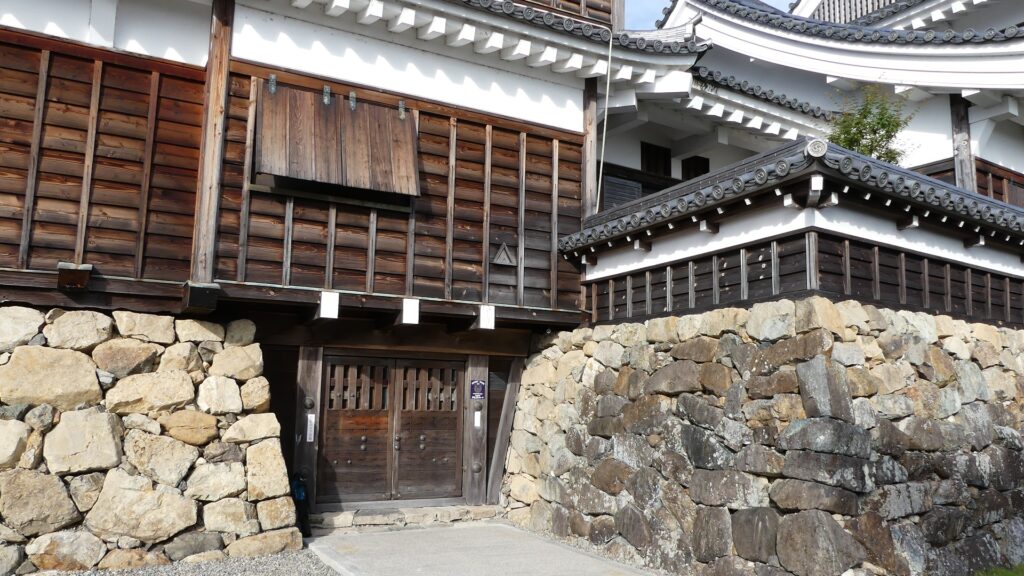
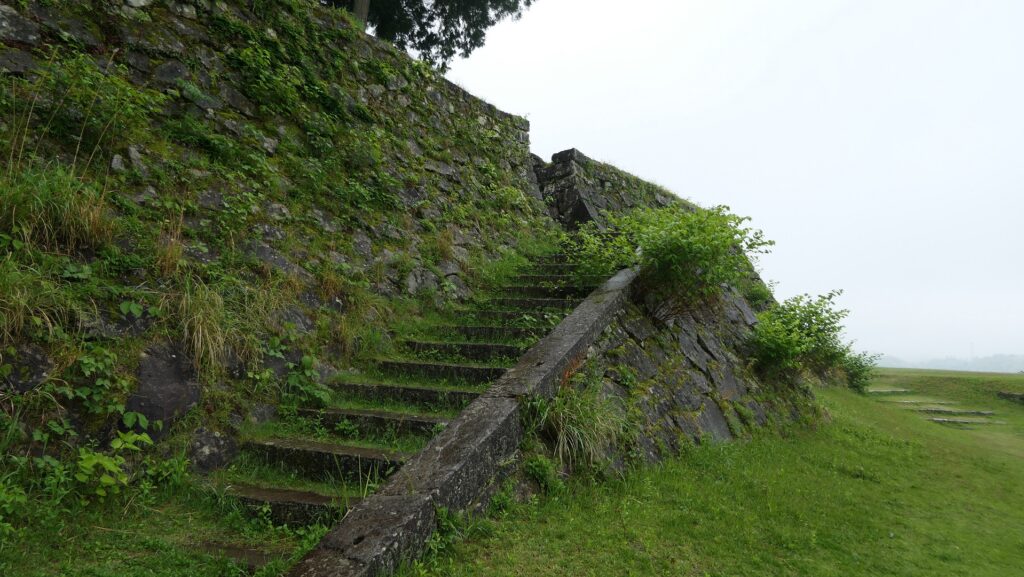
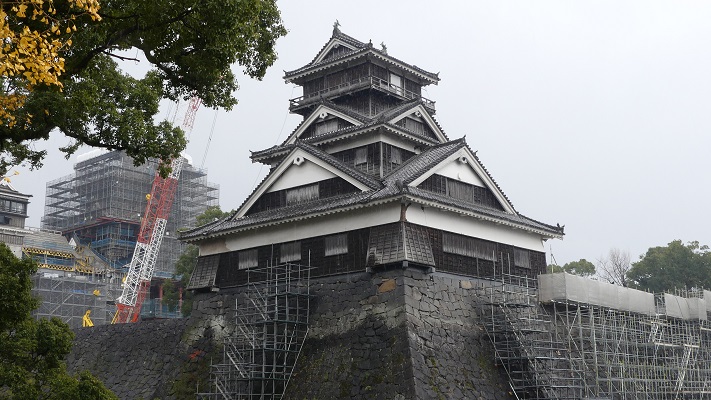
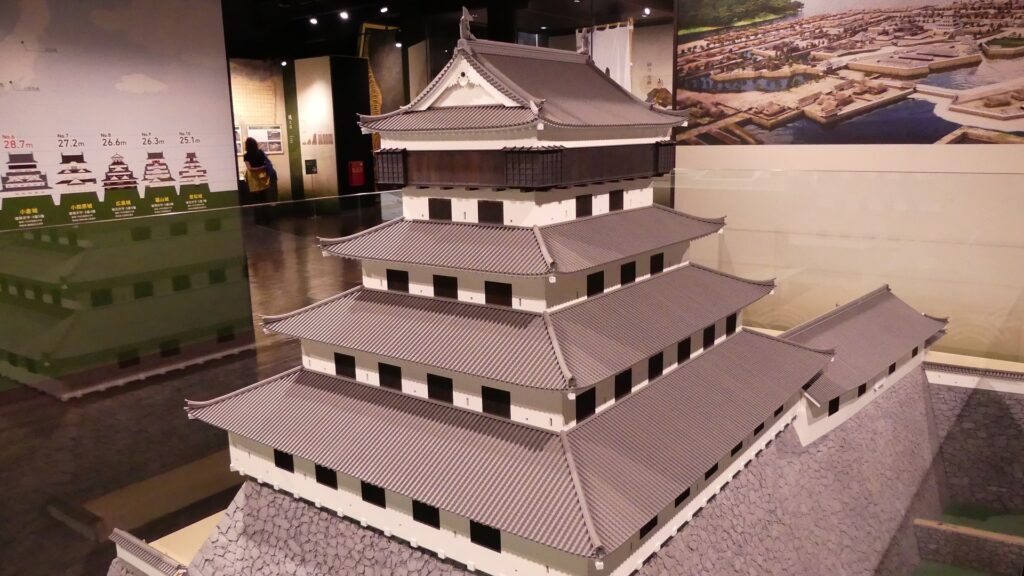
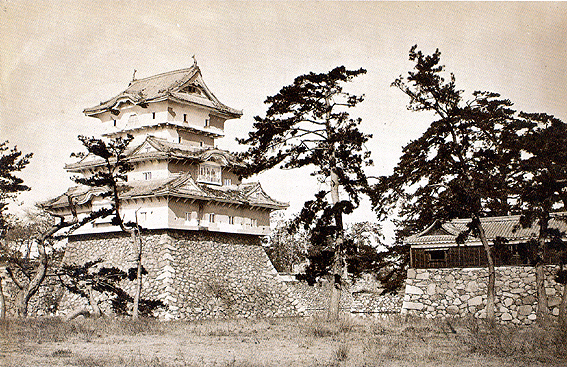
The main portion of the castle was surrounded by high stone walls. In particular, the stone wall base for the Main Tower was built at the northeastern corner of the Main Enclosure and was 18.8m high. The Main Tower itself was 22.8m high, so 41.6m in total. The tower had 4 levels and 5 floors inside because they were no roofs between the fourth and fifth floors. Also, the existing roofs were very simple without any decorations except for the top. It is a method called Soto-siki (meaning multi-storied type). This method made the builders efficient and made the tower easier to protect. The defenders would actually look out over the surronding area and counterattack the enemies at any direction from the tower. In addition, the tower had one more feature called Nanban-zukuri (meaning Western Style) or Kara-zukuri (the Chinese Style). It refers to some of the levels or floors hanging out over the other levels of the tower. In the case of Kokura Castle, it was the top floor because its balcony and handrails were covered by black outer walls to prevent damage from bad weather and strong wind. This Kokura style would be later emulated by other castles like Tsuyama and Takamatsu Castles.

The restored image by CG of the main portion of Kokura Castle, exhibited by Kokura Castle Tower
The miniature model of the original Main Tower of Kokura Castle, exhibited by Kokura Castle Tower
The old photo of Tsuyama Castle including its Main Tower, in the early Meiji Period, taken by Kunitada Matsudaira (licensed under Public Domain via Wikimedia Commons)
The old photo of the Main Tower of Takamatsu Castle

Prosperity and Destruction of Ogasawara Clan

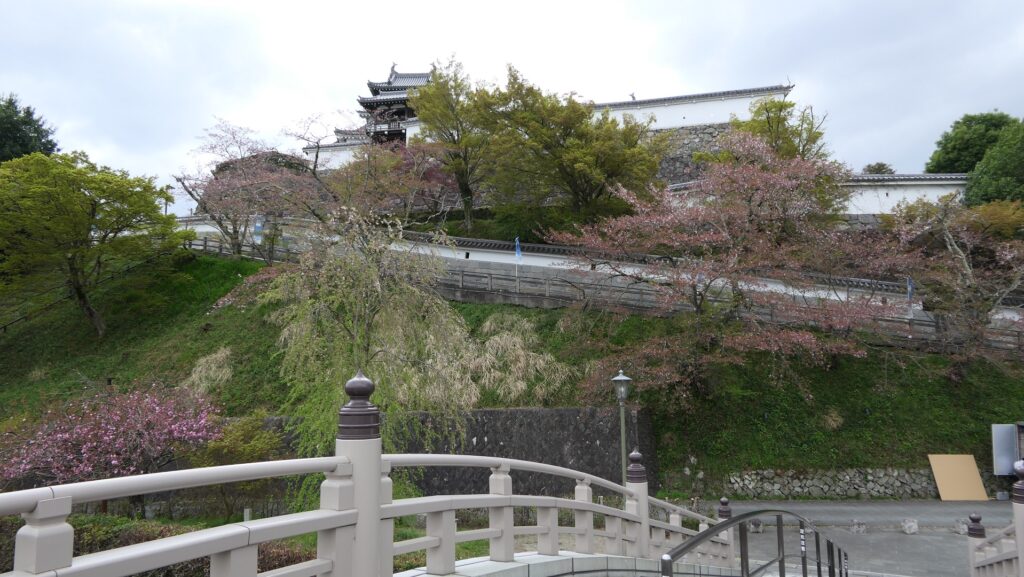
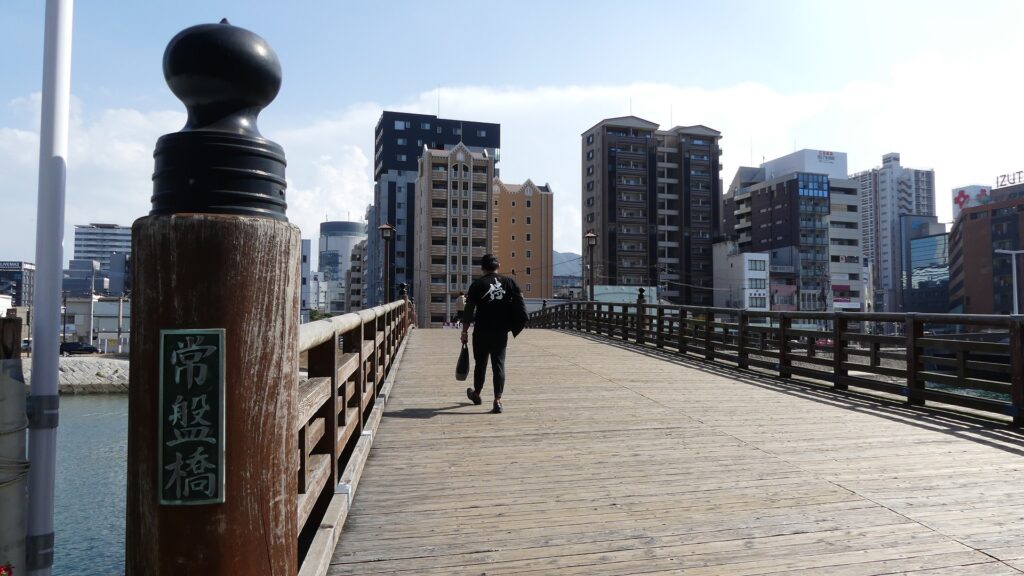
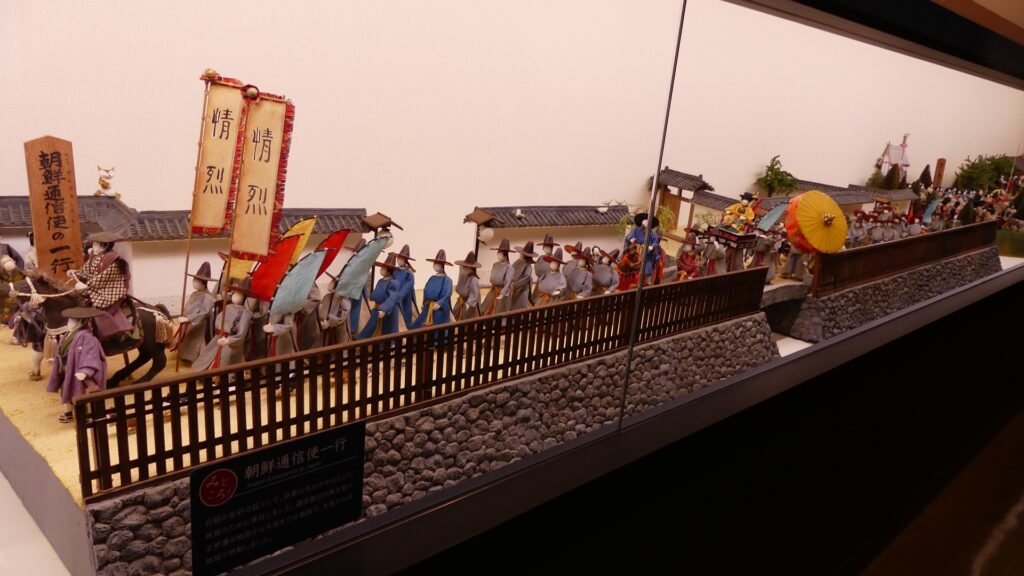
The castle and the domain were followed by Tadazame Ogasawara Ogasawara in 1632 after the Hosokawa Clan was transferred to Kumamoto Castle of the Kumamoto Domain. The Ogasawara Clan was a hereditary feudal lord family of the Tokugawa Shogunate, so it was expected to monitor non-hereditary feudal domains in the Kyushu Region. While the government of the Kokura Domain became stable, its castle town commercially prospered, especially around Tokiwa Bridge which connected the Western and Eastern Enclosures over the Murasaki River. The bridge was also the starting point of the Nagasaki Road where many passengers came and went between the main land and the region. the lords in the region and the Korean Envoys also used the road when they went to Edo.

The portrait of Tadazane Ogasawara, owned by Fukuju-ji Temple (licensed under Public Domain via Wikimedia Commons)
The diorama of the town around Tokiwa Bridge, exhibited by Kokura Castle Tower
The current Tokiwa Bridge, it was restored using wooden materials
The figures of the Korean Envoys, exhibited by Kokura Castle Tower

Meanwhile, a bad sign for the castle occurred in 1837. The Main Tower was unfortunately burned down by an accidental fire though it had survived through some lightning strikes. The tower was not rebuilt by the domain after that. Next, a severe event happened to the castle at the end of the Edo Period. The Choshu Domain at the edge of the mainland over the Kanmon Strait rebelled against the shogunate twice. The Second Conquest of Choshu was planned by the shogunate in 1866. The shogunate ordered the Kokura Domain and its allies to attack the Choshu through the Kokura Route, one of the four battlefields.

A Kawaraban newspaper called the scenes of the Battle of Kokura in Kyushu, exhibited by Cultural Heritage Online

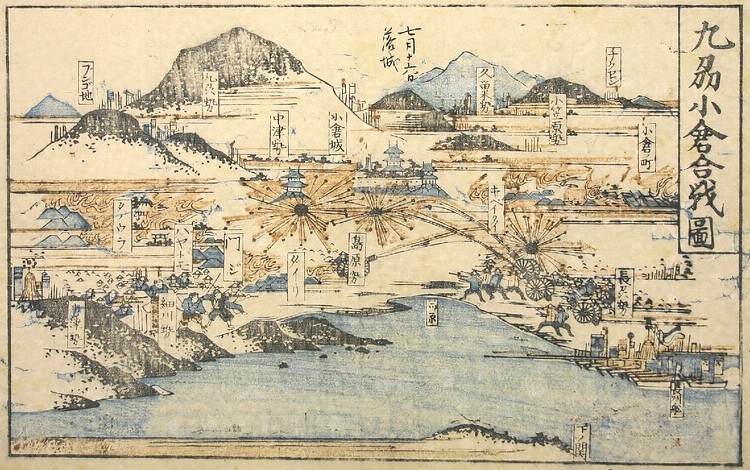
The battles on the Kokura Route started in June. Against all odds, the Choshu troops landed on the Kokura area and counterattacked the shogunate side instead. Moreover, all the allies withdrew after they heard about the death of the shogun, Iemochi Tokugawa, by illness on the 20th of July. The Kokura troops, which were left alone, finally fired at the castle by themselves on the 1st of Aug and continued to fight against the Choshu like a guerrilla army. However, the fall of the castle and the Choshu capturing it became a symbol of the shogunate’s big failure in the battles which would accelerate its destruction and the Meiji Restoration by the New Government including the Choshu Domain.

The current Kokura Castle

To be continued in “Kokura Castle Part2”

158.Fukuchiyama Castle Part2

The southwestern side of the stone wall base of the Main Tower is covered with many diverted stones and some of them are used for its corners. Why did Mitsuhide use them for the important part of the tower?

Features

Main Enclosure as Fukuchiyama Castle Park

Today, the current Fukuchiyama Castle remains as a historical park. The original castle includes the Main, Second and Third Enclosures in a line on a hill. However, the park has only the Main enclosure at the edge of the hill because the Second Enclosure’s part was cut down and turned into residential areas. Therefore, the Fukuchiyama Castle park looks like a castle on a small mountain, which stands out in the city.

The map around the castle

The park has been well developed for visitors so that they can easily walk up on the paved slopes to the top of the hill. You will climb the slope along the remaining stone walls and the restored stone one’s of the Main Enclosure where you can see a diverted stone being used as fillings for the gaps on the wall.

Fukuchiyama Castle Park
The paved path on the slope
The diverted stone that fills the gap

You can access the Main Enclosure by entering the restored Tsurigane-mon or the Hanging Bell Gate after climbing the stone steps or by going on the slope. There is a large well called Toyoiwa-no-i, which is 50m deep and still has 37m deep water.

The slope on the left and the stone steps to the Hanging Bell Gate on the right
The restored Hanging Bell Gate
The Toyoiwa-no-i Well

Main Tower Base uses lots of Diverted Stones

The restored Main Tower is on the original stone wall base which has a complex shape in a plane view because the original tower was extended several times. The entrance of the tower is at the eastern side which has a newer part of the original base.

The aerial photo around the Main Enclosure, there are lots of deverted stones at the lower left of the red lines

The restored Main Tower of Fukuchiyama Castle
The entrance at the eastern side of the Main Tower

If you walk around the base to the southern side, you will find the base uses a lot of diverted stones. Diverted stones refer to the stones which had originally been processed and used for other purposes, such as tombstones, stone statues, and stone mills, but were collected and used for rapid castle constructions. Other examples of using them can be seen in castles like Yamato-Koriyama, Matsusaka and Himeji Castles.

The southern side a lot of diverted stones
A diverted stone used in Yamato-Koriyama Castle (little above the middle)
A diverted stone used in Matsusaka Castle

You may be surprised to see that the southwestern side of the stone wall base is covered with more diverted stones. The view of the restored Main Tower is good, but you should also check out how the stones are used. The stone wall base was mainly piled using natural stones in a method called Nozura-zumi. The diverted stones in other sides are used to fill gaps between these natural stones. However, the diverted stones at the southwestern side are used to form the corners of the base, the most important part of it. Basically, the corners of stone wall bases must support most of the weight of the tower, even in a case of emergency, such as an earthquake.

A view of the Main Tower of Fukuchiyama Castle from the southwest
So many diverted stones
The diverted stones used in a corner

What is Mitsuhide’s intention?

For example, in 2016 many earthquakes happened in Kumamoto, the Iidamaru-five-level Turret of Kumamoto Castle was once supported by only one corner stone even though other stones around had collapsed. Around the southern part of the Fukuchiyama Castle’s Main Tower was said to be the oldest, so Mitsuhide Akechi probably built it. Why did he use so many diverted stones and installed them into the important part of the tower?

Iidamaru-five-level-turret and the miracle lone stone walls in July,2016, quoted from the Sankei Photo

One possible reason is purely technical. The diverted stones in the corner are cuboid ones which look like tombs or carved Buddha status. Collecting them might have been useful for Mitsuhide to build the castle efficiently and rapidly. On the other hand, a local tradition says that Mitsuhide’s troops destroyed the temples which were against his orders and took the tomb stones away from them to build the castle. If it is true, using the stones might have meant the new lord showing the conquest and the authority to people. Other historian argued that it must have symbolized the contribution of people to the castle’s construction or taking Buddha’s power in the castle. Overall, only Mitsuhide can answer this question.

Why did Mitsuhide use these diverted stones for the important part of the tower?

So far, about 500 diverted stones were found in the stone walls of the castle or excavated in other places. The excavated ones lie down in vacant spaces in the Main Enclosure.

The diverted stones lying down in the Main Enclosure

To be continued in “Fukuchiyama Castle Part3”
Back to “Fukuchiyama Castle Part1”

93.Hitoyoshi Castle Part3

A big event for the Hitoyoshi area happened in 1877, when a hero of the restoration, Takamori Saigo started a rebellion against the government known as the Seinan War.

Features

Climbing to Moutain part

Next comes the hill area of the castle, which probably has existed since the first stage of it, but was modernized with stone walls in the later stage. There are no buildings but the foundations remain. You will climb the ruins of Oshita-mon or the Lower Gate which was the only entrance to the Third, Second, and Main Enclosures. You will need to climb wide stone steps and then turn right and walk around below the edge of the hill, where the defenders on the hill must have attacked enemies in the past.

The map around the castle

The ruins of Oshita-mon Gate
Climbing the stone steps
Enemies must have been attacked from above
The path goes around below the hill

You will first be in the Third Enclosure which widely covers the edge of the hill. The enclosure has mostly been made of soil and a square since the castle was active. It may be a good viewing spot of the Hitoyoshi city area.

The Third Enclosure
A view of the city area from the Third Enclosure

Going to Second and Main Enclosures

The Second Enclosure is higher than the Third Enclosure and surrounded by stone walls with two ruins of defensive gates, Nakano-gomon and Uzumi-gomon. This is because there was another Main Hall for the lord which had been considered as the center of the castle before the Mitachi hall was built below the hill.

The Second Enclosure seen from the Third Enclosure
The ruins of Nakano-gomon Gate
The ruins of Uzume-gomon Gate
The inside of the Second Enclosure

The Main Enclosure is the highest enclosure of the castle, but it is small and had no Main Tower. Instead, this enclosure seemed to be used as a religious spot of the Sagara Clan. Its stone steps and foundations have become curved which make us feel its long history.

The stone steps to the Main Enclosure
The inside of the Main Enclosure
The stone steps and foundations have become curved

Later History

After the Meiji Restoration, Hitoyoshi Castle was abandoned and all the castle buildings were sold or demolished. Only one gate of the Main Hall, called Horiai-mon, was move to the residence of a senior vassal, the Shingu Clan and remains. A big event for the Hitoyoshi area happened in 1877, when a hero of the restoration, Takamori Saigo started a rebellion against the government known as the Seinan War. His troops started an attack on Kumamoto Castle from the south in Kagoshima, while many warriors of Hitoyoshi also joined the Saigo’s side as the Hitoyoshi Party. However, they failed to capture Kumamoto Castle and withdrew to the Hitoyoshi area. The party suggested for Saigo to go there because the area has natural defenses, surrounded by mountains.

The Horiai-mon Gate
The portrait of Takamori Saigo by Edoardo Chiossone (licensed under Public Domain via Wikimedia Commons)
Kumamoto Castle

Saigo’s headquarters was at the Eikokuji Temple in the area and his staff stayed in the Shingu Clan’s residence. They thought they would be able to hold the area for a long period of time, but the response of the government army was prompt. A gun battle occurred between the army in the north and the Saigo troops in the south, binding the Kumagawa River. The Saigo troops shot from around the Third Enclosure of Hitoyoshi Castle on the hill, however, the shot did not reach the enemy because their guns were outdated. As a result, Saigo withdrew again to other places and was eventually defeated at Kagoshima Castle, his home base. The Hitoyoshi Party surrendered before then.

The map aound the castle

The Third Enclosure of hitoyoshi Castle, where the Saigo troops set their butteries
The ruins of Kagoshima Castle

As castle ruins, they have been developed as Hitoyoshi Castle Park and were designated as a National Historic Site in 1961. Some castle buildings at the riverside, such as Sumi-Yagura or the Corner Turret and Otemon-waki-Tamon Yagura or the row-style turret beside the Main Gate, were recently restored. The Hitoyoshi Castle History Museum opened in 2005 but is currently closed as mentioned in the previous section.

The restored castle buildings
The closed Hitoyoshi Castle History Museum

My Impression

I was very impressed by the great view of Hitoyoshi Castle Ruins with a large stream of the Kumagawa River. I understood nature could provide not only good things like the terrain for the castle but also bad things like disasters. I really hope that the castle ruins will be completely repaired soon and would like to visit their again so that I will be looking forward to seeing the mysterious basement in the museum and walking over the castle ruins to see larger area of the first stage of the castle.

The panorama view of Hitoyoshi Castle Ruins from a bridge over the Kumagawa River

How to get There

If you want to visit the castle ruins by car, it is about a 10-minute drive away from Hitoyoshi IC on the Kyushu Expressway. There is a parking lot for visitors in the castle ruins.
If you want to use public transportation, it takes about 20 minutes on foot to get there form JR Hitoyoshi Station.
From Tokyo or Osaka to Hitoyoshi Station: Get an express bus from Kagoshima Airport or Sin-Yatsushiro Station of the Kyushu Shinkansen super express, get off at the Hitoyoshi IC bus stop, and transfer to the Sanko bus bound for the station.

The parking lot at the riverside

Links and References

Hitoyoshi Tourist Information, Hitoyoshi City

That’s all. Thank you.
Back to “Hitoyoshi Castle Part1”
Back to “Hitoyoshi Castle Part2”