Let me first introduce you two courses going towards the current Okayama Castle. The first one is the course going to the front side of the castle from Okayama Station. The second one is that going to the back side along the riverside of Asahigawa. After reaching the castle, let us enter the restored main tower of the castle. By going to The Okayama Korakuen Garden, you will feel like the lord of the castle.
Features
Let me first introduce you two courses going towards the current Okayama Castle. The first one is the course going to the front side of the castle from Okayama Station. The second one is that going to the back side along the riverside of Asahigawa. After reaching the castle, let us enter the restored main tower of the castle. By going to The Okayama Korakuen Garden, you will feel like the lord of the castle.
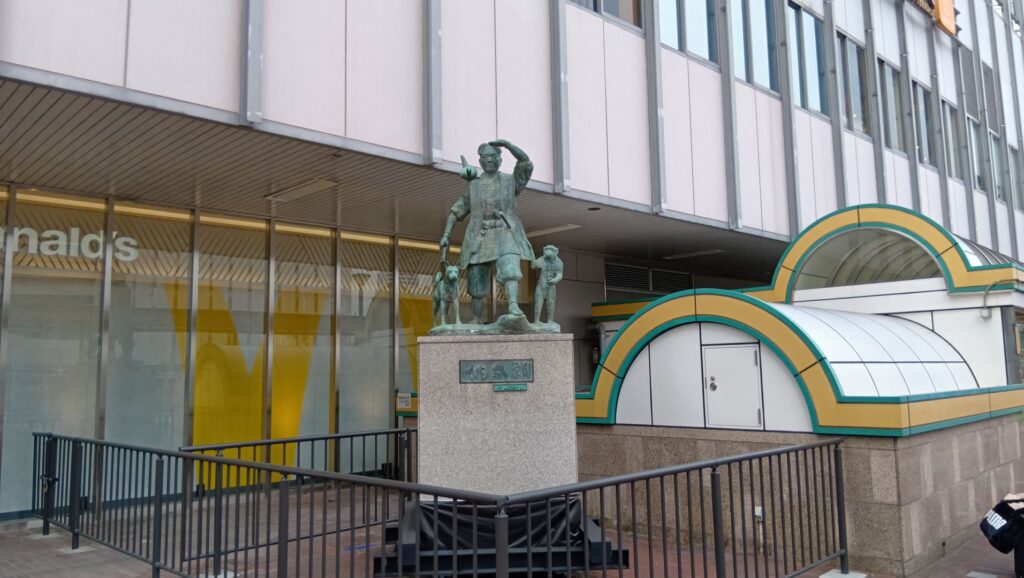
The statue of Momotaro in front of Okayama Station, Momotoro “Peach Boy” is a mythological folklore
The Course to the Front side from Okayama Station
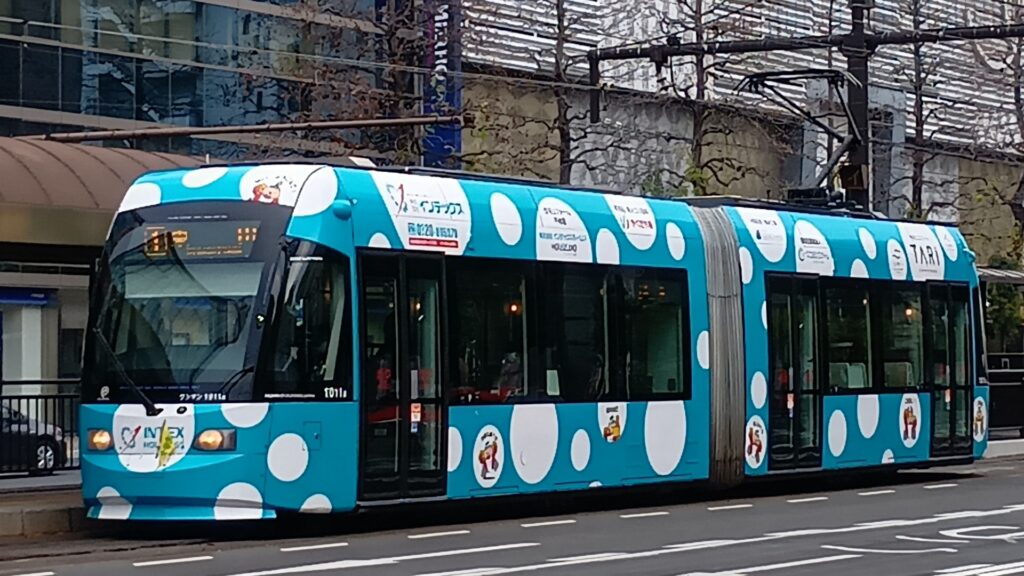
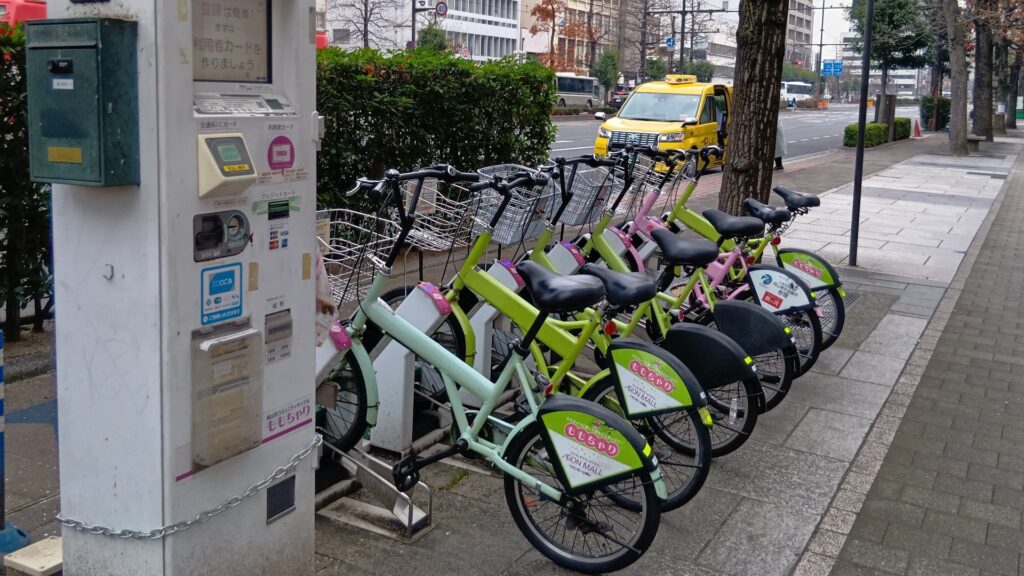
It takes about 2km from Okayama Station to the castle. Therefore, it may be a good idea for you to use the city tram or a rental bicycle.
The city tramThe bicycles of Momochari rental system
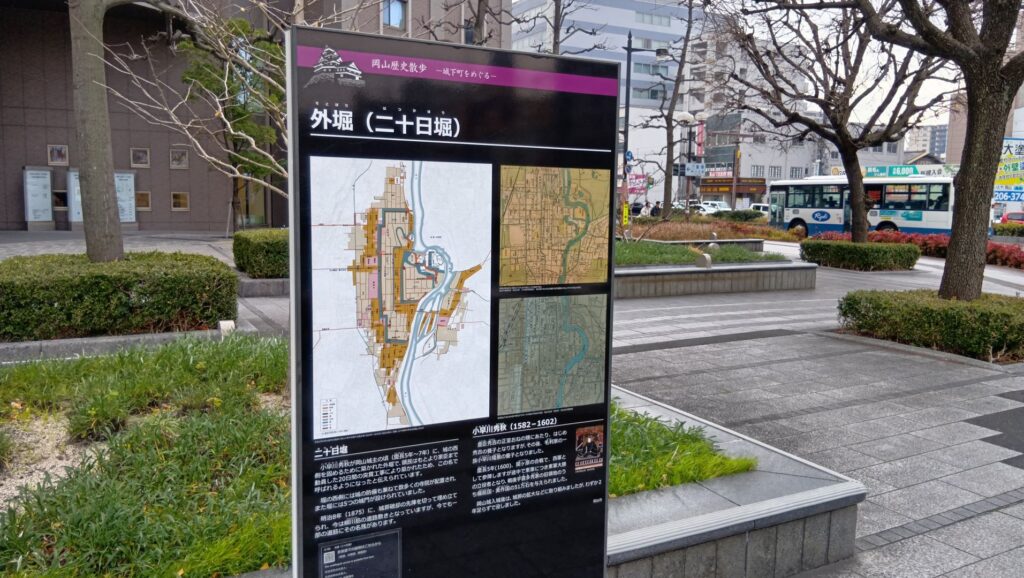
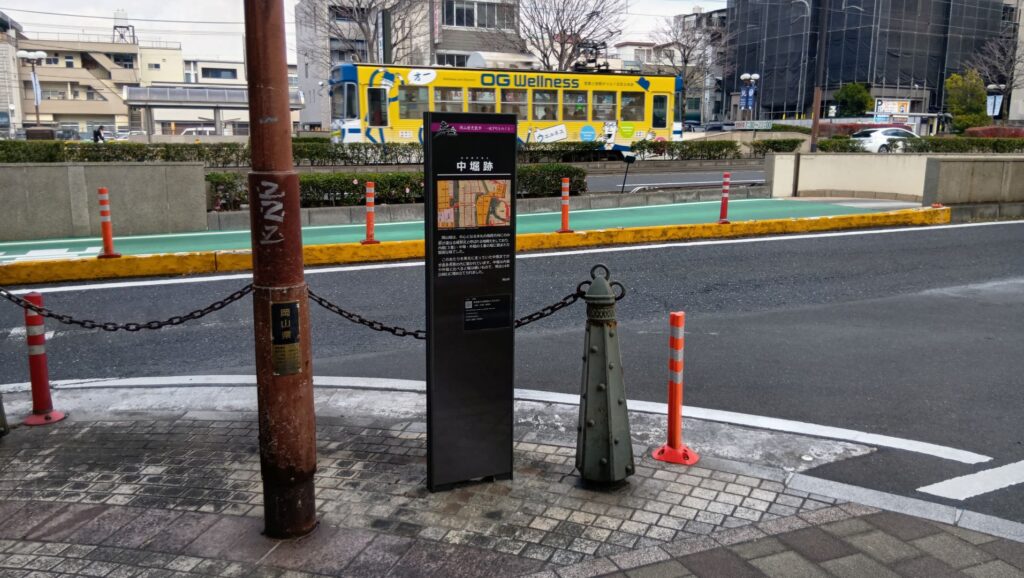
If you go straight along Momotaro-Odori Street from the station, you will eventually find the area around the street turning into the city area. However, you will also find some explanation panels which say there were the outer moat or the middle moat.
The ruins of the outer moatThe ruins of the middle moat
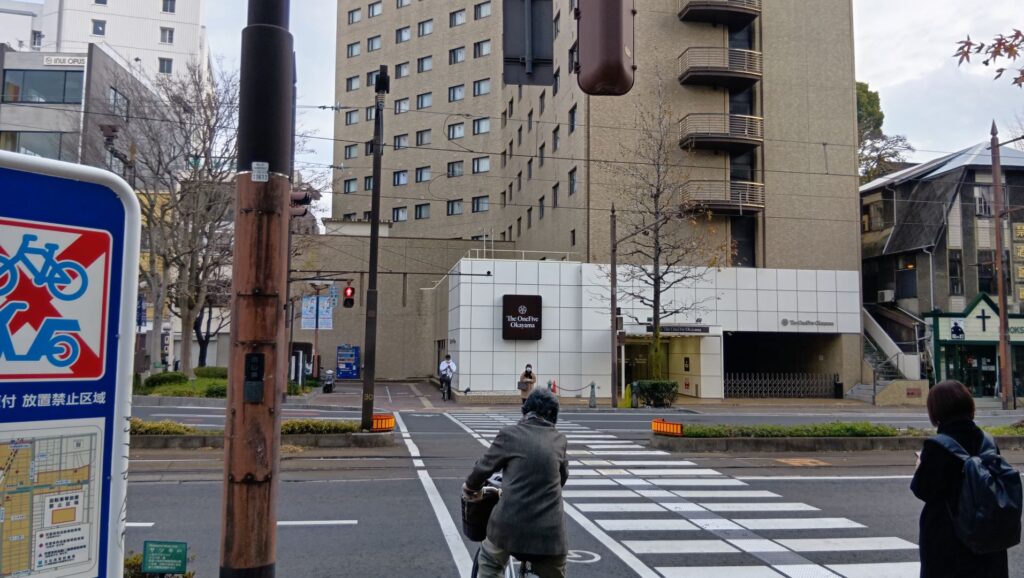
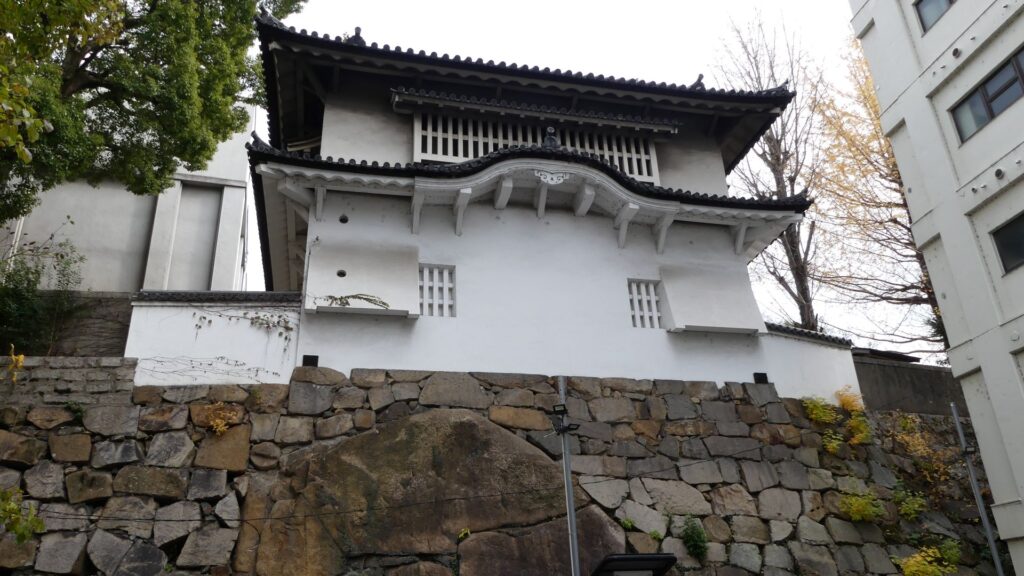
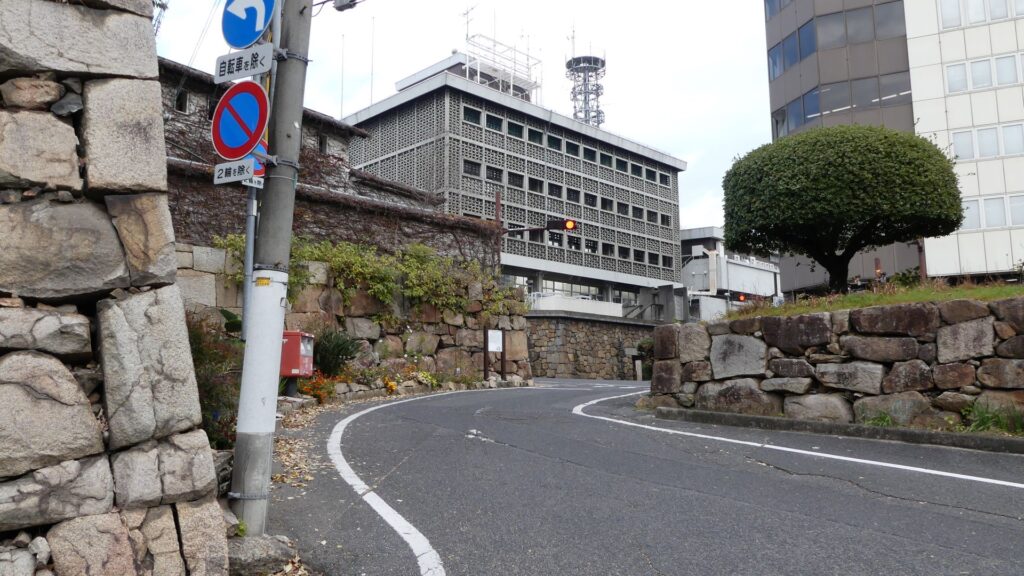
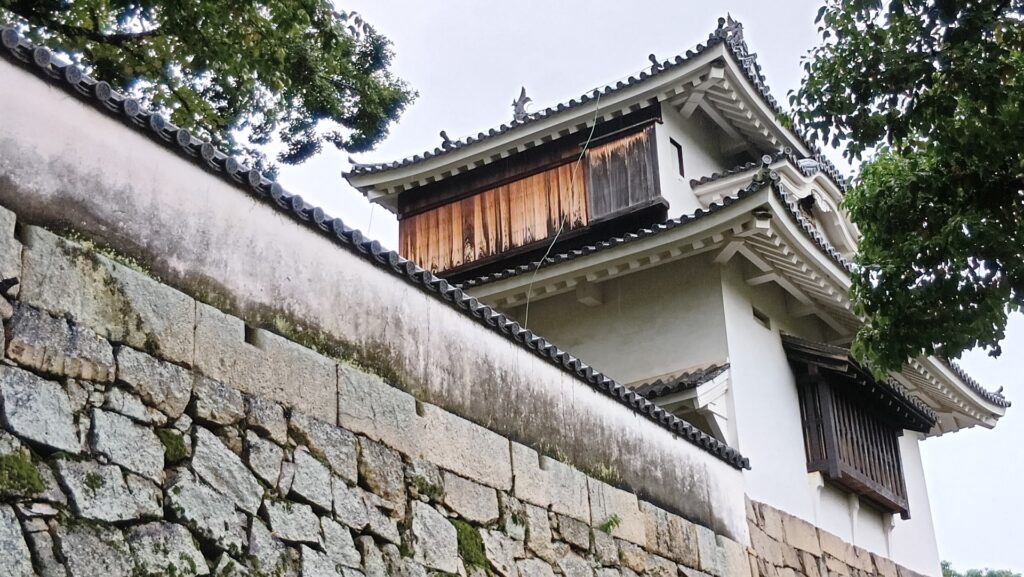
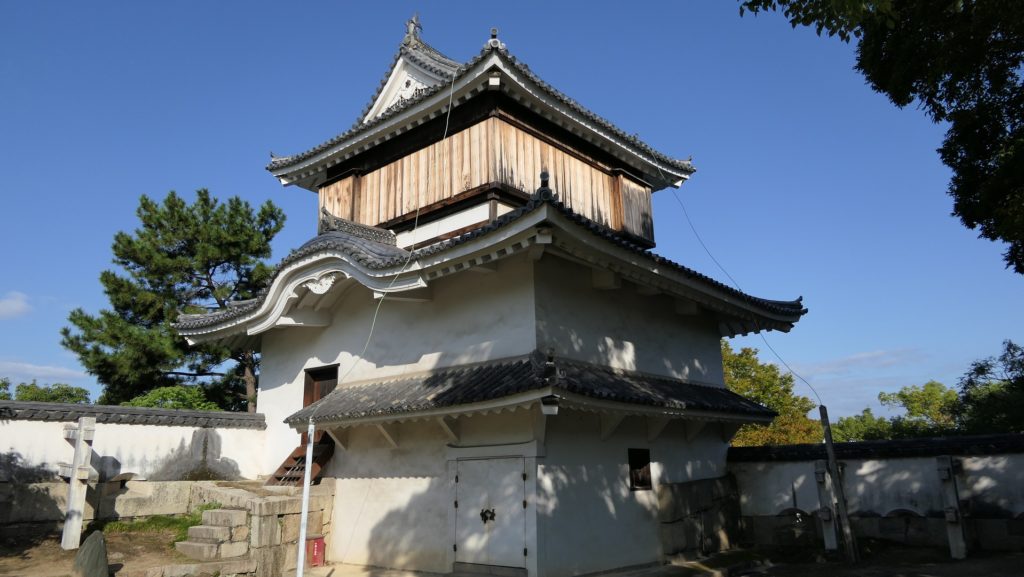
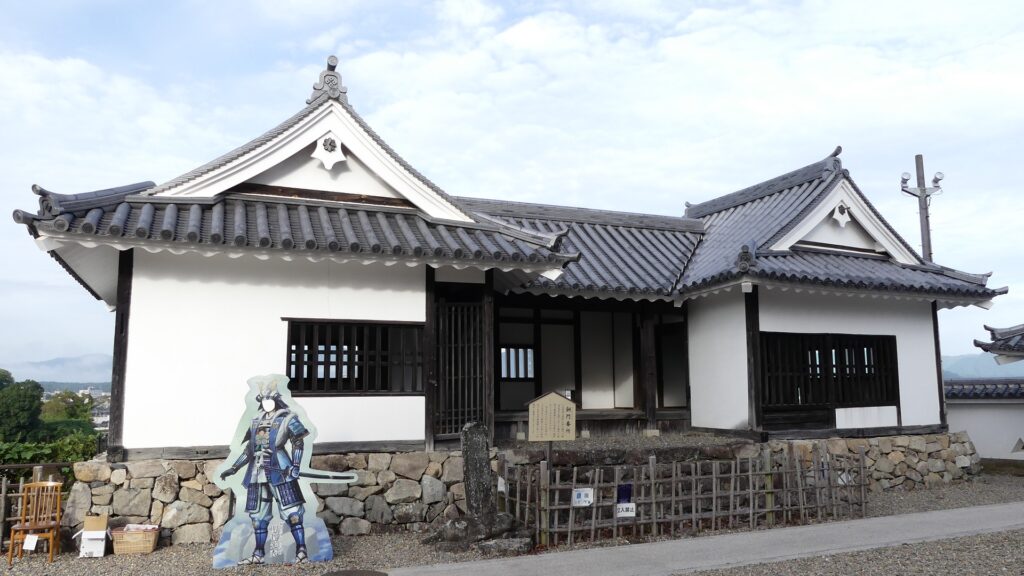
You will eventually arrive at the end of the street, which was inside the inner moat in the past. I recommend you turn to the right because you will soon see the Nishite Turret on the western enclosure, which is one of the few remaining buildings of the castle. It has been designated as a National Important Cultural Property. The turret stood facing the moat.
The end of the street, Going left or right will lead you to the castle, but I highly recommend turning right in order to see the turretThe Nishite Turret on the western enclosure
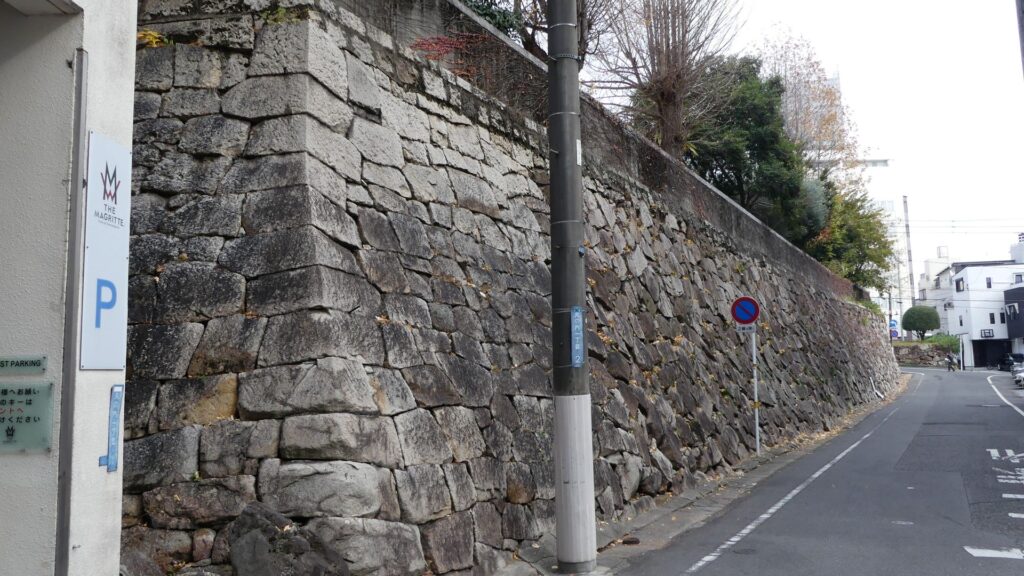
Let us next walk around the western enclosure along the current roads. You will see the remaining stone walls of the enclosure along them. The roads you are walking on were the moats around the enclosure. You will eventually reach the ruins of Ishiyama-mon Gate. Its gate building was unfortunately burned down during World War II. The entrance of the gate was connected by a bridge on the moat to the outside in the past.
The stone walls of the western enclosureThe ruins of Ishiyama-mon Gate
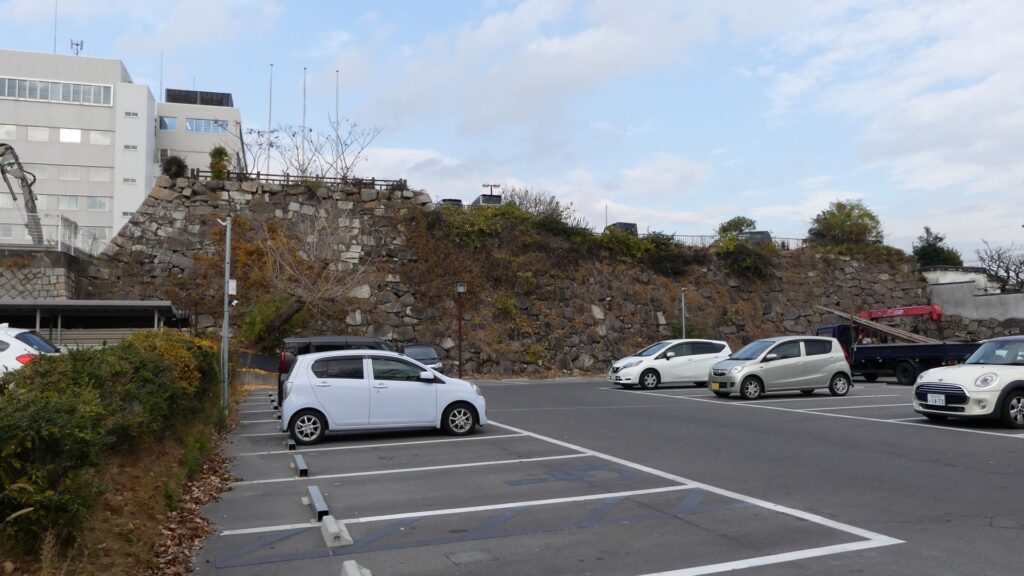
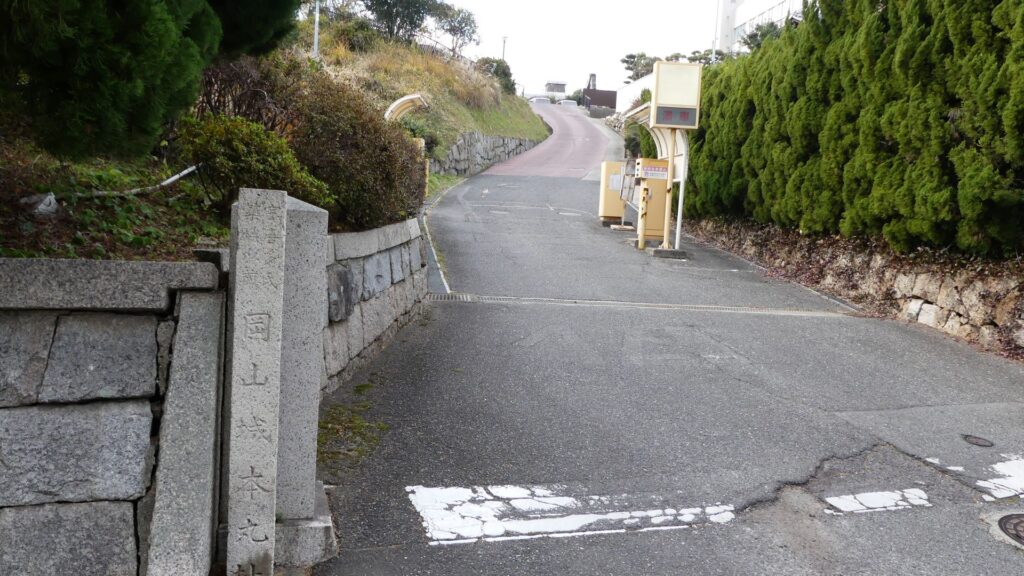
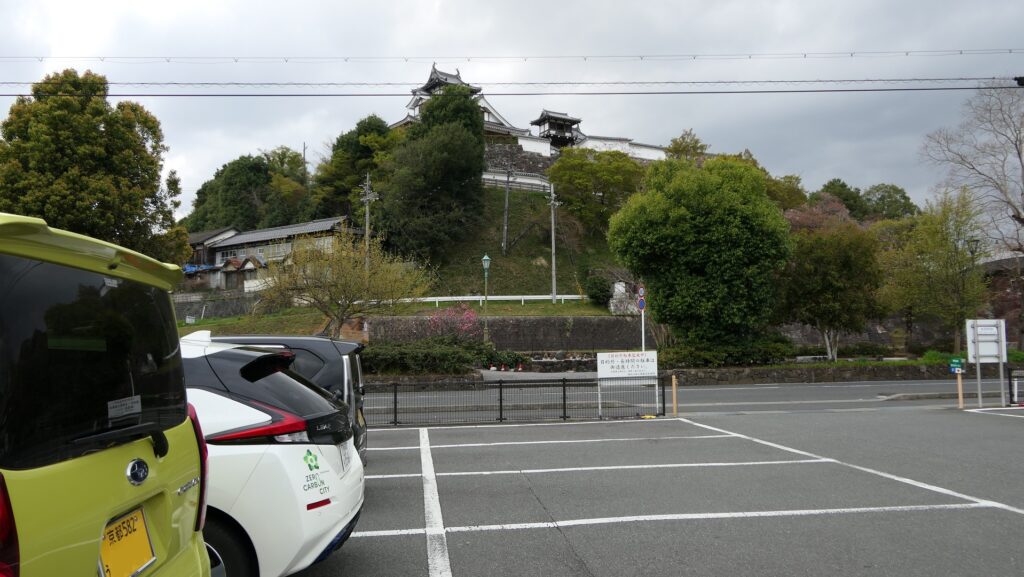
If you go further, you will see the birthplace of the castle, called “Ishiyama-no-shiro” (which means Ishiyama Castle). However, the stone walls around it were built during the period of the Ikeda Clan, which was much later than when it had been born. If you go around it to the eastern entrance, you will notice it is used as a parking lot now. An interesting thing there is the view of the main tower from the west, which looks very narrow.
The Ishiyama Castle, just behind the stone walls is Ishiyama Castle. The top of the walls is also used as parking lotThe eastern entrance of the Ishiyama Castle, Notice the incline leading up to the castleThe main tower seen from the west
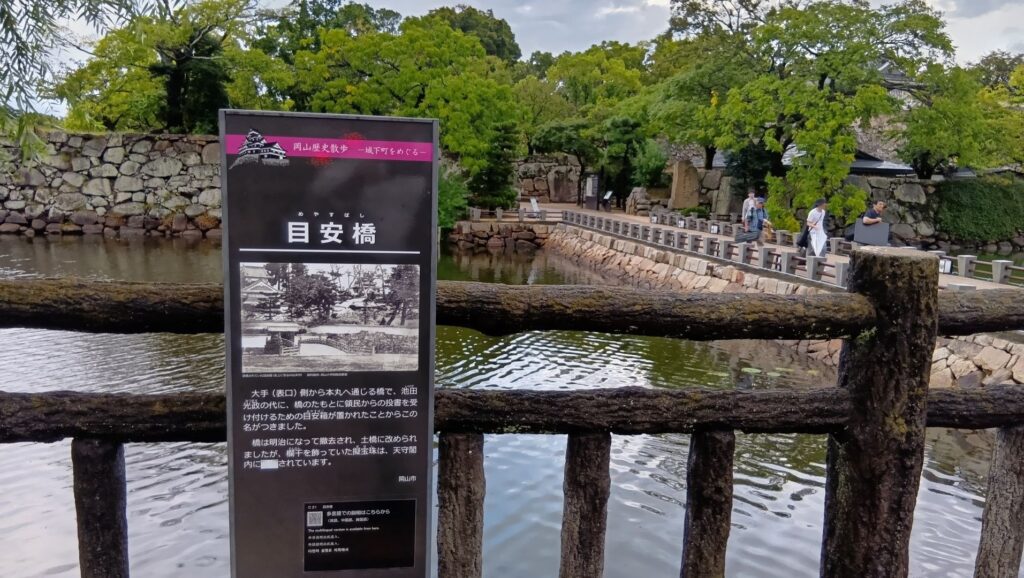
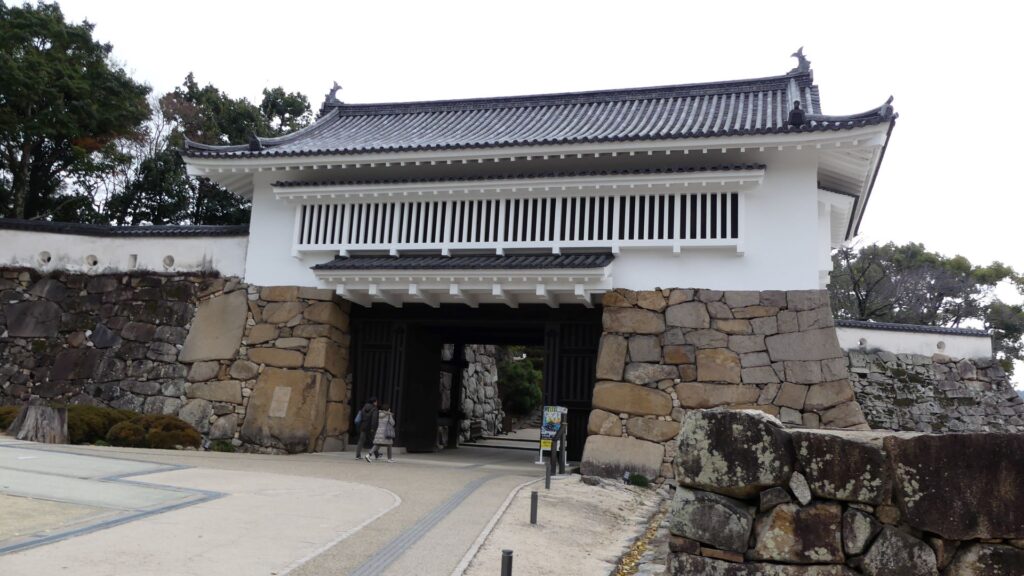
You will finally arrive at the main enclosure of the castle. You can go across the bridge over the inner moat, called “Meyasu-Bashi”. The front gate, called “Uchigeba-mon” has a square space being surrounded by its stone walls, called Masugata, though its building didn’t survive.
The Meyasu-Bashi BridgeThe front gate
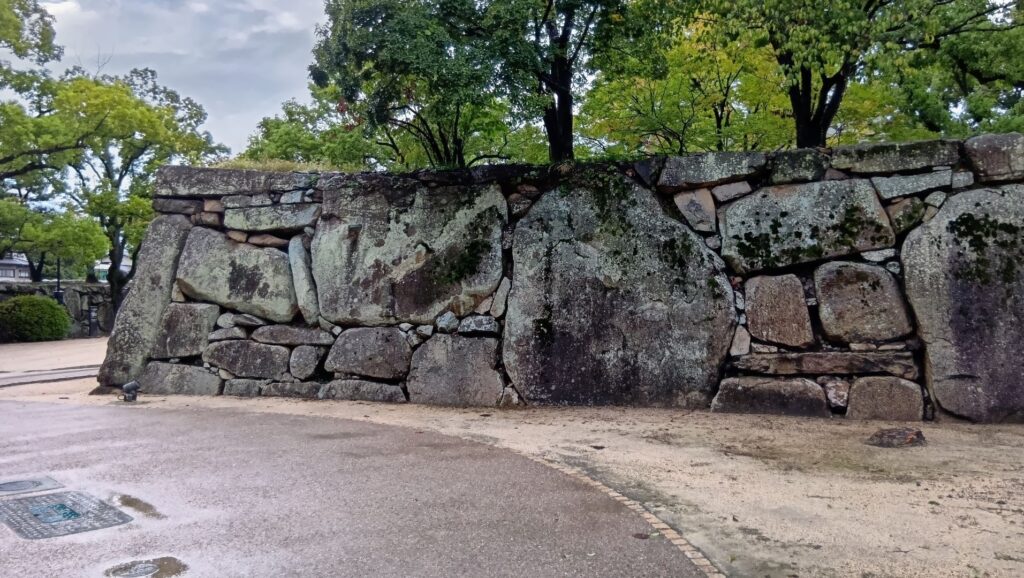
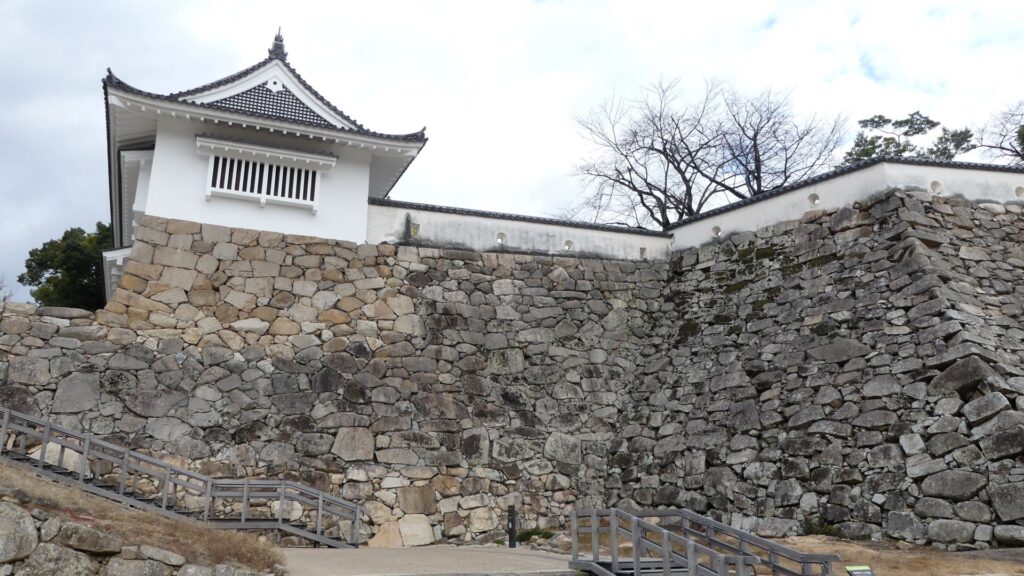
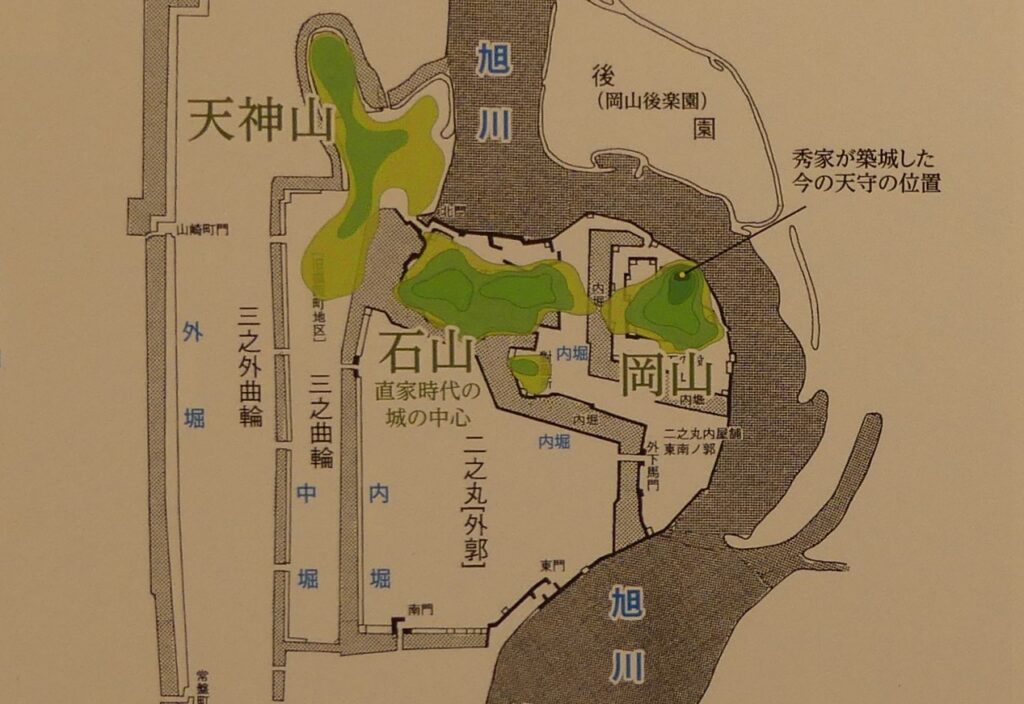
The main enclosure has three tiers. They are called Hondan, Naka-no-dan, and Shita-no-dan from the top. The Naka-no-dan (which means the middle tier) has been extended during the Kobayakawa and Ikeda Periods. Therefore, the tier has mixed stone walls coming from both periods. If you walk on the lowest tier, the Shita-no-dan (which means the low tier), you will see the stone walls of Onando Turret. They were built during the Kobayakawa Period. The stone walls of the Hondan (which means the main tier) were also modified. When you see their connecting part to the middle tier, you will notice they look very complex. This was because the Kobayakawa and Ikeda Clans renovated them.
The ruins of Onando TurretThe stone walls of the middle tier seen from the lower tier
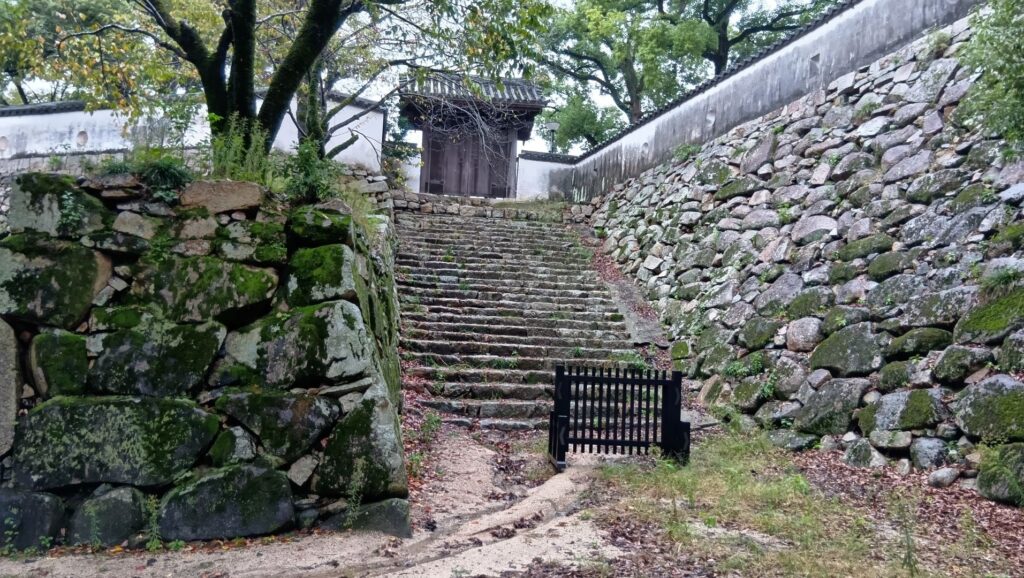
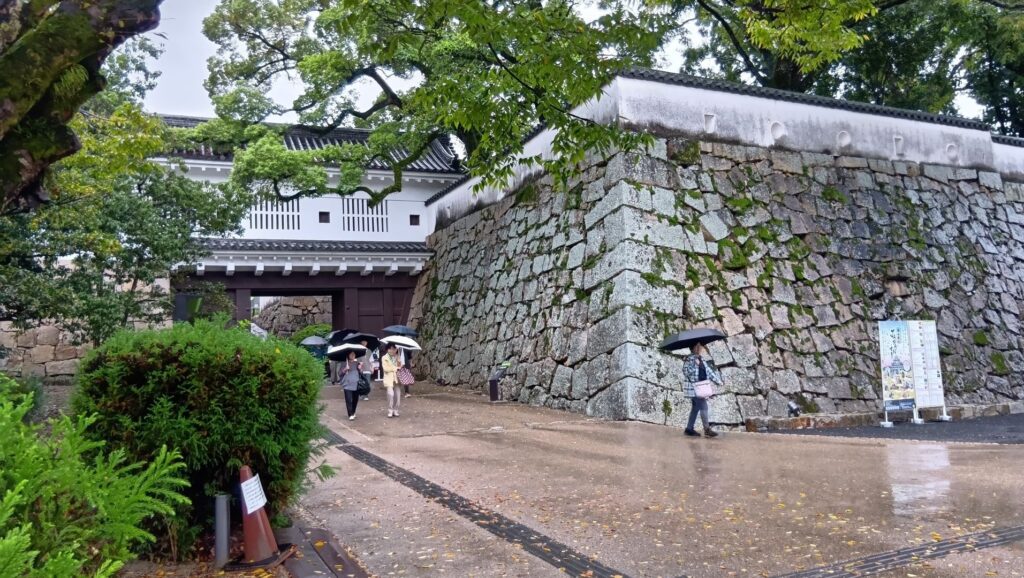
If you walk up on the ruins of Kurogane-mon gate, you will be at the middle tier. You will also see Akazu-no-mon Gate, the entrance of the main tier nearby.
The entrance to the middle tier on the left and the main tier on the rightThe ruins of Kurogane-mon gateThe Akazu-no-mon Gate
The Course to the Back side along Asahigawa River
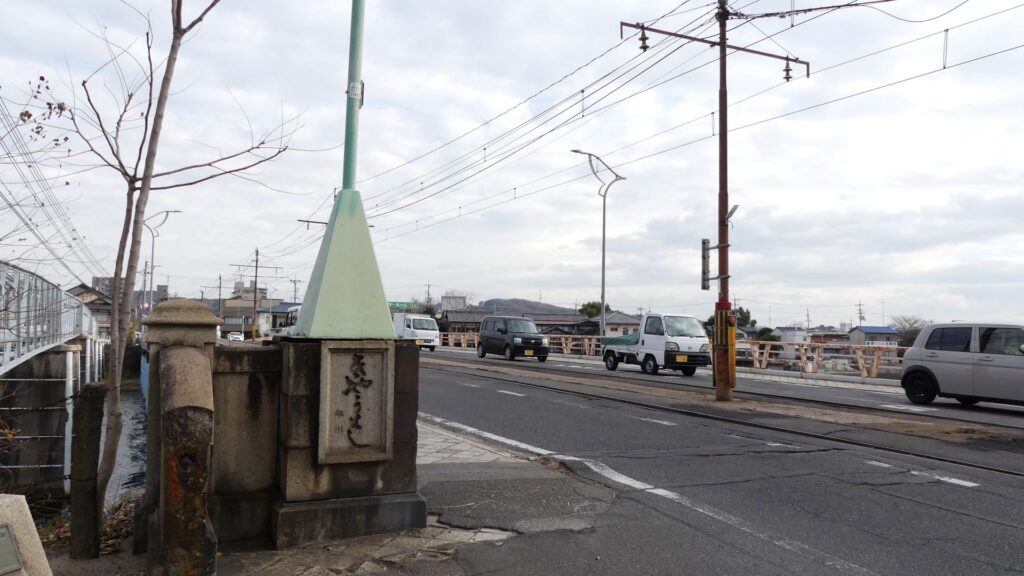
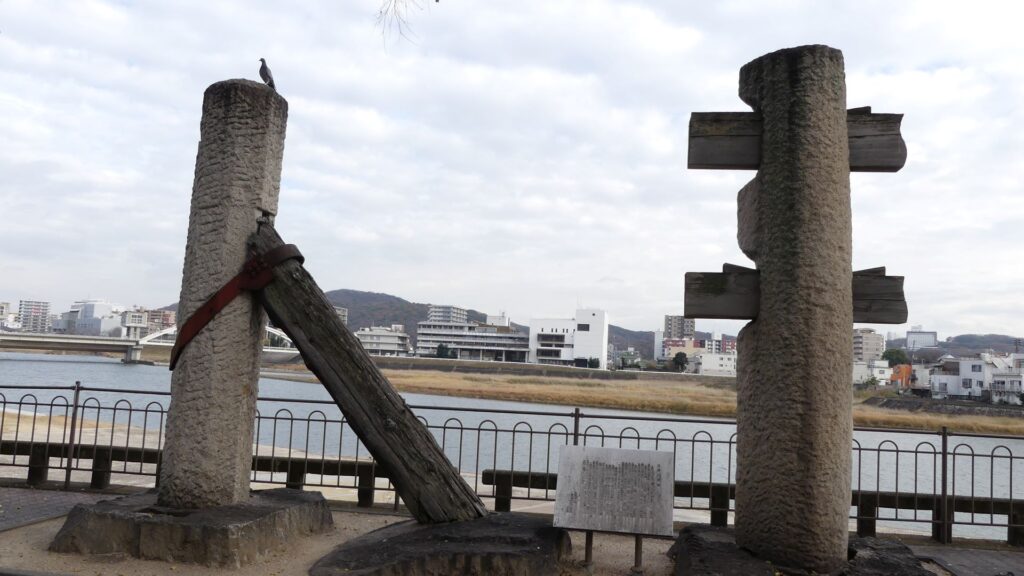
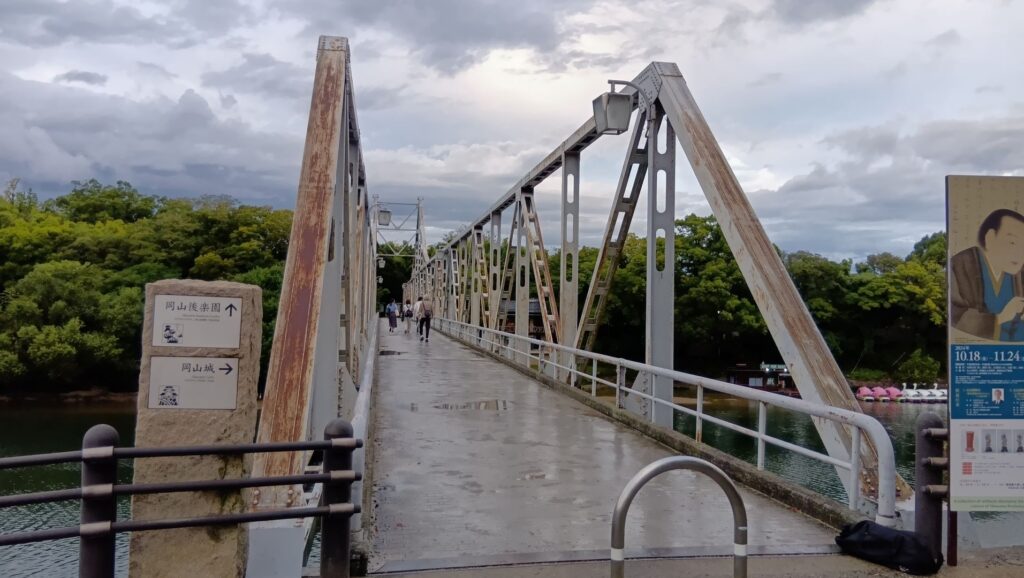
Our next course will start from Kyobashi Bridge over Asahigawa River. The bridge was first built during the period of Hideie Ukita.
The Kyobashi BridgeThe piers of the Kobashi Bridge which were used during the Edo Period and are exhibited near the current bridge
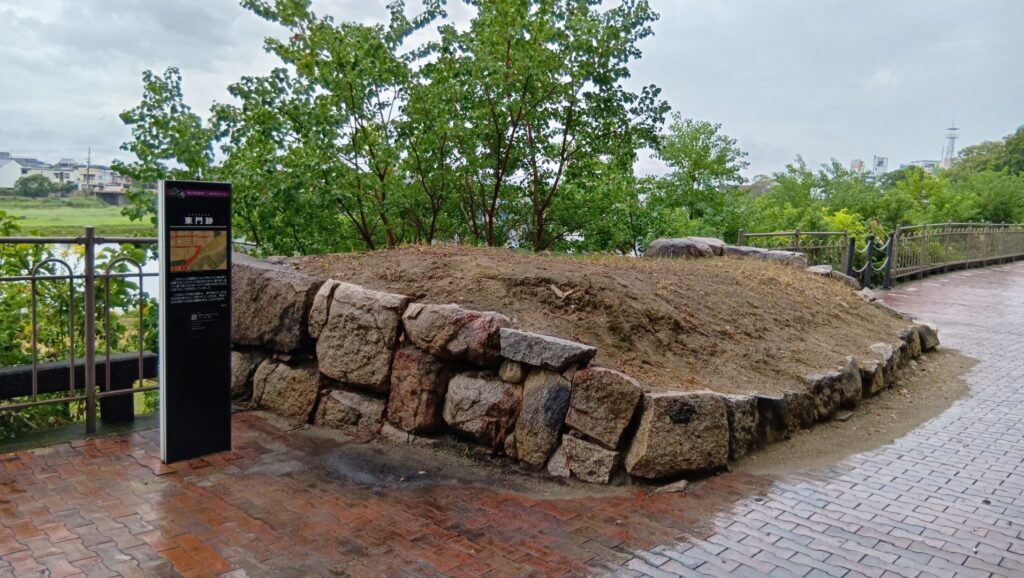
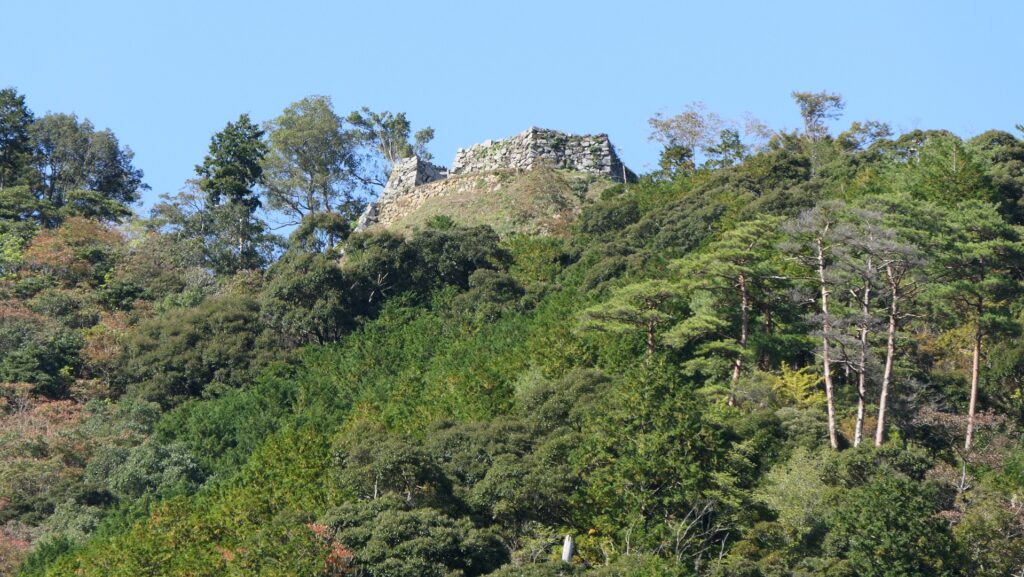
If you go on the riverside, you will see the ruins of the eastern gate and Soken-yashiki Turret. They are over 500m away from the center of the castle, so you can imagine how large the castle was. You will then find other ruins of a turret, which was located in a senior vassal’s residence at the second enclosure. The total number of the turrets were 30! You will eventually see the distant view of the main tower.
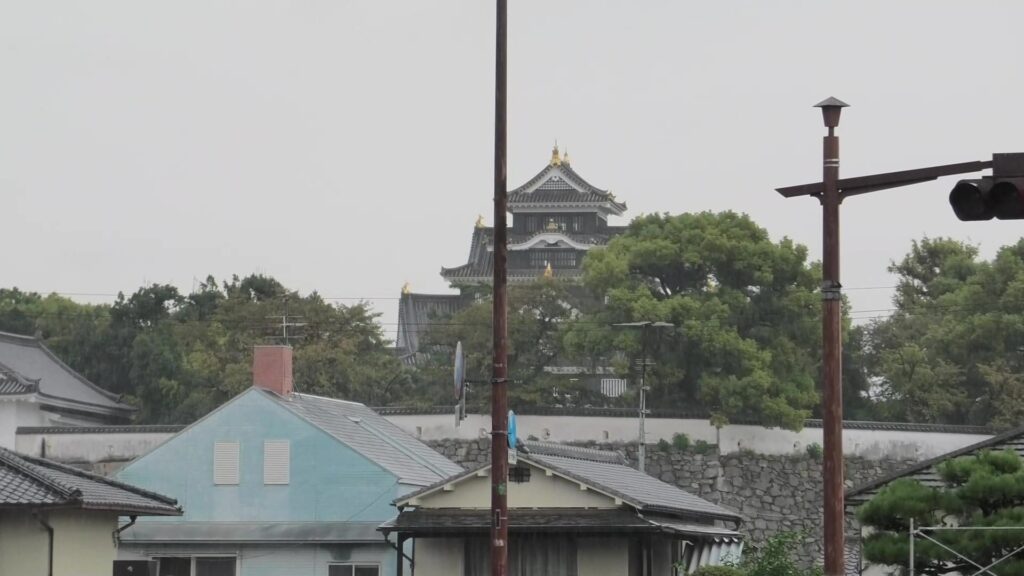
The ruins of the eastern gate,the ruin is not surrounded by a gate, so you might be tempted to step on the ruin. Please don’t because it could be dangerousThe ruins of Soken-yashiki Turret, I wonder what the number on the ground mean.The ruins of the turret, which was located in the senior vassal’s residenceThe main tower seen from the south
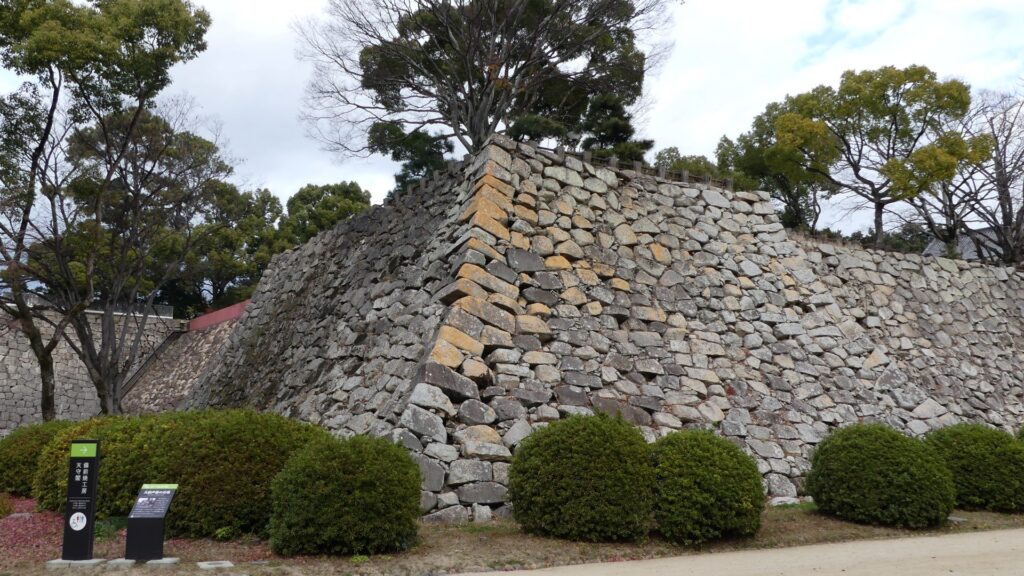
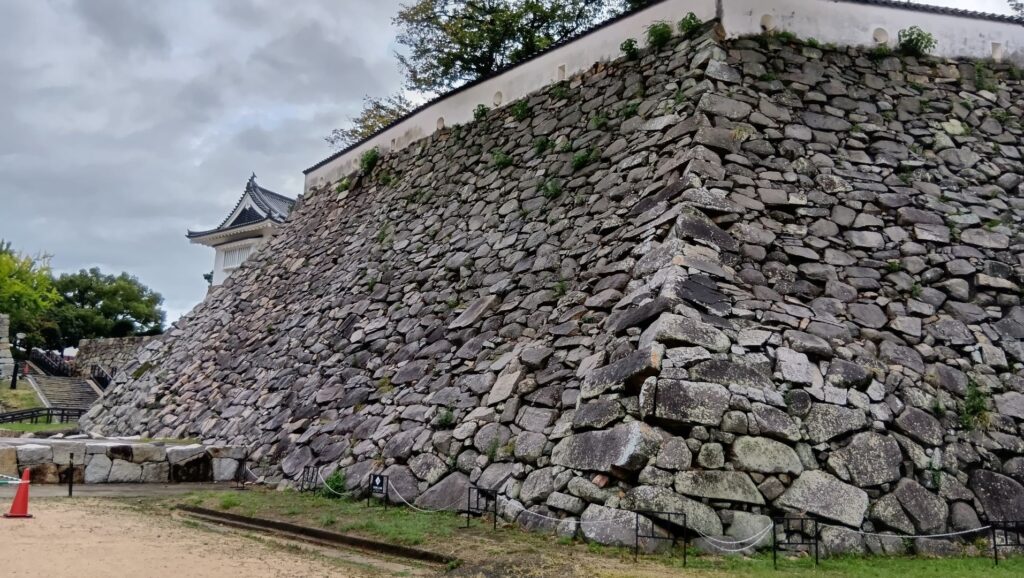
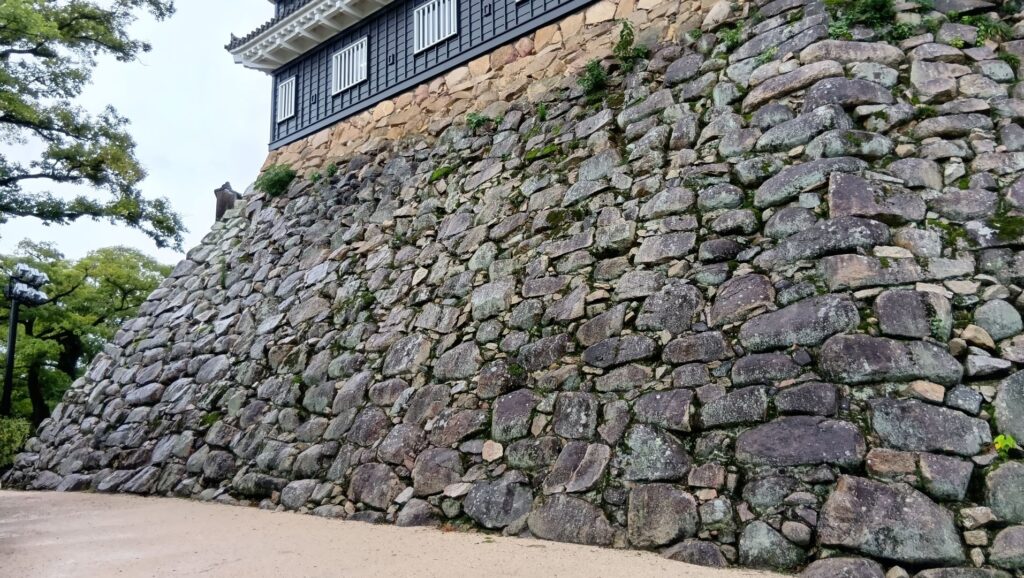
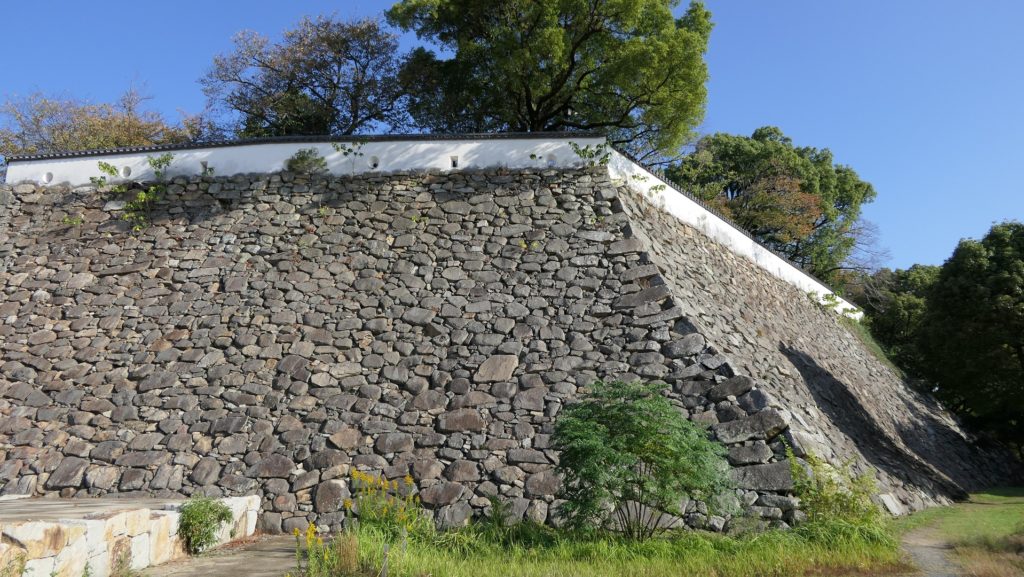
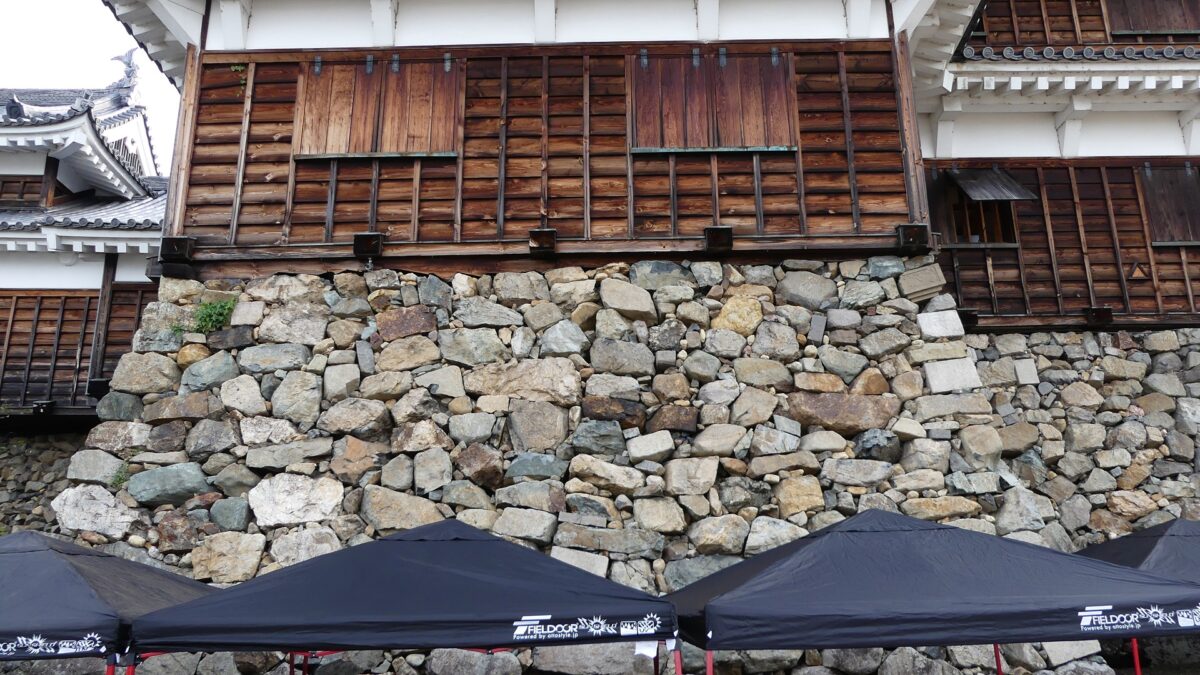
You should check out the amazing stone walls when you reach the main enclosure. They are called the high stone walls of the southeastern part of the main tier. They were piled up using natural stones in the method called Nozura-zumi during the Ukita period. Their height is about 15m which was one of the highest stone walls at that time. They look like those of Azuchi Castle, whose method was probably mimicked by Okayama Castle.
The high stone walls of the southeastern part of the main tier.The stone walls of Azuchi Castle; Notice the similarities between the corners of each wall having similar pilled up pattern
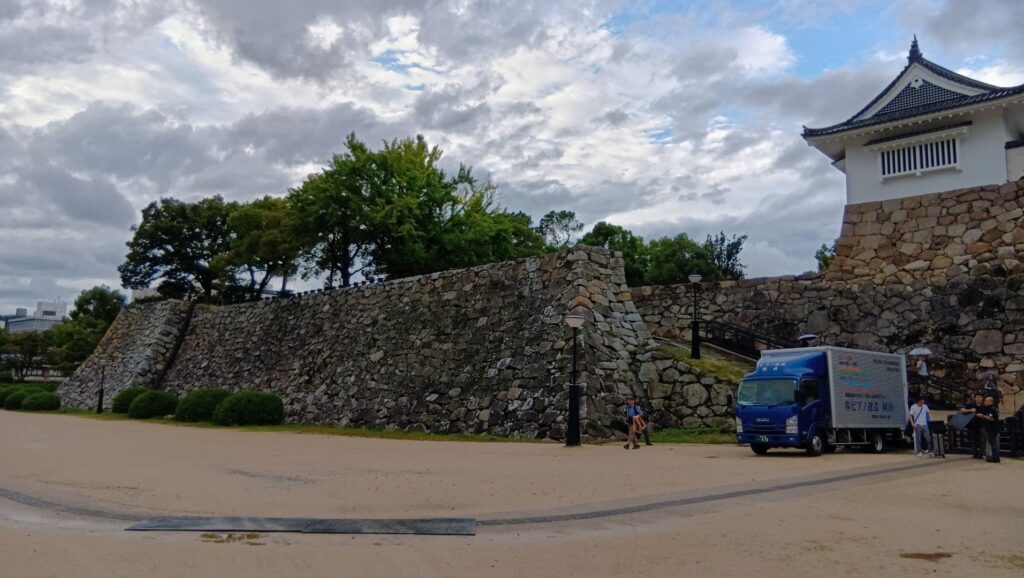
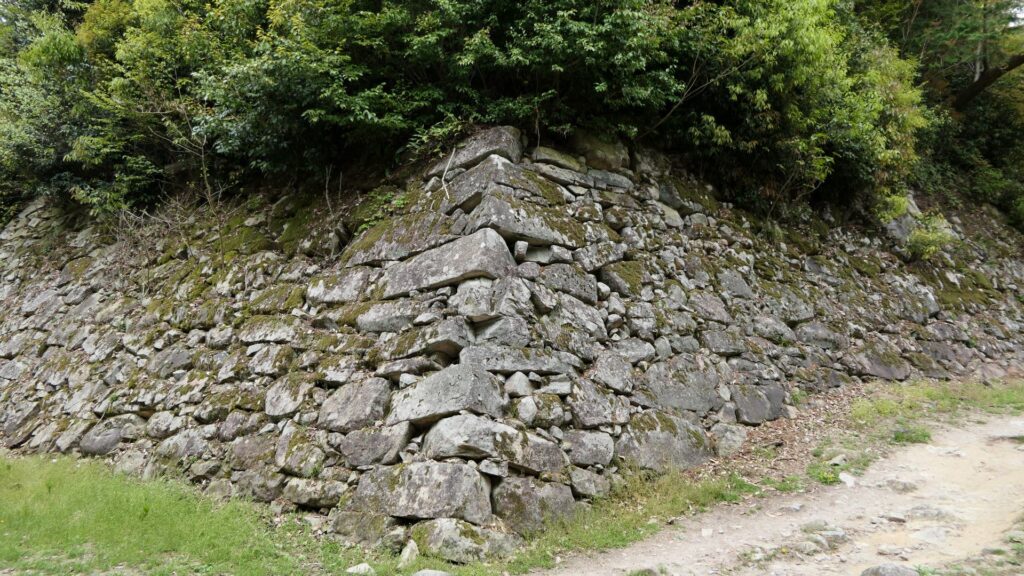
If you go further along the river towards the main tower, you will eventually find the joint section of the stone walls of the Ukita and Kobayakawa Periods. The sizes of the stones used during the Kobayakawa Period were smaller than those used in the Ukita Period. The reason for it is uncertain however, but it might have come from an urgent construction by the Kobayakawa Clan. You will eventually arrive at the stone wall base of the main tower after passing a gate which was built during the Ikeda Period.
The left side was built during the Ukita Period, and the right side of these stone walls were built during the Kobayakawa PeriodThe gate which was built during the Ikeda Period, Notice the partial metal gate sitting at the bottom of the stairs
Many of the stones of the base look burnt. This was because the original main tower collapsed on this side when it was burned down by a US Air Raid during World War II. These stone walls are a living witness to the Japanese history.
The stone wall base of the main tower; Notice the top layer of the stone wall has a different color. This top layer was added when the castle was renovatedLooking up at the main tower
You will soon enter the rebuilt back gate of the main enclosure, called Roka-mon, near the main tower. The inside of the gate is the middle tier of the enclosure.
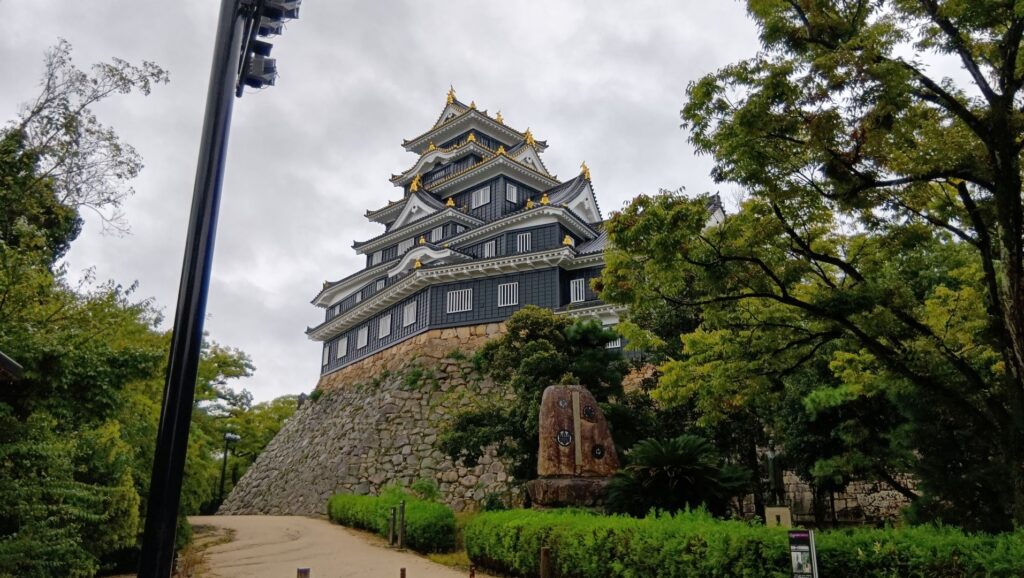
The main tower seen from a viewing spotThe Roka-mon Gate
Visiting the Main Tower and the Main Enclosure
Let us next enter the main tier of the main enclosure through the Akazu-no-mon Gate (which means the closed gate). The main tier was exclusive to the residences of the lord, so the gate was usually closed, which was the origin of its name. You will see the stone foundations of the original main tower, which are exhibited on the tier. They were moved to the current positions when the current tower was built.
The Akazu-no-mon GateThe stone foundations of the original main tower
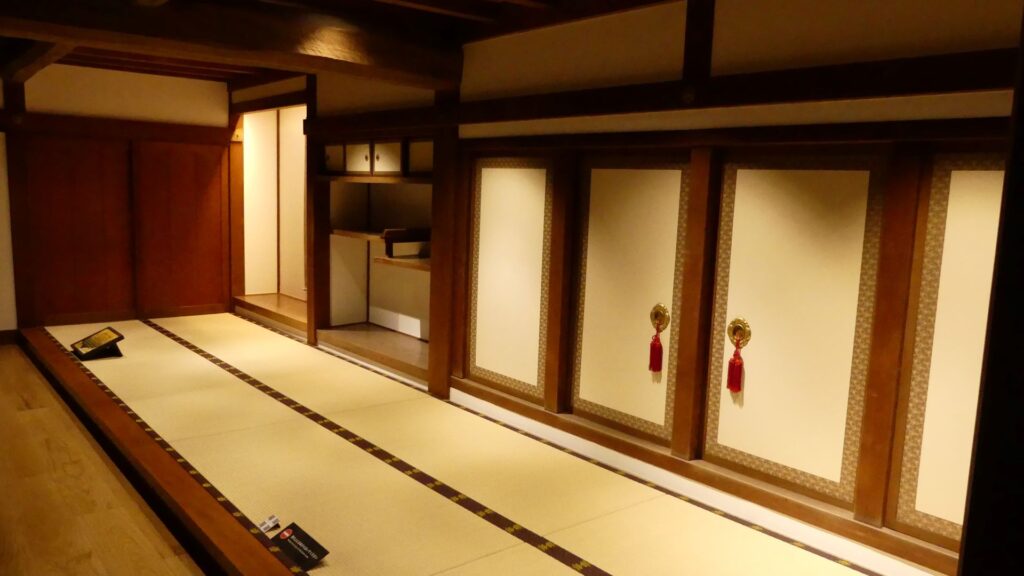
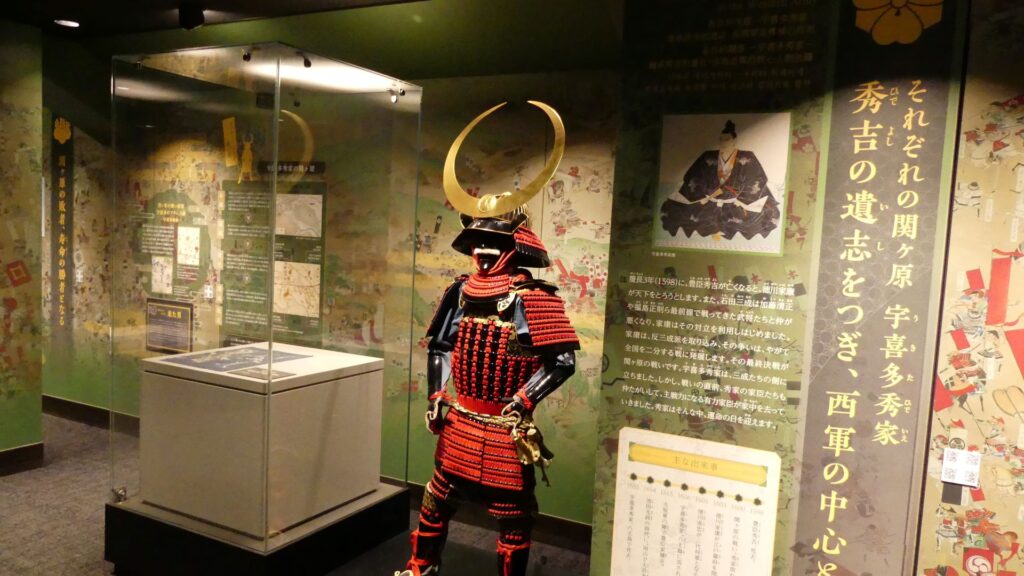
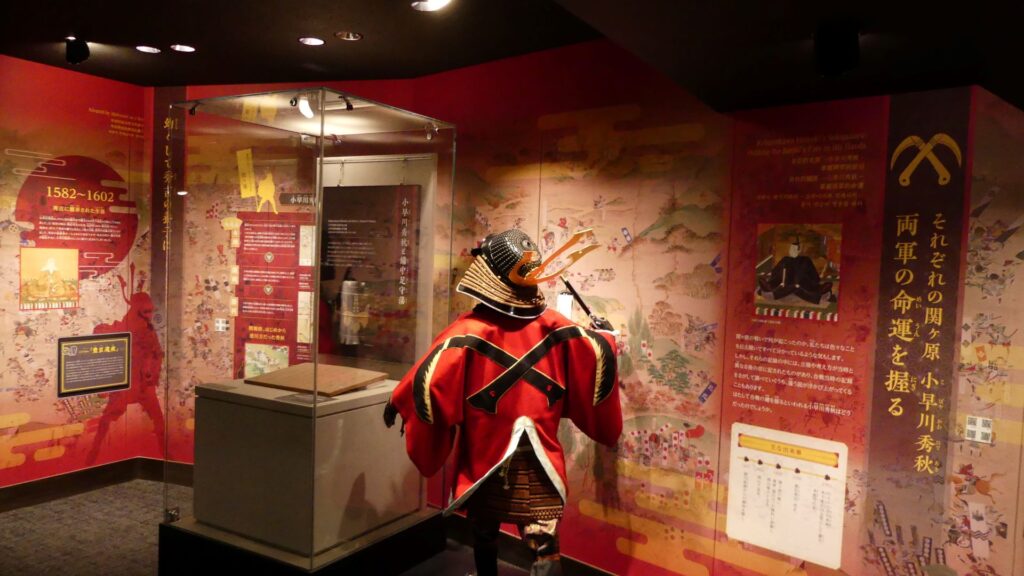
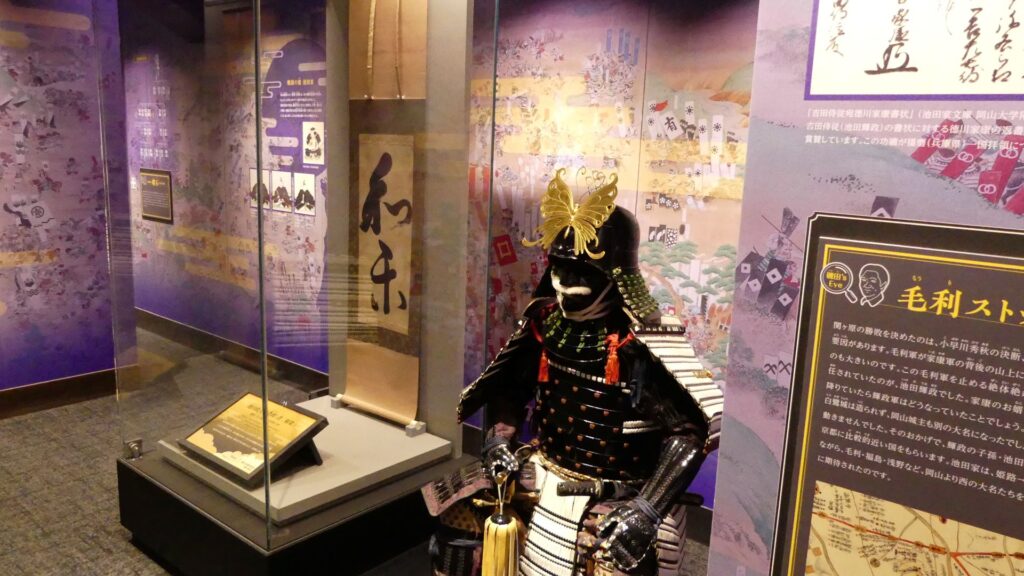
The current main tower has apparently been restored and is used as a historical museum. It was recently renovated as well. For example, the room for the lord, which had been built in the original main tower, was recreated in the current tower. There are also interesting exhibitions about the three lord families, called “Sekigahara for each”. They were all involved with the Battle of Sekigahara. The Ukita Clan joined the Western Allies, and the Ikeda Clan joined the Eastern Allies. Meanwhile, the Kobayakaya Clan switched from the Western to the Eastern Allies. Their different positions are exhibited using different theme colors.
The apparently restored main tower The basement floor of the towerThe recreated room for the lord on the 2nd floor, on the left side is the Tokonoma (Alcove)The Ukita Clan’s part of the Sekigahara exhibitions, represented by the color greenThe Kobayakawa Clan’s part of the Sekigahara exhibitions, represented by the color redThe Ikeda Clan’s part of the Sekigahara exhibitions, represented by the color purple
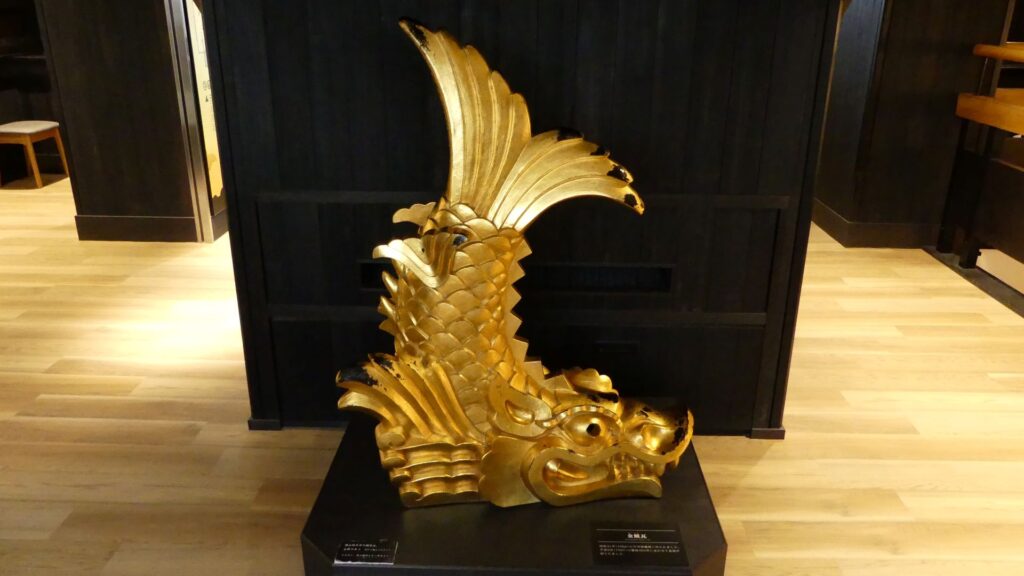
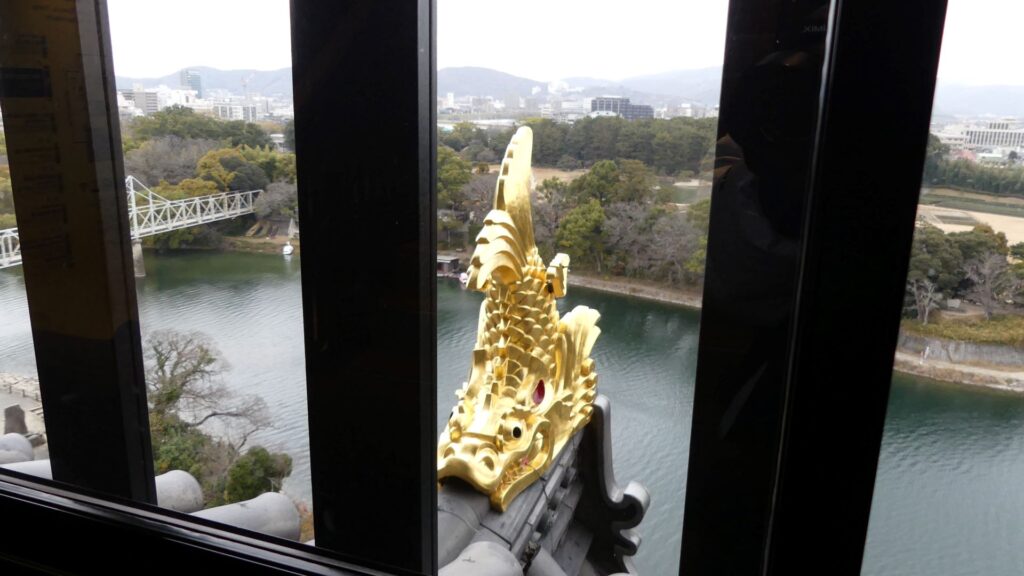
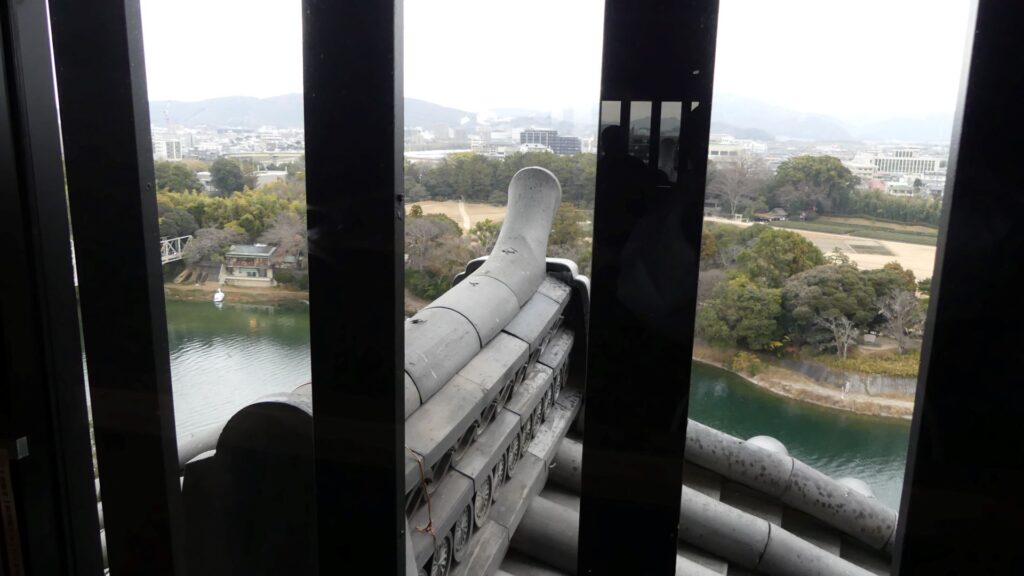
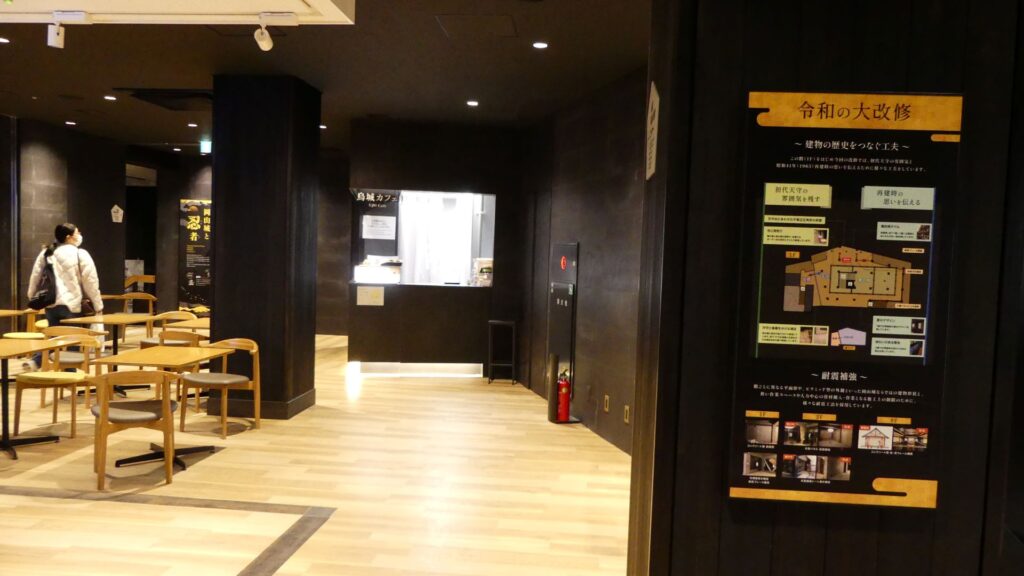
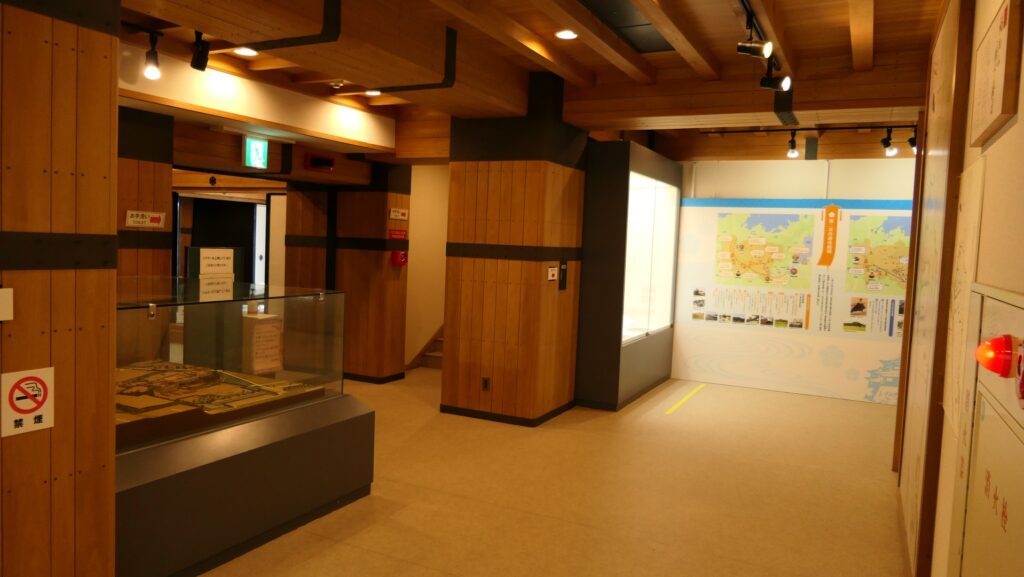
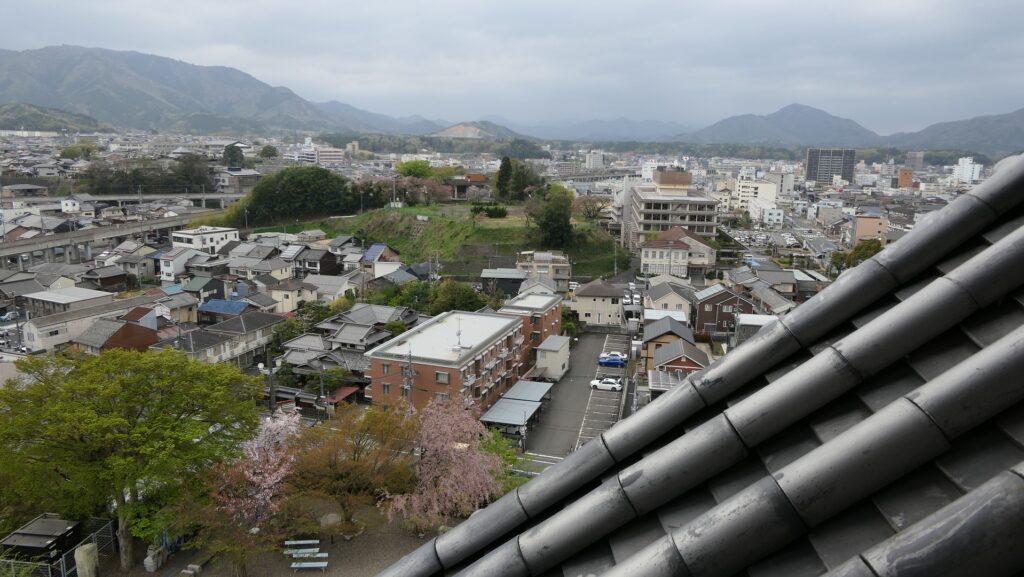
If you go up to the 5th floor of the tower, you will see the grampus rooftile with golden leaf, which is the same size as the one used outside. This tower has 8 grampus rooftiles, one of which can be seen from the floor. On the top (6th) floor, you can also see views around the tower, including Okayama Korakuen Garden. In addition, you can take a break at the café space located on the 1st floor, where you can learn more about the castle using the explanation videos with English subtitles. For example, the videos explain a day in the life of the lord.
The grampus rooftile with golden leaf, exhibited on the 5th floor, It was believed that the grampus rooftiles were represented by a fish, because the lords of the castle believed the fish could put out accidental firesOne of the grampus rooftiles on the roofs, seen from the 5th floorOkayama Korakuen Gaden seen from the top floorThe café space on the 1st floor
After getting out of the tower, it might be worth re-experiencing the day in the life of the lord. The lord usually went down from his residences at the main tier to the middle tier through another exit after he woke up. We will also leave the tier through the same route as the lord. The exit is beside the main tower which leads to the middle tier. The lord usually walked on the passage of the Roka-mon Gate (Roka means passage) while we will walk down on another slope.
The entrance of the passage of the Roka-mon Gate
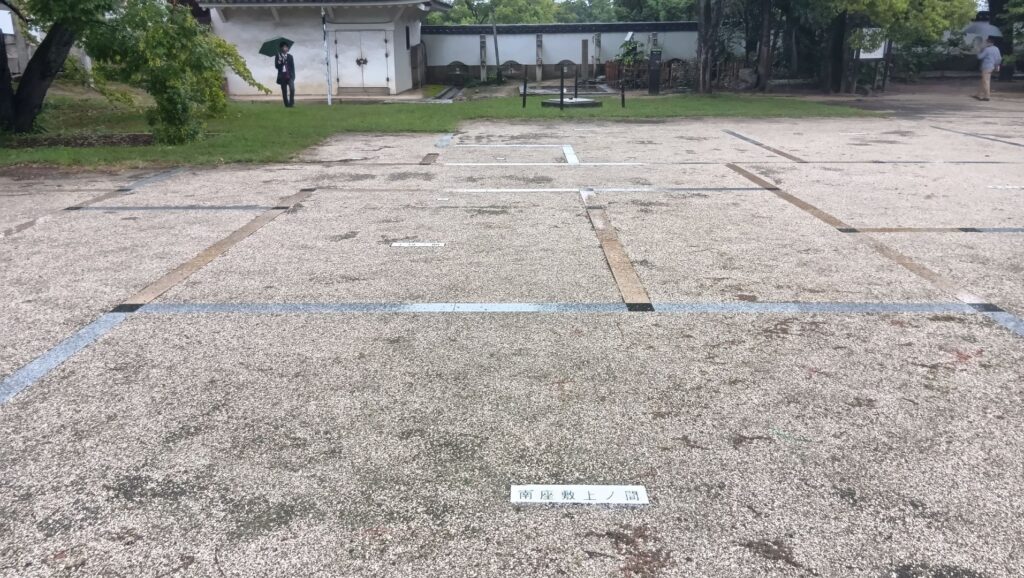
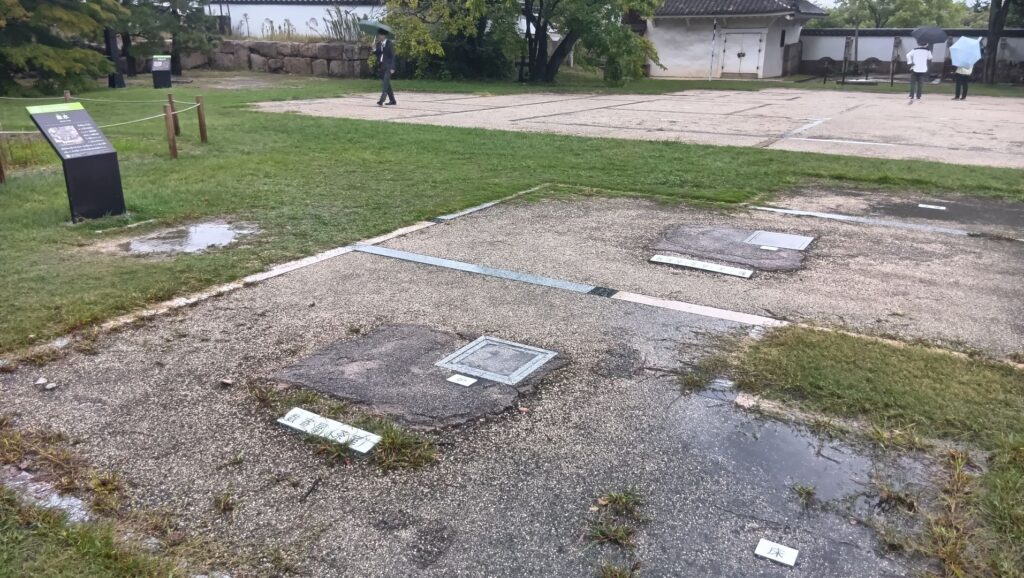
The lord entered Shounkaku room of the government office, called “Omote-shoin” to work. His work usually finished in the morning, so he would move to another room called “Minami-zashiki” to enjoy creating art. These rooms didn’t survive; however, their flat arrangements are exhibited on the middle tier. Therefore, we can easily imagine how he spent his days in the past. If he needed to discuss about important issues with his senior vassals, they would gather at the tearoom.
The middle tier in the front, the main tower in the back, and the Roka-mon gate on the leftThe ruins of the Omote-shoin office, there was the Shounkaku room in the back and the Minami-zashiki room in the frontThe ruins of the tearoom, the square figure sitting in the middle is a tea kettle
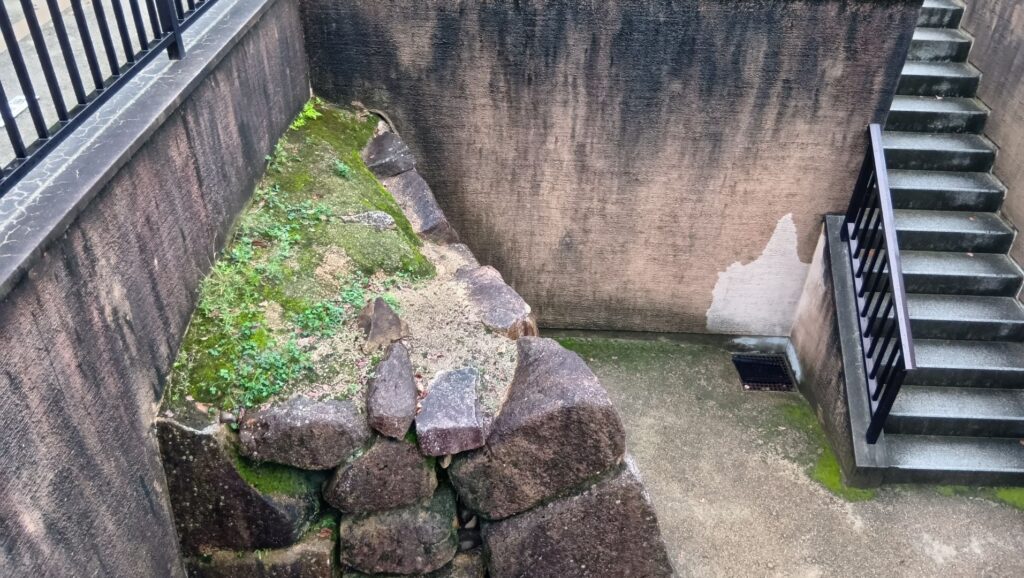
Another interesting item of the tier is the excavated stone walls of the Ukita Period. You need to walk down on the steps to see them. The walls are supposed to have been used as part of a gate. That means the middle tier was smaller than that of the Ikeda Period during the Edo Period.
The stone walls of the Ukita Period
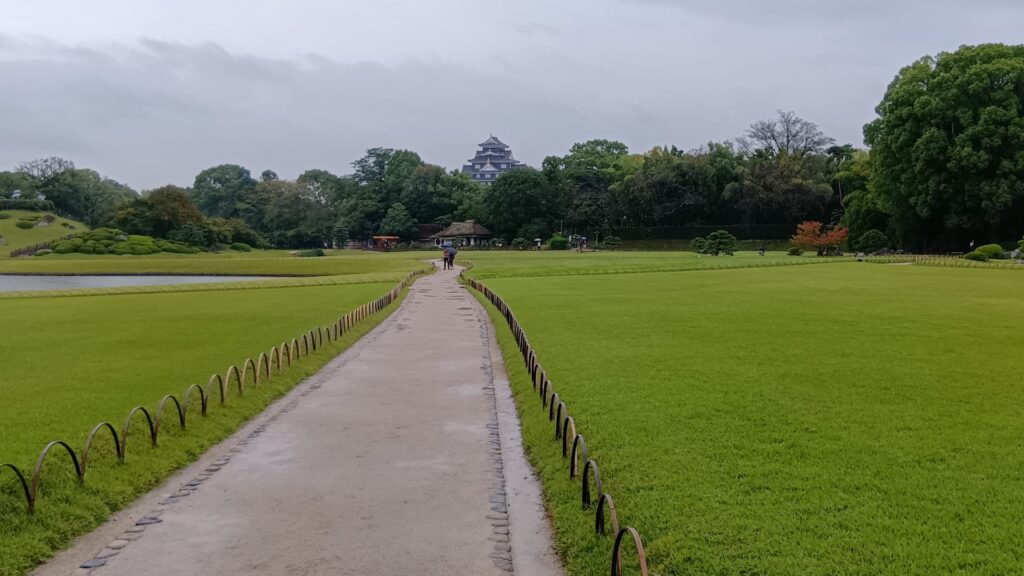
By Visiting Okayama Korakuen Garden, You will feel like the Lord
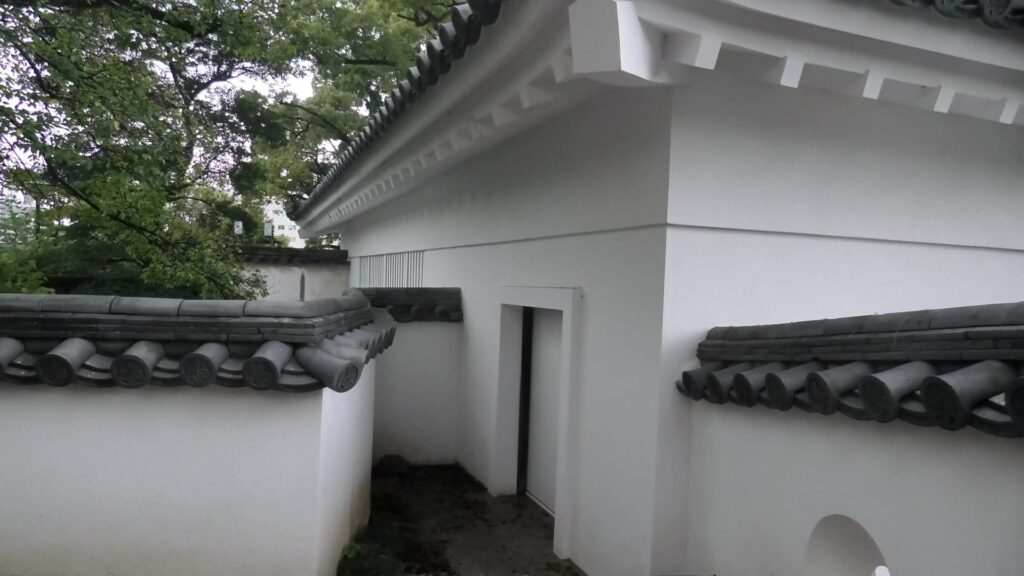
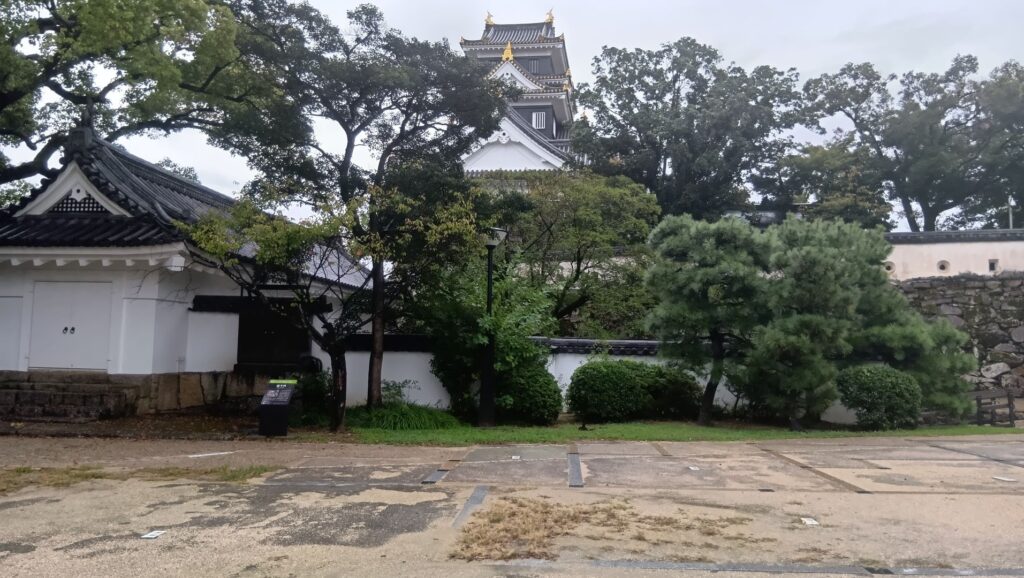
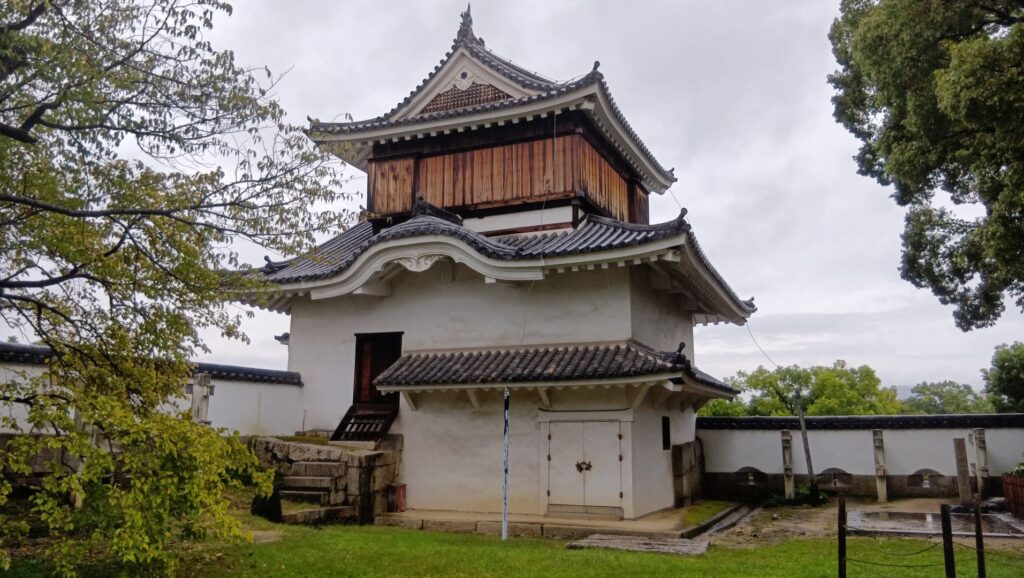
Before going to the garden, let us check out the Tsukimi Turret, the other remaining building of the castle, on the middle tier. It was built during the Ikeda Period, so it has a different appearance from the main tower which was originally built during the Ukita Period. In addition, the turret looks more elegant when you see it from the inside of the tier, but it looks different when you see it from the outside. It has machicolations on its outside to attack enemies. You will find gun holes on the stone walls next to the turret. These stone walls were piled up using well-processed stones in order to avoid enemies from climbing them. The walls of the turret are covered with thick white plaster to avoid them from burning from fires as well. That’s why it looks white in contrast to the black walls of the main tower. Some say it survived the air-raid during World War II unlike the black tower which burned. It has been designated as a National Important Property as well.
The Tsukimi Turret (inside), Notice the wooden curtain on the top floor, which are used to cover the windowsThe Tsukimi Turret (outside)You can see some gun holes on the wall
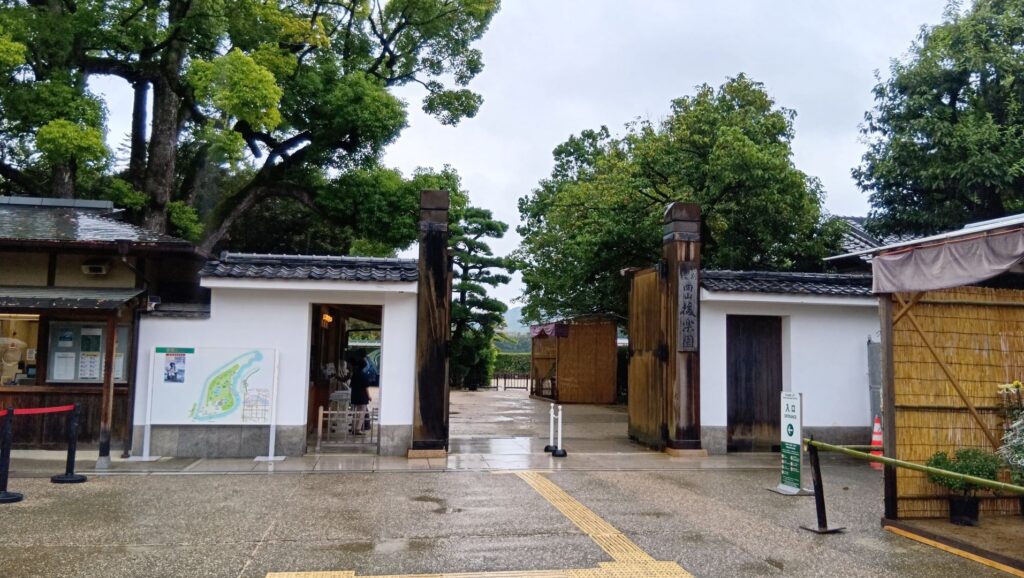
Then, we will next go to Okayama Korakuen Garden.
Tsukimi Bridge to the gardenThe front entrance of the garden
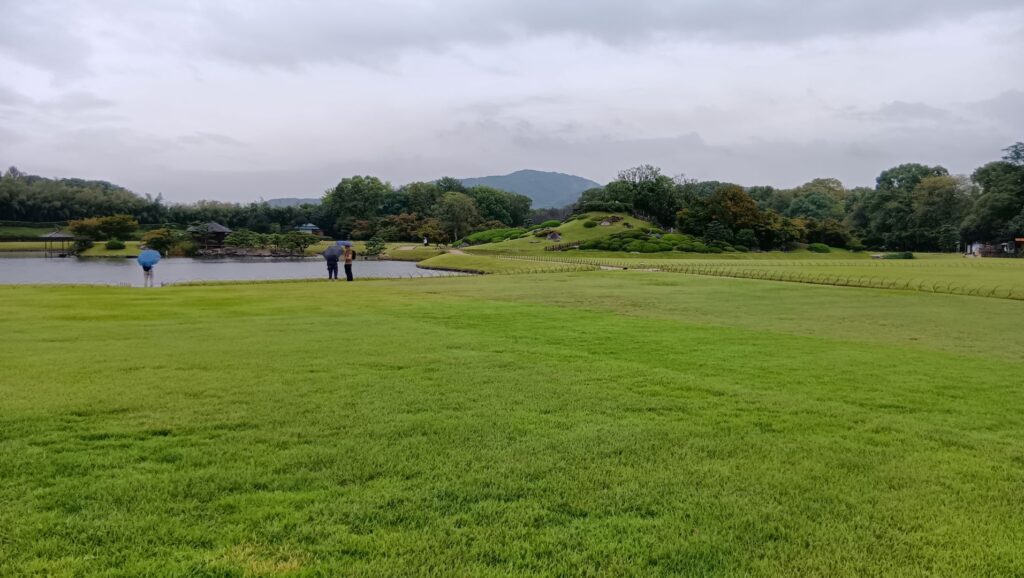
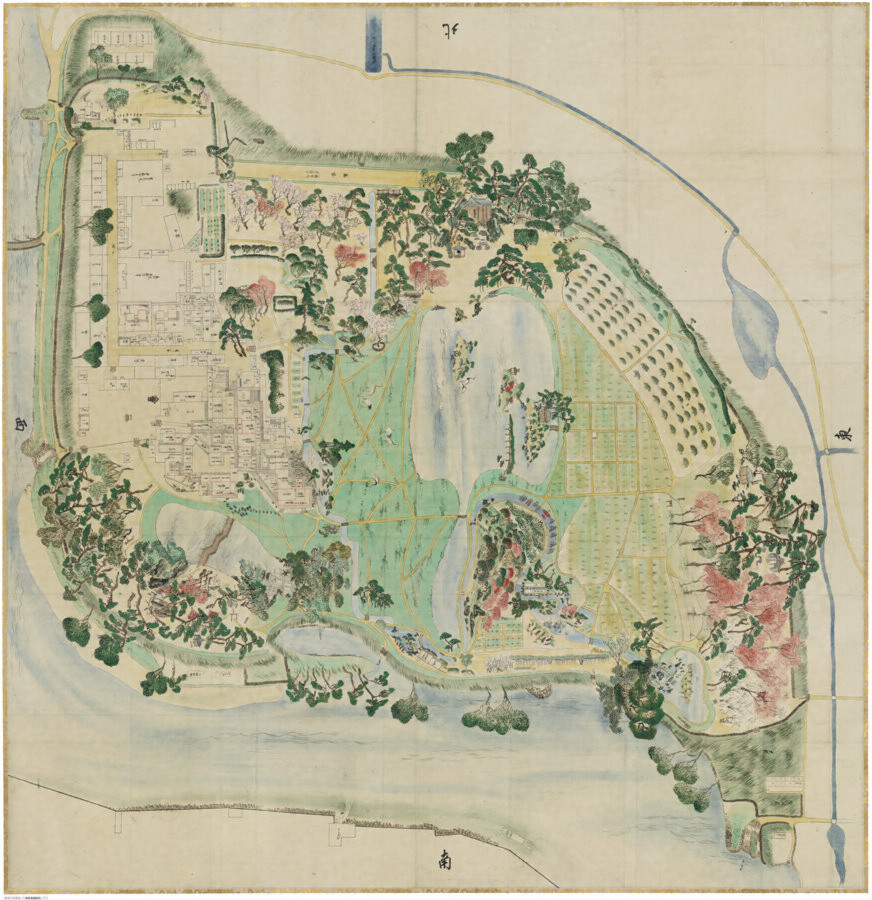
In this garden, natural scenery outside is used as the background for it, which includes Okayama Castle.
Natural scenery with the background of Misaoyama Mountain in the distance located in the center of the pictureNatural scenery with the background of Okayama Castle
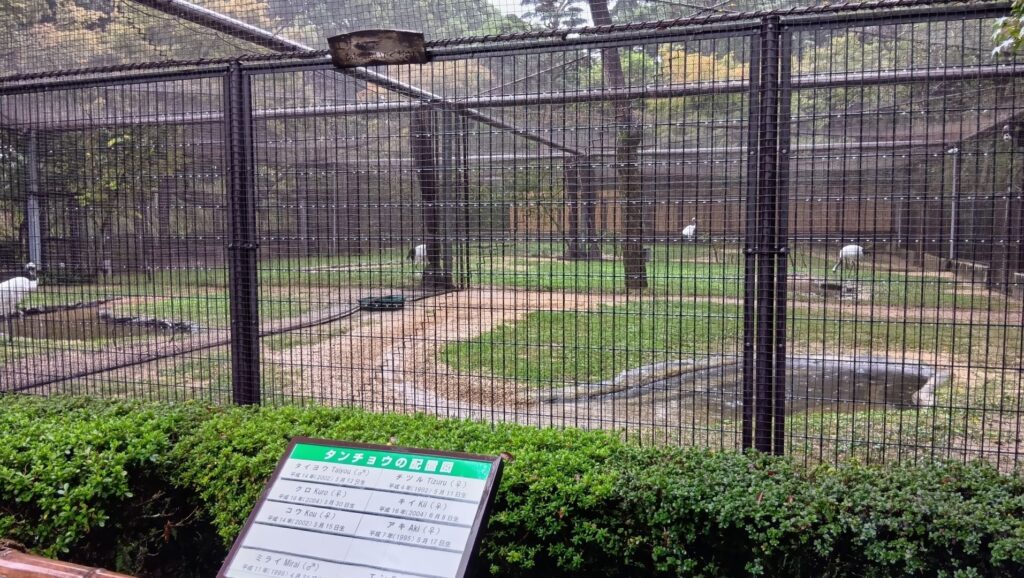
Some red-crowned cranes are kept in the cage of the garden. However, they were let loose around the garden in the past. They are currently let loose around it on some days in autumn and winter.
The red-crowned cranes are kept in the cage
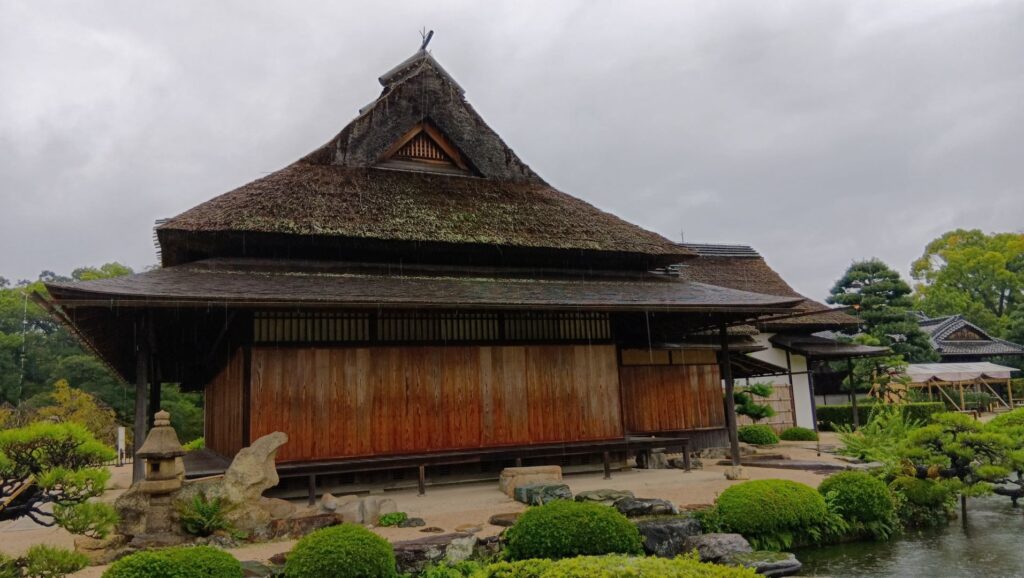
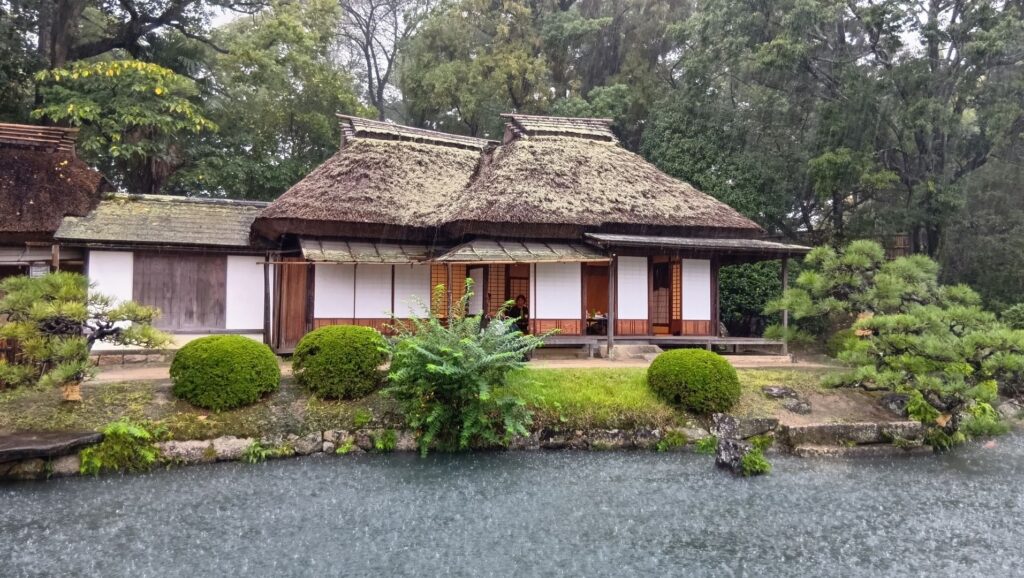
This is the living room for the lord, called “Enyotei”. The original one was burned down during the World War II but was eventually restored.
The Enyotei living room
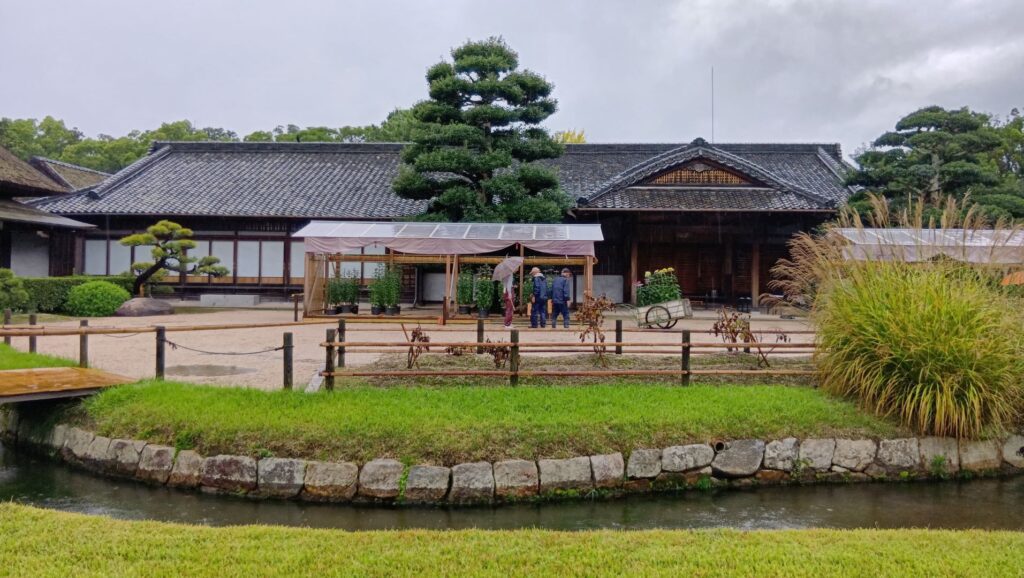
There was also the guest house, called Kakumeikan (which means cranes’ crying voice hall) next to the Enyotei room, but it was burned down at the same time. After that, the residence the Kikkawa Clan had used at Iwakuni was moved to the current position and used as the current Kakumeikan.
The Kakumeikan residence
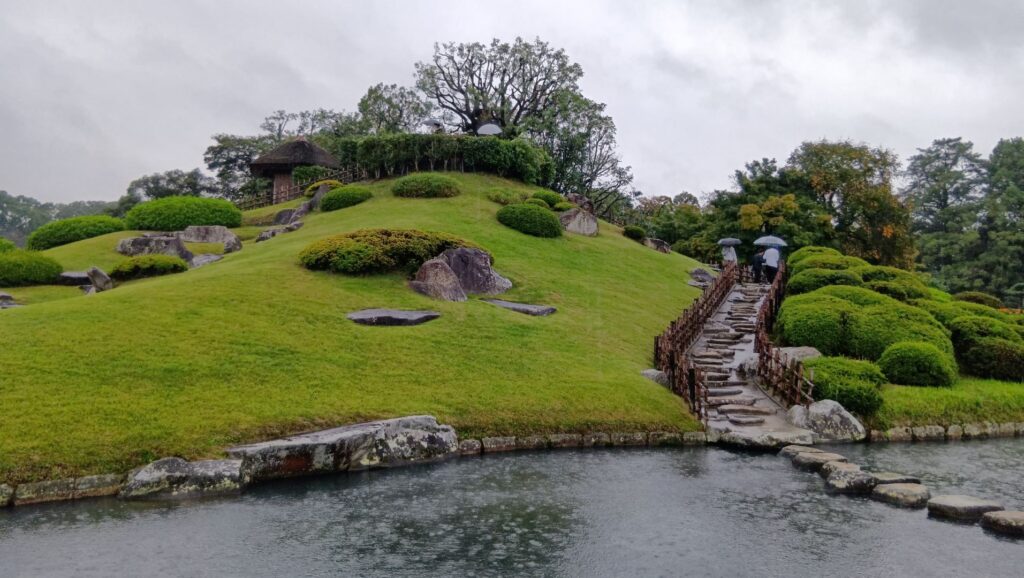
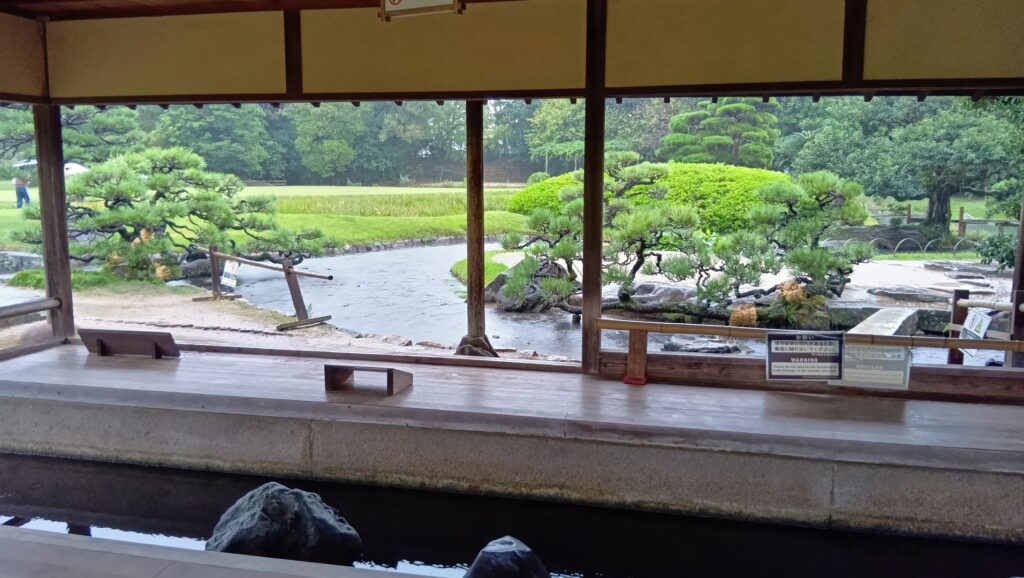
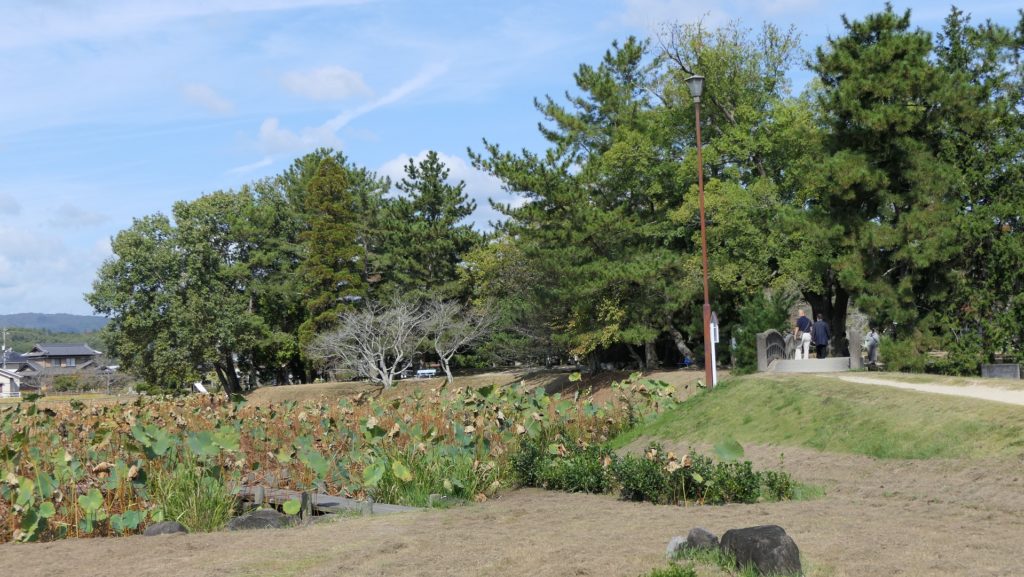
The artificial hill in the center of the garden, called “Yuishinzan”, was built by Tsugumasa Ikeda who was the successor of Tsunamasa Ikeda, the founder of the garden. You can see the grass and ponds in the garden very well from the top. You may also find a small rice farm, called “Seiden”. It is said to be the remains of what the garden originally looked like when the founder first built it.
The Yuishinzan hillThe Seiden rice far, Notice part of the rice farm is occupied by water lilies
There is also a rest house, called “Ryuten”, which is one of the few remaining original buildings of the garden. You can sit and rest there while looking the scenery of the garden. Renchiken is another remaining building which looks like a farmer’s house. Tsunamasa liked it very much and often stayed there and sometimes invited his excellent retainers for ceremonies.
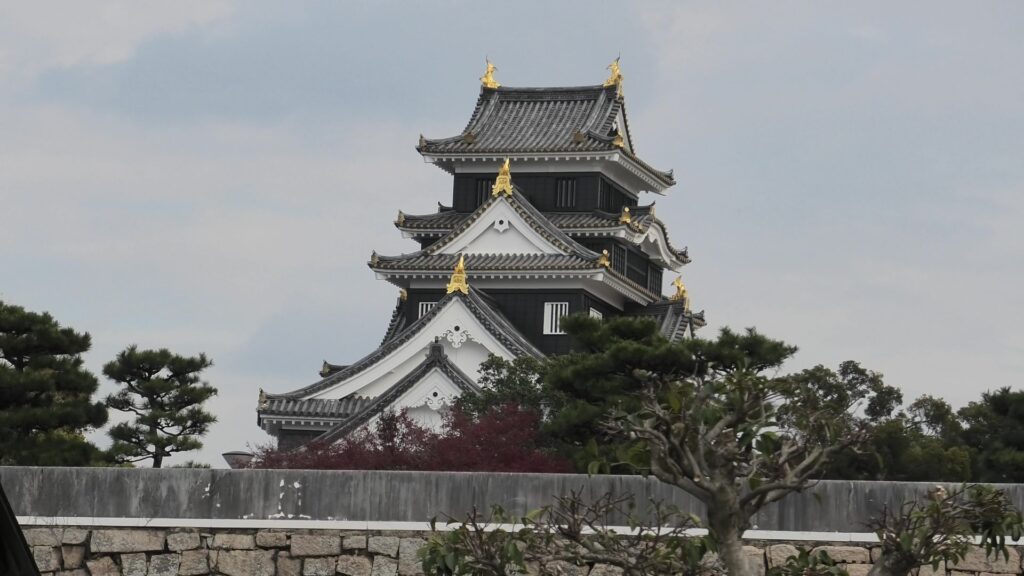
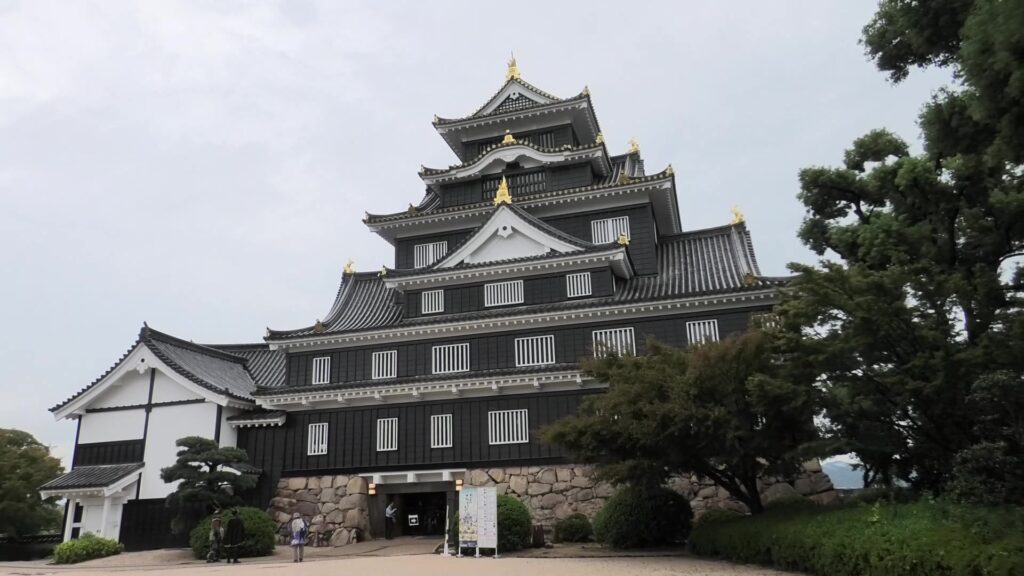
Okayama Castle was still located in Okayama City which is the prefectural capital of Okayama Prefecture. Its main tower was nicknamed as “Ujo” which means “Crow Castle” because of its black colored walls. This article will explain its story from the beginning to its completion.
Location and History
Introduction
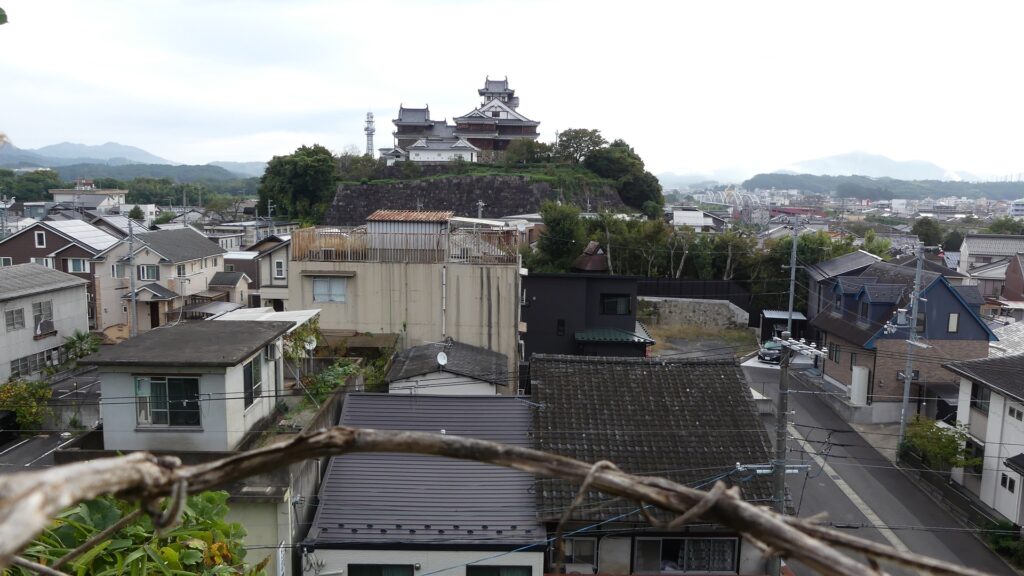
Okayama Castle was still located in Okayama City which is the prefectural capital of Okayama Prefecture. Its main tower was nicknamed as “Ujo” which means “Crow Castle” because of its black colored walls. Although the original main tower was unfortunately burned down by the Okayama Great Air Raid on the 29th of June in 1945, it was apparently fully restored in 1966. There is the Okayama Korakuen Garden across the river from the castle, which is called one of Japan’s three most beautiful gardens. Therefore, the area around is a very popular tourist spot. The area was created not for a short time but for a long time between three different lord families. They are the Ukita Clan which built the castle, the Kobayakawa Clan which modernized it, and finally the Ikeda Clan which completed it. As a result, the castle became the origin of the city. This article will explain its story from the beginning to its completion.
The current main tower of Okayama Castle
Was Naoie Ukita an Accomplished Villain?
Naoie Ukita became a great warlord around the current Okayama Prefecture in his life during the Sengoku Period. However, he wored so hard to achieve this that he has been labeled “an accomplished villain” or “One of the three great villains” in the period (the other two were Dosan Saito and Hisahide Matsunaga”). The bad reputation started from the first Edo Period. Hoan Oze, a writer at that time, described it in his “Hoan Taikoki” which is a popular biography of Hideyoshi Toyotomi. He wrote as followed:
“A person, who has a good talent, but uses it for his own benefit against justice, would eventually destroy himself.”
He mentioned Naoie in the example above. Hoan was devoted to Confucianism, therefore, he seemed to look back at the Sengoku Period to make a consequence theory. As a reality, most warlords were also something like Naoie which Hoan wrote, but as a result, most people during the peaceful Edo Period accepted Hoan’s theory. The three villain’s family’s power declined then because of financial reasons; therefore, they lost the ability to complain about it.
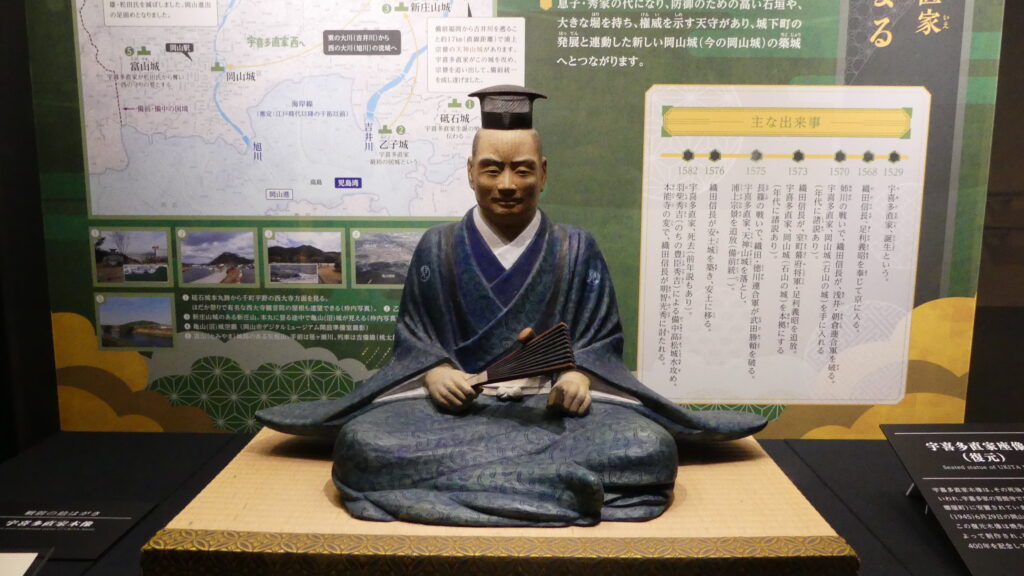
The restored wooden statue of Naoie Ukita, exhibited by Okayama Castle
The theory was accelerated by the Bizen Gunki, a war chronicle which was written during the late Edo Period. This book is one of the few remaining records which say Naoie’s early days as followed:
“Naoie and his family were attacked by an enemy but managed to escape from their castle and wandered when he was only a little child. After he grew up, he served the Uragami Clan and avenged the enemy. He also got promoted because of his talent. However, he worked hard for this. For example, he even killed his relatives even they were his son-in-laws. He used any means necessary such as tricks, assassinations and the use of poison. He eventually defeated his master to become a great warlord.”
The book makes us believe that Noaie was really an accomplished villain. However, recent studies are confirming these descriptions one by one. So far, some of them are false (for example, one of the murders was not actually committed by Naoie). The work is incomplete and vague. If more evidence comes out in the future, Naoie might actually be seen as a hero rather than a villain. Even though many of the descriptions are confirmed, they may have been common ways for warlords to survive. In addition, the hierarchical system was very chaotic and unstable during the Sengoku Period. It was often revised and changed because of the power struggle that often plagued the Senoku Period, unlike the peaceful Edo Period.
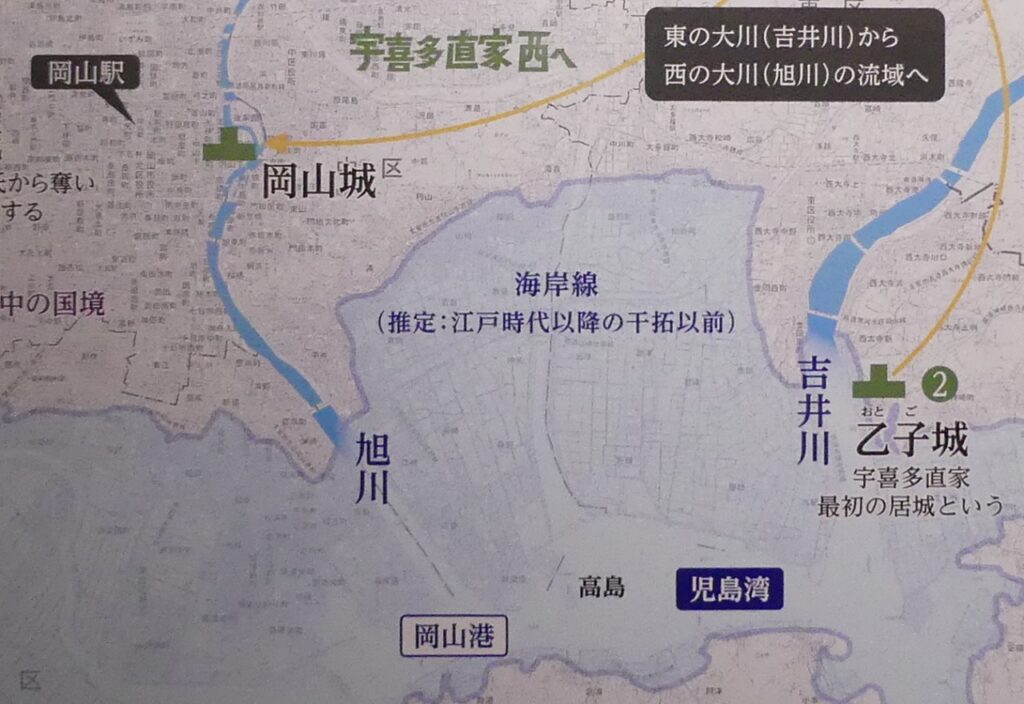
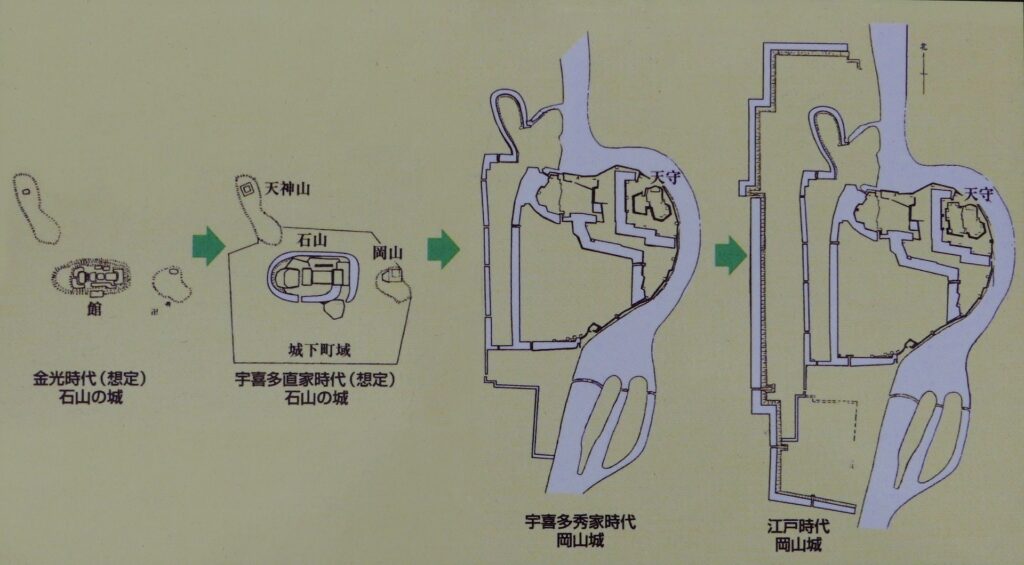
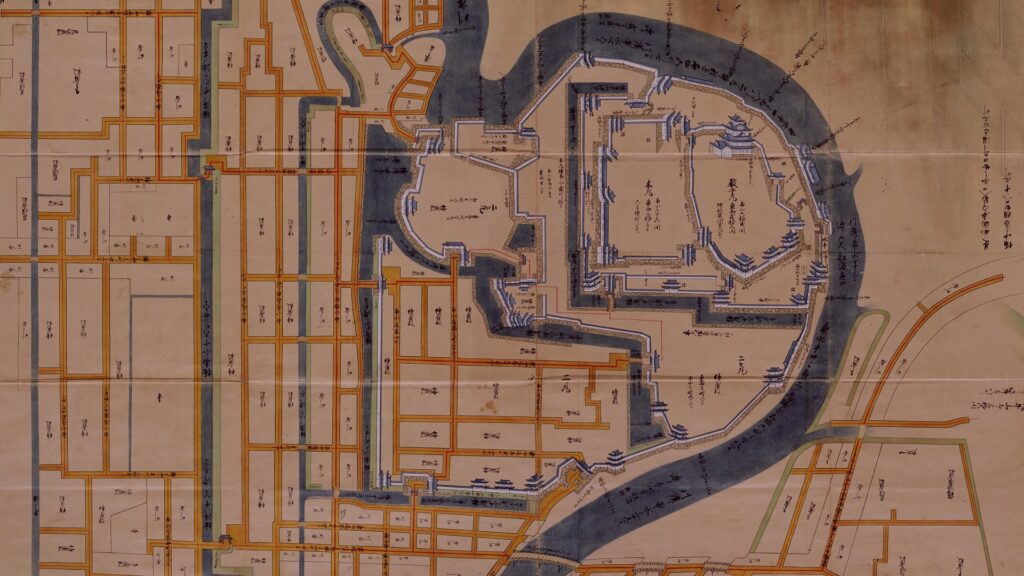
Naoie’s last home was Okayama which was near the Seto Inland Sea to the south at that time. The location was good for land and water transportation. It was on the delta of estuary of Asahigawa River which flowed into the sea. The delta had three hills, one of which was called Ishiyama (which means stone mountain), where Naoie built the main enclosure of the castle. Another one was called Okayama, which was the origin of the castle and the current city’s name. The scale of the castle was still small. However, Naoie expected that the castle and town would eventually prosper.
The imaginary map around the Okayama area before the Edo Period, exhibited by Okayama CastleThe range of Okayama Castle during Naoie’s period, exhibited by Okayama Castle
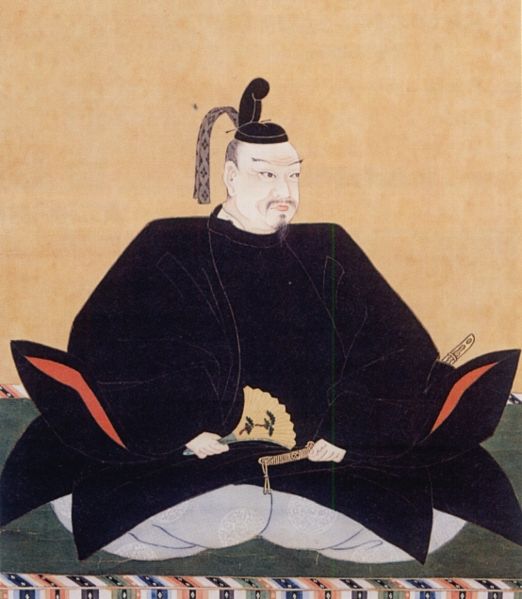
After Naoie became a great warlord, his actions were recorded multiple times. However, the records say Naoie was worried about his last decision. In the late 1570’s, the Oda Clan and the Mori Clan battled each other over the Chugoku Region including Naoie’s territories. He was on the Mori’s side and fought against the Oda Clan. At first the Mori Clan was more superior than the Oda Clan which eventually changed. Naoie seemed to continue watching this trend while keeping a cool head. He finally decided to switch over from the Mori to the Oda in 1579 through the agency of Hideyoshi Hashiba who was a senior vassal of the Oda Clan. That meant Naoie would become the frontline against the Mori Clan. Severe battles continued for a while. Naoie unfortunately got sick and eventually died around January in 1582 (according to the lunar calendar). Hideyoshi wanted to expand his empire. He entered Okayama Castle in April and battled against the Mori Clan at Bicchu-Takamatsu Castle in May before the Honnnoji Incident happened in June, which resulted in him being the next ruler. As a result, Naoie’s decision was correct.
The portrait of Nobunaga Oda, attributed to Soshu Kano, owned by Chokoji Temple, in the late 16th century (licensed under Public Domain via Wikimedia Commons)The portrait of Terumoto Mori, owned by the Mori Museum (licensed under Public Domain via Wikimedia Commons)The ruins of Bicchu-Takamatsu Castle
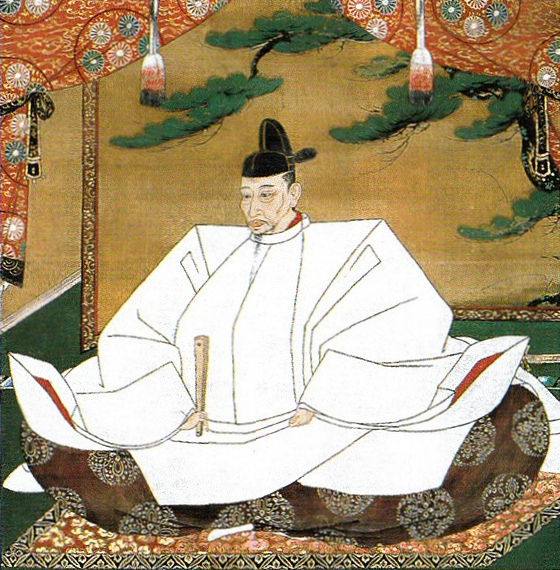
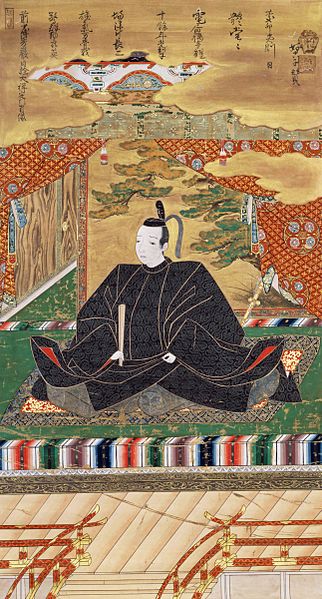
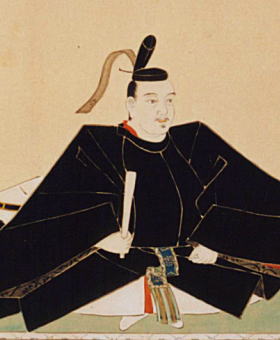
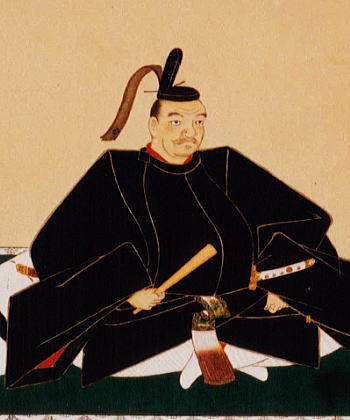
Hideie Ukita, a young nobleman of the Toyotomi Government, develops the Castle
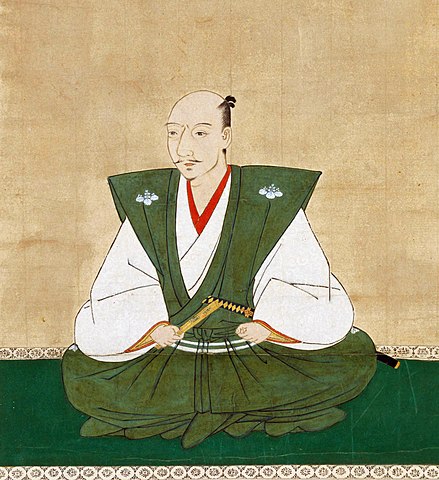
Hideie Ukita followed his father, Naoie when he was only 11 years old but was supported by his relatives. The Ukita Clan joined the unification of Japan by Hideyoshi Toyotomi (who changed his name from Hashiba). Hideie was eventually promoted by Hideyoshi finally as a member of the council of the 5 elders. He was the youngest member in the council (at only 27 years old) while the others were all over 40. Historians speculate that there are 4 reasons for his early promotion.
The portrait of Hideie Ukita, owned by Okayama Castle (licensed under Public Domain via Wikimedia Commons)
Hideyoshi felt an obligation for the contributions of the Ukita Clan The clan joined Hideyoshi’s troops during the most important period of his unification of Japan.
The affection from Hideyoshi to Go-hime, Hideie’s wife Go-hime was a daughter of Toshiie Maeda, who was adopted to Hideyoshi when she was a baby. Hideyoshi loved her very much because he didn’t have children then. However, he finally got more children later on his life. Her husband was Hideie. When she suffered from a terrible sickness, Hideyoshi blamed it on the curse of the foxes. He ordered Fushimi Inari Shrine to pray for her recovery (the shrine uses foxes as envoys). He also declared that he would destroy the shrine and hunt foxes every year if she died. She fortunately recovered. Go-hime was the important connection between Hideyoshi and Hideie.
The good relationship between Hideyoshi and Hideie himself There are no records that indicate Hideyoshi, who was a whimsical ruler, was ever angry at Hideie. Hideyoshi once announced that Hideie would be the ruler of Japan or Korea during the first stage of his invasion of Korea. (Hideyoshi himself wanted to rule China.) Hideie didn’t have his own military contributions but was often active fighting which might have been admired by Hideyoshi. He also spent huge amount of money and time for Noh plays, tea ceremonies, and falconries (using a falcon for hunting), which Hideyoshi also liked. In addition, you might think he was handsome person when you look at his portrait. However, the image above was drawn during the Showa Era using the author’s imagination.
4, Hideyoshi wanted to promote his relatives When Hideyoshi got old, all of his male relatives were all gone excluding his only son, Hideyori. For example, the ex-successor, Hidetsugu was forced to kill himself by performing Harakiri. Hideyoshi’s brother, Hidenaga died because of illness. Hideie might have been considered one of his few relatives who would support Hideyori in the future.
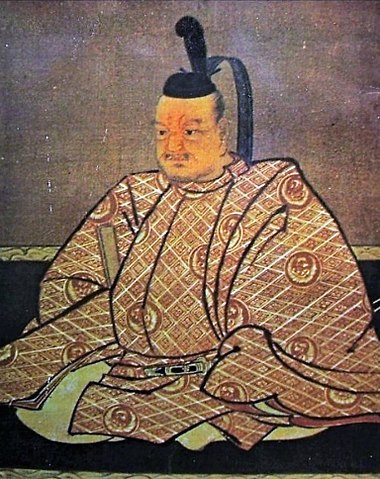
The Portrait of Hideyoshi Toyotomi, attributed to Mitsunobu Kano, owned by Kodaiji Temple (licensed under Public Domain via Wikimedia Commons)
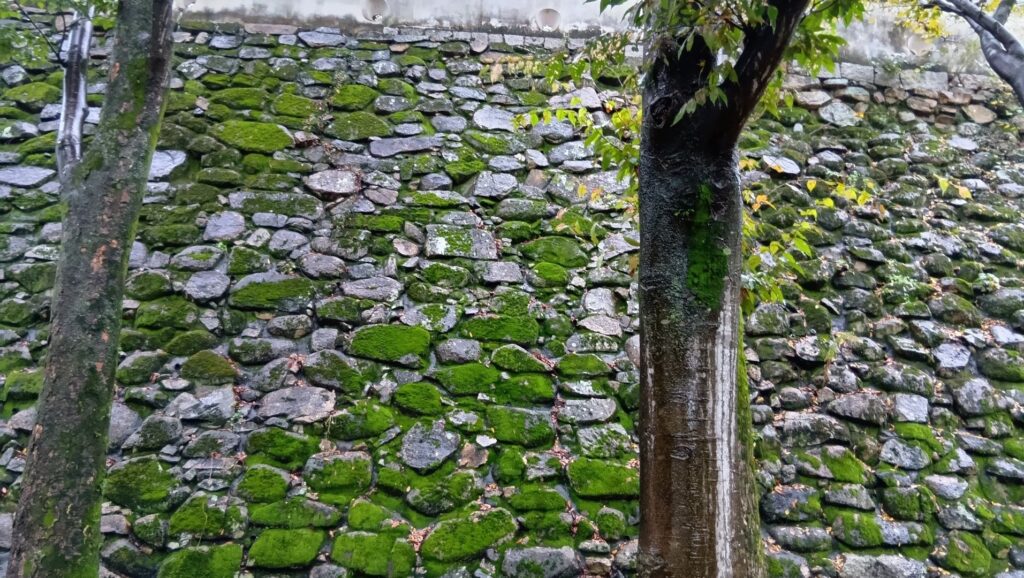
Hideie was also a great lord who several territories with about 500,000 Koku of rice. Okayama Castle was renovated as his home. It was said that the construction was done between 1590 and 1597. The center of the castle was moved from the Ishiyama hill to the Okayama hill to the east. The new center (the main enclosure) was surrounded by high stone walls which was over 15m high. They were built piling up natural stones, which was called the Nozura-zumi method. Asahigawa River had been diverted into several flowing rivers around the castle but was converged as a natural moat in the north and east of it. Many other enclosures were also built in the southern and western parts of the castle, which were surrounded by artificial moats. The castle town was well developed. However, Hideie was so busy that he couldn’t live there for a long time. However, he sent his instructions on how to build the castle town to Japan from Korea where he was positioned during the invasion.
The transition of the scale of the castle, the second one from the left is Naoie’s period and the third one is Hideie’s period, notice the diversion of the riversThe range of Okayama Castle during Hideie’s period, exhibited by Okayama Castle, The dark blue line represents the convered river flow that turns into one big moatThe remaining stone walls of Hideie’s period
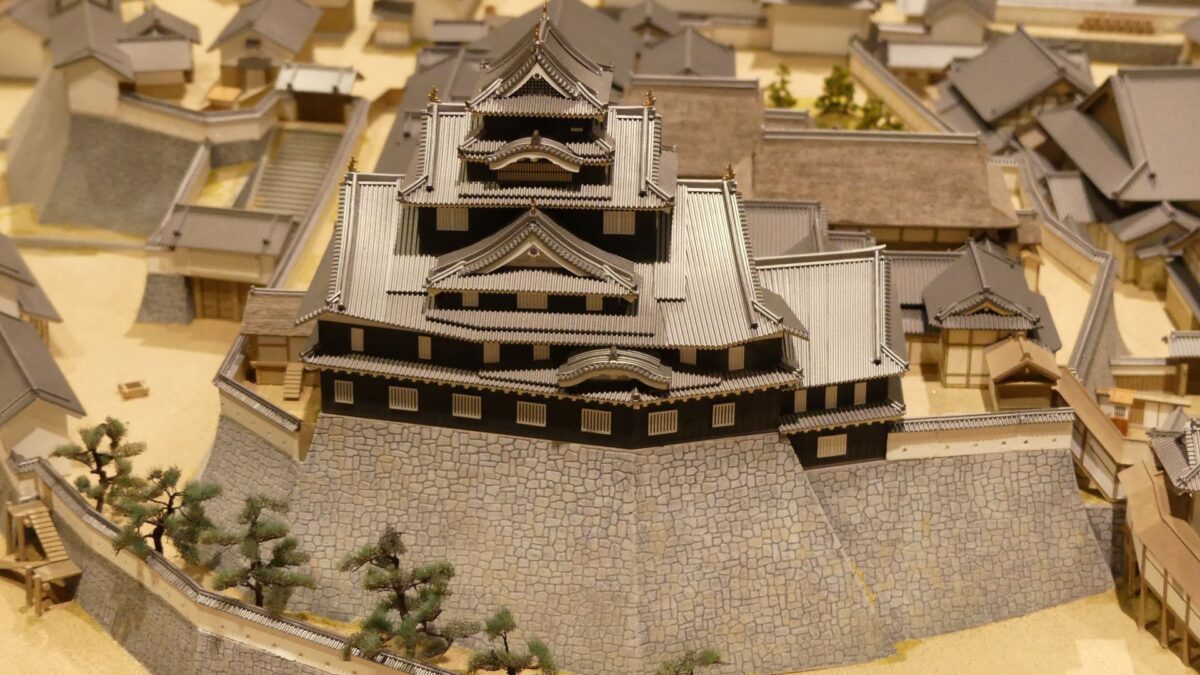
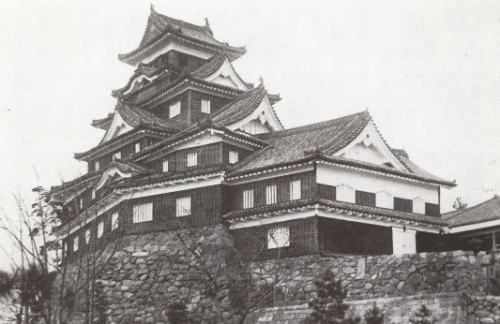
The most interesting thing of the castle was its main tower as the symbol. It officially had 3 levels with 6 floors (however, some historians consider it 4 or 5 levels because of its complex roofs). It was over 20m high (about 35m in total including its stone wall base). The base was built along the natural terrain as the techniques were still primitive at that time. Therefore, the base became a scalene pentagon on a plane. As a result, the first floor became the same shape as the base. As you go higher, the shape turns into a square. Because of the complex floors, the first and second levels looks like multiple turrets and the top level like a lookout point was on them. This style is called “Boro-gata” (means the lookout type). The main tower of Okayama Castle is said to have followed the style of Nobunaga Oda’s Azuchi Castle and Hideyoshi’s Osaka Castle. The walls of the tower were painted black, which originated from the nickname of the castle, “Ujo” (means Crow Castle). In addition, the castle was decorated by rooftiles using gold leaves, which needed special permission from Hideyoshi to be used.
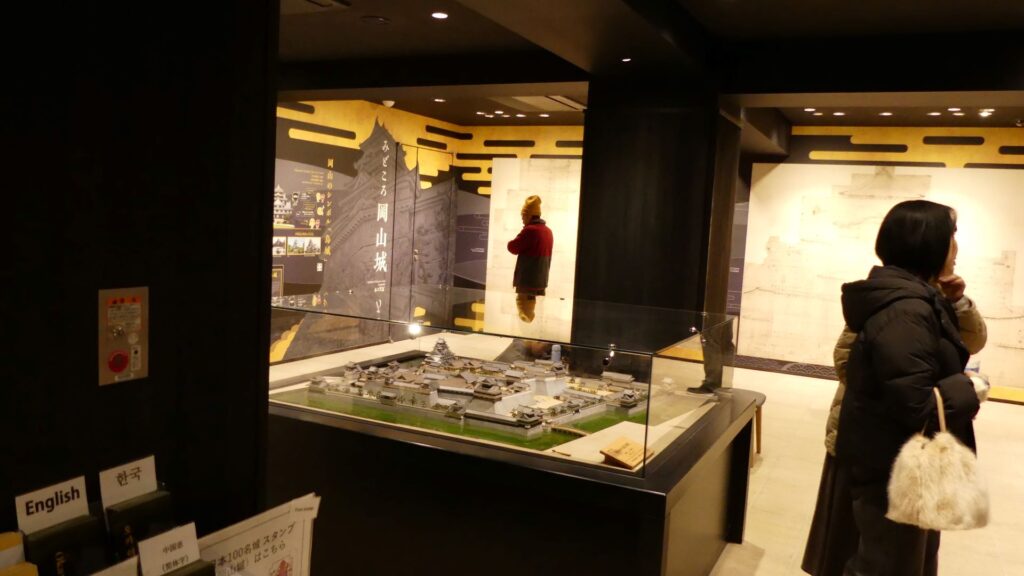
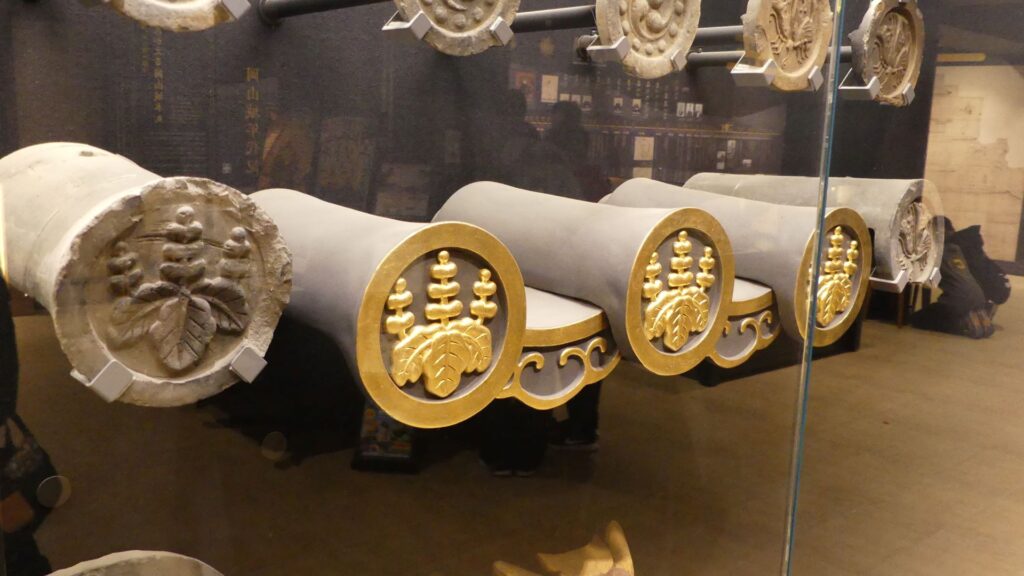
The old photo of the original main tower (licensed under Public Domain via Wikimedia Commons), Unfortunately because the picture is in black and white, it’s hard to tell that the walls were indeed in the color of blackThe miniature model of the main tower, exhibited by Okayama Castle, The minature model has a slight difference in design compared to the modern look of the castle todayThe excavated or restored rooftiles using gold leaves, exhibited by Okayama Castle, the round family crest is Toyotomi Hideyoshi’s family
However, after Hideyoshi died in 1598, the situation changed dramatically. The authority of Hideie, which had been back upped by Hideyoshi, began to deteriorate. That caused an imbalance in power, which is often called Ukita Trouble. Some senior vassals, such as Ukita Sakyonosuke, and Hideie’s close vassals like Jirobe Nakamura fought against each other about who would rule their territories. Unfraternally, Hideie was not able to stabilize it. Eventually, many vassals left Hideie. For example, Ukita Sakyonosuke would become the lord of Tsuwano Castle. As a result, the power of Hideie would eventually disappear.
The portrait of Ukita Sakyonosuke, private owned (licensed under Public Domain via Wikimedia Commons)The ruins of Tsuwano Castle (in Shimane Prefecture)
On the 15th of September in 1600 (according to the lunar calendar), the Battle of Sekigahara occurred, where Hideie joined the Western Allies but was unfortunately defeated. He escaped from the battlefield and hid in the mountain areas with his few retainers for a while. Then, he sailed to Satsuma Province to ask the Shimazu Clan which also joined the Western Allies for help. The clan still did not surrender to the Tokugawa Shogunate which was the former Eastern Allies. Hideie wanted to survive and get back to being a lord. After the clan and the shogunate made peace in 1603, Hideie presented himself at the shogunate the following year. The decision of the shogunate was to banish him to Hachijojima Island, nearly 300km away from Edo (the current Tokyo), forever. It was said Hideie never gave up on his comeback until his death when he was 84 years old in 1655. Hideie must have been stronger than his image of ” a young nobleman of the Toyotomi Government”.
The encampment of Hideie Ukita at the Sekigahara battlefield
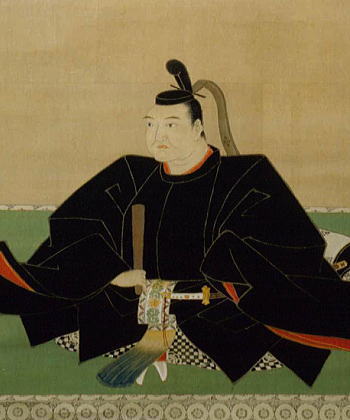
Hideaki Kobayakawa, a Misfortunate Lord who Modernizes the Castle
After that, Hideaki Kobayakawa entered Okayama Castle as the lord of the Okayama Domain which earned him about 400,000 Koku of rice. This was his reward for helping Ieyasu win The Battle of Sekigaha. His actions gave him the reputaiton of a betrayer. He switched from the Western Allies to the Eastern Allies during the battle, being forced by the way of Toi-deppo (shot by Ieyasu Tokugawa). However recent studies suggest that Hideaki did not switch sides halfway through the battle but rather was supportive of the eastern allies from the very beginning. In spite of this, his bad reputation affected his relationship with the Okayama Domain. They said that Hideaki lived a luxurious life, doing bad things, and finally died a madman. As a matter of fact, he killed a senior vassal, which resulted in other senior vassals leaving him in fear of getting killed.
The portrait of Hideaki Kobayakawa, owned by Kodaiji Temple (licensed under Public Domain via Wikimedia Commons)
However, recent studies suggest that Hideaki’s death was caused by excessive alcohol drinking since his childhood. In addition, he left too many achievements for his short two years at Okayama before his death at only 21 years old. The purge to his senior vassals might have indicated his new government with his new close vassals. Some of Hideaki’s achievements include land survey, reorganization of temples, destroying unnecessary castles, and modernizing Okayama Castle (excessive castles could lead to rebellions which many lords wanted to minimize). The modernizing was done because the castle needed to adapt to new military methods after the Sekigahara battle.
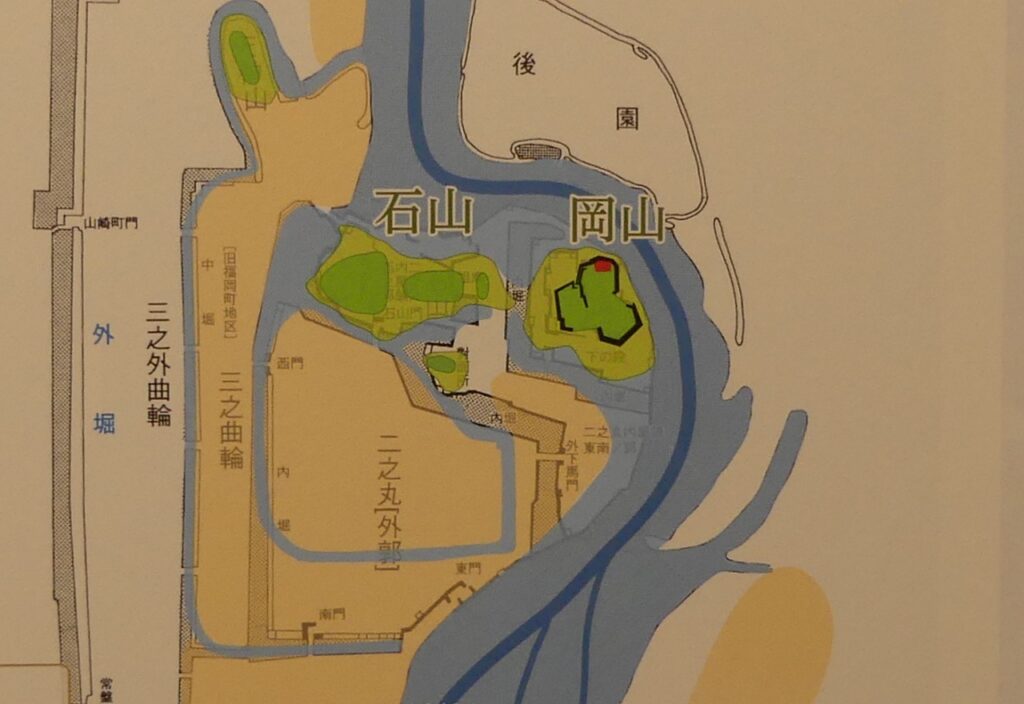
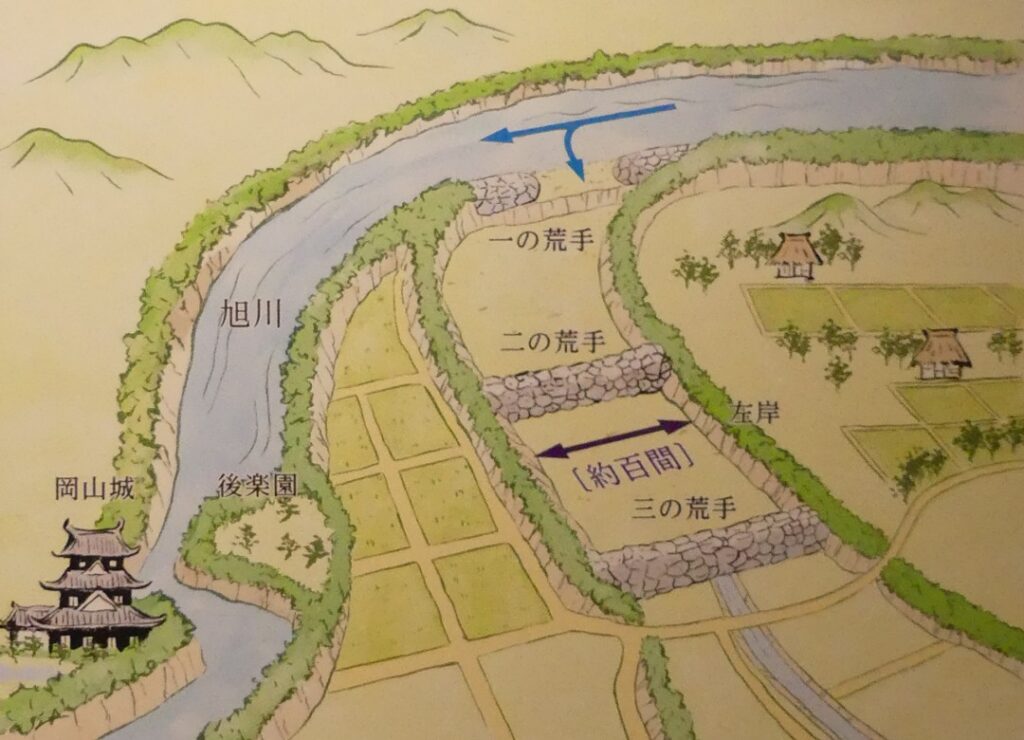
Hideaki doubled the range of the castle (from 60 hectares to about 110 hectares). The outer third enclosure was built in the new western part of it. The outer moat also surrounded the enclosure, which was 2.5km long in total. It was said that the moat was built in only 20 days, which gives it its nickname “Hatsuka-bori” (which means 20 days moat). It was also said that it was fortified to prepare for the possible invasions from the Mori Clan. The clan was defeated during the Sekigahara battle and their territories were reduced by the shogunate, but Hideaki wanted to prepare for a possible revenge invasion from the west of Okayama Castle. In addition, Hideaki also extended the main enclosure and built new turrets and gates. We can see the stone walls of the enclosure, built by him, next to those of Hideie Ukita’s period. Some of the turret buildings were said to have been moved from castles which had been abandoned.
The ruins of the outer moatThe right side of these stone walls were built by Hideaki, the left side was built by The Ukita ClanThe miniature model of Onando Turret, which was one of turrets that were moved\ from other castles, exhibited by Okayama Castle
Hideaki died not having a successor. For this reason, the shogunate fired the Kobayakawa Clan. He was forced to mature at a young age, and like the wind he had an early demise. If he could have lived for few more years or have had his successor, his reputations would have been different from the current ones. He was really a misfortunate lord.
Ikeda Clan, the Pivot of Western Japan completes the Castle
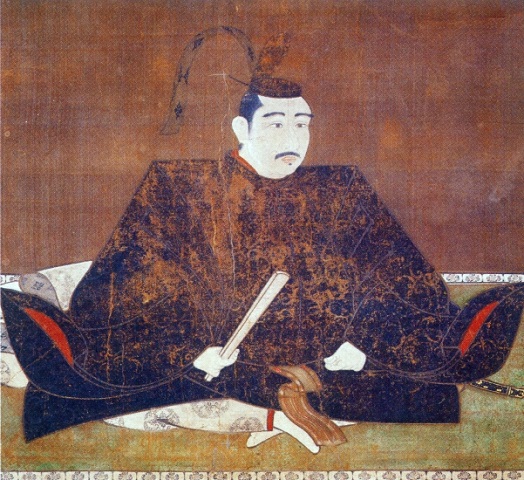
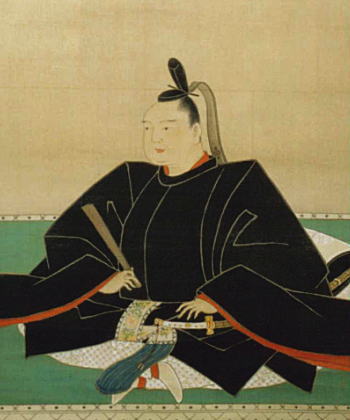
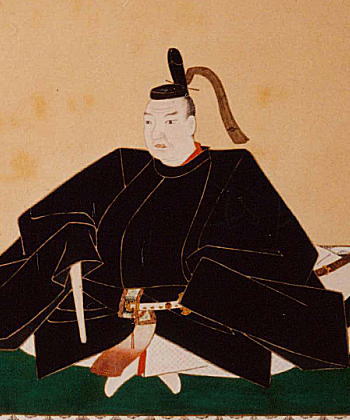
Okayama Castle and the Okayama Domain was followed by Tadatsugu Ikeda when he was only 5 years old. He was a son of Terumasa Ikeda, the lord of Himeji Caste, whose wife was a daughter of Ieyasu Tokugawa. Therefore, Tadatsugu was a grandson of Ieyasu. This promotion may have been favoritism by Ieyasu. Tadatsugu was back upped by Toshitaka Ikeda (20 years old) who was another son of Terumasa, but his mother was different from Tadatsugu (Terumasa’s ex-wife). Tadatsugu died young just after he grew up, so his brother, Tadakatsu (14 years old but after his coming-of-age ceremony) followed him. Tadatsugu died when he was 31 years old and his successor (Mitsunaka) was only 3 years old back then. The shogunate decided to move Mitsunaka to Tottori Castle. Instead, Mitsumasa Ikeda, who was a son of Toshitaka, moved from Tottori to Okayama when he was 24 years old. Overall, the shogunate considered Okayama castle and the domain as an important spot in western Japan, where a young lord was not able to govern it properly.
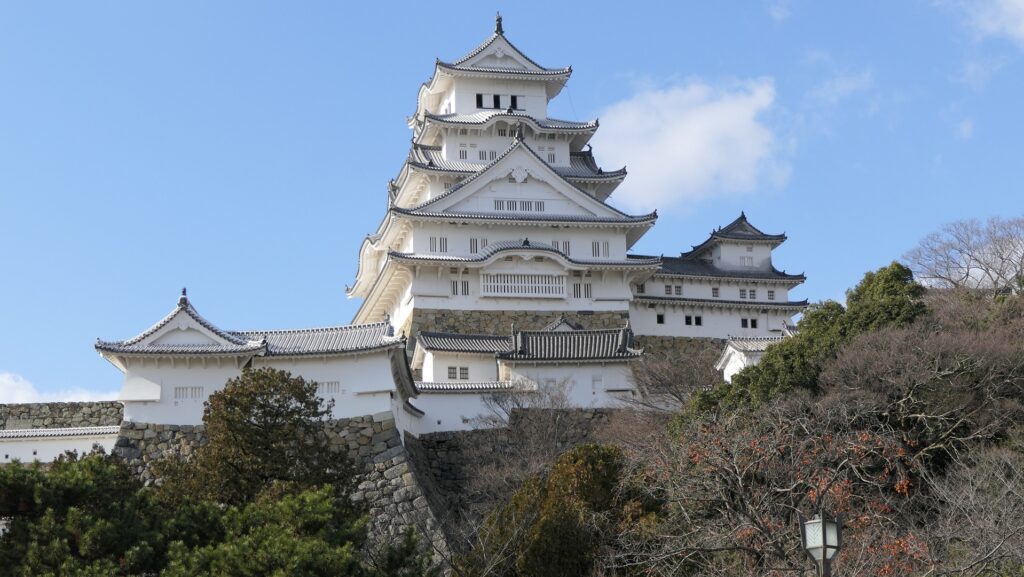
Himeji CastleThe Portrait of Terumasa Ikeda, owned by Tottori prefectural art museum (licensed under Public Domain via Wikimedia Commons)The Portrait of Tadatsugu Ikeda, owned by Setai-in Temple (licensed under Public Domain via Wikimedia Commons)
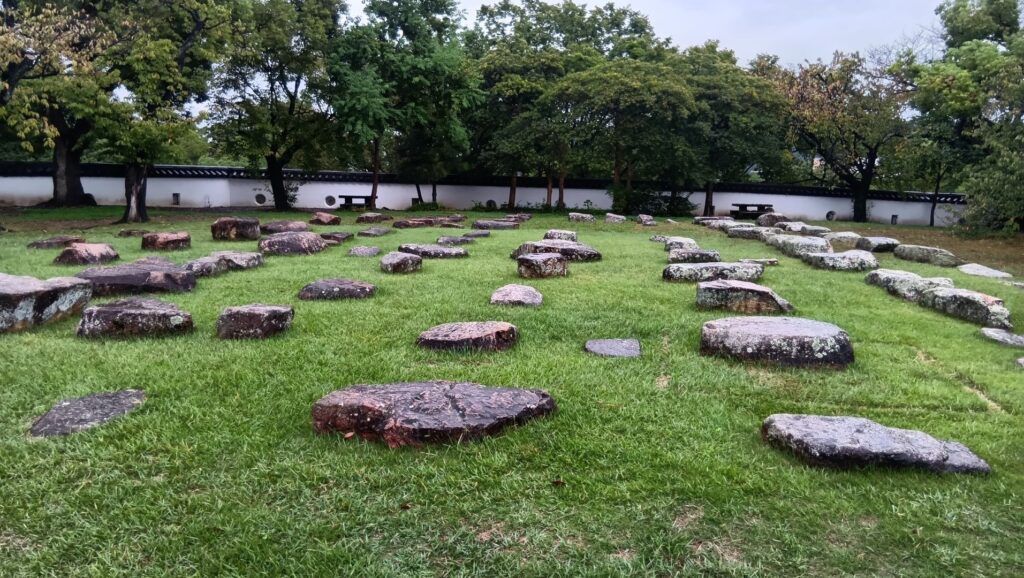
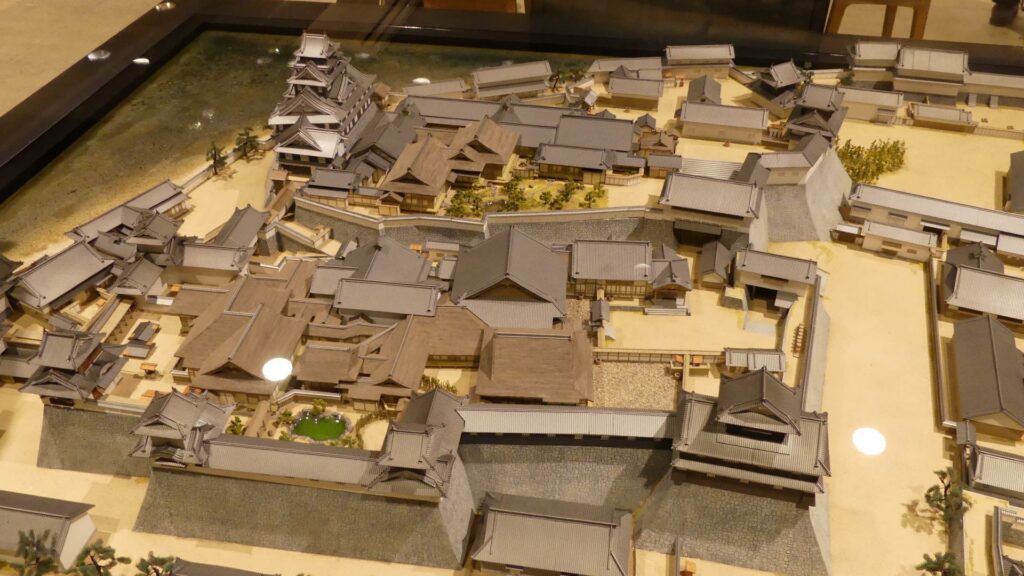
Okayama Castle was finally completed by the Ikeda Clan. First, Toshitaka, who was the guardian of Tatatsugu, developed the inner second enclosure and the western enclosure. The remaining Nishite Turret was built at the western enclosure at the same time. Secondly, Tadakatsu extended the main enclosure to build the government office called “Omote-shoin”. The remaining Tsukimi Turret was also built there. The castle not only become a home for battles, but it also become an office for the government.
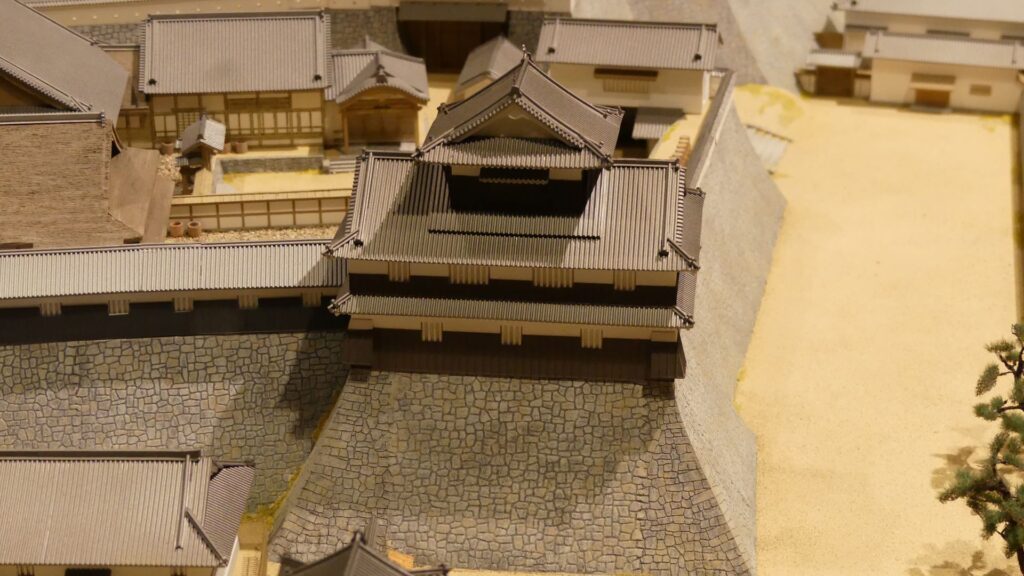
Part of the illustration of Okayama Castle in Bizen Province, exhibited by the National Archives of JapanThe Portrait of Toshitaka Ikeda, owned by Hayashibara Museum of Art (licensed under Public Domain via Wikimedia Commons)The remaining Nishite Turret, which is located in front of the inner moatThe Portrait of Tadakatsu Ikeda, owned by Setai-in Temple (licensed under Public Domain via Wikimedia Commons)The miniature model of the main enclosure of Okayama Castle, exhibited by Okayama CastleThe remaining Tsukimi Turret, This turret is located on the bottom left corner of the diorama shown above
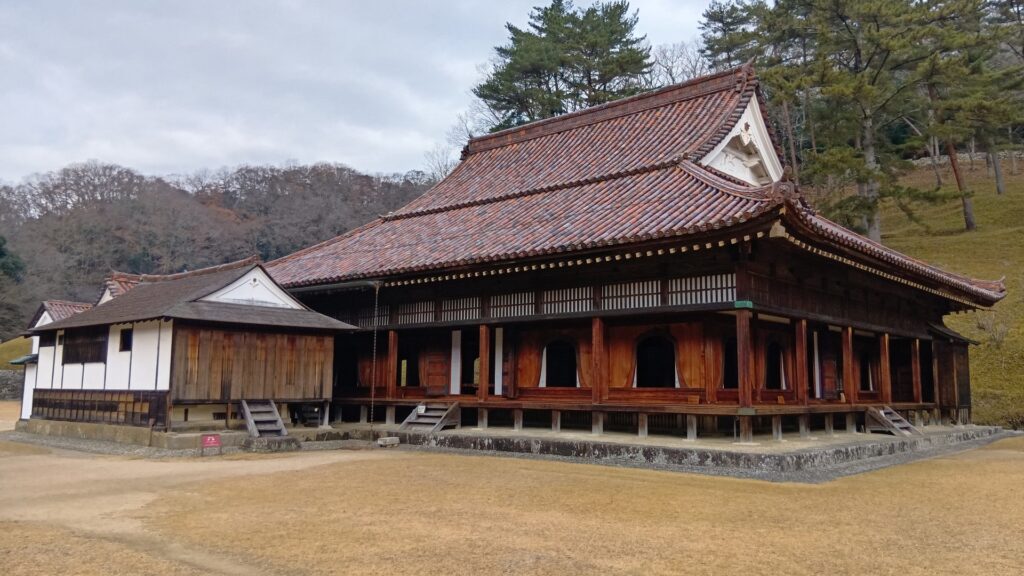
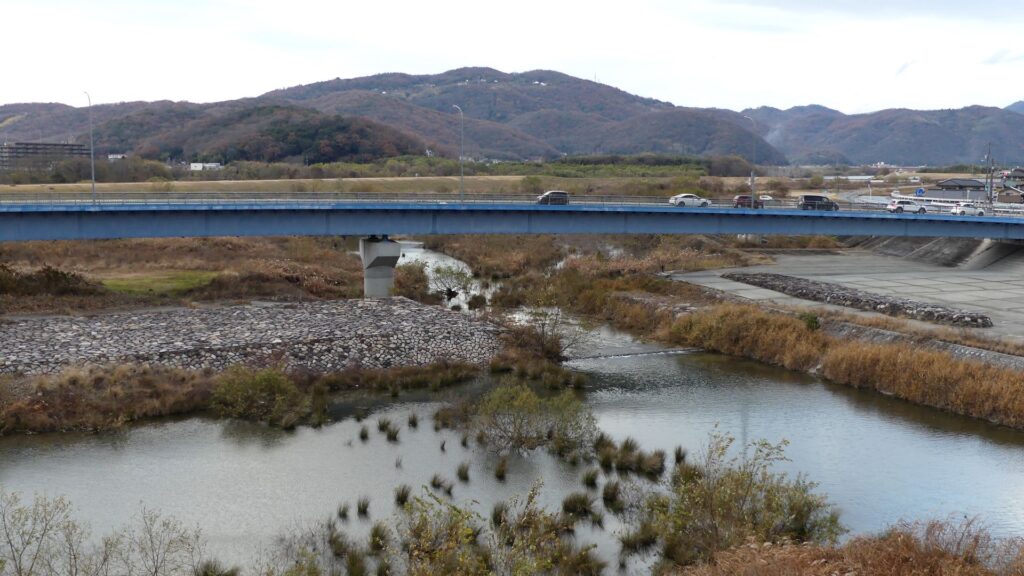
After Mitsumasa Ikeda became the lord, he improved the civil administration and cultural affairs in his domain. He learned Confucianism to lead the people in the domain. He also established the Okayama Domain School in 1669 for the Samurai-class people. Furthermore, he built the Shizutani School in 1670 for the lower-class people, which was said to be the earliest school for commoners in Japan. The constructions of the schools were instructed by his excellent close vassals like Nagatada Tsuda. On the other hand, the castle town of Okayama often suffered from natural disaster damages like floodings of Asahigawa River. This was because the river was artificially converged as a natural moat when the castle was renovated. As a result, the water of the river would often overflow to the town during harsh weather conditions. Mitsumasa ordered Nagatada to prepare preliminary measures for possible natural disasters. Nagatada decided to build spillways called “Hyakkenn-gawa” (which means 180m-wide river) at the upstream of Asahigawa River which came from the ideas of a Confucian, named Hanzan Kumazawa. The spillways usually worked as banks, but they changed to a river when the flow of Asahigawa River overflowed.
The Portrait of Mitsumasa Ikeda, owned by Hayashibara Museum of Art (licensed under Public Domain via Wikimedia Commons)The ruins of the Okayama Domain SchoolThe auditorium of the Shizutani SchoolThe explanation of Hyakkenn-gawa River, exhibited by Okayama Castle, the curved blue arrow represents the overlow of the riverbanks during flooding. Notice the stone fortification in front of the reservoir that was prepared for the excess of water from the flooding. Back then the reservoirs were used as farmlands by farmers.The second bank of Hyakkenn-gawa River
Mitsumasa’s successor, Tsunamasa liked culture and entertainment very much. After the spillways were completed, the site across Asahigawa River from the castle became a wasteland. Tsunamasa launched the construction of his garden there, called Gokoen which is the current Okayama-Korakuen, one of the three greatest gardens of Japan. It was also instructed by Nagatada, who was like a superman! (a powerful retainer, rather than a powerful warrior) The garden was mostly consisted of fields, where farmers worked, as if it was a real countryside, by Mitsumasa’s interests. He commuted to his own garden by a boat from the castle occasionally. As time passed, the appearance of the garden was changed by his descendants. For example, most of the fields were turned into grass. Artificial hills and ponds were added on some points of the garden, which resulted in what we see today. The garden was also used for guests and opened to the public on somedays during the later Edo Period.
The Portrait of Tsunamasa Ikeda, owned by Hayashibara Museum of Art (licensed under Public Domain via Wikimedia Commons)The current Okayama-KorakuenThe illustration of the Gokoen garden, 1n 1863, exhibited by the Cultural Heritage Online
As long as looking at the stone wall base for the Main Tower of Fukuchiyama Castle, Mitsuhide Akechi seems to have followed a policy of Nobunaga Oda’s castle constructions. That means Mitsuhide was a follower of Nobunaga.
Features
Views from Restored Main Tower
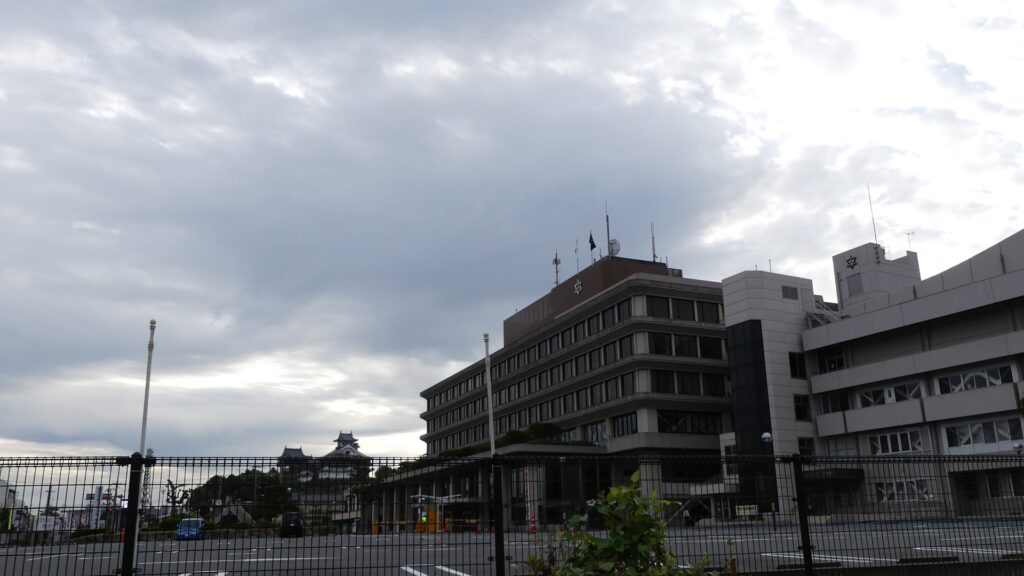
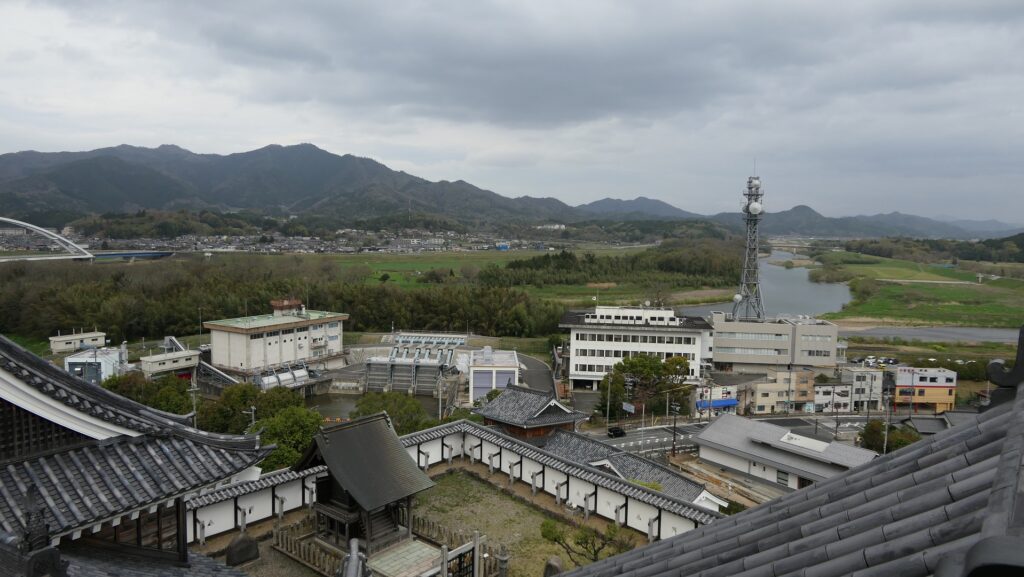
The current Main Tower is actually a restored modern building which is used as a historical museum and an observation platform, where you can learn about Mitsuhide Akechi and the history of the castle. You can also enjoy a view of the city area around the castle from the top floor. For instance, you can see the Third Enclosure which is used as the City Hall on the right and the Hoki-maru Enclosure which has become a park on the left, over the residential area of the former Second Enclosure in the west.
The map around the castle
The interrior of the Main TowerA view to the west from the towerThe Third Enclosure has become the City HallThe Hoki-maru Park
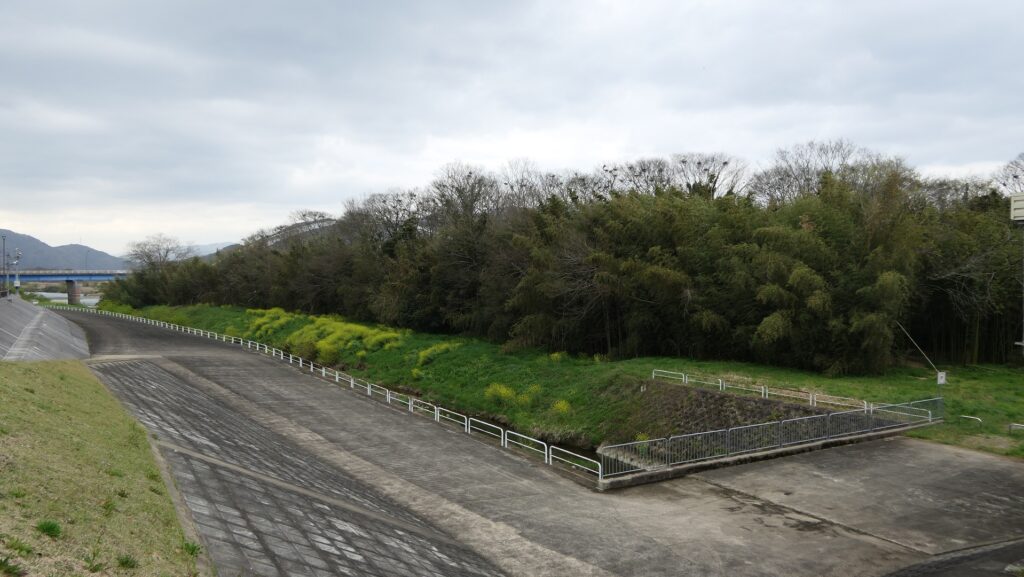
In the northern direction, you can see the Yuragawa River and the bank along it that Mitsuhide built, and it’s called Akechi-yabu or Akechi-bush. Mitsuhide planted bamboos along the river bank to make it durable.
A view to the north from the towerThe Akechi Bush
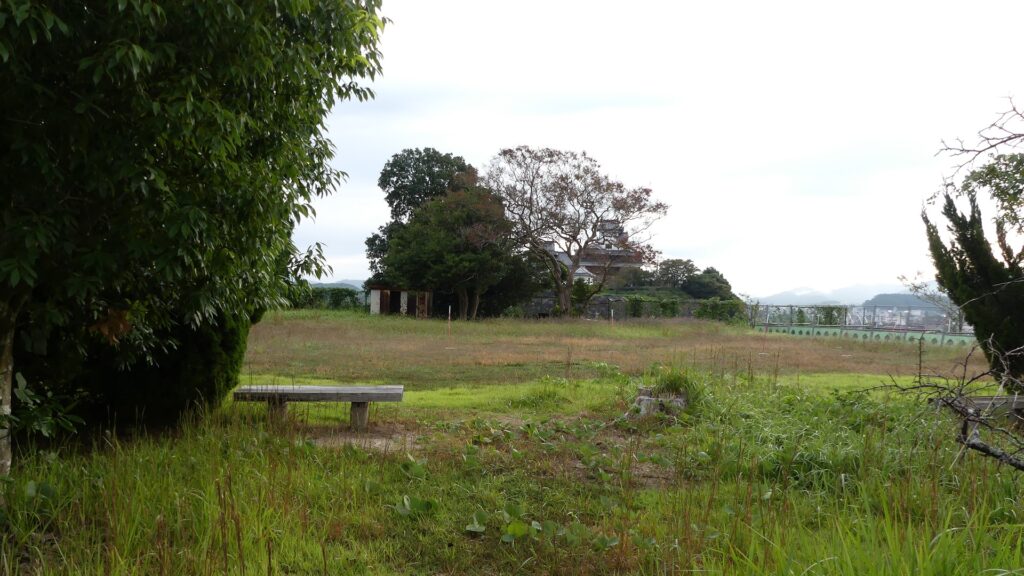
Only remaining building of Castle
Akagane-mon Bansho or the Guardhouse for the Bronze Gate, which is located in the Main Enclosure, is the only remaining part of the building and is one of its attractions. It had been originally built in the Second Enclosure, but was moved to the current position because the said Second enclosure was removed. In addition, the building of the Bronze Gate was moved to Shogenji Temple in the city and is used as its front gate.
The map around the castle
The Guardhouse for the Bronze Gate in the Main EnclosureThe ruins of the Bronze GateThe front gate of Shogenji Temple, quoted from the Fukuchiyama City Website
Later History
After the Meiji Restoration, Fukuchiyama Castle was abandoned and most of the castle buildings including the Main Tower were demolished or moved. It is said that the 20th Infantry Regiment of the Imperial Japanese Army destroyed the Second Enclosure for the convenient of the transit between their station and maneuvering ground. On the other hand, people in Fukuchiyama wanted to restore the Main Tower as a symbol of the city for a long time. The restoration launched since 1968 when the illustration of the castle in the Edo Period was found. It is once faced with a budget problem, but it was completed in 1986 with lot of donation from the citizens, which was more than a half of the final budget.
The Second Enclosure was removed and became the city area
My Impression
One of the popular assumptions of the reason for Mitsuhide’s rebellion has been the difference of Nobunaga and Mitsuhide’s characters. It is said that Nobunaga was radical while Mitsuhide was traditional. However, as long as looking at the stone wall base for the Main Tower of Fukuchiyama Castle, Mitsuhide seems to have followed a policy of Nobunaga’s castle constructions. It refers to using anything including Buddhism items to build their castles immediately. I honestly say that the stone walls using the tomb stones looks little strange. There is no telling how people at that time felt. I think Mitsuhide was definitely a follower of Nobunaga. A new assumption recently came that Mitsuhide’s position became weak during the discussion about how Nobunaga would invade the Shikoku Region. Mitsuhide’s opinion about it was rejected and his rival, Hideyoshi’s one was taken by Nobunaga. The Honnoji Incident occurred just before the invasion would be done. I’m wondering if the real reason for Mitsuhide’s decision will be uncovered.
The joint of the newer stones on the left and the older ones on the right for the stone wall base of Fukuchiyama Castle’s Main Tower The portrait of Nobunaga Oda, attributed to Soshu Kano, owned by Chokoji Temple, in the late 16th century (licensed under Public Domain via Wikimedia Commons)The Portrait of Hideyoshi Toyotomi, attributed to Mitsunobu Kano, owned by Kodaiji Temple (licensed under Public Domain via Wikimedia Commons)
How to get There
If you want to visit there by car, it is about 3 kms away from Fukuchiyama IC on the Maizuru-Wakasa Expressway. There is a parking lot beside the castle hill. By public transportation, it takes about 15 minutes on foot to get there from JR Fukuchiyama Station. From Tokyo to Fukuchiyama Station: Take the Tokaido Shinkansen super express and transfer to the Sanin Line at Kyoto Station.