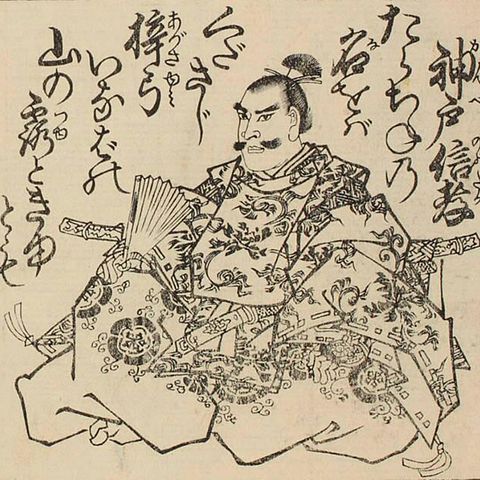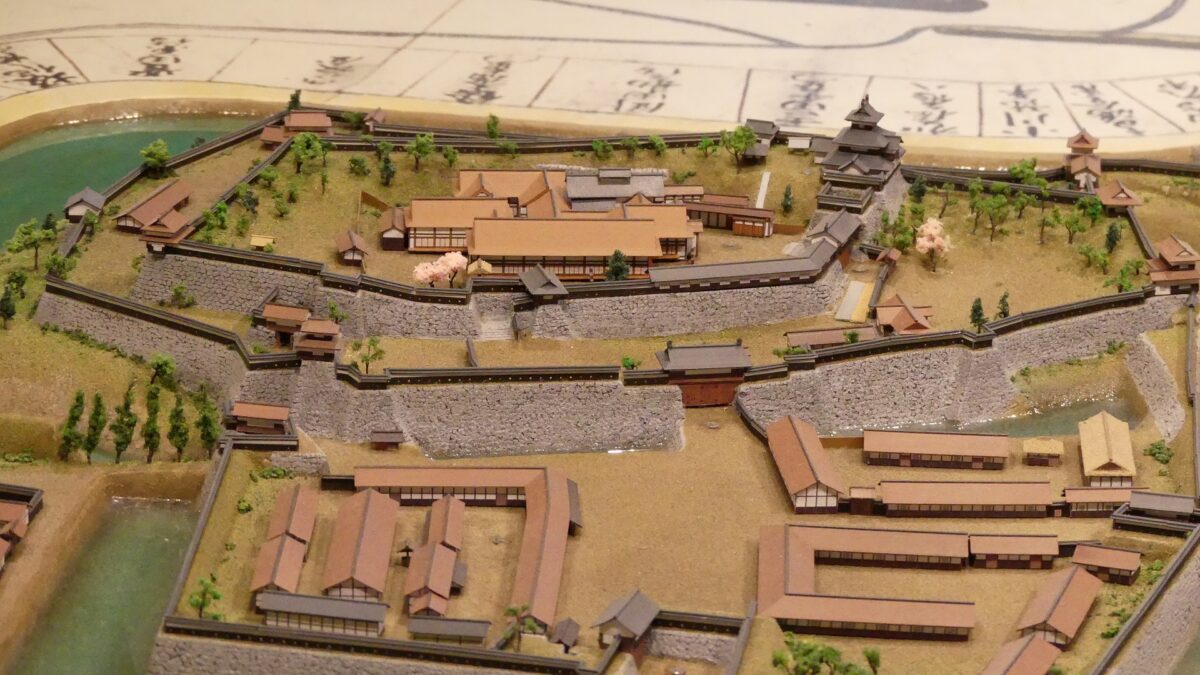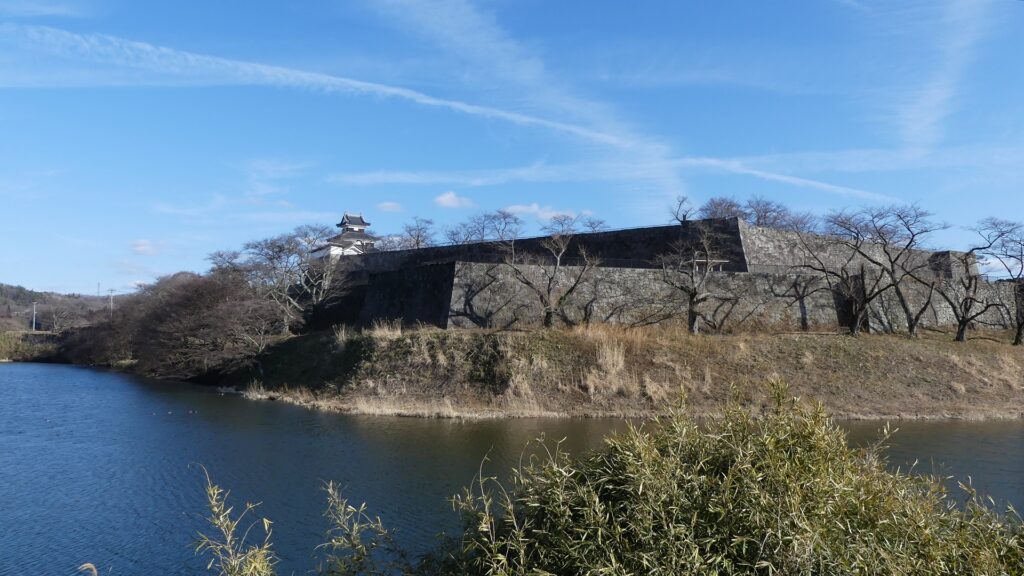
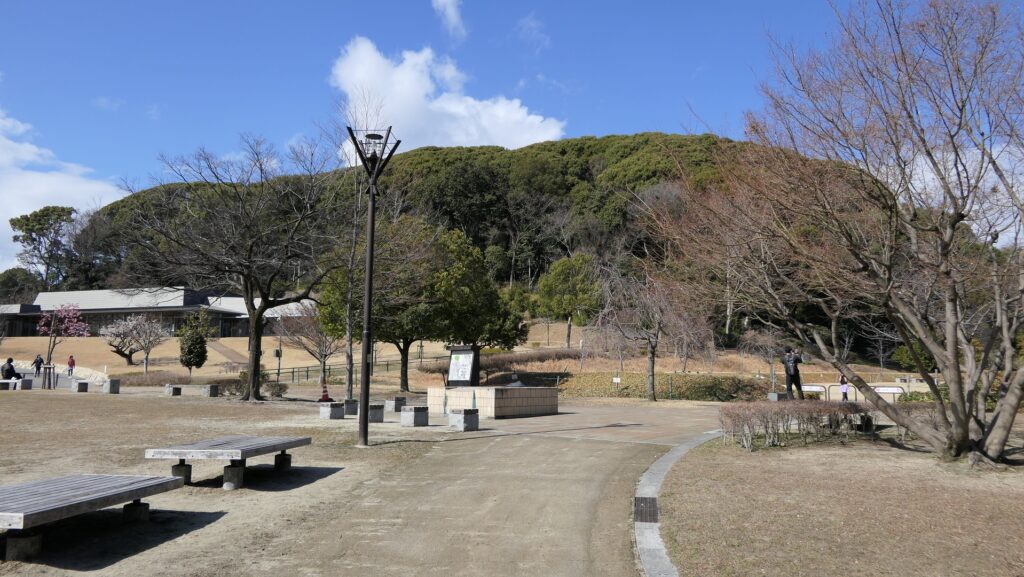
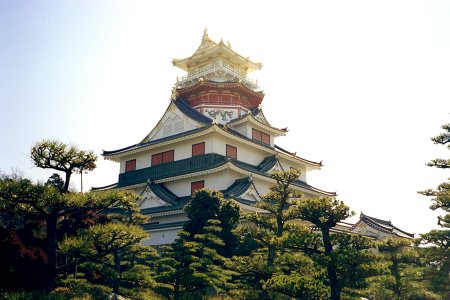
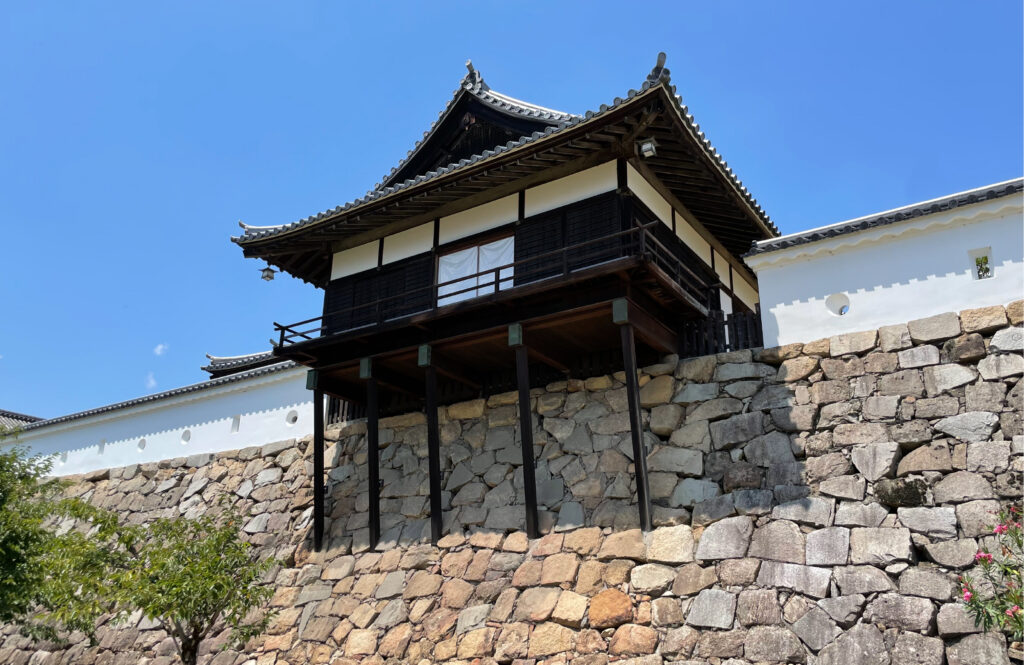
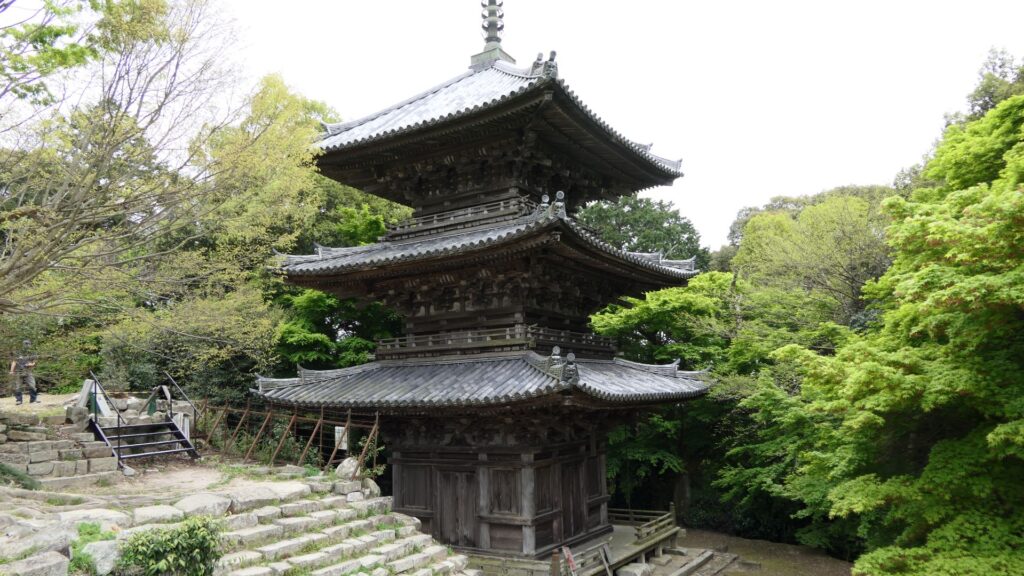
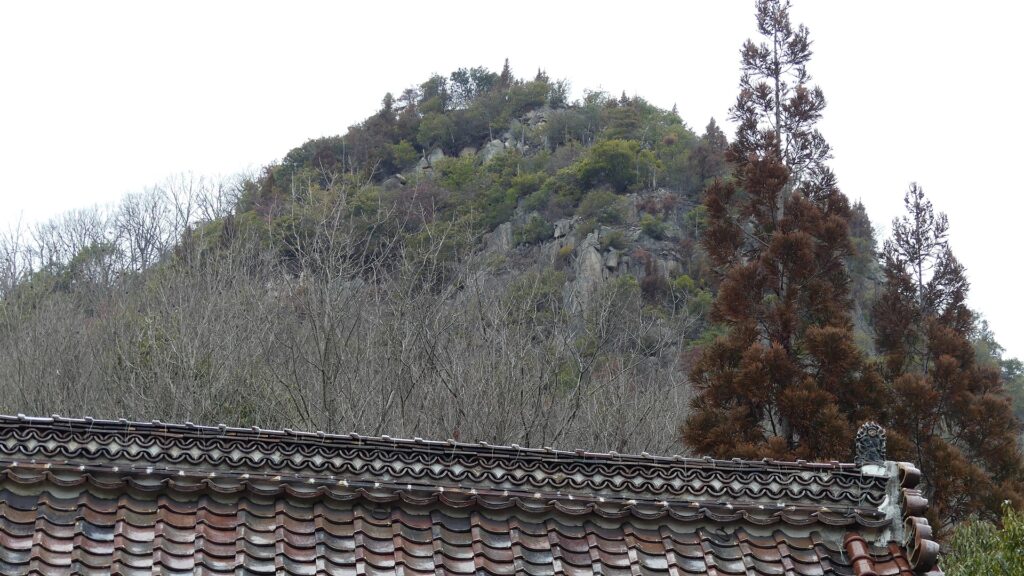
Azuchi Castle was, needless to say, known for the final and most popular home of Nobunaga Oda. Other than that, he created a typical style of Japanese castles, including the main tower, turrets, and white walls on top of the stone walls, which are guarded by defensive gates and are surrounded by water moats. The style was passed down from one generation to the next by other great Japanese lords. That’s why we still think it as the most typical Japanese castles’ style. Therefore, Azuchi castle was the inspiration for many other castles that came after it.
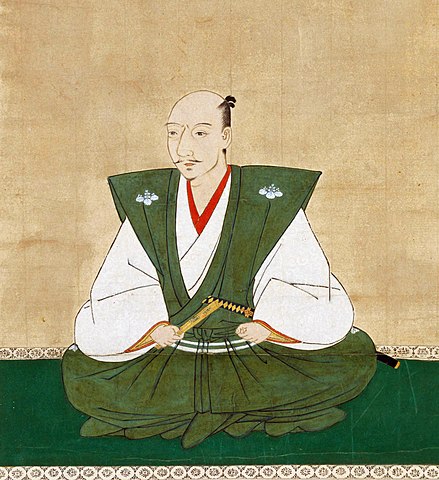
However, the castle had a very short life for its impact. The construction of the castle launched in 1576. Nobunaga started to live in its main tower three years later. Its completion was done in September of 1581 (according to the luna calendar), just 9 months before Nobunaga’s death during the Honnoji Incident in Kyoto on the 3rd of June the following year. The main tower of the castle was burned down around the 15th of June for some unknown reasons. The Oda’s relatives still used the remaining parts of the castle for a while. Atter that, the castle was eventually abandoned in 1585 because their new home, which was called Hachimanyama Castle, was completed.
As you saw, the castle, which had many unique characters, suddenly appeared and disappeared in a short amount of time like its master, Nobunaga. As a result, it has a lot of mysteries which attract us. For example, its own name “Azuchi” is one of them. A record of the Hosokawa Clan says that Nobunaga changed the name of the land to Azuchi. However, the record doesn’t say why. Some speculate the name came from Kyoto’s nickname “Heian-rakudo” which borrows the two Chinese characters of Azuchi (安土). The original Chinese characters of Heian-rakudo is as followed: 平安楽土. They think Nobunaga wanted the castle to be the new capital of Japan. The speculation is not very plausible because other experts argue that other speculations are more plausible.

This article will focus on 5 items of the mysteries, which people often dispute about. I will also compare Theory A with Theory B for each item by summarizing the opinions about each one. Theory A will mainly consist of conventional wisdom from the officials, historians, and experts. Theory B, on the other hand, will focus on the opinions of Mr. Senda who is a famous castle archaeologist and from me (in the last part).
Location and History (Mystery Showdown)
Mystery of the Straight Main Route to the Mountain
Introduction
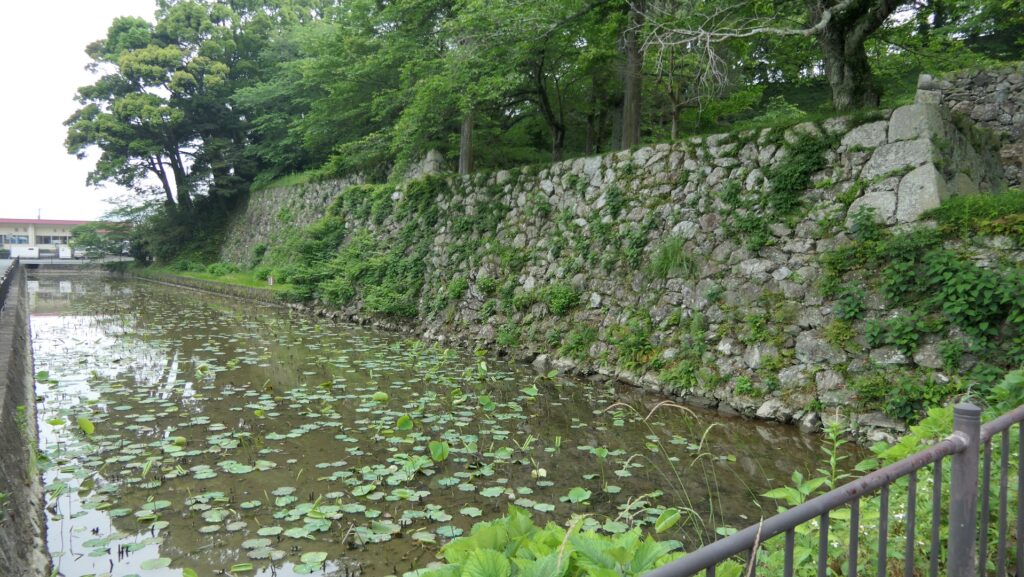
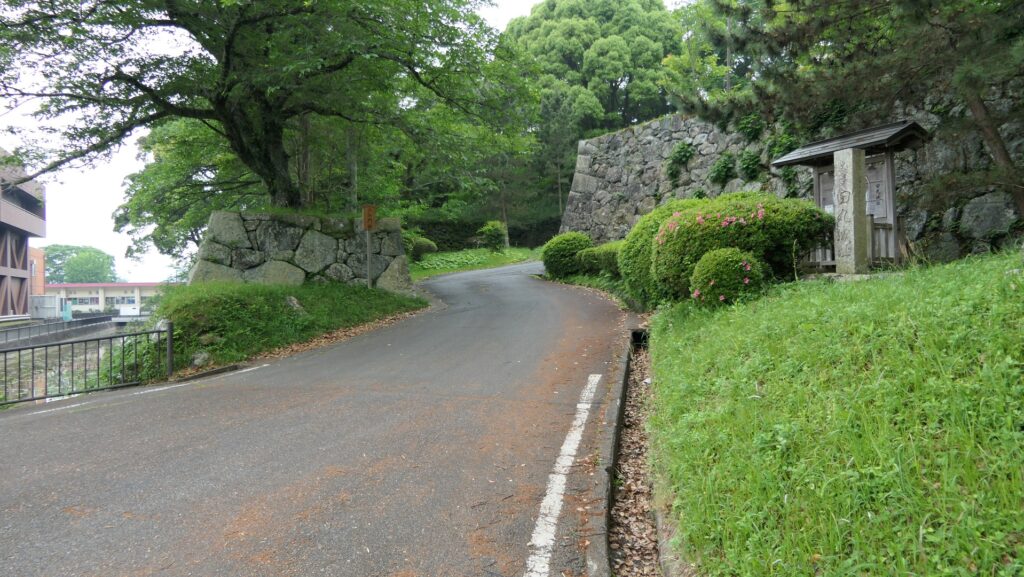
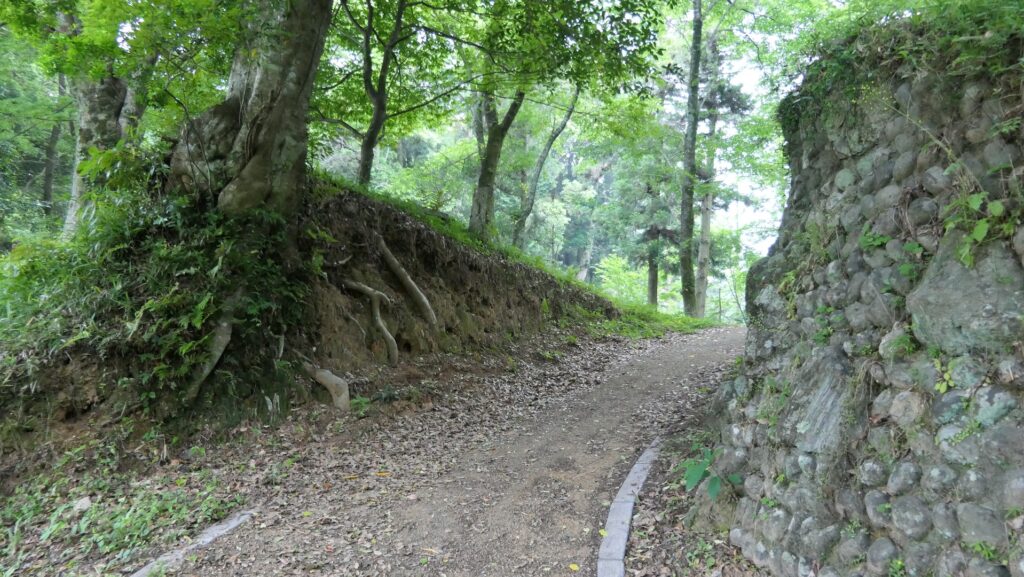
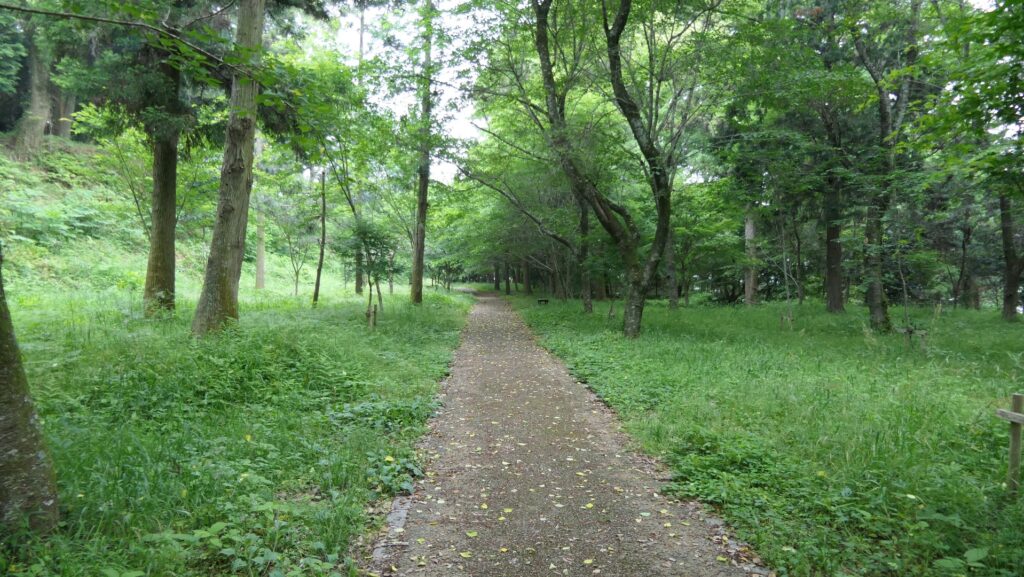
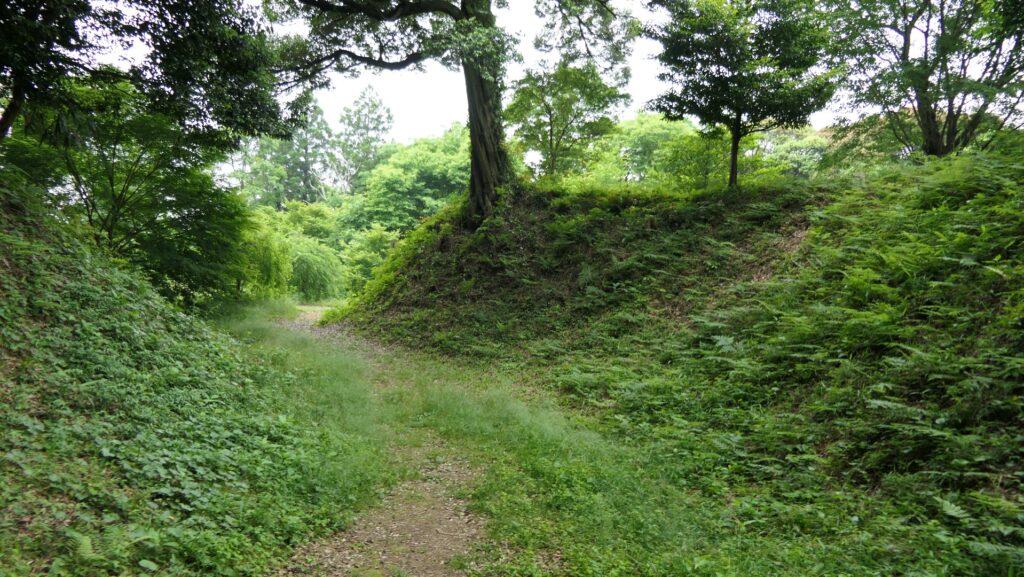
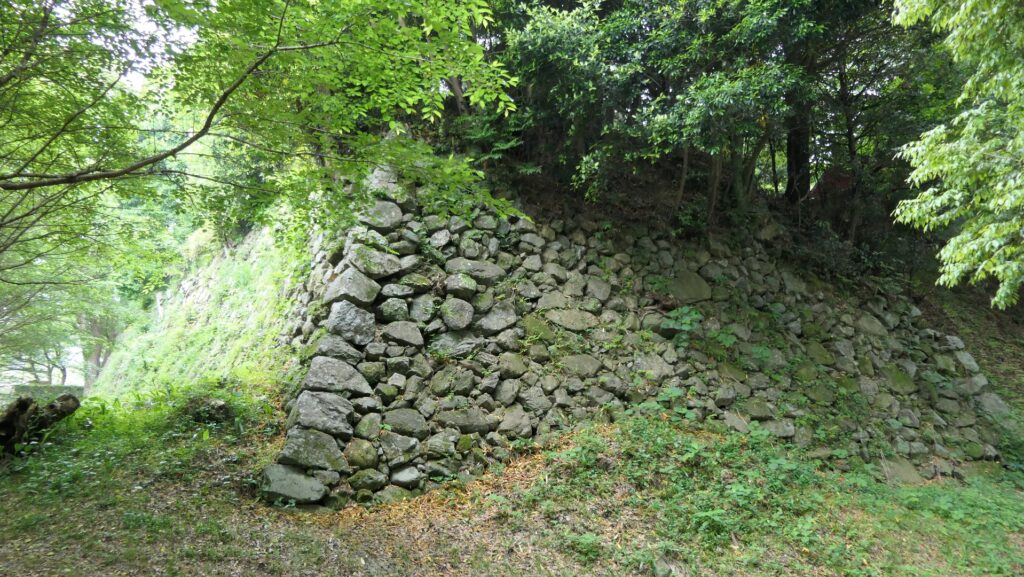
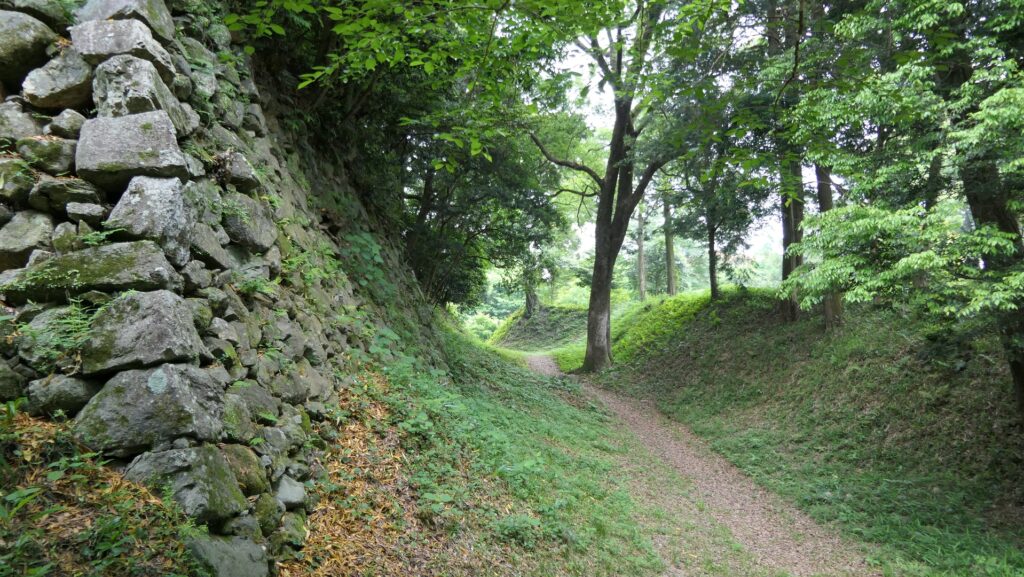
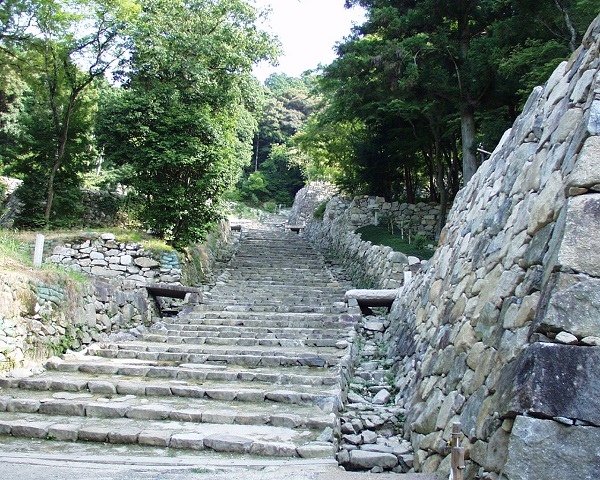
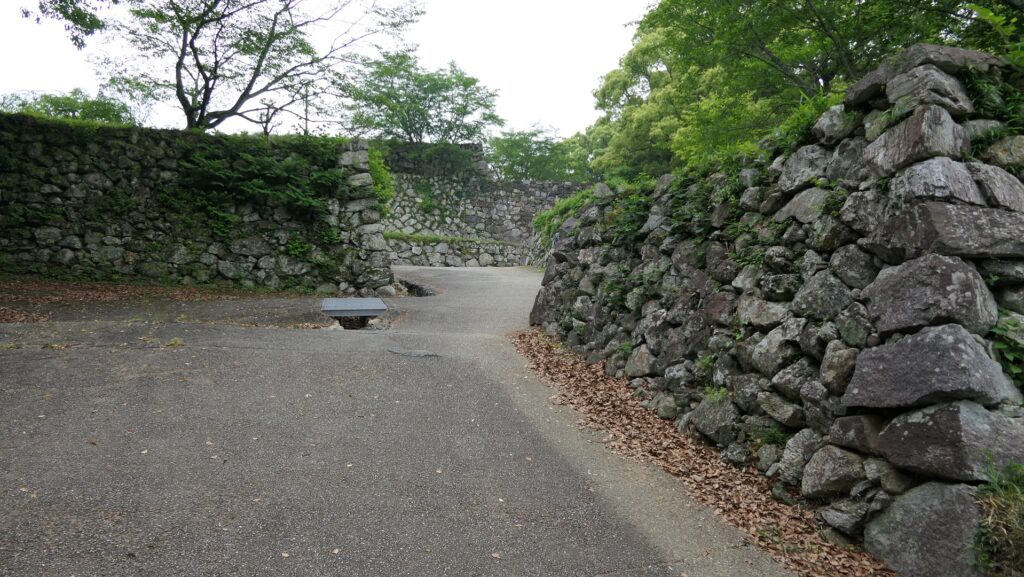
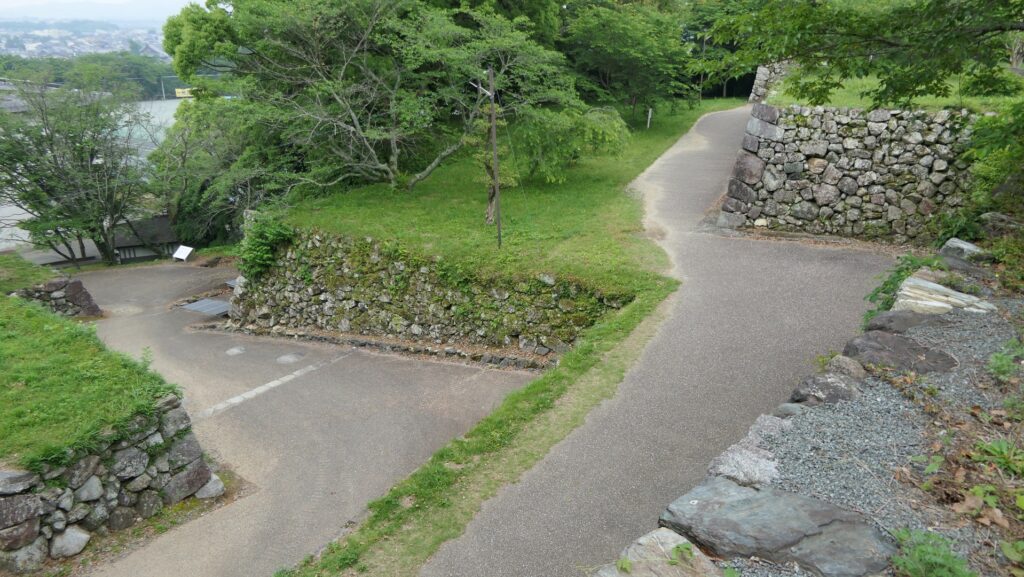
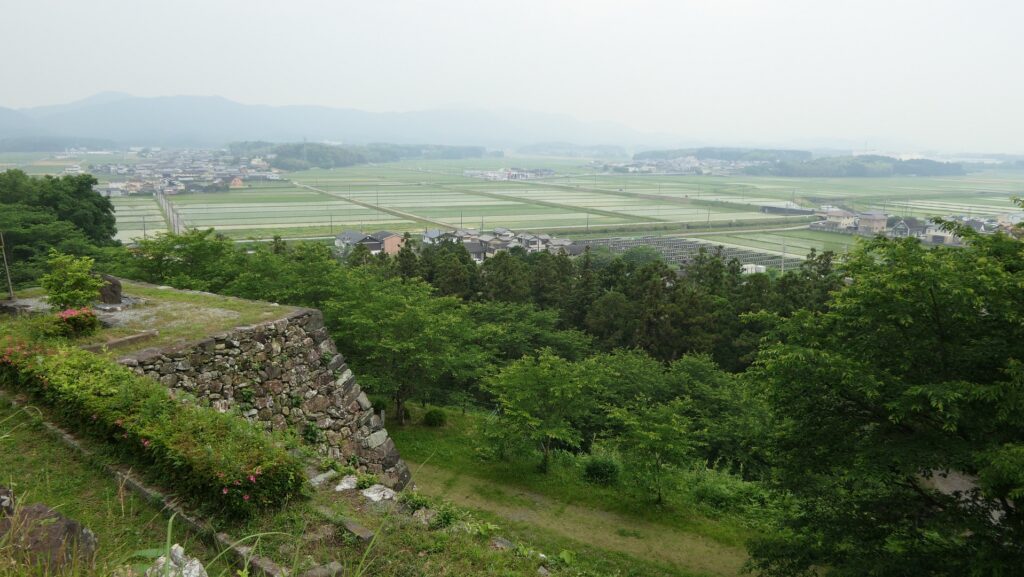
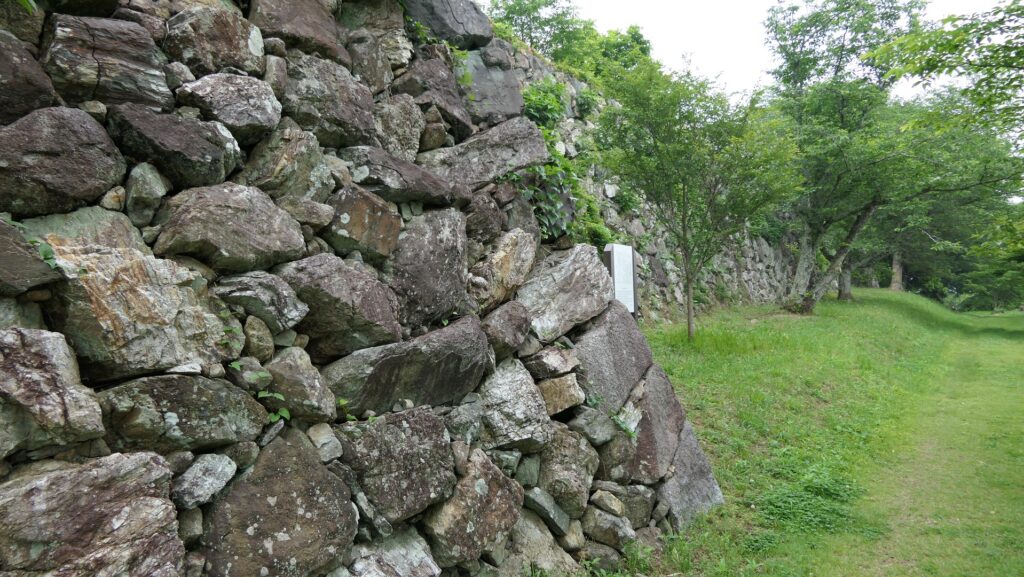
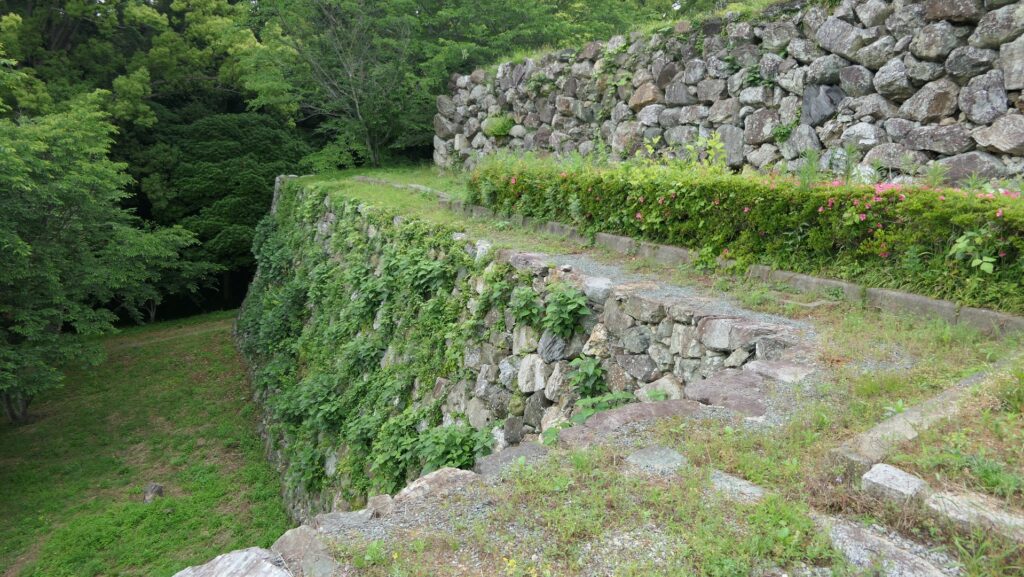
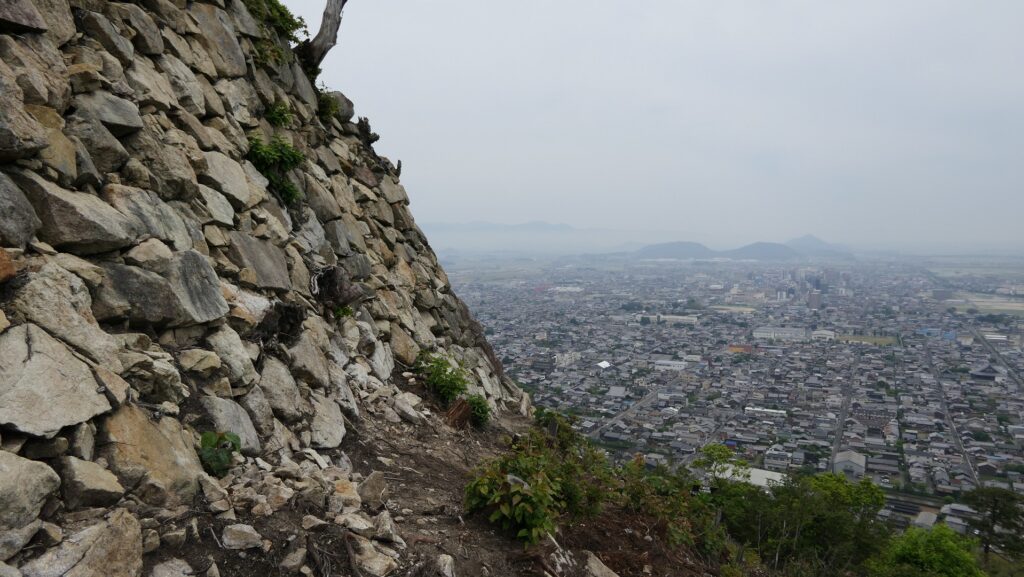
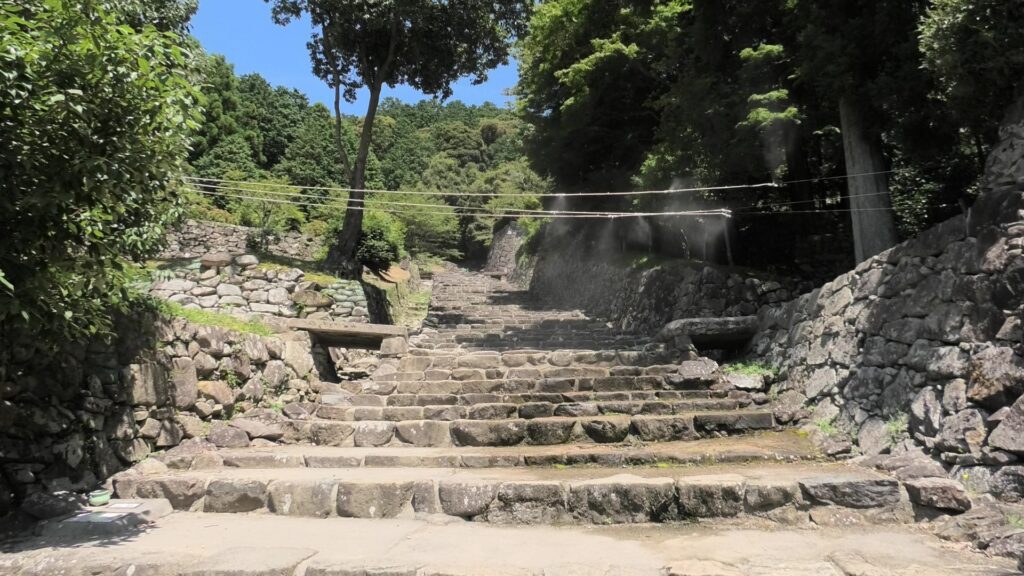
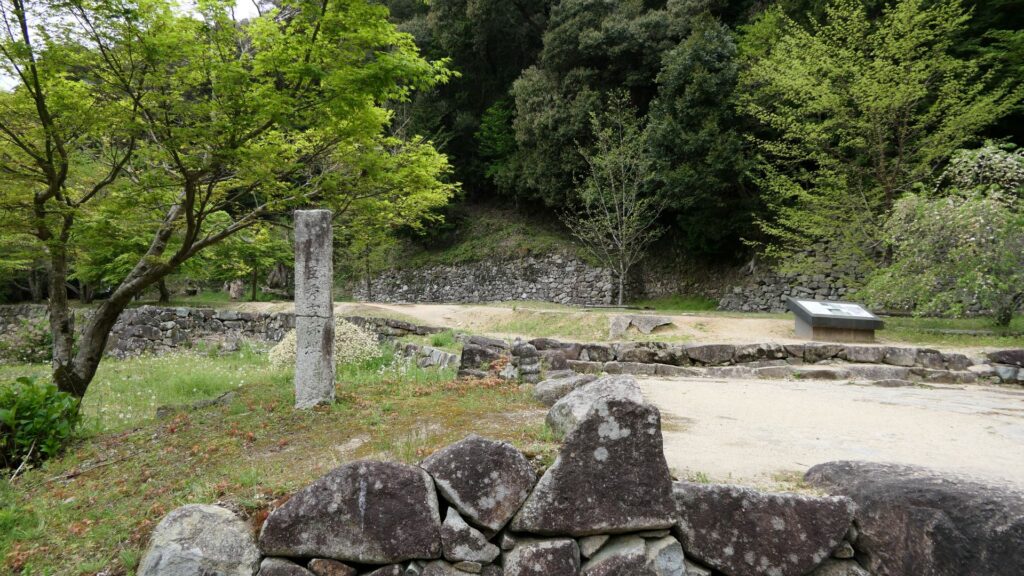
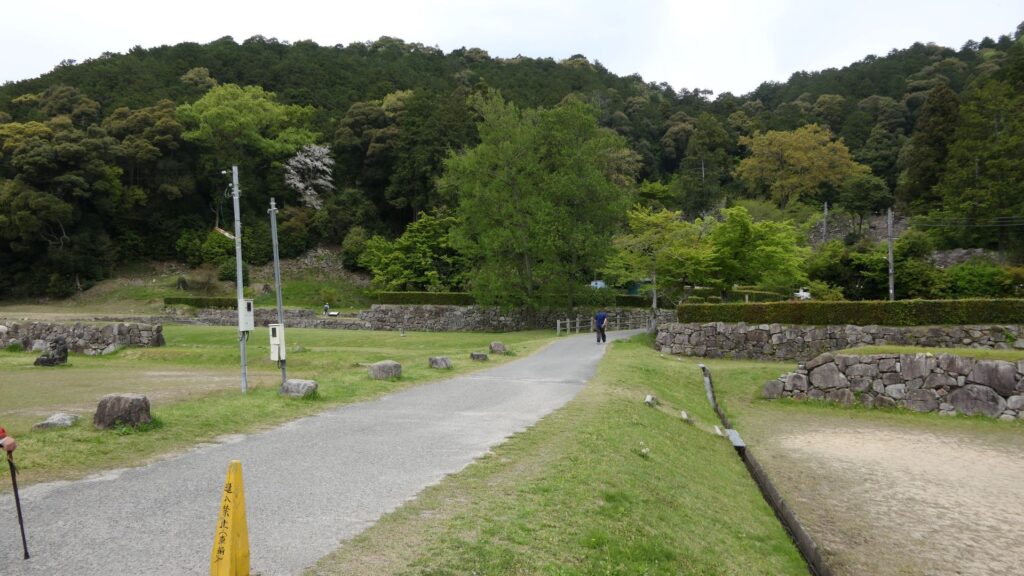
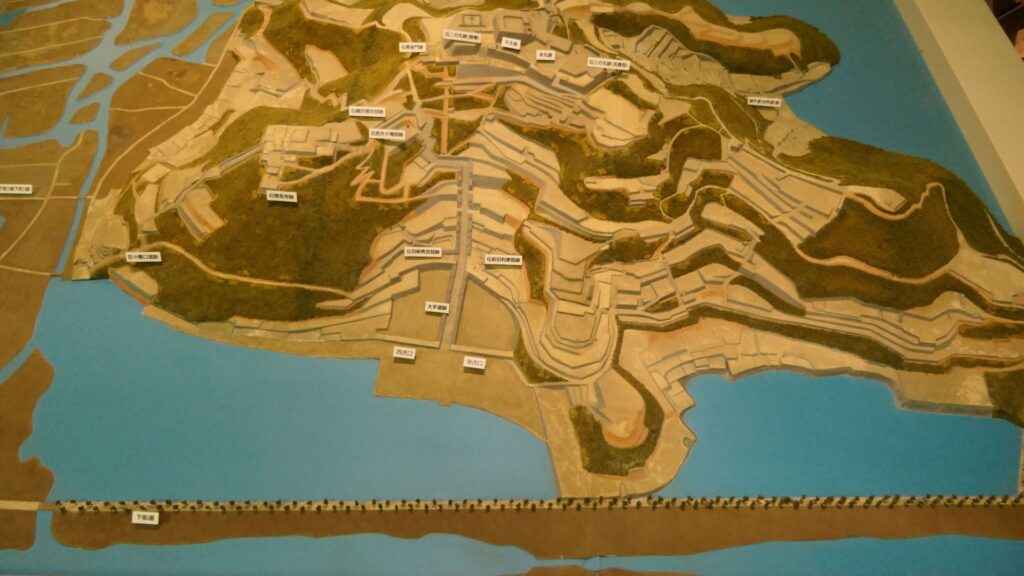
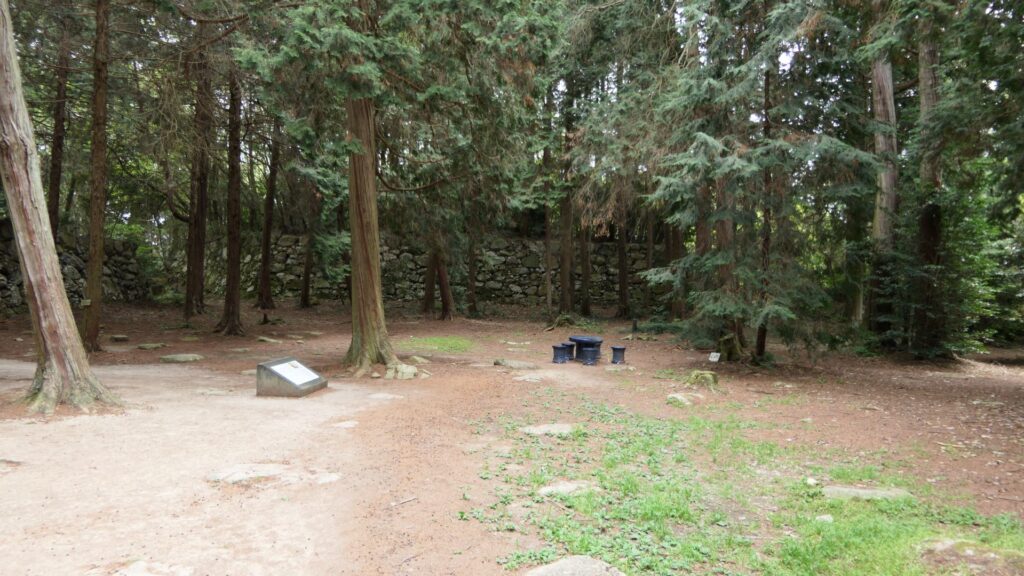
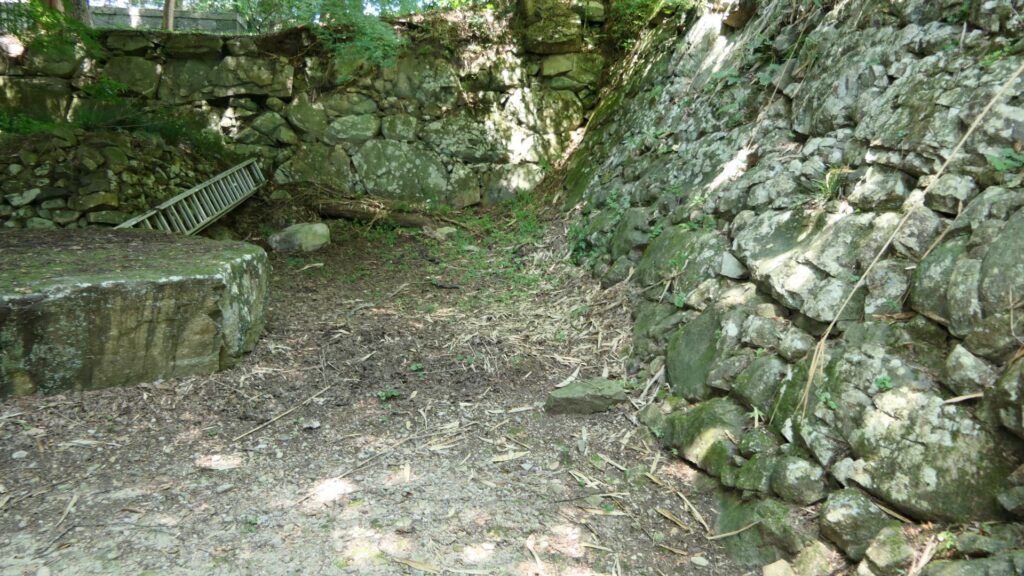
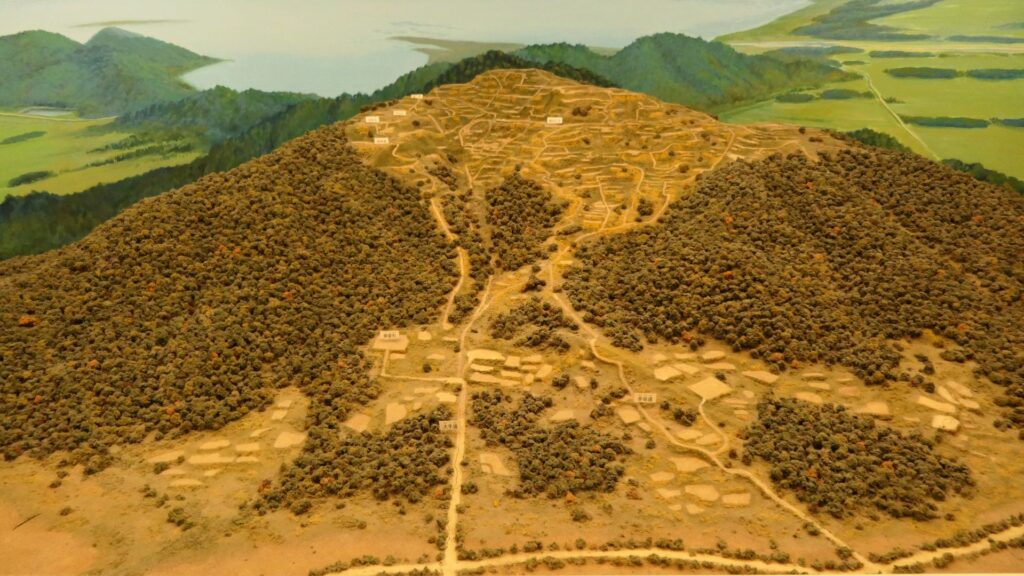
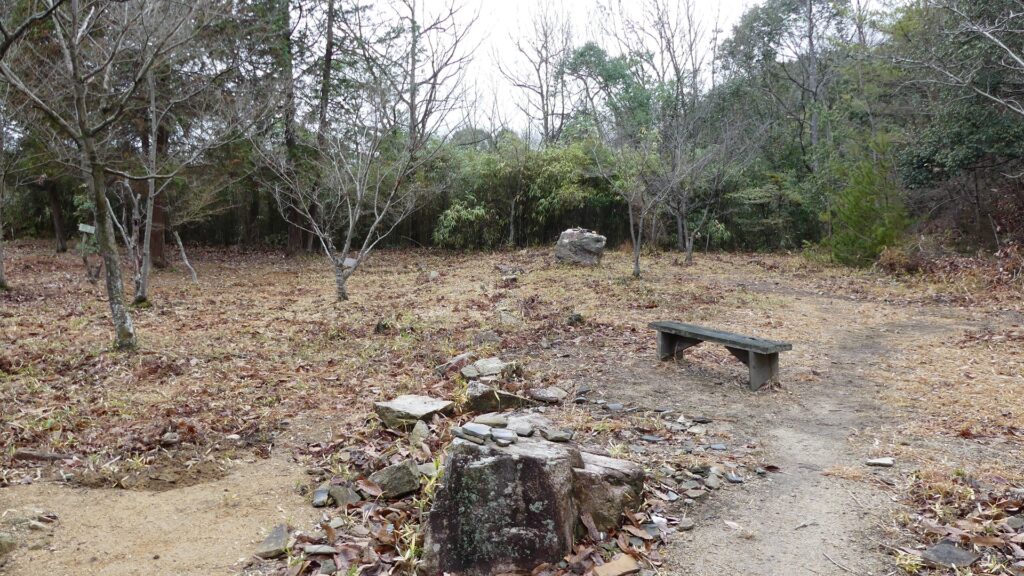
A surprising thing was discovered in the ruins of Azuchi Castle during the excavations since 1989 by Shiga Prefecture. Castles on mountains during the Sengoku Period usually had zigzagged routes to the top and had defensive walls, gates and turrets on the way to the top. Azuchi Castle Ruins had had stone walls on the way of the main route, which looked like a typical mountain castle at that time. However, the stone walls were built by Sokenji Temple at Azuchi Mountain during the Edo Period, abd not the Sengoku Period. The excavation team removed the stone walls and discovered that there was the original straight main route to the mountain, which is approximately 180m long. It also found the ruins of residential areas maybe for the senior vassals along the route, such as “Hideyoshi Hashiba (then later Hideyoshi Toyotomi who would be the ruler of Japan). In addition, four gate ruins were found around the entrance of the route. Three of the four gates had a simple design, called “Hira-koguchi”, where visitors (and possibly enemies) could have passed through easily. I wonder Why the straight main route was built instead of the zigzagged route which is typical of defensive castles during the Sengoku Period?
Theory A
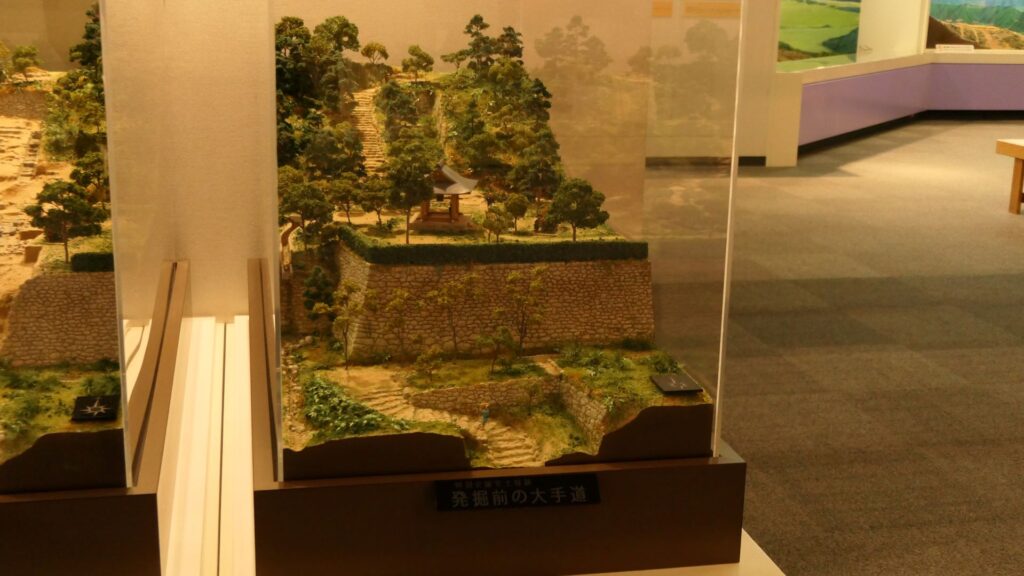
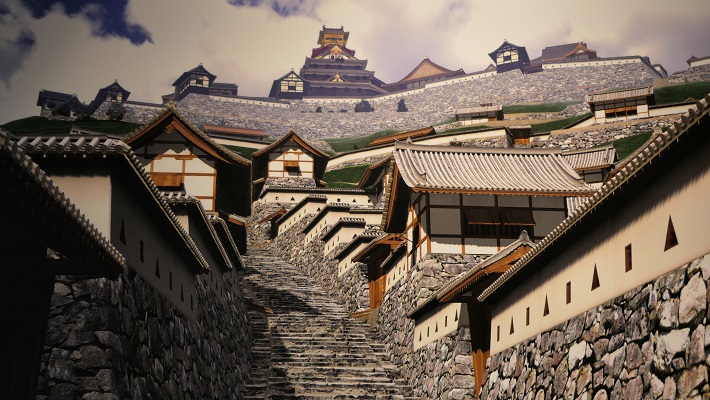
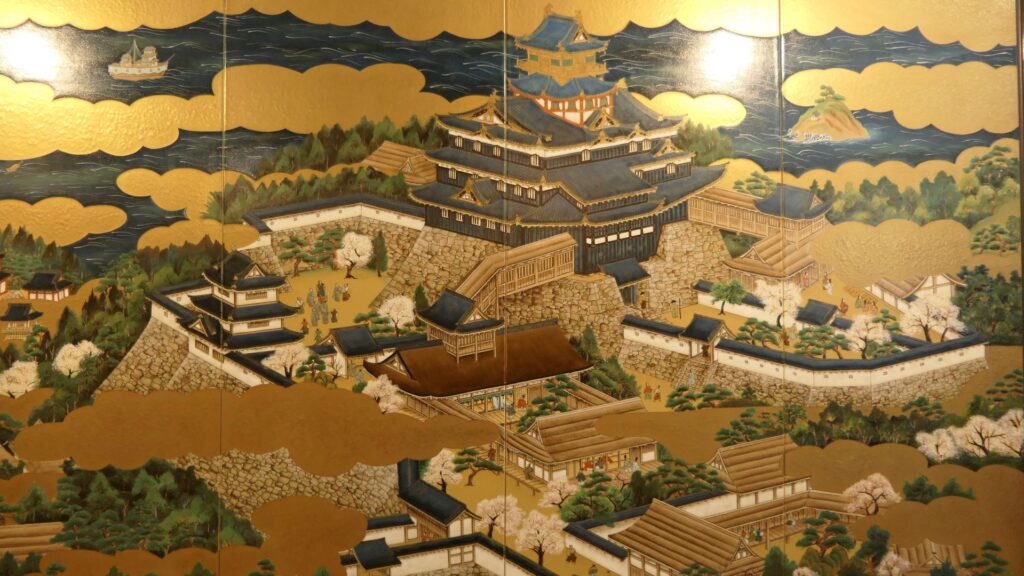
One theory suggests this route was used only for special visitors in special cases. It was particularly considered as the route for the emperor’s royal visit to Azuchi Castle though it never happened. That’s why the route was built straight for the convenience of the visitors. The straight layout might also have been emulated to look like the central street of Kyoto. In addition, there are no records of this route because it was rarely used. The three simple gates around the route entrance must have also been built only for these visits. The layouts were very similar to that of the imperial palace at that time. The gates were used depending on the visitors’ classes. The ruins of the residential areas along the route might have been used as the facilities for the visitors. According to the imaginary drawing through the use of CG of the main route, the great main tower of the castle stands over there (refer to the third picture at the bottom). The visitors on the route would feel the power of the castle’s master, Nobunaga Oda
Theory B
The next theory was the main route was built not only for the royal visit, but also for the residential areas, as I mentioned earlier. In fact, Nobunaga had built the similar straight main route in Komakiyama Castle on Komakiyama Mountain, which was his home earlier on. The residential areas of his senior vassals were constructed along the route, too. The route was straight until the midway point of the slope of the mountain but the route above had zigzagged patterns for defensive purposes. This had been done when Nobunaga was young, so he never met the emperor. Azuchi Castle had the same system as Komakiyama Castle. The route to the top zigzags after 180m. Several defensive gates were also built on the way to the upper part. Why didn’t Nobunaga make all the routes straight if he wanted them to use only for the royal visits? The reason for the three simple gates were designed to classify Nobunaga’s retainers when they went to the castle. In addition, the masters of the residential areas of Azuchi Castle were very busy and had their own territories in other locations. As a result, the areas were usually vacant, which wouldn’t appear on records.


Mystery of the Main Hall
Introduction
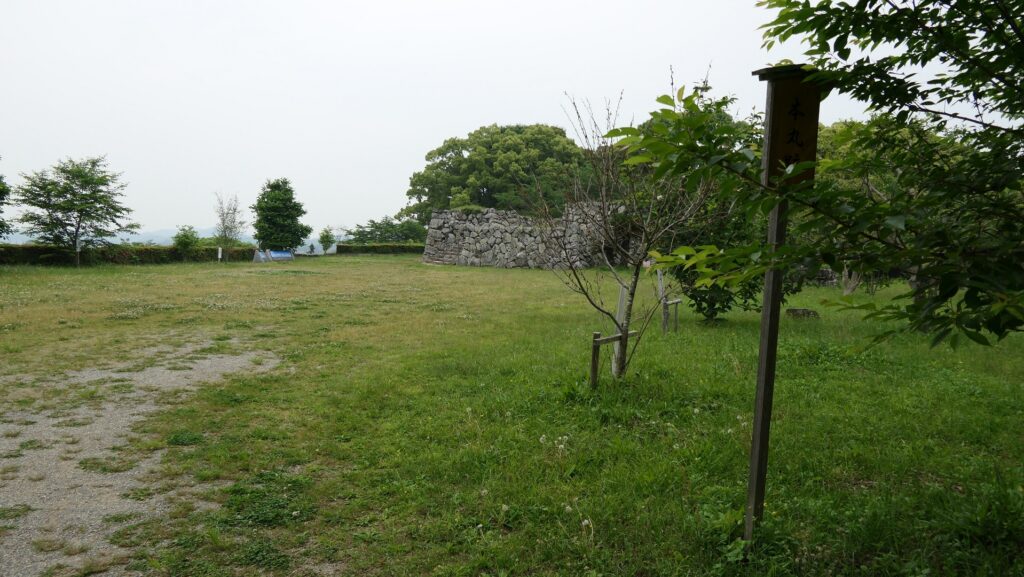
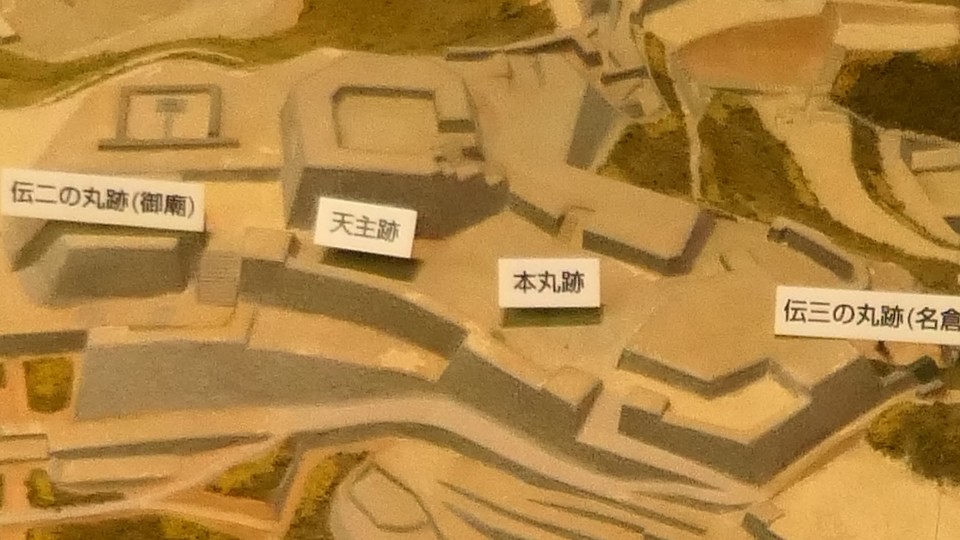
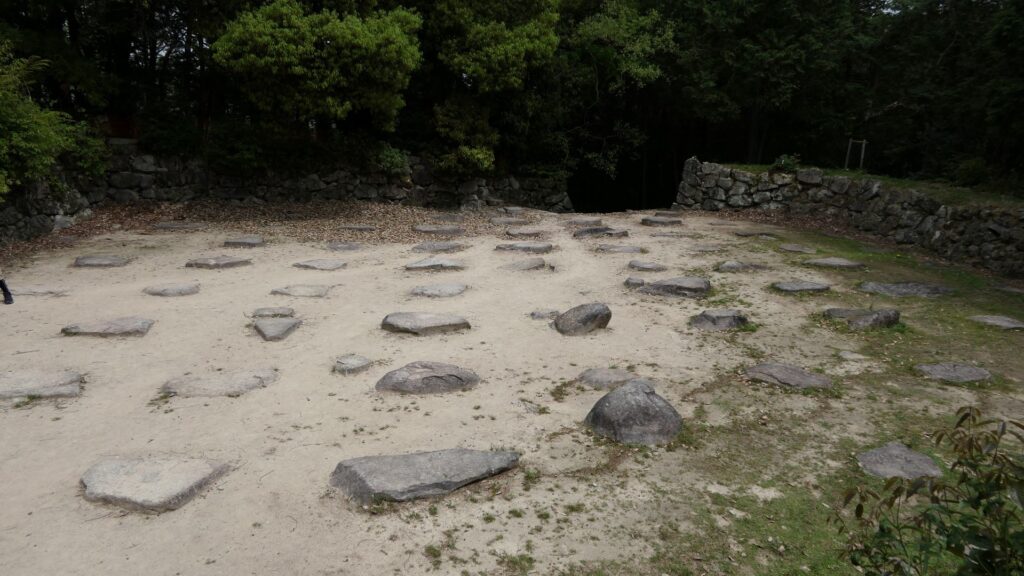
The excavation team also researched the top area of Azuchi Mountain, which includes the main enclosure. They found another answer. The team discovered that the stone foundations of the main hall on the enclosure have wider intervals than the typical halls at that time. After some studies, it was found that the layout of the stone foundations of Azuchi Castle Hall is very similar to that of Seiryoden Hall in the imperial palace during the Edo Period. Shincho-koki, which is the most reliable biography of Nobunaga, stated that Azuchi Castle had room for the royal visit or the emperor’s stay. A noble’s diary also says that the emperor would go to Azuchi. What did the main enclosure of Azuchi Castle really look like?
Theory A
One plausible theory suggests there must have been the main hall for the emperor on the main enclosure. Nobunaga might have thought he would move the emperor and the capital of Japan from Kyoto to Azuchi. Before the construction of Azuchi Castle, Nobunaga retired as the lord of the Oda Clan. He also resigned from all his positions in the imperial court until the completion of the castle. Nobunaga might have wanted to be the person who surpasses all the positions of Samurai and the imperial court. He actually gave his castle in Kyoto to the current prince. He also adopted the prince’s son. These facts might indicate that Nobunaga would invite one of them to Azuchi as the new emperor. If the new emperor lived in the main hall of the main enclosure, Nobunaga could look down on him from the much higher main tower. That would symbolize Nobunaga was just like the most powerful monarch of Japan.

Theory B
An alternative theory suggests the main hall must have been the government offices. Nobunaga usually lived in the main tower and the second enclosure, with his family where other people were rarely allowed to enter. The other third enclosure on the mountain was used as the reception hall. Therefore, if the main enclosure was used just for the emperor, there would be no place for the government to stay in. According to architects, it is impossible to determine what was built using only stone foundations. The Shincho-koki biography also states that there was another hall, called “Nanden” (which means “south hall”) in the enclosure. It was thought that Nobunaga usually met his retainers there. “The royal visit room”, written in the biography, also states that there was probably part of the hall or another small hall. As for Nobunaga’s position, he might have destined to become the next shogun, which was the traditional position for the new shogunate, according to a historian’s study.
Mystery of the Main Tower
Introduction
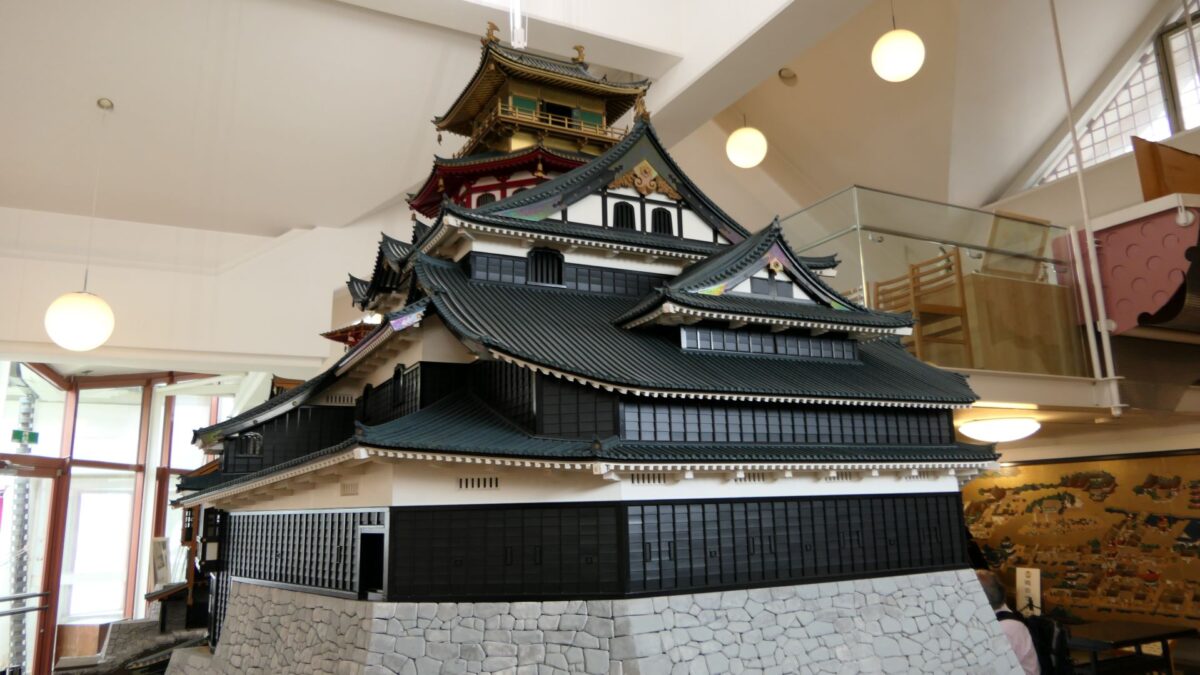
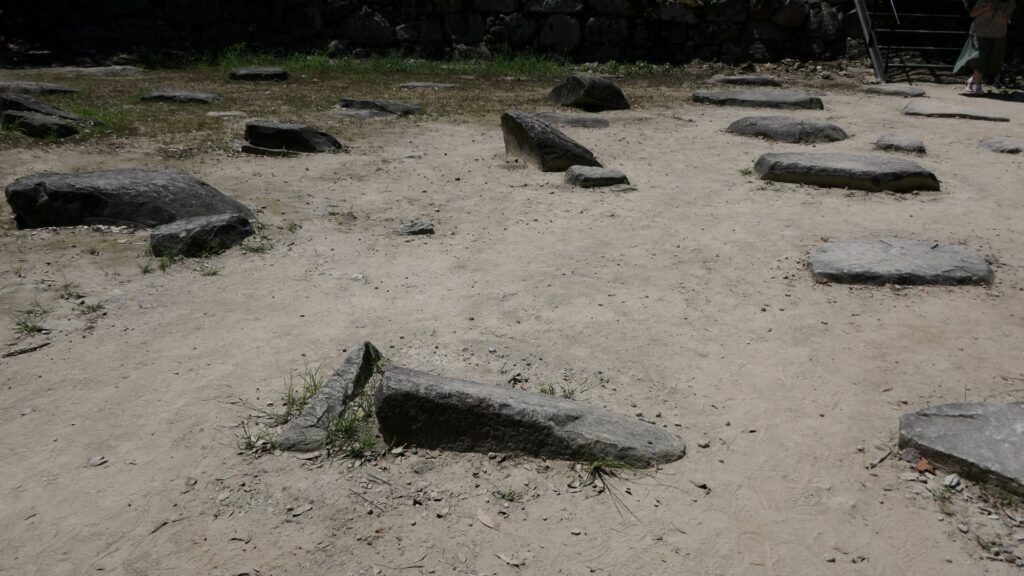
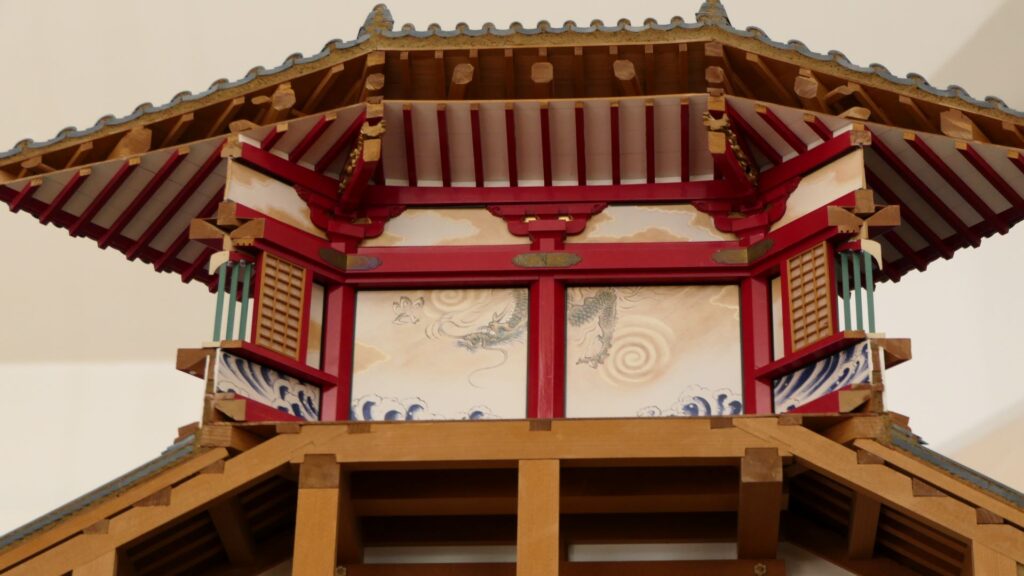
The main tower of Azuchi Castle is one of the examples of the first proper high buildings for Japanese castles at that time. It was said that Nobunaga was the only person who lived in a main tower according to records. The tower must have had a spiritual aura and authoritative presence. According to Gyuichi Ota who was the author of the Shincho-koki biography and Luis Frois, a missionary who visited Japan at that time, it was about 32m tall (41m including the tower base) composed 5 levels (6 floors and 1 basement). The tower was very colorful. Especially, the 5th floor was a red octagon shape with Buddhist paintings on the inside walls. The top 6th floor was a golden square shape with Chinese saints’ painted on the inside walls. There are a lot of remaining stone foundations to the base, but they just lack the central one, which comes from the original conditions. What did the main tower actually look like?

Theory A
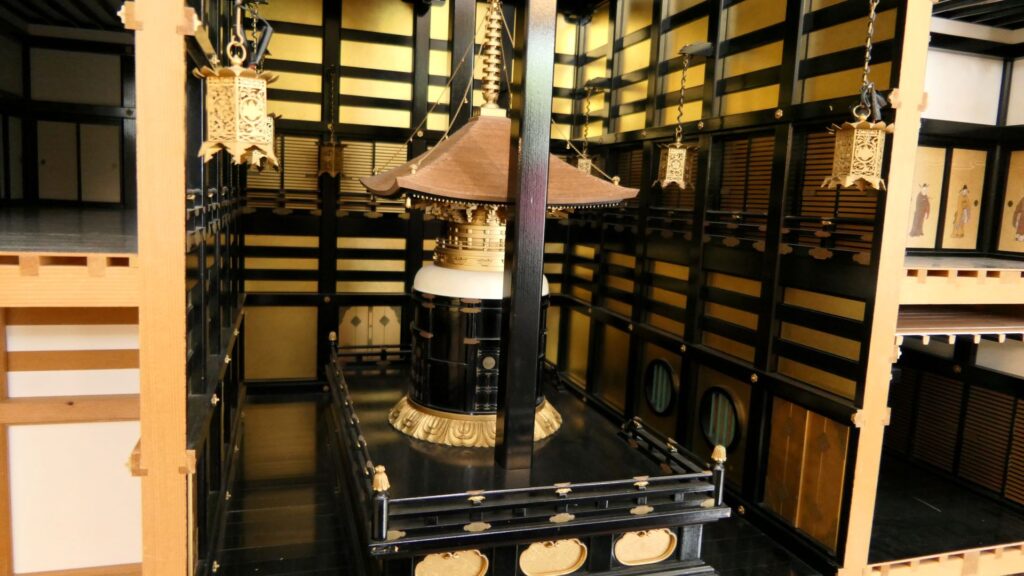
A popular theory suggests there is a drawing which shows the design of the tower, called “Tenshu-sashizu” (which means “the design of the tower”). It was recorded and passed down by a magistrate family of the Kaga Domain. It doesn’t say it is the design of Azuchi Castle tower, however, it matches the records mentioned above and the on-site situations. Dr. Akira Naito made a restoration plan using the drawing, which is wildly accepted. According to the plan, the tower had an atrium structure, and a pagoda on the center of the base without the stone foundation. Experts speculate that the pagoda would indicate the appearance from the ground, written in the Lotus Sutra. You can see the 1/20 scale model based on the plan in Azuchi Castle Museum. You can also see the real life model of the 5th and 6th floors of the tower in Nobunaga no Yakata Museum. The tower was vewed as a heaven for Nobunaga who would reign over the pagoda as the only living god.

Theory B
Others have argued the plan based on the Tenshu-sashizu drawing. They say that it is impossible that the characteristic atrium structure was not recorded. For this reason, there is another restoration plan which doesn’t the atrium. Furthermore, the most controversial problem is that if you rebuild the main tower just as Gyuichi said, the tower will have to hang over the existing base. Dr. Yoshihiro Senda has an alternative theory however. He says that the tower would be able to be supported by Kake-zukuri method. This method involves building the foundation by combining many columns and horizontal beams like lattices on rocks or the ground. Buildings using this method can been seen in some old shrines and temples such as Kiyomizu-dera Temple in Kyoto. It has also been seen in some castles like Himeji and Fukuyama. Dr. Senda points out the traces of stone foundation were found beside the base, which could indicate the Kake-zukuri method was used. In addition, the decisive evidence could be found in the future. Nobunaga sent the screen of illustration of Azuchi Castle, called “Azuchi-san-zu-byobu” to the Pope. The screen was once exhibited in the Vatican Palace but disappeared mysteriously. Officials from Shiga Prefecture is currently seeking for it in Italy. If it is found, it could be the discovery of the century.
Mystery of Sokenji Temple
Introduction
Nobunaga founded Sokenji Temple inside Azuchi Castle. It is large for a castle. The materials of the temple were not new but were collected from older temples. This temple currently worships Nobunaga. However, curious to say, the temple officially says it was founded by a priest after Nobunaga died. According to Gyuichi’s records, there was a stone, named Bonsan, in the main tower. However, the stone was moved to the temple, according to Luis Frois. The temple was located at the middle point between the center of the castle and the side entrance. This point was important for protecting the castle, where defensive systems could have been built. So, why did Nobunaga build the temple instead of the systems?

Theory A
Frois also said that Nobunaga founded the temple in order to make people worship him there. The Bonsan stone was the icon of Nobunaga. Frois described that Nobunaga also built a public noticeboard which states people should go to the temple and worship him on his birthday. As a matter of fact, Nobunaga thought his birthday (the 11th of May according to the luna calendar) was like the birthday of the western people. For example, he moved to the main tower on that day, not during lucky days where most Japanese people believed in. The conclusion is that Nobunaga made the important spot as his holy place of the temple.

Theory B
In fact, it was not unusual that castles had temples inside them. For instance, Kannonji Castle near Azuchi had Kannon-seji Temple. Takakage Kobayakawa, who was a great warlord in the Chugoku Region, built Kyoshinji Temple in his Ni-Takayama Castle. During the Muromachi and Sengoku Periods, the Samurai ceremonies consisted of two phases. The first one was to confirm the master-servant relationship at Shuden places. The second was to communicate with each other at Kaisho places. In the case of Azuchi Castle, the center of the castle was clearly equivalent to a Shuden place. Meanwhile, Sokenji Temple must have been used as a Kaisho place. For example, when Nobunaga invited his ally, Ieyasu Tokugawa to Azuchi Castle, a Noh play (similar to Kabuki play) was held there. In addition, there are no records about people worshiping Nobunaga at the Japanese side.
Mystery of the Main Tower burning down
Introduction
The center of Azuchi Castle, including the main tower, was burned down around the 15th of June in 1582 (according to the luna calendar), just after the Honnoji Incident on the 2nd of June. The following list are the relatives who were involved in using the castle and also the prime suspects who might have burned it down.
・Katahide Gamo: He was at Azuchi Castle on behalf of Nobunaga when the incident happened. However, he left the castle with Nobunaga’s family on the 3rd of June after he heard about the incident.
・Mitsuhide Akechi: He entered the castle on the 5th of June after he killed Nobunaga during the incident. He then gave the treasures of the castle to his retainers and moved to his original home of Sakamoto Castle.
・Hidemitsu Akechi: He was Mitsuhide’s retainer and held the castle instead of Mitsuhide. He left the castle on the 14th of June after he heard about his master being beaten by Hideyoshi Hashiba on the 13th. Taikoki, which is one of Hideyoshi’s biographies, says Hidemitsu was responsible for setting the castle on fire.
・Nobukatsu Oda: He was Nobunaga’s son, and he entered the castle on the 15th of June. According to Luis Frois, it was Nobukatsu who burned the castle down.
The castle might have burned down accidentally or by night thieves. However, if you must speculate one person from the list, who was the biggest suspect?
Theory A
Nobukatsu must be the suspect as Frois said. Hidemitsu had an alibi that he was at Sakamoto Castle on that day. The Taikoki biography is only adds to the blames of the Akechi Clan. Frois also said that Nobukatsu did it for no reasons because he was unwise. Before the incident, he selfishly attacked Iga Province, failed to do so, and was yelled at by Nobunaga. After the incident, he battled against Hideyoshi, together with Ieyasu Tokugawa. However, he eventually made peace with Hideyoshi who dangled a carrot in front of him, without Ieyasu’s permission. Finally, he was fired by Hideyoshi who became the ruler after the battle of Odawara Castle. He rejected the change of his territory, ordered by Hideyoshi, though Ieyasu accepted it. Nobukatsu was not able to understand the situations properly. He was so incompetent that he could impulsively destroy the legacy of his father who was also angry at him.
Theory B
This theory is believed in. Nobukatsu must be the suspect, too. However, he was not so incompetent that he did it for a good reason. When he attacked Iga Province, he was the independent lord of the Kitabatake Clan, so he could decide it. Nobunaga had adopted Nobukatsu to the clan as the next successor. He was still the lord of the Kitabatake Clan when he allied with Ieyasu. Hideyoshi mostly captured the territory of the clan (Ise Province) because Ieyasu was so strong. Nobukatsu had to compromise with Hideyoshi before his territory would be occupied. After that, he tried to mediate between Hideyoshi and Ieyasu. He also worked hard in the battle of Odawara Castle for Hideyoshi’s unification of Japan. Therefore, it might not be sensible for Nobukatsu to be fired completely even though he rejected Hideyoshi’s command. This might have been Hideyoshi’s strategy which attempted his prefered territory plan. After the Honnoji Incident, Nobukatsu wanted to be the lord of the Oda Clan, not just that of Kitabatake Clan. However, his brother, Notbutaka also wanted it. Nobukatsu might have burned the main tower down intentionally in order to prevent Nobutaka and other senior vassals from disturbing him.