Introduction
浦添城は、現在の沖縄県浦添市にあったグスク(城)です。グスクとは、12世紀終わり頃から15世紀中頃にかけて築かれた、按司(あじ)と呼ばれた領主の城館及び地域の宗教・集落施設としても使われた場所のことです。奄美諸島から沖縄諸島、先島諸島にかけて、約300も築かれたと言われています。特に13世紀から14世紀(日本本土の鎌倉~南北朝~室町時代辺り)には、有力按司の居城として長大な石垣で囲まれた大型グスクが出現しました。日本本土で本格的に石垣を使って築かれた城は、戦国時代後半(16世紀後半)に登場しますので、それより200年以上も早かったことになります。しかも、グスクの石垣は琉球石灰岩を使い、優美な曲線を描いていて、日本本土の石垣とは、ルックスも随分異なっています。浦添城は、そのような大型グスクの一つで、琉球王国成立までの歴史にも関わっています。この記事では、浦添城の歴史を、グスクの登場と琉球王国成立までの歴史と絡めながら説明していきます。なお「琉球」という名称は、もともと中国人が命名した地域名で、琉球王国が支配した奄美・沖縄・先島諸島一帯を指すとされています。(「沖縄県の歴史」)

立地と歴史
グスク時代と三王国の成立
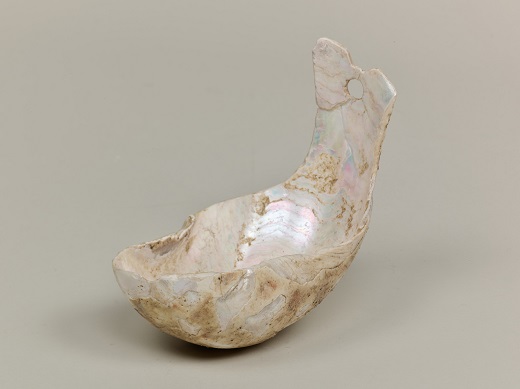
沖縄は古代から夜光貝などの貝殻類の産地として知られていました。夜光貝を加工した螺鈿細工が、美術工芸品や建築の装飾に使われていたのです。当初その交易(「貝の道」と呼ばれた)は、当時日本の境界とされていた奄美諸島の喜界島周辺で活動していた商人たちが、担っていたのではないかという見解があります(「琉球史を問い直す」)。その時点では、沖縄の多くの人たちは、漁労・狩猟・採取を中心とした生活を送っていたと考えられていて、沖縄の時代区分として、11世紀頃までを貝塚時代と呼んでいます。
それが、11〜12世紀頃になってくると、貿易の恩恵が沖縄全体に及んできました。石鍋・陶器(亀焼、かむいやき)・鉄器が普及し、農業が普及し、生活レベルが向上しました。沖縄でも「グスク土器」が生産されるようになります。中国の宋王朝も積極的な貿易政策を取っていました。そして高価な中国製磁器が取引されるようになり、沖縄からは夜光貝や硫黄が輸出されました。貿易商人は、最初は中国・朝鮮・日本本土の人たちが中心でしたが、それに沖縄の人たちも加わるようになります。こうして、沖縄に「按司」と呼ばれるたくさんの有力領主たちが現れ、グスクを築きます。琉球王国が成立するまでの、この時代は「グスク時代」と呼ばれています。
14世紀になると、沖縄本島では有力な按司のもと、3つの王国が成立しました。
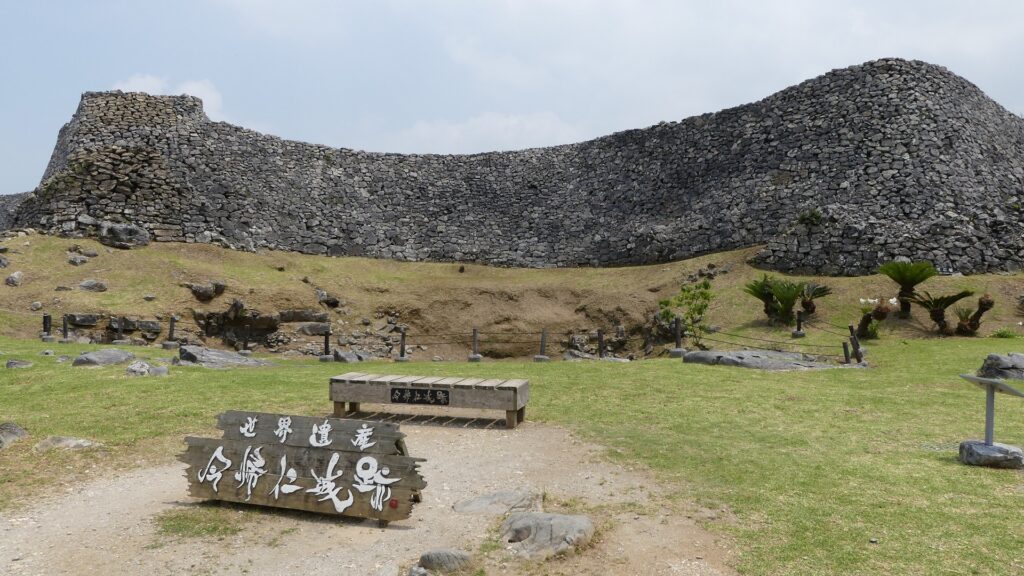
・北山(山北):本拠地 今帰仁城
・中山:本拠地 浦添城
・南山(山南):本拠地 島添大里(しましーおおざと)城
彼らの本拠地にもなった大型グスクの築造も、その動きに沿ったものと考えられます。これらの多くは高台に立地し、複数の郭から構成されていて、中心部は、儀式を行う正殿と、宗教的施設の御庭(うなー)から成り立っていました。
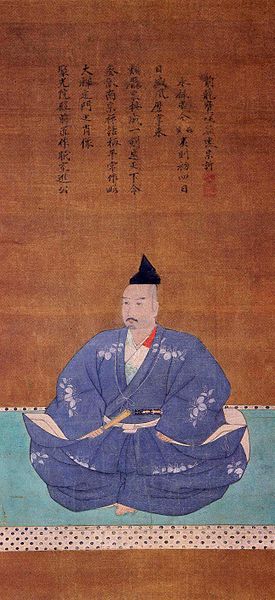
同じ頃、中国では明が建国されました。創立者の洪武帝は、反対勢力や倭寇を取り締まるために、「海禁」政策(私的な海外貿易や海外渡航の禁止)を実行しました。また、漢民族が再建した王朝の正当性(以前の「元」は異民族国家)を示すため、伝統的な儒教的秩序の確立を目指しました。そのため、日本を含む周りの国々に、宗主国(明)への朝貢を求めたのです(招撫使)。そして、1372年には中山王国に使節が送られました。三王国の中では最大勢力と見なされていたからと思われます。当時の王、察度は直ちにその弟を進貢使として明に派遣しています。続いて、1380年には南山王が、1383年には北山王も明への朝貢を始めました。この朝貢は、貿易とセットになっていたため、三国に莫大な利益をもたらしました。

中山王国と浦添城
浦添城を本拠とした中山王国については記録が少なく、いつからどのように治められていたかは、後に作られた琉球王国の正史(「中山世鑑」など)しか文献史料がありません。それによると、3つの王統が統治しました。
1187年:舜天即位(3代継続)
1260年:永祖即位(5代継続)
1350年:察度即位(武寧までの2代、1390年には先島が帰順)
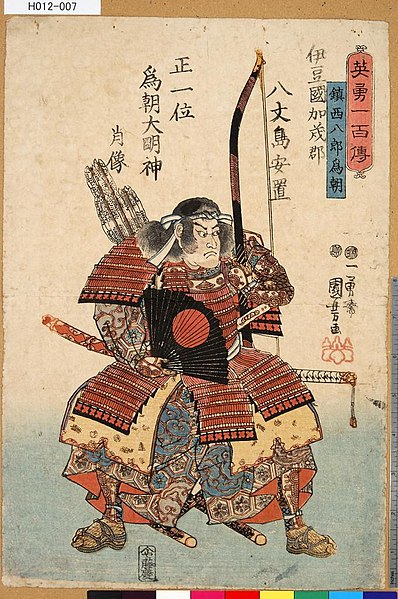
最初に即位した舜天は、日本本土から逃れてきた源為朝と、大里按司の妹との子とされています。そのこともあって、最初の王統は伝説上のものではないかと言われています。実在の可能性があるのは、次の英祖からで、考古学から考えられた浦添城の築城時期と重なっています。最後の察度は、中国側の記録にも現れているので、存在がはっきりしています。
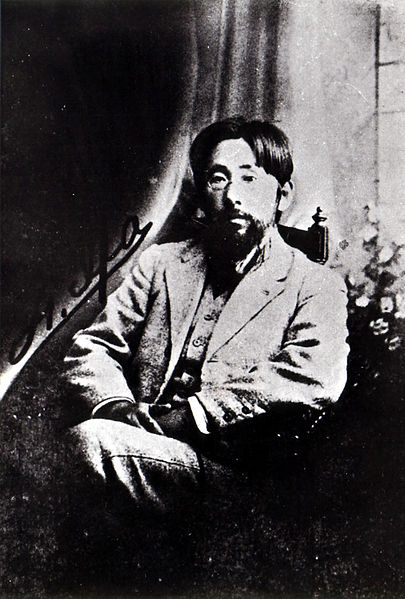
実は正史では、これらの王は全て最初から首里城にいて、琉球は最初は統一されていたが、英祖王統4代目の玉城(たまぐすく)のとき三国に分裂したことになっています(下記補足1)。しかし歴史家の中では、最初から三国だったであろうという意見が多いです。また、中山王国の本拠地についても、歴史家で「沖縄学の父」と伊波普猷(いはふゆう)たちによって、浦添城の存在が明らかになりました。
(補足1)今の王城を首里城というのは、昔天孫氏が初めて天から降臨して、あまねく諸国を巡り、城を築く地を選ばれたところ、今の王城の地が最も優れていたので、初めて経営して城を築かれたから首里というのである。
舜天尊敦と申し上げるのは、大日本人皇五十六代の清和天皇の孫、六孫王より七世の後胤、六条判官為義の八男、鎮西八郎為朝公の男子であらせられる。
この時(玉城王)から世は衰え、政はすたれて朝勤会同の礼も日に日に衰え、内では思うままに女色に溺れ、外では狩猟に耽られたので、諸侯は朝廷に出仕する礼を取らず、国々の戦いが始まった。国は分かれて三つとなり、中山王、山南王、山北王と呼ばれた。(中略)中山というのは、首里の王城である。
(「訳注 中山世鑑」より)
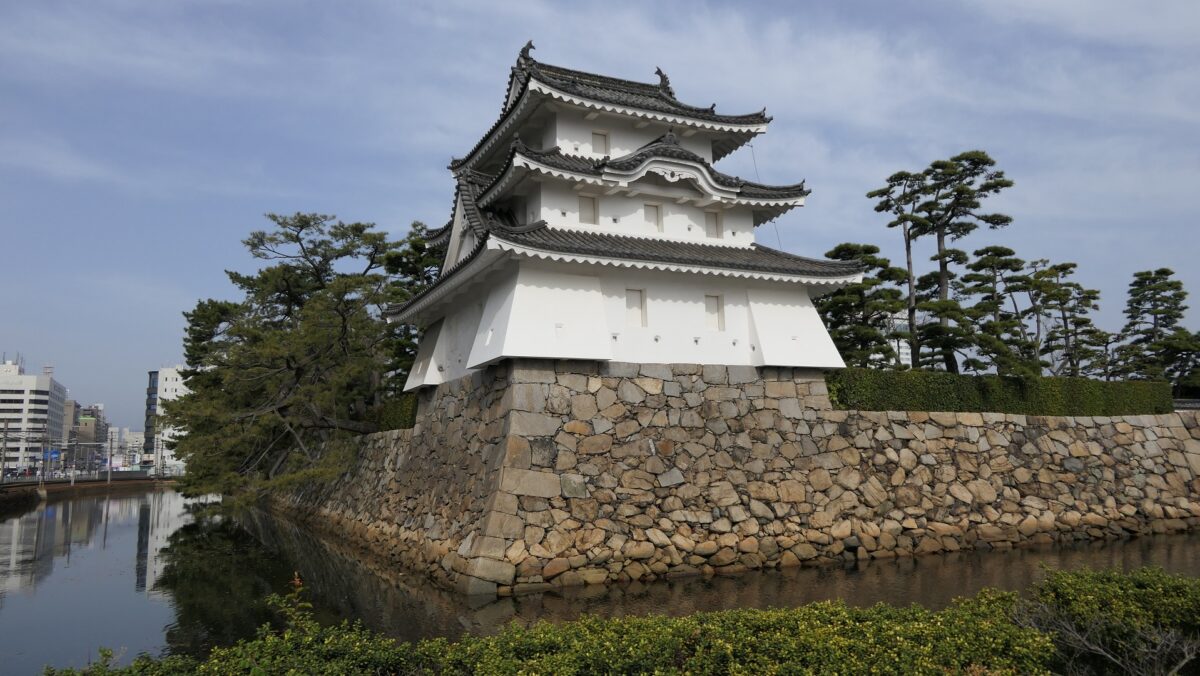
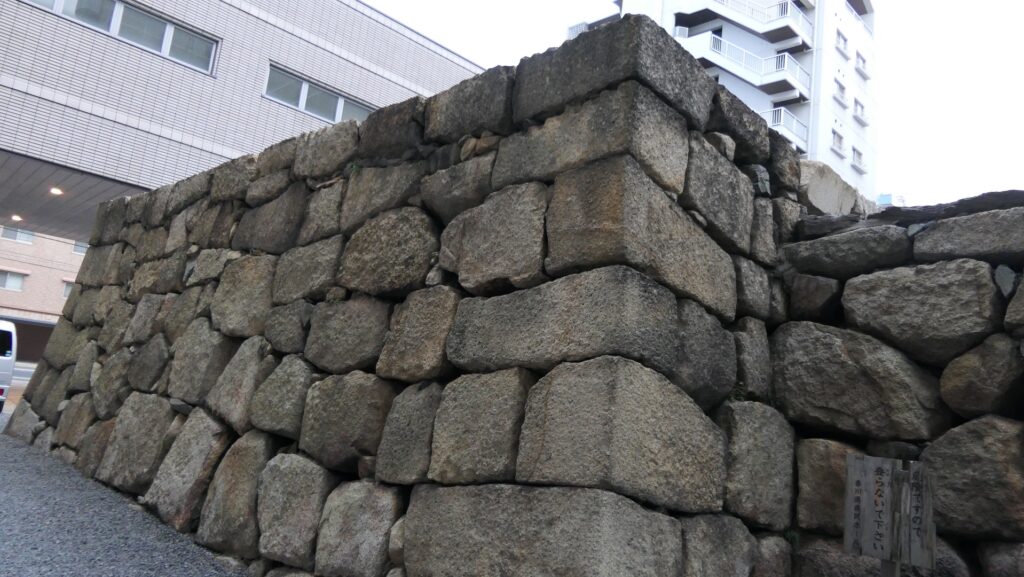
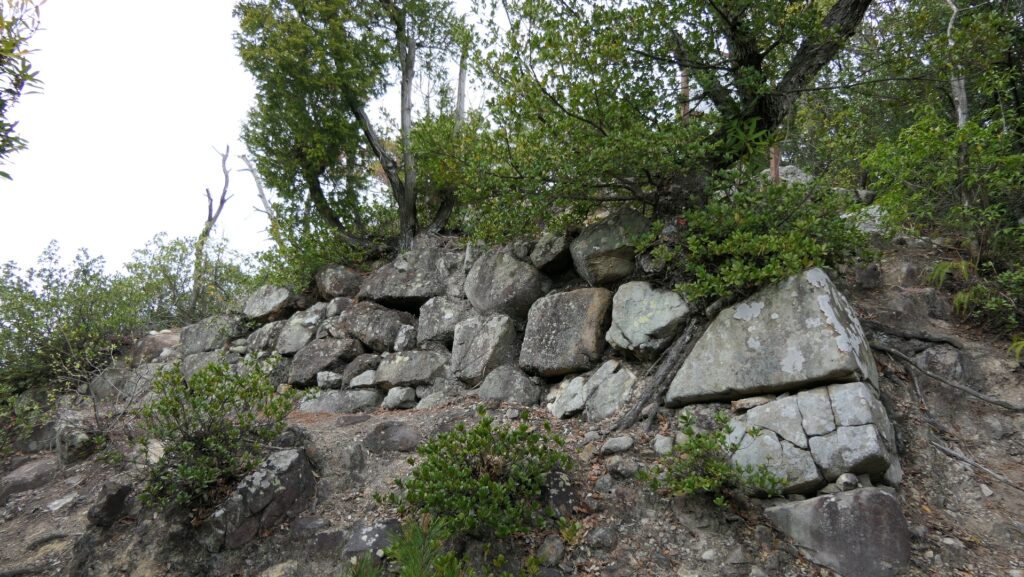
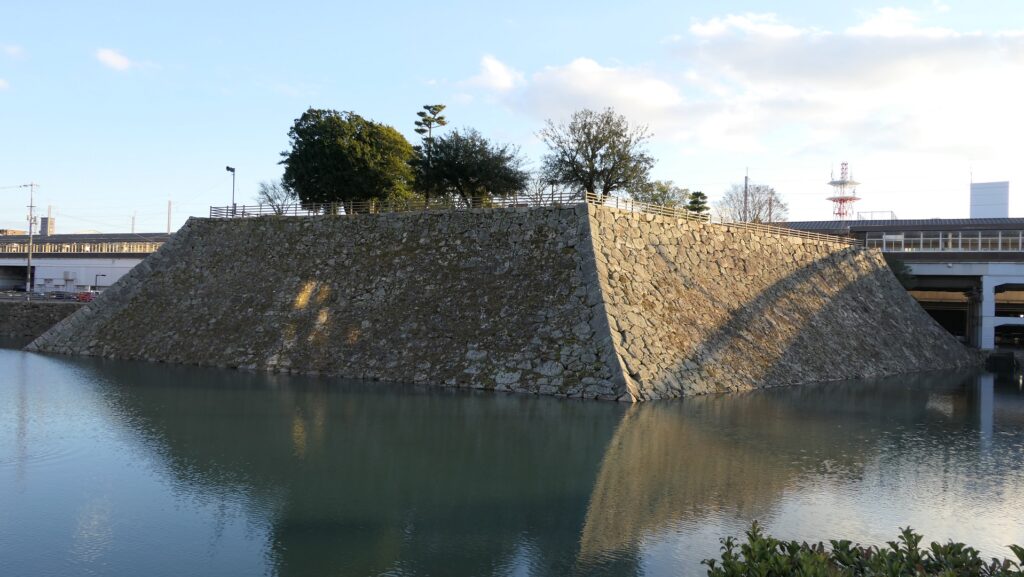
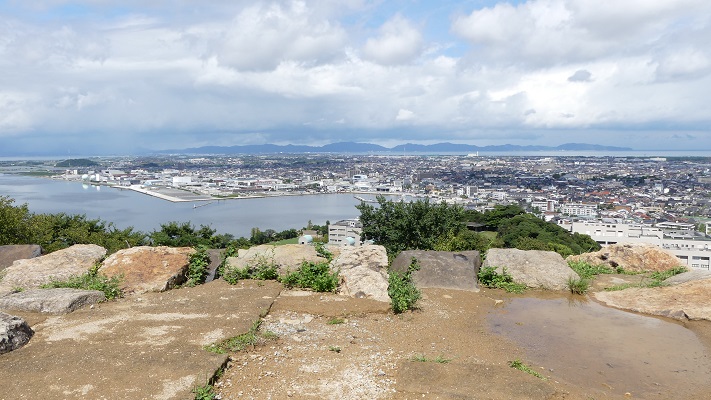
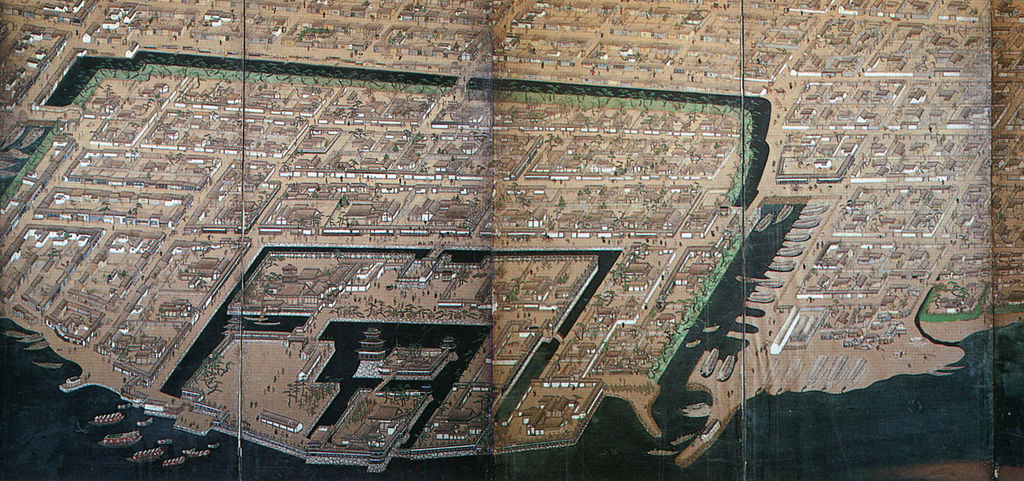
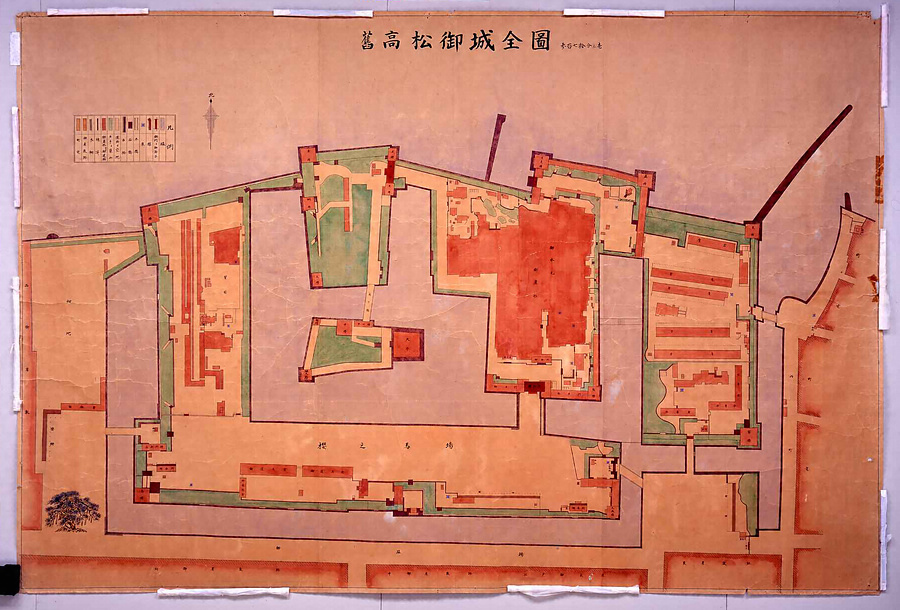
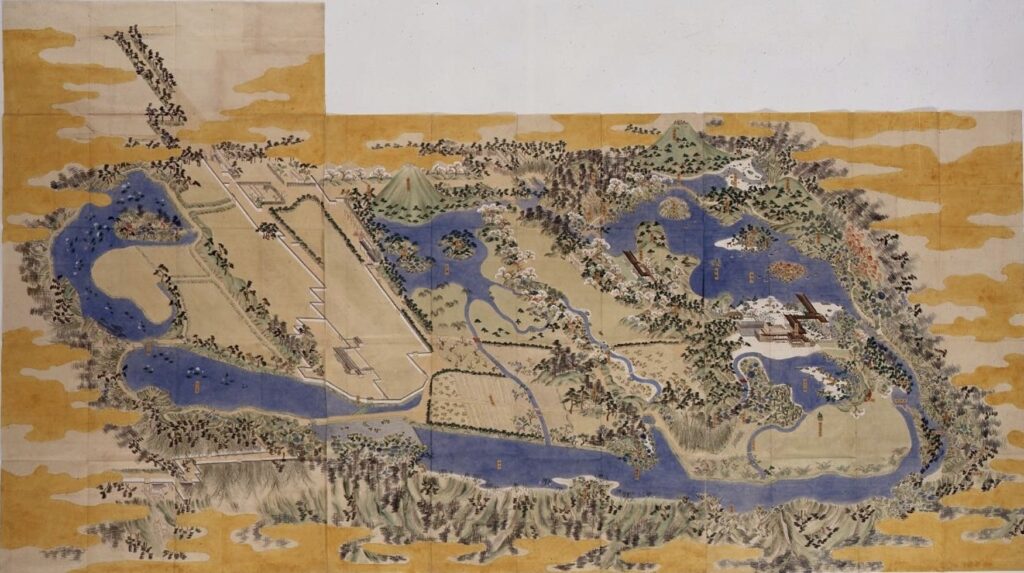
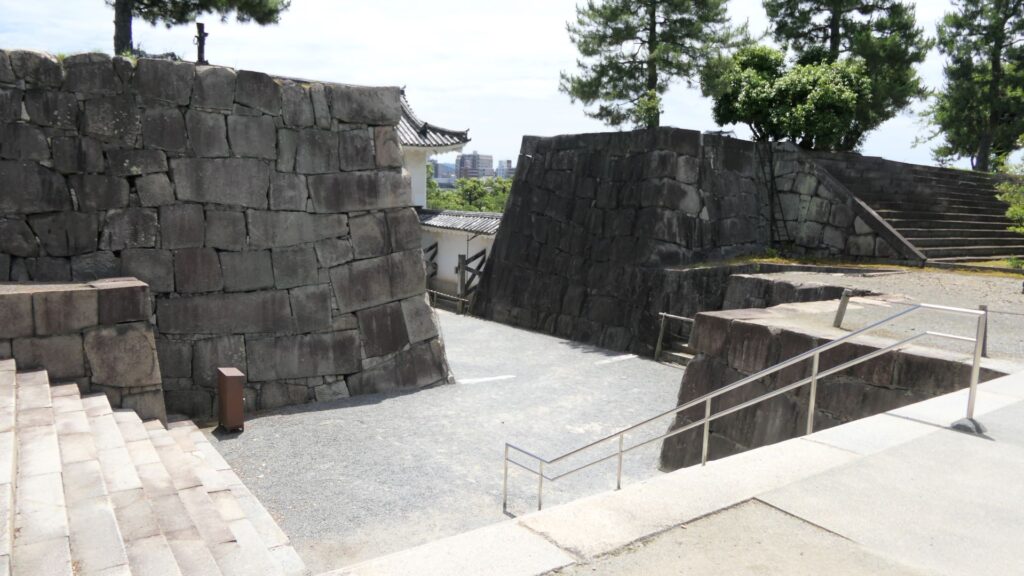
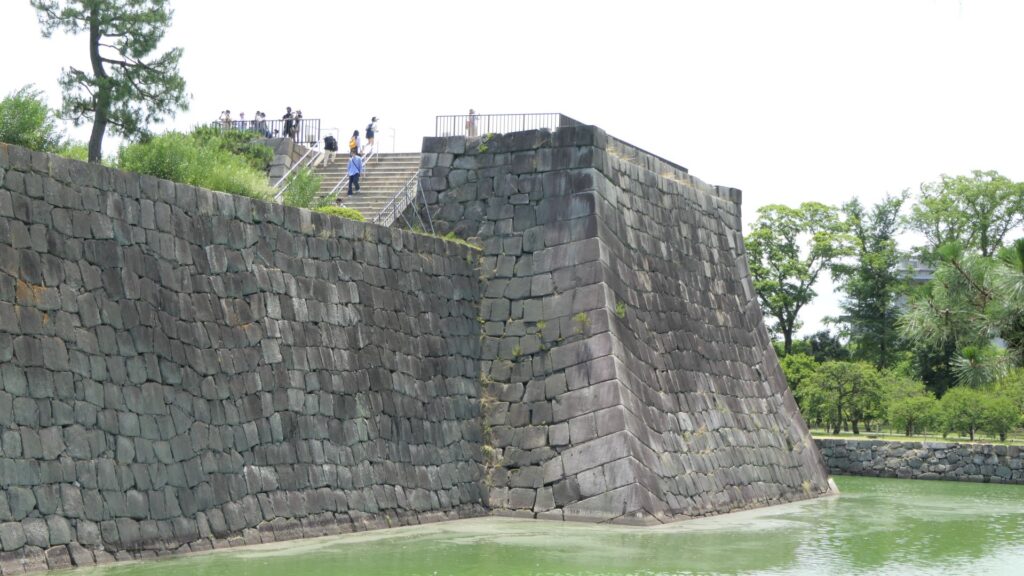
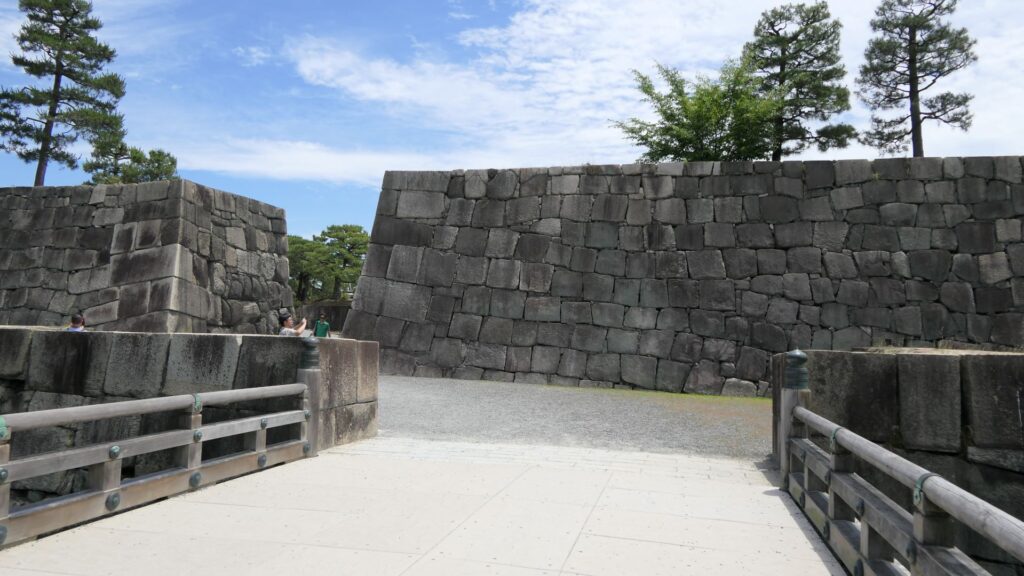
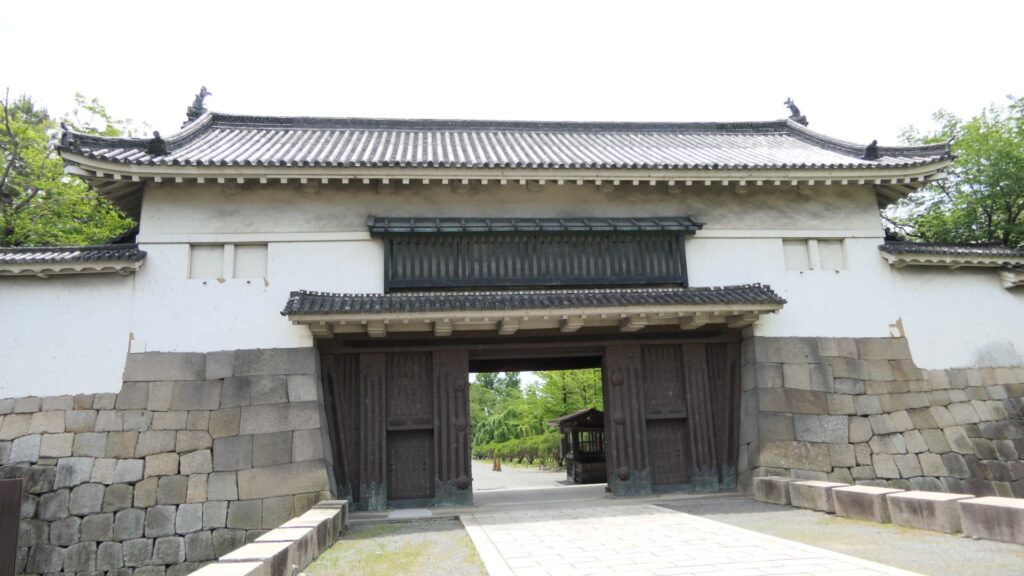
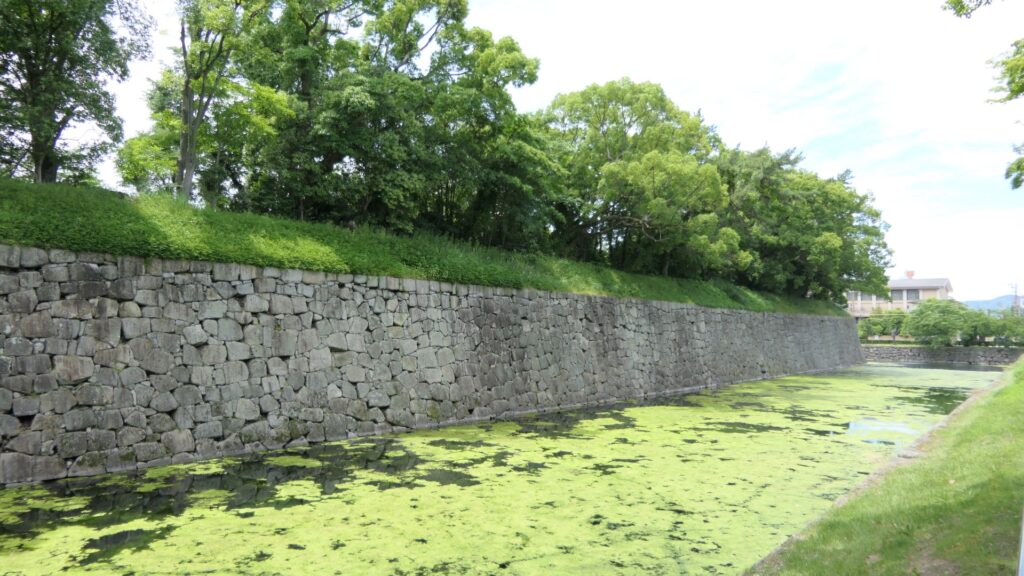
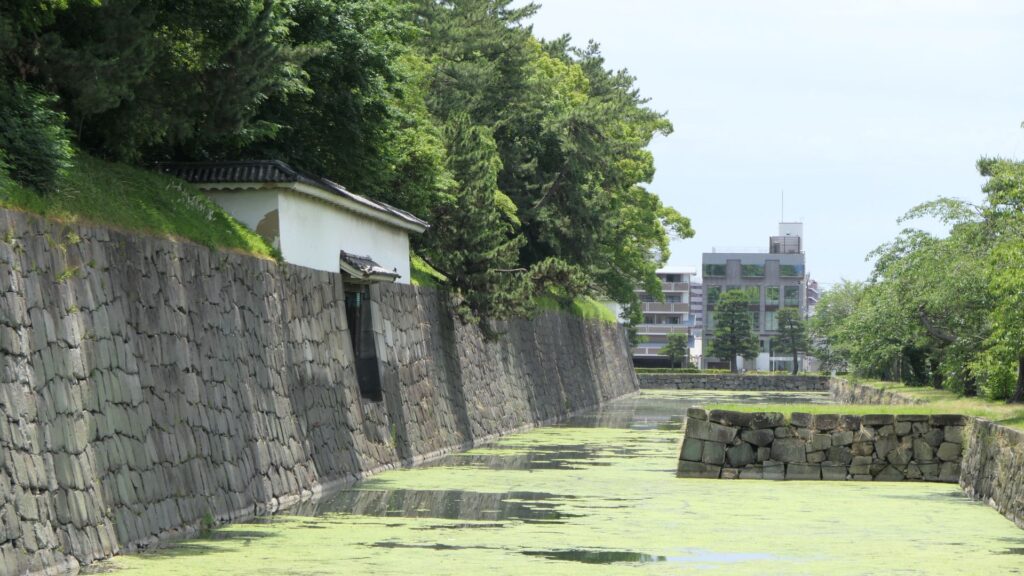
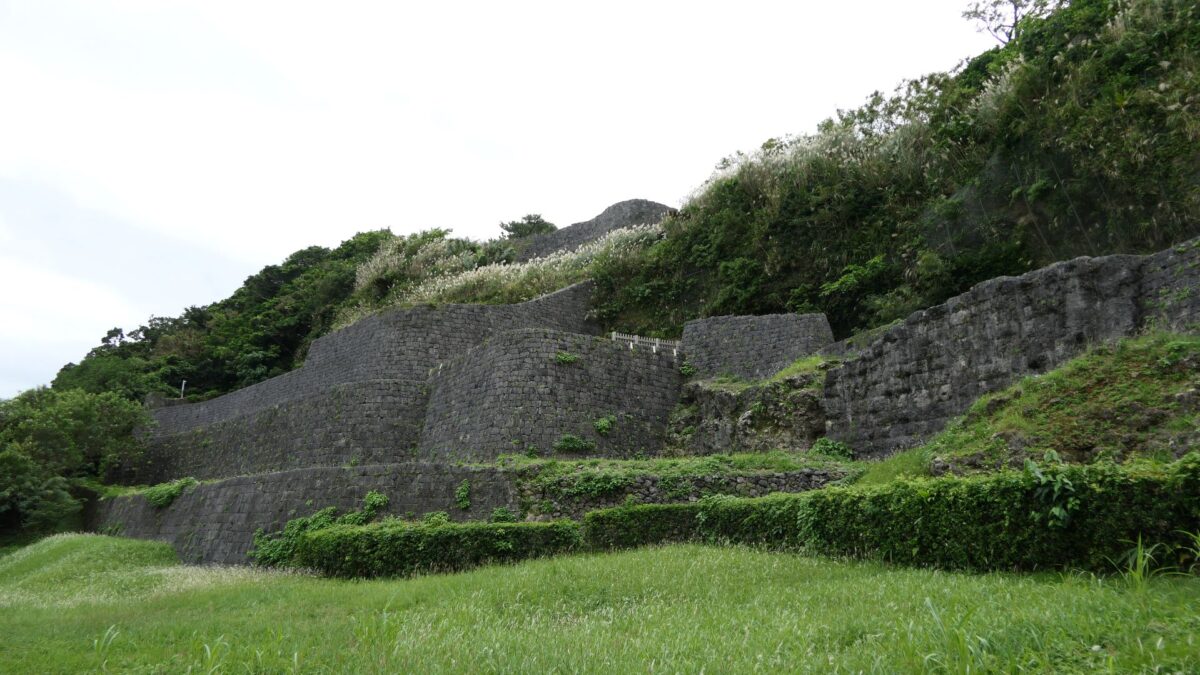
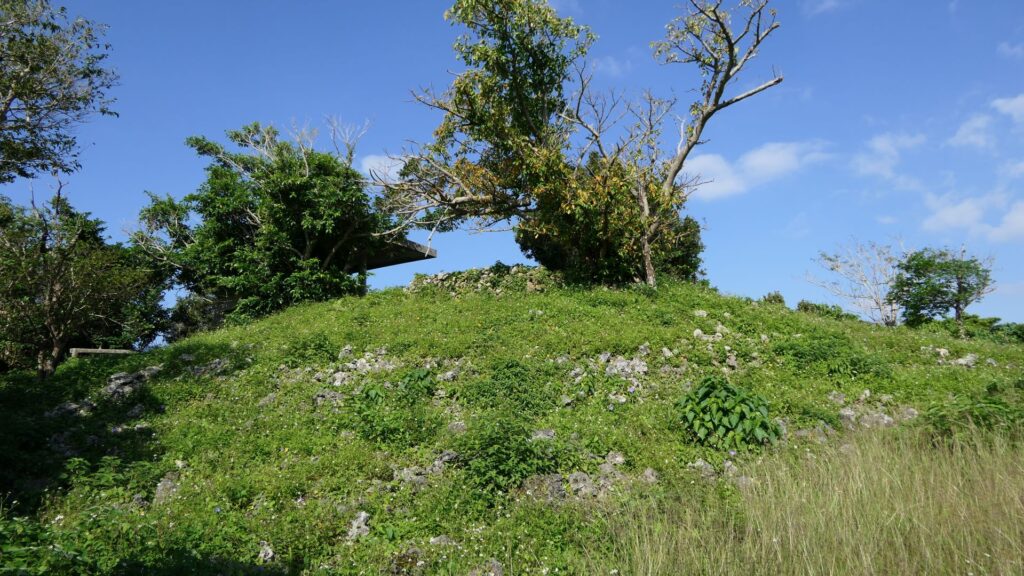
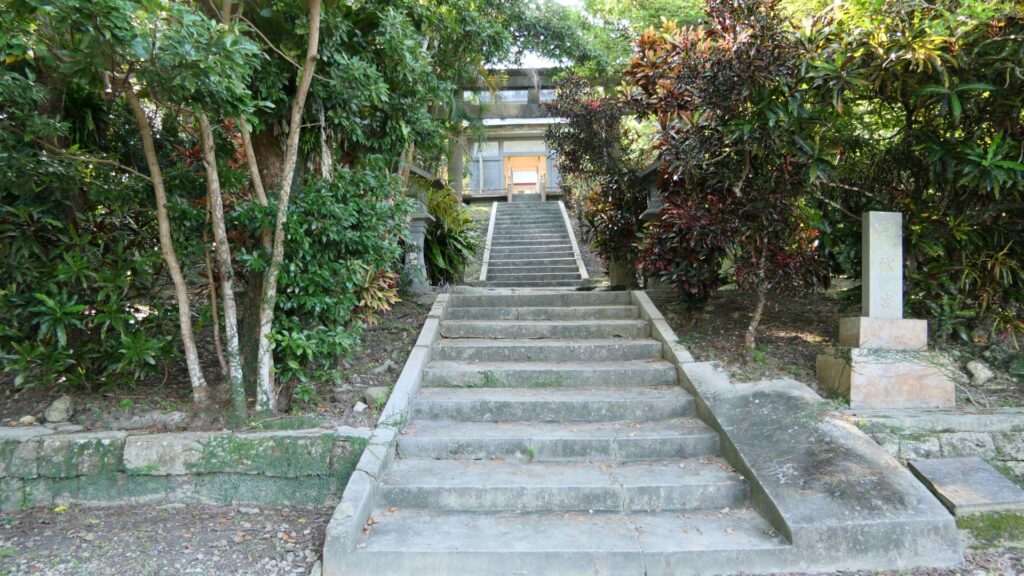
浦添城は「浦添断層崖」と呼ばれる琉球石灰岩でできた崖の上に築かれました。頂上部は東西約4百メートルにわたって石積みの城壁に囲まれていました。城の北側は切り立った崖によって天然の要害になっていたので、南側に堀や張り出しの郭(土造り)を築いて防御を固めました。また、崖下を流れる牧港川が貿易港である牧港に通じていました。当時の沖縄では、北山の今帰仁城と並ぶ最大級のグスクだったのです。
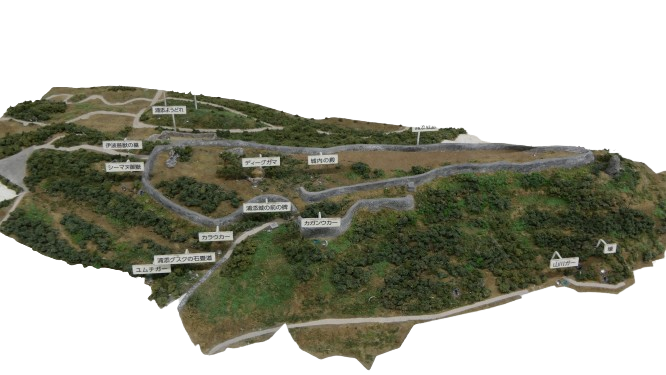
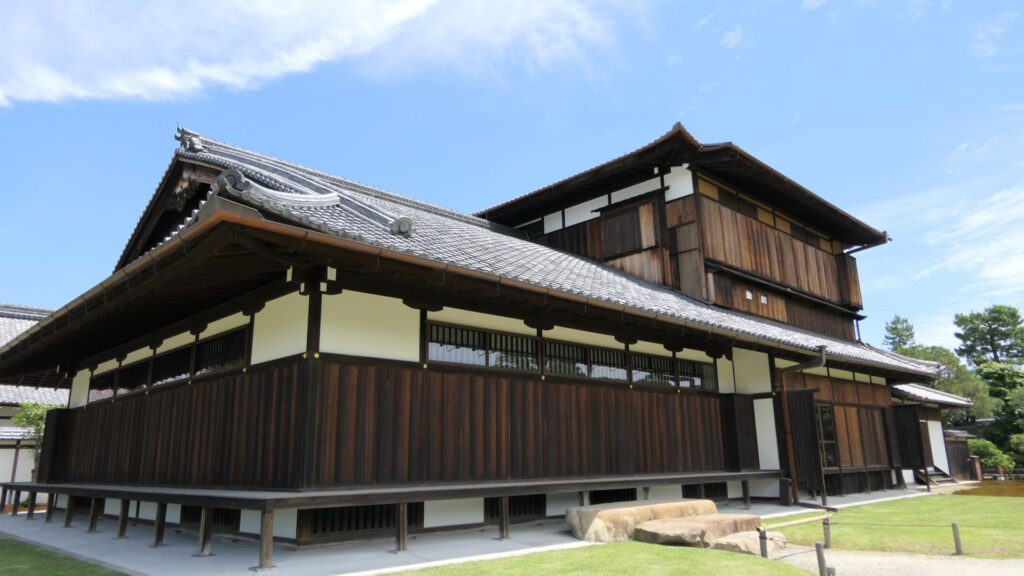
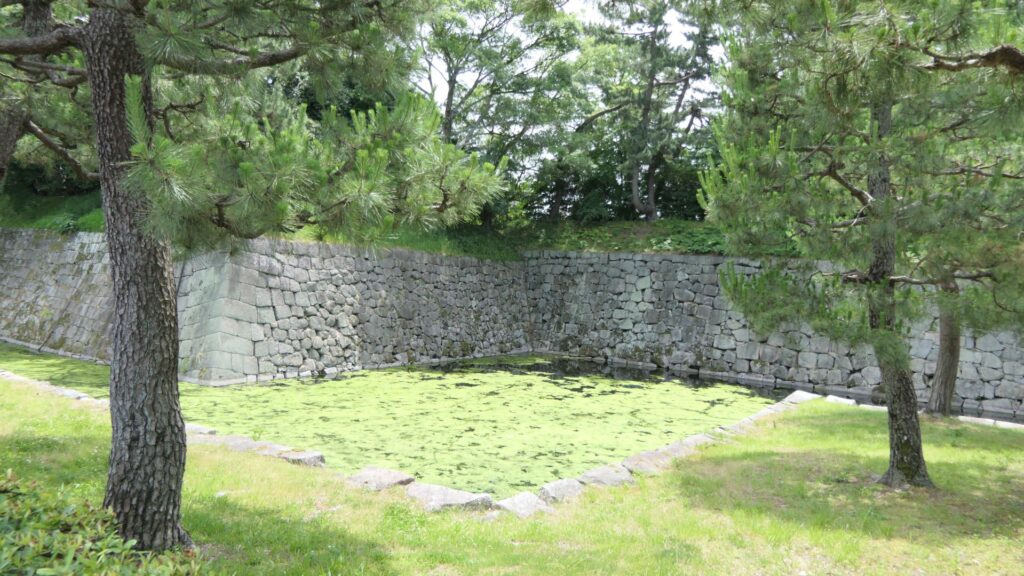
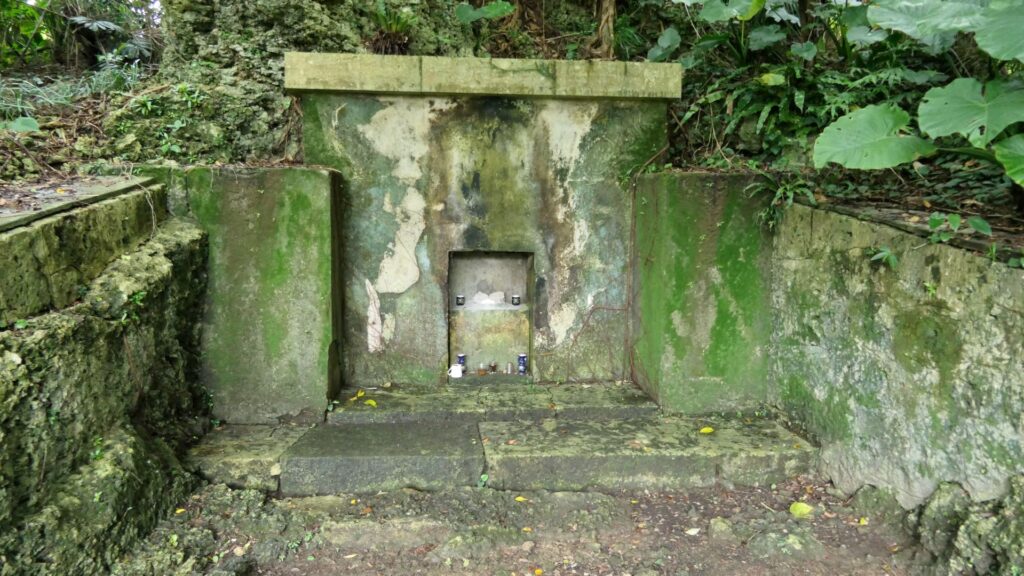
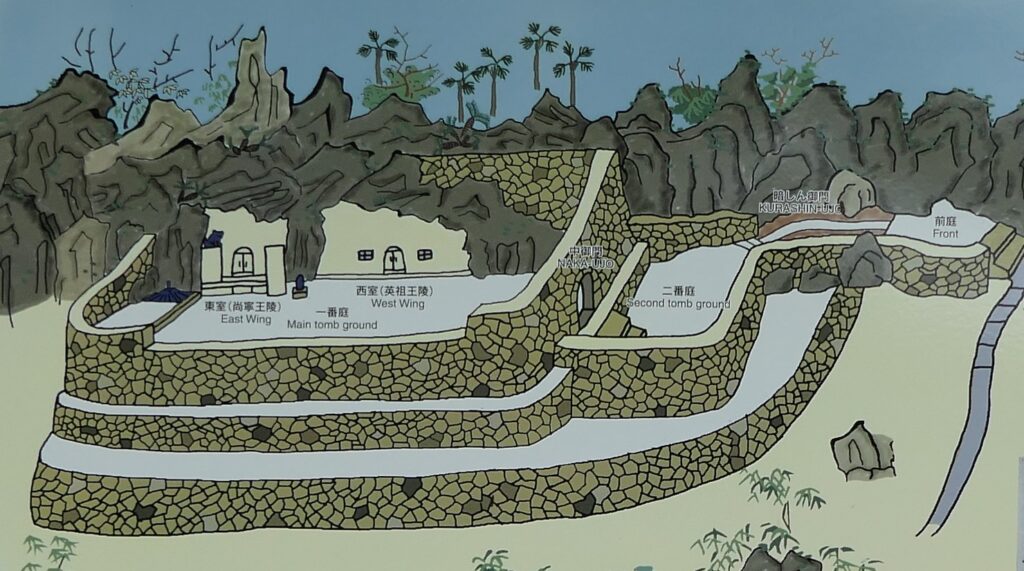
主郭部には、高麗系の瓦を使った正殿があり、外来の技術者が関わっていました。その前には御庭があり、周辺にも「ディークガマ」などの祈りの場所がありました。城の北側には王墓である「浦添ようどれ」が作られました。後の史書(「琉球国由来記」など)によれば、1261年に英祖王が造営しました。これも、現地の発掘調査による想定と一致しています。英祖王統の王たちが葬られている可能性がある墓室(西室)では、中世本土日本人の特徴がある頭蓋骨が発見され、もう一つの墓室(東室)では中国・東南アジア系人のDNAが検出されています。また、近くには琉球最古の寺院と言われる極楽寺が創建され、城の南側には人工池の「魚小堀(いゆぐむい)」が作られました。こういった城の構成は、後の首里城の原型になったと言われています。
明との朝貢貿易は発展していました。明が琉球を優遇していたからです。他の国に対しては「勘合貿易」と言われるように、回数や場所を限っていましたが、琉球はほぼ自由でした(中山は35年間に40回、南山は50年間に35回、北山は33年間で15回)。それだけでなく、貿易船を貸し与えたり、「久米村」と呼ばれる実務者集団を派遣したりしました。これについては、明は新興国の「琉球」を「貿易商社」として使おうとしたとか、「倭寇」として活動していた勢力の受け皿にしようとした、倭寇情報の収集・監視役とした、日本に対する交渉の仲介役にしたなどの見解があります(「琉球史を問い直す」「琉球王国 東アジアのコーナーストーン」)。その結果、中国との交易を制限された国や勢力の間に琉球が入ることになり、ますます三王国が繁栄することになりました。1404年には、中国から冊封使が琉球に派遣され、中国皇帝が中山王・武寧が琉球国中山王として認める儀式が行われました。


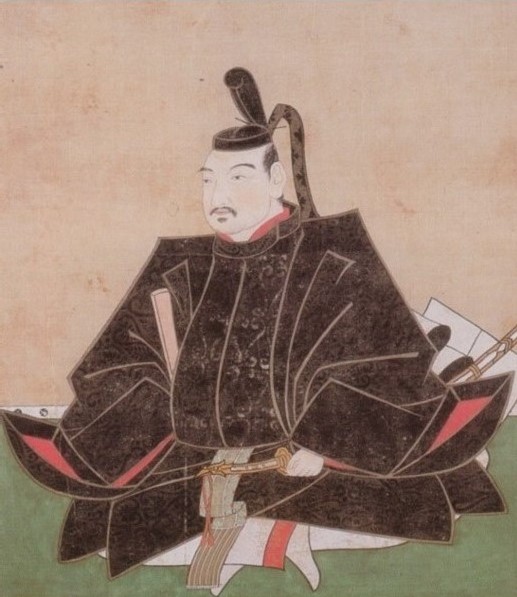
尚巴志による琉球統一、首里城への移転
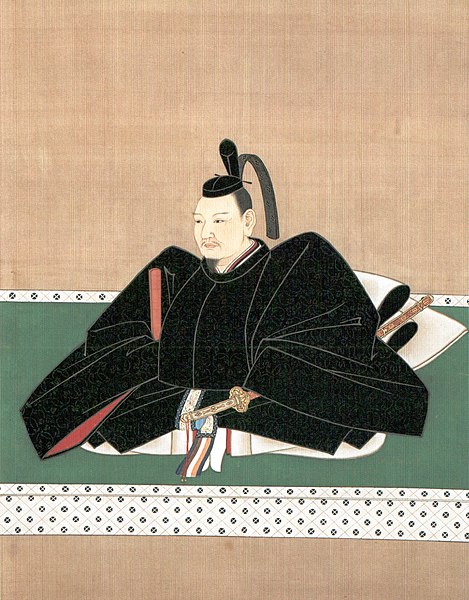
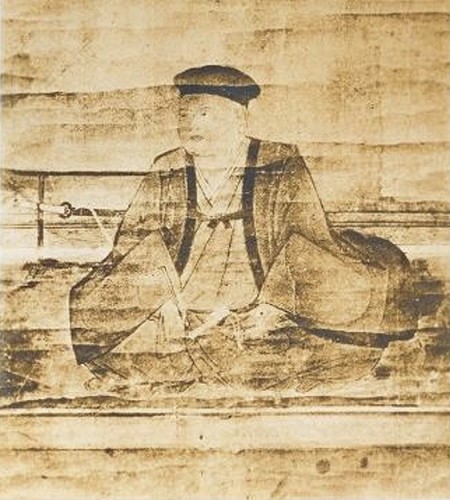
15世紀になると、尚巴志により三山が統一され、琉球王国が成立します。尚巴志(生年:1372年~没年:1439年)は、南山王国の一部・佐敷城の按司でした。佐敷城は土造りの小さなグスクでしたが、その地は農業に適し、近くには良港(馬天、与那原)もありました。後世の史書(「球陽」など)によると、彼は身長が低く(五尺(約150cm)未満)で「佐敷小按司」と呼ばれたそうです。「小按司」が「尚巴志」という名の基になったのではないかという説があります。また、彼の刀を外国船が積んできた鉄塊と交換し、それを農具にして農民に与え、人望を得たという伝承があります。小領主ながら人心を掴める人物だったのでしょう。
尚巴志の琉球統一のストーリーですが、琉球王国の史書に、3つの異なった説が書かれているのです。
・中山世鑑(ちゅうざんせいかん):1650年成立、琉球王国初の正史
・蔡鐸本中山世譜(さいたくぼんちゅうざんせいふ):1701年成立、「中山世鑑」を修正
・蔡温本中山世譜(さいおんぼんちゅうざんせいふ):1725年成立、更に加筆修正
地元の伝承に基づいて書かれた最初の説を、中国の記録などを見ながら修正したらしいのです。現在の定説は、最後の説(蔡温本中山世譜)を基にしたもので、それをご紹介しますが、最初の説(中山世鑑)も捨てがたいので、異説として括弧書きで掲載します。
1402年、尚巴志は近くの島添大里城を攻撃・占領し、そこに本拠を移しました。この城は南山王国の本拠地とされていましたが、1429年まで明に朝貢を行っていることなどから、別の場所(島尻大里城か)に本拠が移ったと解釈されています。当時、南山王国では中山との抗争や内紛が起きていて(下記補足2)、尚巴志はその混乱に乗じたのかもしれません。(異説:尚巴志が島添大里城に移ったときに南山王になった、南山は尚巴志による傀儡政権になったとする歴史家もいます。)尚巴志の次のターゲットは、南山ではなく、中山の本拠地・浦添城でした。1406年、尚巴志軍に対し、当時の中山王・武寧は呆気なく降伏しました。そして尚巴志は父親の恩紹を中山王としました(異説:11421年に中山を倒し、尚巴志が中山王になった)。史書によると、武寧は周りの按司たちの支持を失っていたとされます。しかし、恩紹が1409年に朝鮮に使者を送ったときの記録によると、敵対勢力を鎮圧するのに数年を要したことが伺えます(下記補足3)。
(補足2)
朝鮮に在逃する山南王子承察度の発回(「李朝実録」太祖3年(1394年)中山王察度の願い出)
山南王温沙道(おんさどう)が中山王に追われ来たりて晋陽に寓す(「李朝実録」太祖7年(1398年)中山王察度の願い出)
是れより先、(先王の)応祖は兄達勃期(たぶち)に弑される所と為る。各塞官兵を合わせて、達勃期を誅し、他魯毎(たるみー)を推して国事を摂らしむ(「明実録」永禄13年(1415年)山南王世子他魯毎が明皇帝にあてた奏文)
(補足3)武寧が死んだ後、各按司が争いを起こし連年遠征をしていたため、使者を派遣するのが遅れた(「朝鮮太宗実録」、訳は「尚氏と首里城」より)
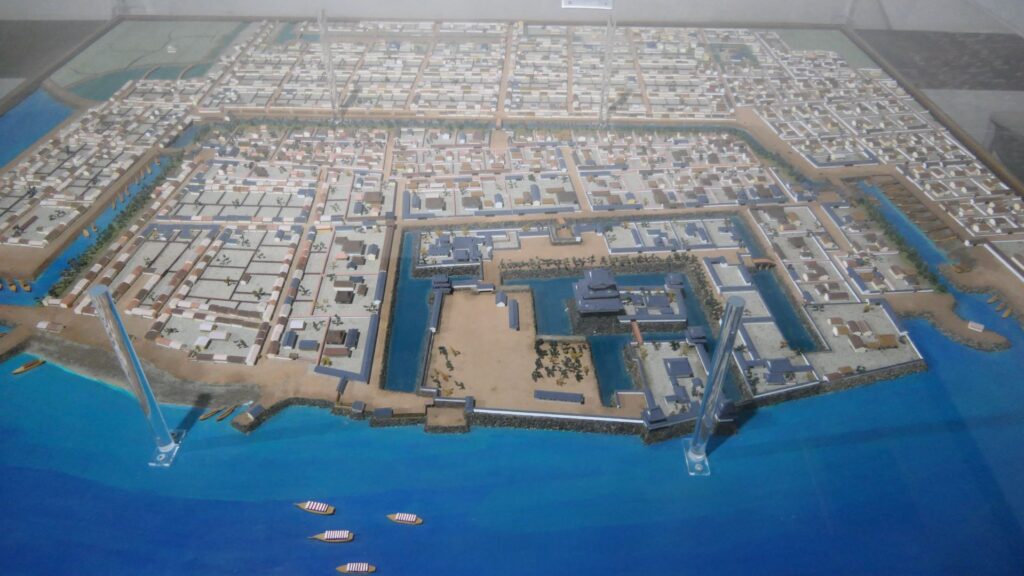
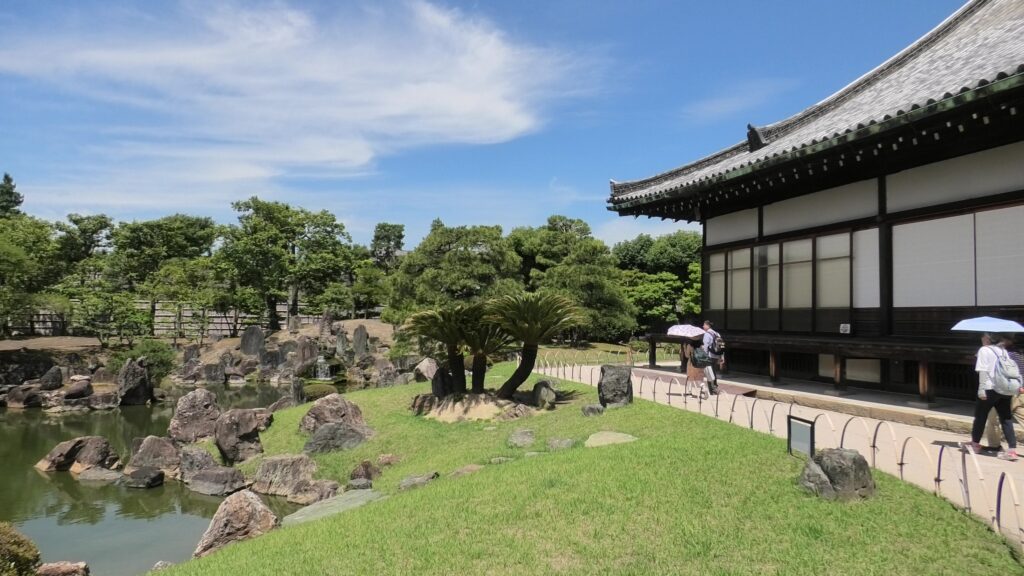
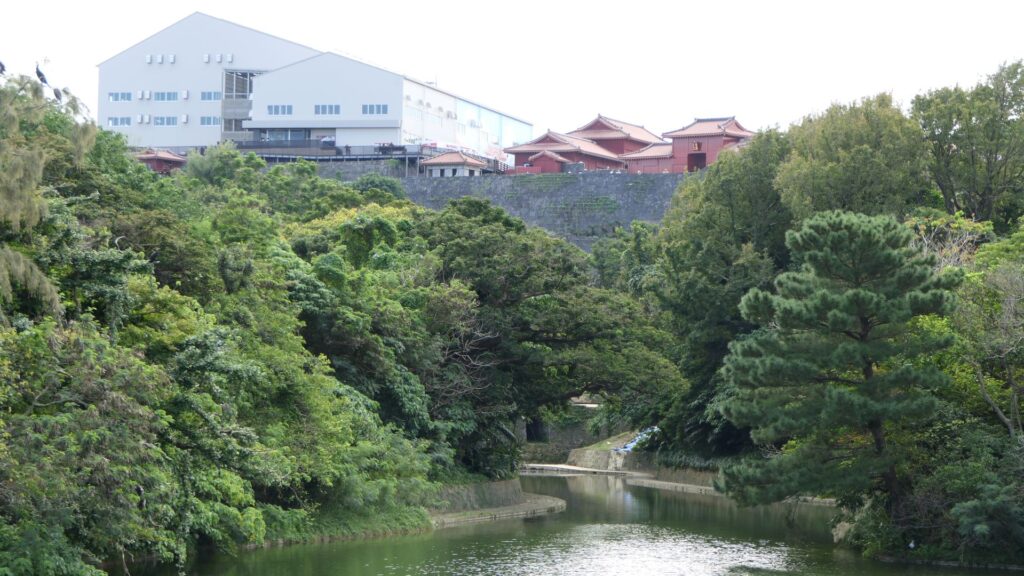
そして尚巴志は1416年(北山最後の進貢の翌年)、最大の敵・北山王国と対決、これを倒しました。(異説:1422年に北山を倒しこの時点で琉球統一)1421年には父から王位を継ぎ、1429年に南山王国を制圧し、ついに三山統一を果たしました(異説:すでに統一済み)。琉球王国の成立です。この間、尚巴志は本拠地を浦添から首里に移したと考えられています。現存する琉球最古の石碑「安国山樹華木之記碑」が1427年に作られ、城の周辺に人工池(龍潭)を作り、花木を植え、太平の世の記念としたことが記されています。かつての浦添城の姿が再現されたのでしょう。首里城は、以前の中山王国のときから支城として使われたと考えられていますが(「京の内」の範囲)、尚巴志が本拠とした大きな理由は、近くの那覇港の存在がありました。サンゴ礁に囲まれた沖縄は、大型船が安全に停泊できる港は、当時那覇港と運天港(今帰仁城の近く)くらいでした。尚巴志の政権は、貿易を司る「久米村」との結びつきも強めていました。城の範囲は、現在「内郭」とされる瑞泉門から内側であったとされています。尚巴志の王統(第一尚氏)は6代続きました。

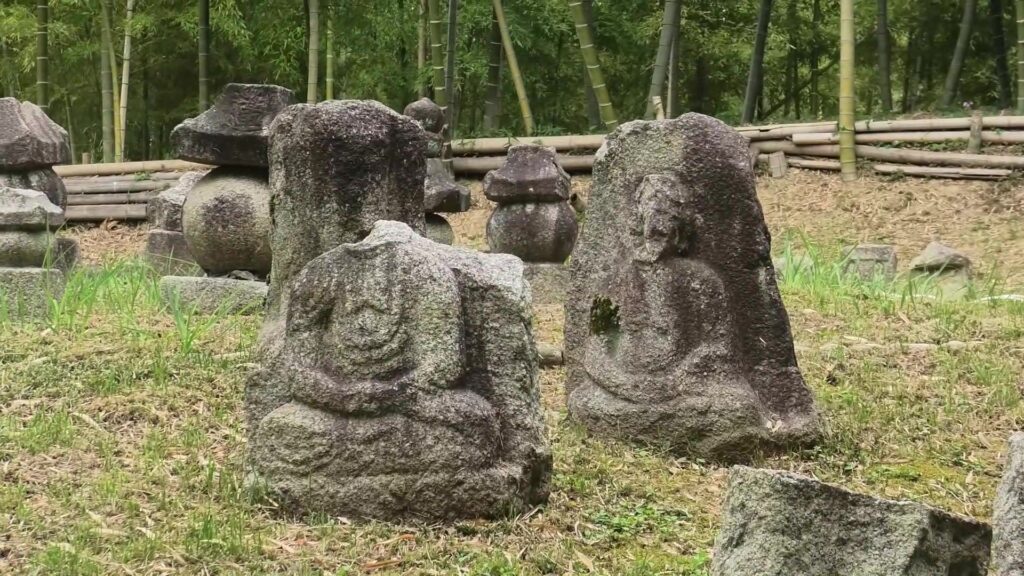
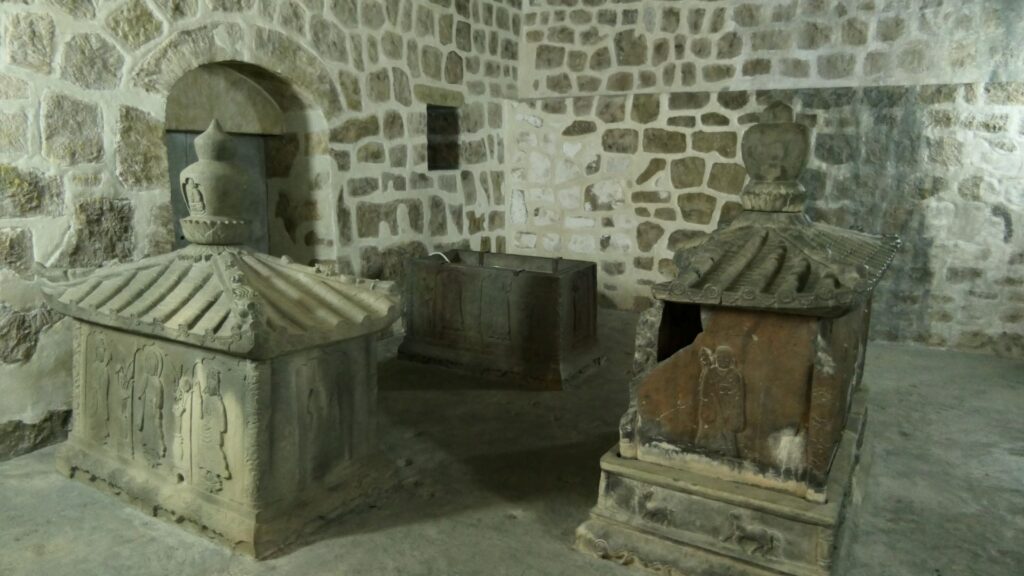
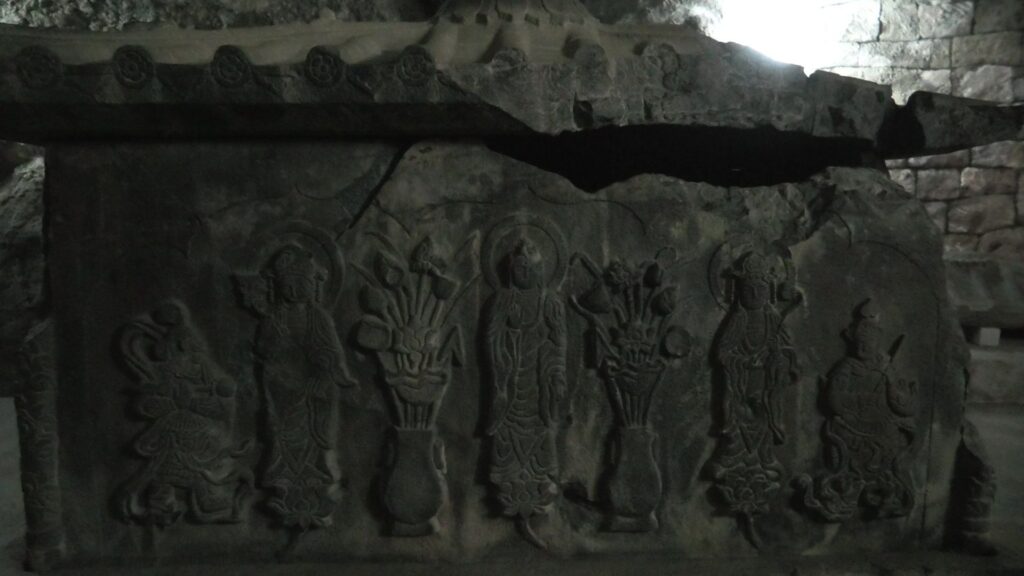
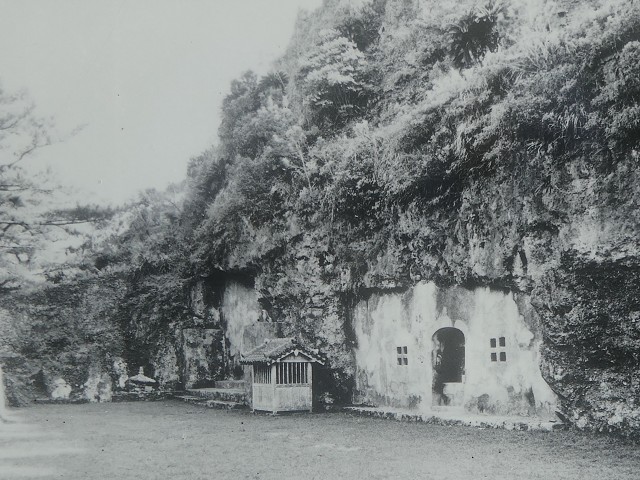
主のいなくなった浦添城は、荒れ果てた状態になったという記録があります(下記補足4)。しかし一方で尚氏(尚巴志の王統である第一尚氏)は、王墓である浦添ようどれを改修したと考えられています。自分たちが正当な王権を継ぐ者であることを示そうとしたのでしょう。墓室である洞窟内にあった瓦葺きの建物が撤去され、中国産の石(輝緑岩)で作られた石棺墓を設置しました。そこには沖縄最古とされる仏教彫刻が刻まれています(第二尚氏の尚真、または察度王統の時代の可能性もあり)。
(下記4)城毀壊し、宮殿荒蕪して、瓦廃れ垣崩れ、鞠りて荒野と為る(「球陽」)
その後
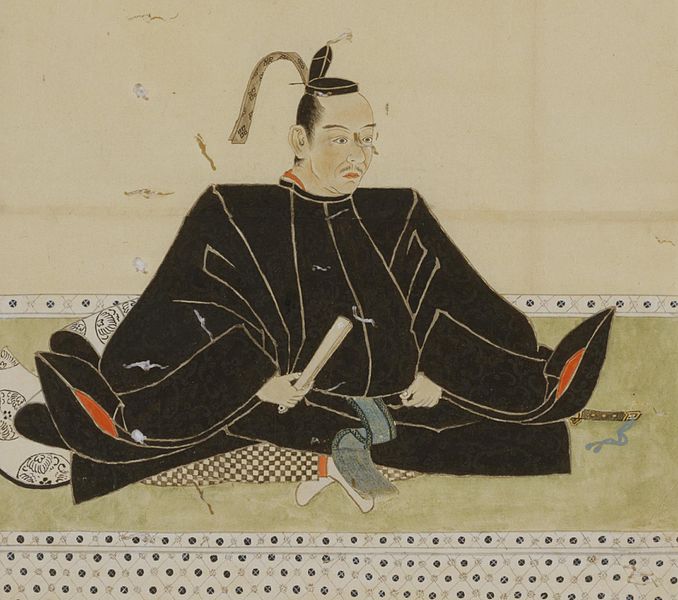
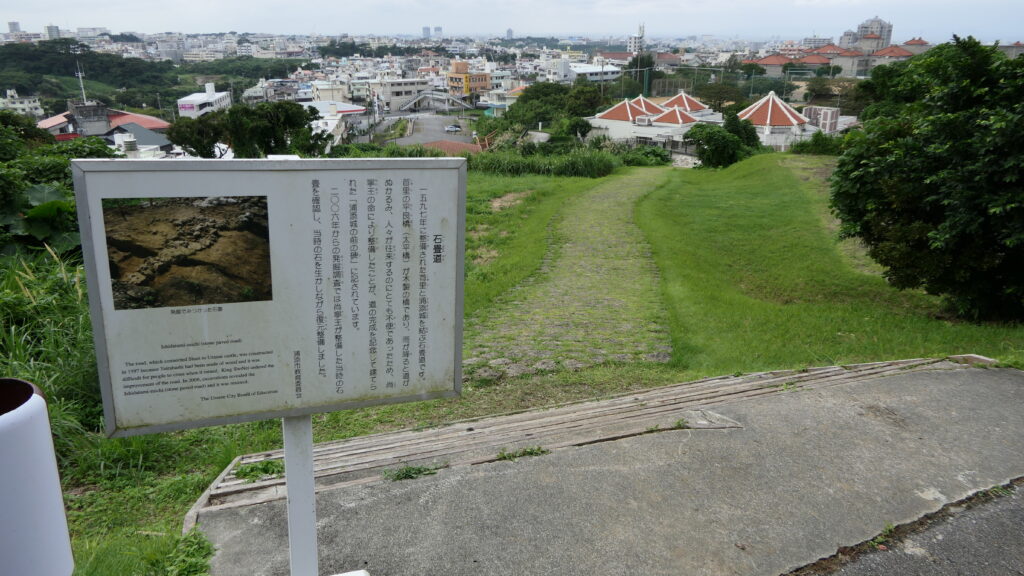
その後、琉球王朝は尚巴志とは違う王統の第二尚氏によって引き継がれましたが、その3代目の尚真王の子・尚威衡(しょういこう)が1524年に浦添城に移り住み、浦添尚家となりました。浦添城もその本拠として再整備されました。やがて尚家本家に跡継ぎがいなくなると、1589年に尚威衡のひ孫・尚寧(しょうねい)が王位を継ぎました。尚寧は首里城に移りましたが、浦添城には出張機関(浦添美御殿)を残し、両城の間を石畳の道で結びました。
ところが1609年、琉球王国は薩摩の島津氏の軍による侵攻を受けてしまいます。島津軍は読谷海岸に上陸し、浦添城の屋敷や城下の寺の焼き討ちを行いました。そして、尚寧が作った石畳道を通って、首里城に迫ったのです。城を包囲された尚寧は降伏し、琉球は薩摩藩の支配下に入りました。尚寧王が亡くなると、その亡骸は浦添ようどれに葬られました。2つある墓室のうちの一つ(東室)が、そのとき作られたものとされています(察度王統によるものではないかという意見もあります)。ようどれはその後、御墓番(比嘉家など)によって守られていました。
そして1945年の沖縄線では、浦添城にとって最大の悲劇が起こりました。米軍は読谷海岸に上陸し、日本軍司令部があった首里を目指して南下しました。そのとき激戦があったのが、崖上にあった城跡に設置された陣地「前田高地」です(米軍は「ハクソー・リッジ」と呼称)。12日間にわたる戦闘で、浦添ようどれを含む城跡はほぼ壊滅しました。何よりも日米両軍兵士だけでなく多くの住民も犠牲となったのです。
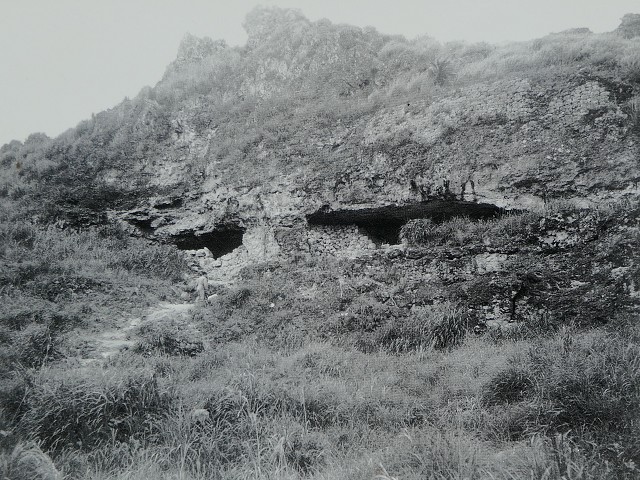
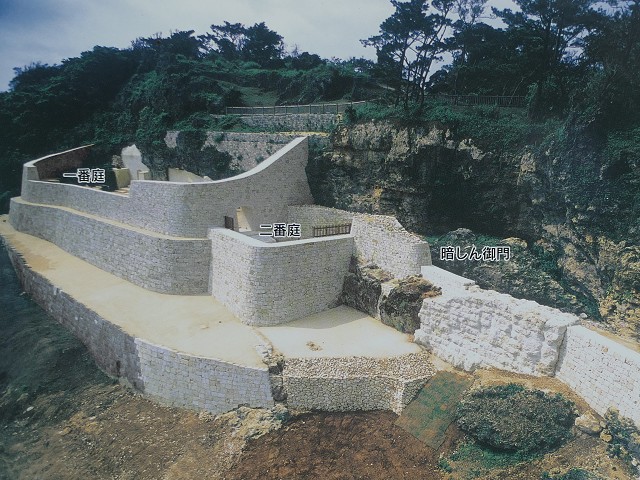
戦後、城跡は採石場となり、ますます城跡の荒廃が進みました。1955年になって、当時の琉球政府がわずかに残った墓室の修復を始めました。その後公園用地となり、1989年には国指定史跡になりました。それを受けて浦添市は発掘調査を行い、2005年には浦添ようどれの復元を行いました。現在は浦添城の復元を目指した調査や整備を行っています。
今回の内容を趣向を変えて、Youtube にも投稿しました。よろしかったらご覧ください。